I am building something

This is the place where you can introduce yourself, and include a photo if so desired.

Postby NorthernMN » Tue Jul 06, 2010 12:49 pm

I finally got to putting on the exterior skin. This is the same 1/4" underlayment plywood that I used for the interior roof. I had to start out working inside. It was just too hot in the sun.

Image

I spent most of the day getting the first side done but it looks pretty sharp I think.

Image

I started on the second side yesterday and that went pretty good. It was hot again but I managed to suck it up and work outside anyway.

Image

It went so well that I managed to get the second side and the back done before calling it a day.

Image

I guess it is on to the roof now. I expect that will take me a bit longer.
User avatar
NorthernMN
Teardrop Builder
 
Posts: 33
Joined: Tue Aug 25, 2009 10:00 pm
Location: Minnesota

Postby fromeo » Tue Jul 06, 2010 1:35 pm

Looks good!

- Frank
fromeo
Teardrop Master
 
Posts: 157
Joined: Tue Feb 27, 2007 2:01 pm
Location: Sicklerville, NJ

Postby parnold » Tue Jul 06, 2010 5:50 pm

Looking very good!!

Excellent progress for a hot day.
User avatar
parnold
Donating Member
 
Posts: 2344
Images: 302
Joined: Mon Feb 08, 2010 4:49 pm
Location: Northwest New Jersey
Top

Moving right along

Postby NorthernMN » Mon Jul 12, 2010 12:55 pm

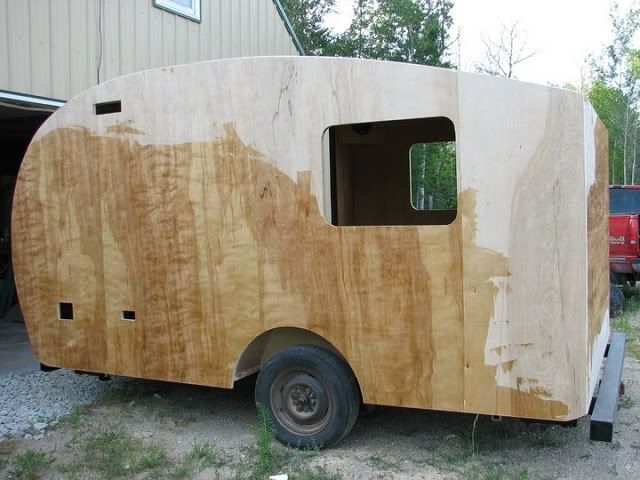
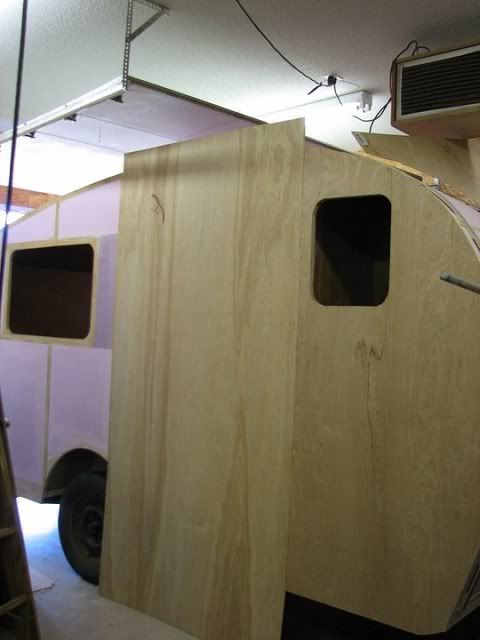
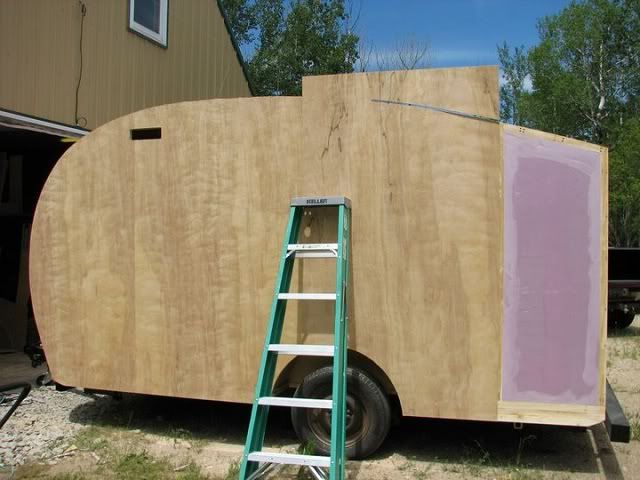
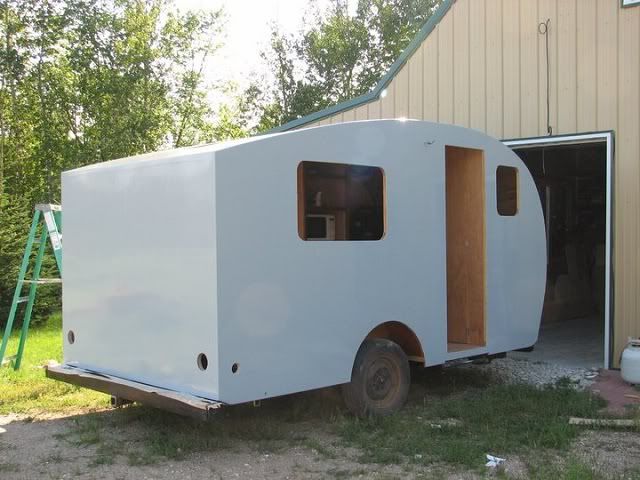
Still making good progress on the trailer. I managed to get the roof on last week. I am still really impressed with this underlayment plywood. I picked it up at Menards. It is sold under the name Integraply. Normally Menards sells utter junk and I had low expectations for this plywood. However this is very good. It is quite flexible for 1/4" plywood. I did the inside and outside of my roof and never cracked or broke any. I didn't cut any kerfs and didn't wet any of it before bending it.

Image

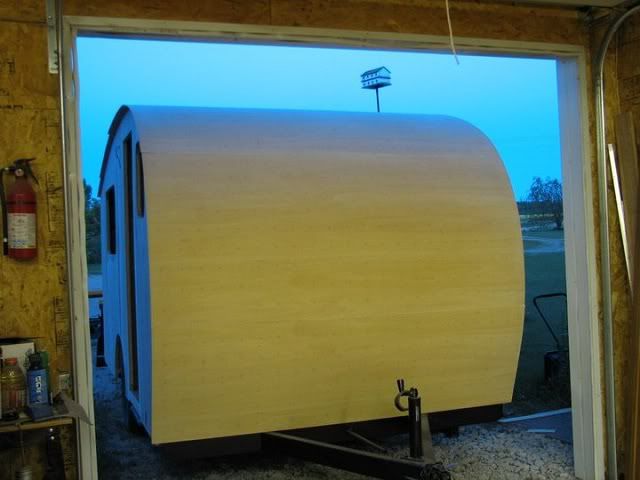
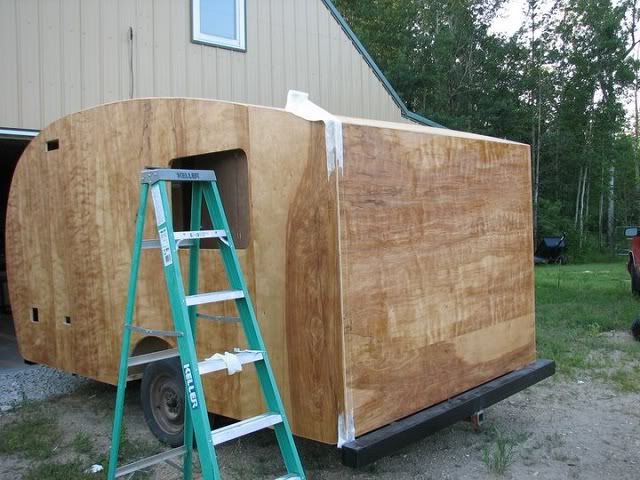
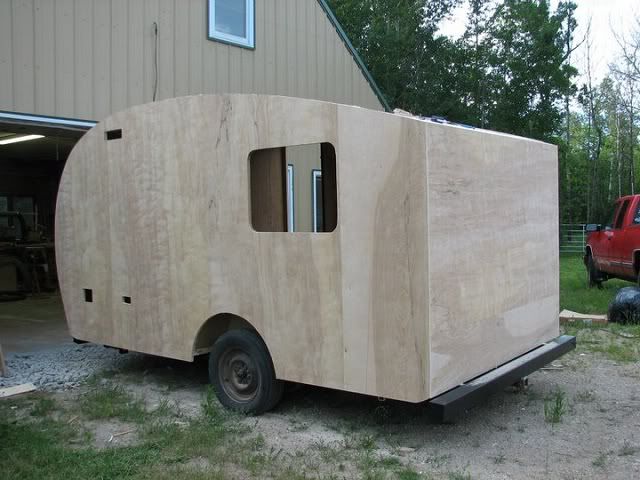
I used my router to trim all the plywood flush. Then I ran a 1/4" round over bit around all the edges. I spent several hours sanding the entire exterior in preparation of the epoxy.

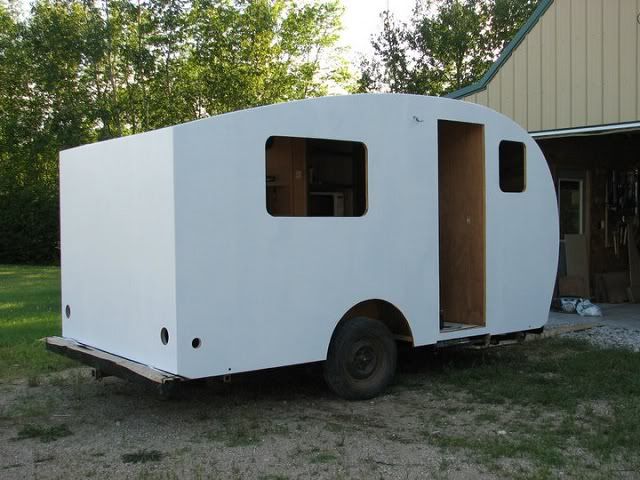
I started the base cost of epoxy on Saturday. I should have gotten started earlier in the day. By noon it was 94 degrees and it wasn't any fun to be outside let alone fighting with epoxy. I am using System Three Sivertip resin and the slow hardener. Even in the heat as long as I mixed small batches I was able to keep working.

Image

I managed to get the entire exterior covered with a base coat. On Sunday I started laying fiberglass on the seams. Thankfully the weather was much nicer. The high on Sunday was only 74.

Image

Going to take me a while to get all the seams done but I will just keep plugging away at it. I was hoping to be ready for paint by next weekend but there is a lot of prep work before paint so I will have to wait and see.
User avatar
NorthernMN
Teardrop Builder
 
Posts: 33
Joined: Tue Aug 25, 2009 10:00 pm
Location: Minnesota
Top

Getting close

Postby NorthernMN » Wed Jul 28, 2010 12:23 pm

Well after spending a couple weeks working on getting the exterior finished I am finally getting close. I started with a base coat of epoxy. Then I glassed the seames with 6 oz. cloth. Then another coat of epoxy to fill the fiberglass. Then I used System Three Quick Fair to feather out the fiberglass seams and fill any holes. After sanding it all smooth which took sooooo many hours I did a third coat of epoxy over the whole thing to coat any spots that I might have sanded thin and fill any holes or dips.

I decided to use Interlux Brightside to paint with. The paint is designed for boats. I know I am not building a boat, but the paint has all the properties I was looking for. Before paint I had to prime and that means 2 coats of Interlux Pre Kote. It has a high build and hide so it should help even out the surface. Here it finally is dressed in primer.

Image[/img]

My new wheels are supposed to be delivered today. Thank goodness cause those wheels there look terrible. :thumbdown:
User avatar
NorthernMN
Teardrop Builder
 
Posts: 33
Joined: Tue Aug 25, 2009 10:00 pm
Location: Minnesota
Top

Postby doris s. » Wed Jul 28, 2010 12:38 pm

Looks Great! Only a few more hours and you can go camping!

Doris
User avatar
doris s.
500 Club
 
Posts: 682
Images: 32
Joined: Mon Aug 31, 2009 5:15 pm
Location: jefferson, maryland
Top

Postby bve » Wed Jul 28, 2010 12:54 pm

You can add me to the list of people with shop envy.

Nice build you have going on, looking like it will be a pretty comfy camper.


Burke
Burke

KISS > COMPLEX
Image
Image

Build threads converted to PDFs.
As of 2008-08-08 I have added more build threads to the pdf collection
User avatar
bve
500 Club
 
Posts: 694
Images: 98
Joined: Sat Aug 25, 2007 1:44 am
Location: Edmonton, Alberta, Canada
Top

Postby LoriCz » Wed Jul 28, 2010 4:10 pm

Wow, I am impressed. Can't wait to see what comes next :)
User avatar
LoriCz
Teardrop Builder
 
Posts: 35
Images: 19
Joined: Wed Jul 14, 2010 7:49 pm
Location: IL
Top

Postby Steve_Cox » Wed Jul 28, 2010 8:55 pm

Nice Job :thumbsup:

Like the build methods and materials too.
Steve
User avatar
Steve_Cox
4000 Club
4000 Club
 
Posts: 4903
Images: 196
Joined: Sun Apr 03, 2005 8:46 am
Location: Albuquerque New Mexico
Top

Painted

Postby NorthernMN » Thu Jul 29, 2010 9:34 am

Two coats of Interlux Brightside Polyurethane in Kingston Grey.

Image

I installed the door and one window last night. I am hoiping to be able to wrap most of the remaining stuff tonight.

Image

My wheels did show up but I didn't get time to put them on.
User avatar
NorthernMN
Teardrop Builder
 
Posts: 33
Joined: Tue Aug 25, 2009 10:00 pm
Location: Minnesota
Top

Postby Papi » Thu Jul 29, 2010 10:26 am

8) This is a very inspiring build!
I dream of a day when a chicken can cross the road without having his motives questioned.
User avatar
Papi
Teardrop Master
 
Posts: 177
Images: 50
Joined: Thu Jul 29, 2010 9:07 am
Location: North GA
Top

Postby Prem » Thu Jul 29, 2010 4:48 pm

It's a jumbo version of Frank's weekender that pops up on the Hall of Fame!

VERY nice job.

More power to ya.


Prem :thumbsup:
My goal...

_____________________________________________
...is to live in a trailer.
User avatar
Prem
Gold Donating Member
 
Posts: 3222
Images: 144
Joined: Thu Aug 21, 2008 11:25 am
Location: State of Jefferson (Oregon side)
Top

Postby NorthernMN » Fri Jul 30, 2010 8:31 am

I stayed up way too late last night finishing up the outside. And since you all deserve a prompt update I am going to give you one. This is 100% exterior complete. :D 
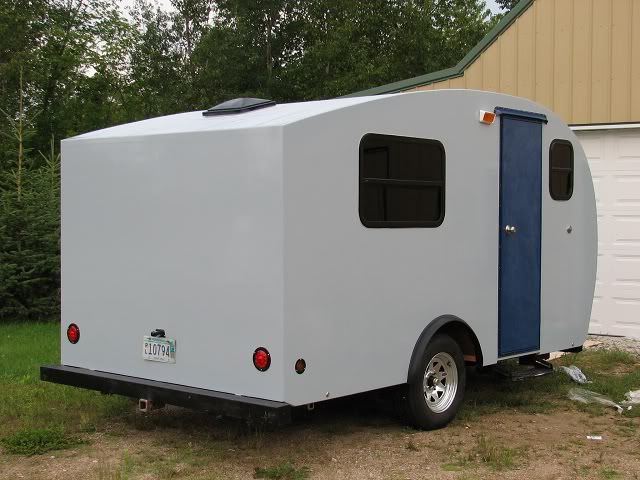
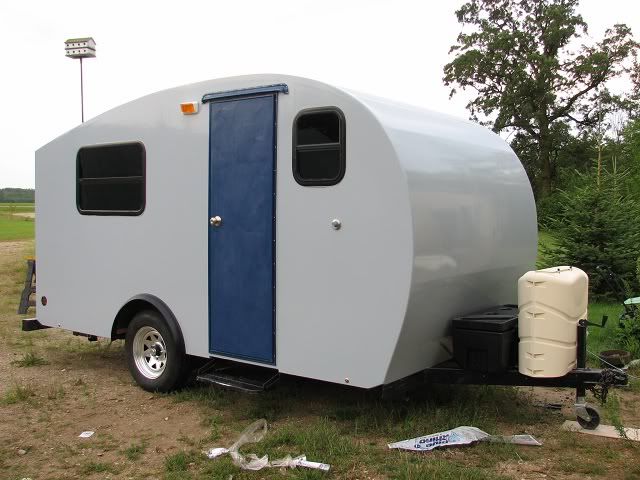
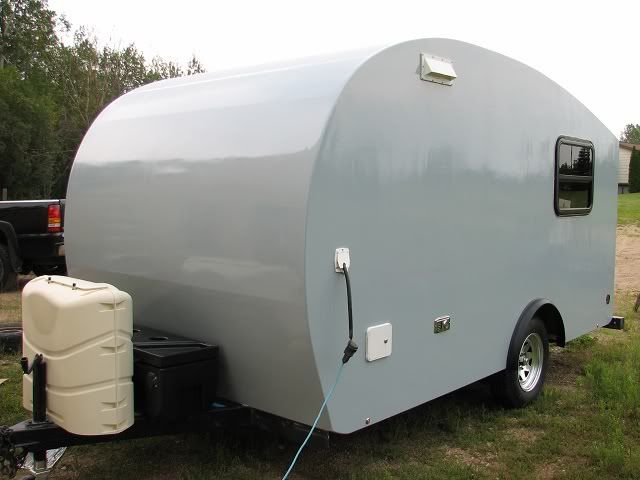
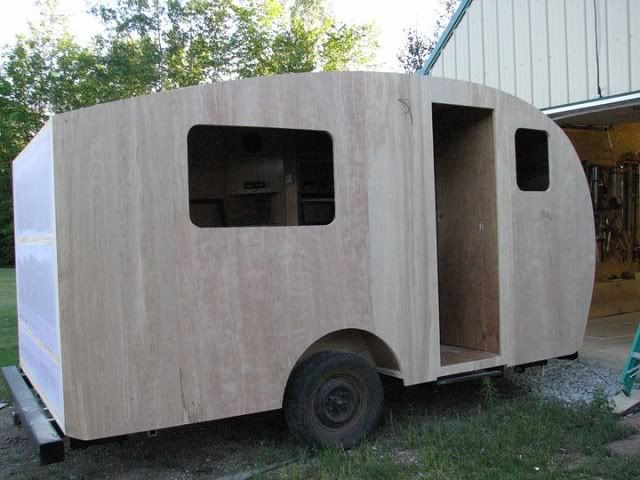
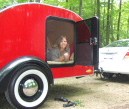
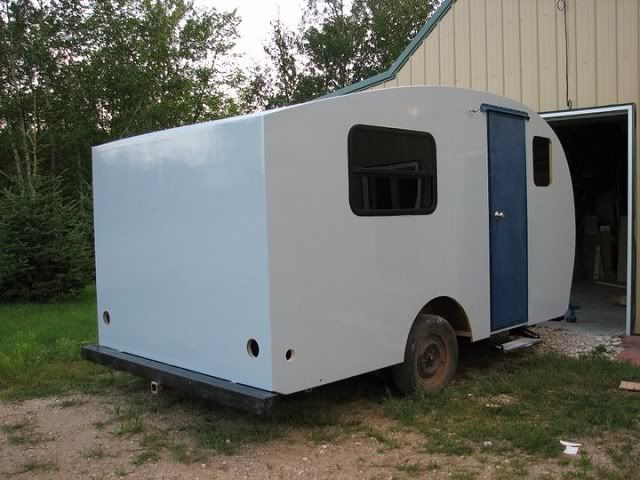
Assuming the lights all work I am heading out today for a weekend camping trip. Even though the interior is not 100% complete it should should be close enough to camp in for now.

I want to again thank everyone on this site for the kind words and many forms of inspiration. There are so many great ideas floating around here.

And now...

Image

Image

Image

Image

Have a fantastic weekend everyone!
User avatar
NorthernMN
Teardrop Builder
 
Posts: 33
Joined: Tue Aug 25, 2009 10:00 pm
Location: Minnesota
Top

Postby Cliffmeister2000 » Fri Jul 30, 2010 8:40 am

Beautiful! :applause: :applause: :applause: :applause:

How about some interior shots?
God Bless

Cliff

♥God. ♥People.
1 John 4:9-11

My Teardrop build pictures
User avatar
Cliffmeister2000
Titanium Donating Member
 
Posts: 3622
Images: 157
Joined: Thu Jul 26, 2007 10:18 pm
Location: Phoenix, AZ
Top

Postby Ratkity » Fri Jul 30, 2010 8:47 am

Such a great job! It looks like it just rolled out of a factorry.

Have a great time camping and take lots of pictures!!!

Hugs,
Ratkity
Ratkity
Gold Donating Member
 
Posts: 1065
Images: 0
Joined: Wed May 26, 2010 1:01 pm
Top

PreviousNext

Return to Newbies, Introduce yourselves

Who is online

Users browsing this forum: No registered users and 2 guests