Re: The Pup's Penthouse - 7/17/12 - Flooring

...ask your questions in the appropriate forums BUT document your build here...preferably in a single thread...dates for updates, are appreciated....

Postby Cliffmeister2000 » Tue Apr 06, 2010 7:59 pm

Thread hijack alert

Carter, yours is one of the nicest I've not yet seen! I want to build a standie some day, and if my wife lets me, I will be "borrowing" heavily from your design. If only I could borrow your skills...

You may now return to normal programming
God Bless

Cliff

♥God. ♥People.
1 John 4:9-11

My Teardrop build pictures
User avatar
Cliffmeister2000
Titanium Donating Member
 
Posts: 3622
Images: 157
Joined: Thu Jul 26, 2007 10:18 pm
Location: Phoenix, AZ

Postby synaps3 » Tue Apr 06, 2010 9:23 pm

I agree with your thread hijack, Cliff. I just looked at Jim (Carter)'s album and :o That thing is nice!

People do think what we do is amazing -- out of the blue while I was working tonight, I got a job offer to go build sets for a TV studio. The guy gave me his card, and said I could start tomorrow! I could never do this for a living though, so I had to pass on the offer. Plus, I think I'll make more in software engineering. 8)

After working for awhile, I ran out of decent screws... Then wood... It's too late to get more materials, so I'll have to get some tomorrow!

Here's a few pics to get you guys caught up...

Front outer walls / roof (Maddie has an itch):
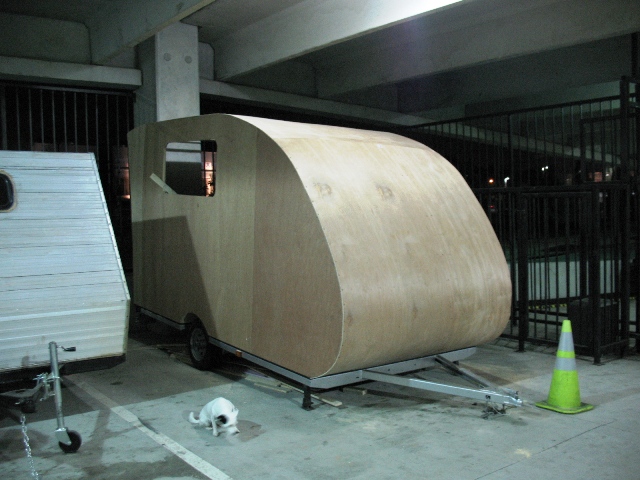
Image

Side view:
Image

Here's an interior view:
Image

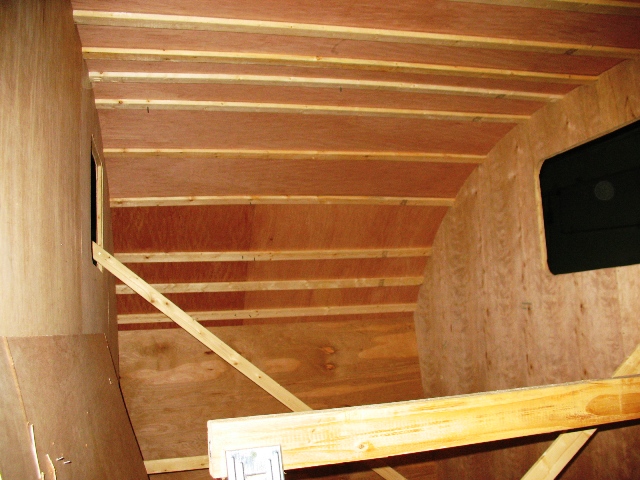
You can't quite tell, but the boards are just barely tacked in place. I bought crappy screws to hold the spars to the skin, and therefore got crappy results... The pieces are being held on their edges by deck screws for now -- I'll get some good, high-grade screws to hold the spars tomorrow. :thumbsup:

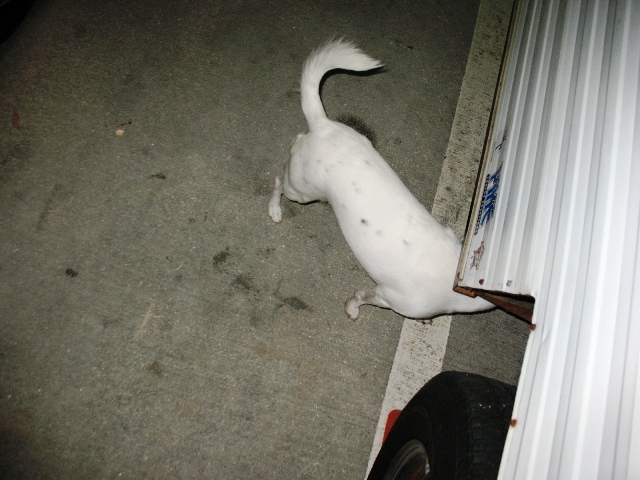
Maddie said that my cargo trailer needed inspected. Apparently there was something interesting under the wheel well:
Image

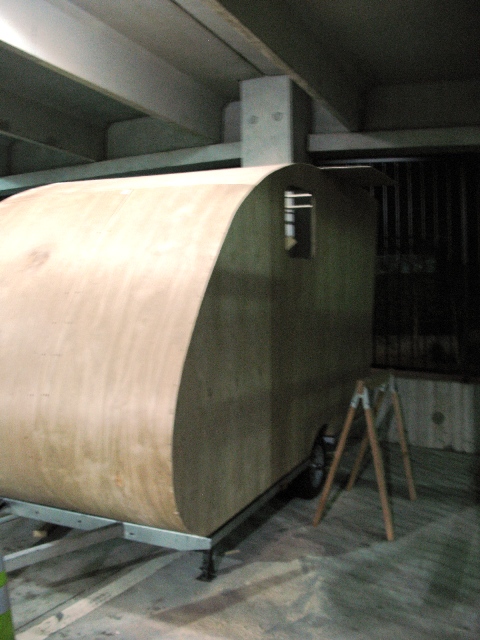
Here's a quick idea of how I get the roof on. I use a sawhorse as a scaffold:
Image

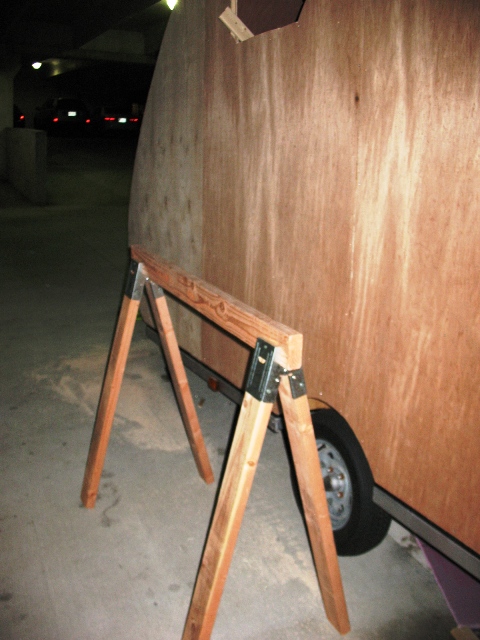
I jump up on it, and while I'm standing on the sawhorse, screw the edges into place into the wall with 2" deck screws. Since I didn't have any good screws, the middle will get more fasteners later. Once the roof is tacked in place on the edges, I climb on to the top of the trailer:
Image

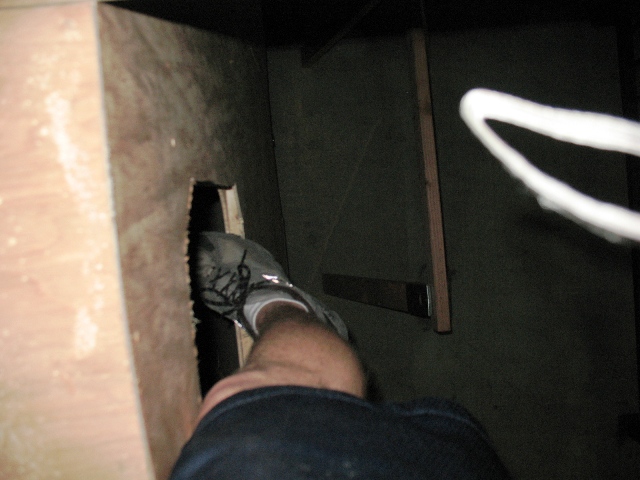
I use the window as the next step:
Image

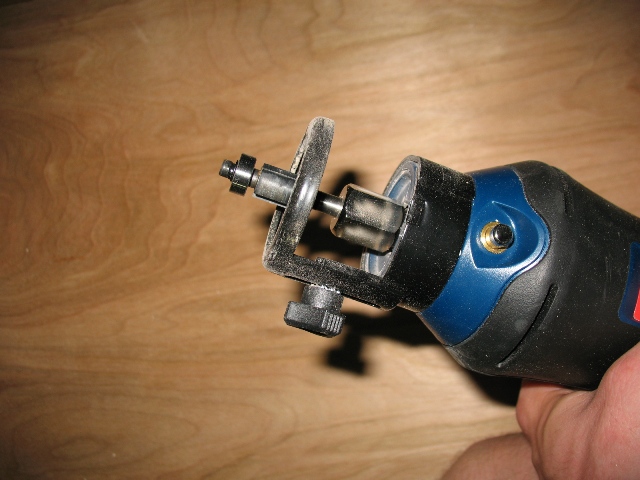
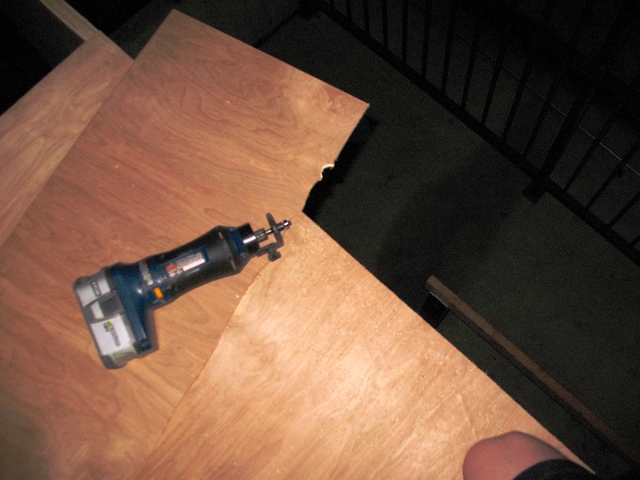
And, once I am on the roof, I use a router to trim off the edges. Here's my handy cordless Ryobi router:
Image

The router is armed with a flush-trim bit:
Image

I made some sawdust, pausing for a pic:
Image

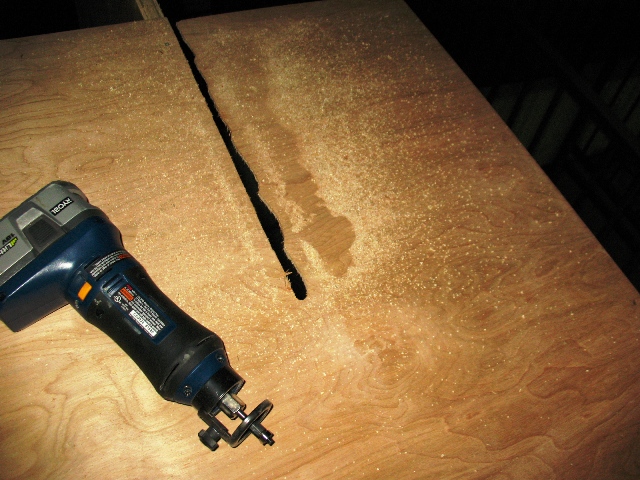
And finish the edge:
Image

That's the basic process for the roof thus far. The interior panels will all have to be pre-cut, but I'm still trying to get the bottom piece pre-bent so that it won't delaminate when I bend it. :roll: I might have to use another material to make the interior bend without the piece destroying itself.

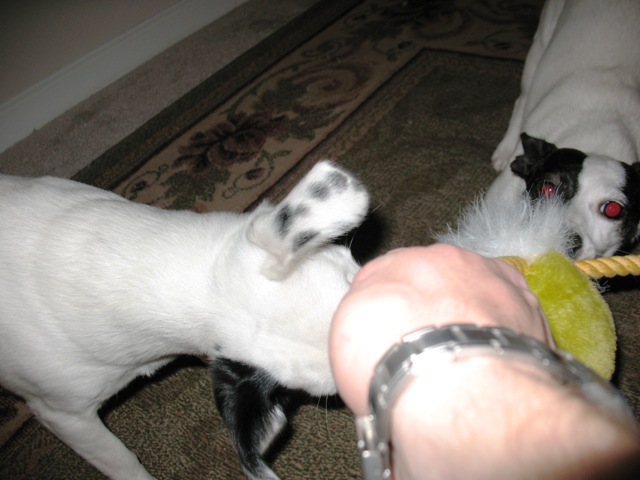
I came in and enjoyed a pint of Guinness, and played with the pups. I got them a new toy yesterday. They love it:
Image

Image

Image

Image

I'll finish the outer roof tomorrow, get better screws on it, and try to start the interior roof. :thumbsup:
-- Dave

Build log: here
User avatar
synaps3
The 300 Club
 
Posts: 433
Images: 254
Joined: Sun Nov 08, 2009 1:09 am
Location: Marietta, GA

Postby Carter » Wed Apr 07, 2010 4:24 am

Thanks guys, the trailer has been fun. I don't know about skills, I just plan ahead. I'd like to be able to just build one from a sketch but can't. I have to spend months making a detailed 3d CAD model.

Dave, looking good, I like the Aero front end.

Jim
I need a new Avatar. I'd put my dog up there but she doesn't look much like me. She's the skinny one.
User avatar
Carter
Gold Donating Member
 
Posts: 319
Images: 32
Joined: Sun Aug 10, 2008 6:45 am
Location: Rochester Hills, MI
Top

Postby mandy » Mon May 17, 2010 11:14 pm

Bump!!!
Are finals finally over? How is the build going? I need fresh puppy pics!!!!
:oops: :lol:
The greatest wealth is to live content with little.
~Plato~
User avatar
mandy
Donating Member
 
Posts: 14160
Images: 86
Joined: Wed Jul 25, 2007 3:47 pm
Location: Albuquerque, NM
Top

Postby synaps3 » Tue Sep 14, 2010 10:23 am

I'm not dead, I promise! :lol:

We bought a house, and I had to completely tear out the bathroom (including 2000lbs of concrete on the floor, sheetrock, and at least 500lbs of tile), as well as redo the bedroom ceiling.

Front of the house:
Image

Backyard:
Image

And here is the bathroom with the new floor, and wall tiles going on:
Image

I also managed to blow up my old motorcycle (Honda Reflex), so I traded up for a scooter, sold that, bought another at a steal, traded it, sold the next bike, traded a few more times, and finally slapped down $1000 + the money gained from all the trades for a Honda Pacific Coast. It's a wonderful bike (note: pic not my bike, mine just looks identical):
Image

We just paid tuition for this semester, so money's a bit tight, but I'm working on getting some fiberglass to get going on this thing again. In the meantime, I have enough materials to work on the interior some, so perhaps we'll see some progress this week. :thinking:
-- Dave

Build log: here
User avatar
synaps3
The 300 Club
 
Posts: 433
Images: 254
Joined: Sun Nov 08, 2009 1:09 am
Location: Marietta, GA
Top

Postby absolutsnwbrdr » Tue Sep 14, 2010 10:28 am

It's been a while Dave! Sounds like you've been busy! Congrats on the house!
Zach
Coming Soon...
Image Image
User avatar
absolutsnwbrdr
Donating Member
 
Posts: 2657
Images: 412
Joined: Mon Jan 25, 2010 6:10 pm
Location: Hanover, PA
Top

Postby synaps3 » Tue Sep 14, 2010 11:40 am

Thanks! :)

Since cost is a concern, the plan is to go cheap, and use alternatives to fiberglassing. I'm considering putting down a layer of epoxy, then a layer of (epoxy-soaked) thin bedsheets obtained from a thrift store (or possibly canvas), followed by another layer of epoxy, then epoxy "garage floor paint" as the topcoat. There is a thread in the general forum about alternatives to fiberglass cloth, and it inspired me to try it.

I found someone selling some epoxy locally but they want a ridiculous amount for it.

Here's the costs of epoxies (including hardener) I've found:
$312 / 6gal: http://boatbuildercentral.com/products.php?cat=41
$288 / 6 gal: http://store.raka.com/6gallonkit.aspx
$400+ / 4 gal (local West Marine)
$260 / 5 gal: http://www.uscomposites.com/epoxy.html

I've heard so much good about Raka, I probably will go with them if given the option.
-- Dave

Build log: here
User avatar
synaps3
The 300 Club
 
Posts: 433
Images: 254
Joined: Sun Nov 08, 2009 1:09 am
Location: Marietta, GA
Top

Postby NathanL » Tue Sep 14, 2010 12:23 pm

synaps3 wrote:Thanks! :)

Since cost is a concern, the plan is to go cheap, and use alternatives to fiberglassing. I'm considering putting down a layer of epoxy, then a layer of (epoxy-soaked) thin bedsheets obtained from a thrift store (or possibly canvas), followed by another layer of epoxy, then epoxy "garage floor paint" as the topcoat. There is a thread in the general forum about alternatives to fiberglass cloth, and it inspired me to try it.

I found someone selling some epoxy locally but they want a ridiculous amount for it.

Here's the costs of epoxies (including hardener) I've found:
$312 / 6gal: http://boatbuildercentral.com/products.php?cat=41
$288 / 6 gal: http://store.raka.com/6gallonkit.aspx
$400+ / 4 gal (local West Marine)
$260 / 5 gal: http://www.uscomposites.com/epoxy.html

I've heard so much good about Raka, I probably will go with them if given the option.


I know of several yachts sailing around that cost as much as a small house that have a deck built out of plywood covered in epoxy. Then a thin coat of Titebond II, then they put canvas down over it and soak the canvas with Titebond II again and let it set over night. Come back the next day and kinda steam iron it down to shrink it down and finish with a thinned coat of Titebond II again. They leave just enough weave telegraphing through to act as a non skid part of the floor.

Last for years like that. I don't know if it's cheaper than fiberglass and epoxy however.

I will say 6 gallons of epoxy is a LOT of epoxy. You could build and cover a 25' sailboat and not use that much epoxy.

Go to the West Epoxy website and they have a deal that will tell you how much epoxy you will need to cover a square foot of fiberglass of XX weight and on what type of substrate, as well as how much to just do a plain coat of epoxy.

Here's the coverage guide for fabric.

http://www.westsystem.com/ss/fabric-coverage/

Here's the coverage guide for plain epoxy.

http://www.westsystem.com/ss/coating-quantity/

Using 12 oz cloth you can get 110sq. foot on the first coat and 318sq.feet on the second/fill coat out of 1.2 gallons just to give you an idea.
NathanL
The 300 Club
 
Posts: 371
Joined: Thu Sep 17, 2009 4:41 am
Top

Postby synaps3 » Tue Sep 14, 2010 6:06 pm

The trailer is 15' long, 7' tall, 7' wide. Each gallon will do about one coat...

1st coat, base coat
2nd coat, "fiberglass" (may take much more than a gallon because of my nonconventional planned method)
3rd coat, cover coat

Might need 4th coat.

I'll also need to put at least 2 coats on the interior, in the shower, which will also take a gallon.

My guess is 4 gallons -- 6 to be safe. Worst-case, I have some leftovers to play with. :thumbsup:
-- Dave

Build log: here
User avatar
synaps3
The 300 Club
 
Posts: 433
Images: 254
Joined: Sun Nov 08, 2009 1:09 am
Location: Marietta, GA
Top

Postby CliffinGA » Tue Sep 14, 2010 8:59 pm

Hey Dave congrats on the house!! If you need help some time drop me a line and will be more than happy to give a hand!

Cliff
In God we trust, shoot the rest and he will sort out!

My Build:

viewtopic.php?f=50&t=42628
User avatar
CliffinGA
1000 Club
1000 Club
 
Posts: 1499
Images: 207
Joined: Sat Nov 14, 2009 1:29 pm
Location: Jefferson, GA
Top

Postby azmotoman » Fri Sep 17, 2010 2:58 am

Congrats on the PC-800! Those bikes were/are great. Too bad Honda doesn't still make them.
Money isn't everything, but it keeps the kids in touch!
*************
Dinero isn' ¡t todo, pero él mantiene el interés de los niños!
User avatar
azmotoman
Silver Donating Member
 
Posts: 165
Images: 10
Joined: Fri Jul 02, 2010 10:07 am
Location: AZ ('bama transplant)
Top

Postby vtx1029 » Fri Sep 17, 2010 5:01 am

azmotoman wrote:Congrats on the PC-800! Those bikes were/are great. Too bad Honda doesn't still make them.


Just like most good bikes they make :hammerhead: Valkyrie, VTX...
User avatar
vtx1029
Teardrop Master
 
Posts: 251
Images: 70
Joined: Fri Apr 23, 2010 11:42 pm
Location: MN
Top

Postby Judeyramone » Fri Sep 17, 2010 11:41 am

I'm also an avid motorcyclist.

Mine:
Image
Image
Image

With Gurl, and "Tour-pak", at Mid-Ohio VMD this past July:
Image

Projects:
Image

Assembled with my (then) 8yr old son, using naught but his tools:
Image

Oh... my favourite... then 1yr old daughter drooling on my close friend, and former (now deceased) neighbour's '70 BSA Thunderbolt:
Image

Delightful that you have managed to buy a house, but I must admit... among the most fascinating points of this trailer build, was the fact that you were doing it without a space, in a "public" parking garage. I have a very close friend, and former (platonic) room mate who now lives in Atalanta, recently finished her chiropractor school there. She loves Atlanta.

I like that you have planned your trailer to haul the scooter... I am attracted to teardrops for similar reasons. My TV is a 2004 F-250 - bike in the bed, and tow the TD behind.
I hated PC800 when introduced (looks like an overgrown Spree... as I cut my teeth on vintage Triumphs & a '76 CB750f - "real" motorcycles :) ), but as I age they look better & better. Most important question: Will it still fit in the camper?
User avatar
Judeyramone
Teardrop Master
 
Posts: 103
Joined: Tue Aug 17, 2010 12:13 pm
Location: MI
Top

Postby synaps3 » Tue Oct 19, 2010 9:54 am

Nice bikes! Good to see other bikers on here. :thumbsup:

Sadly, the PC800 would fit -- but the load would exceed the weight capacity of our torsion axle. I've had a few thoughts about redesigning the interior, but I'll get to that in a few weeks. I'll probably end up with a setup like yours. My fiancee has called dibs on my truck, so I'm going to use the opportunity to get a pickup next year. Probably an F150 or Tacoma.
-- Dave

Build log: here
User avatar
synaps3
The 300 Club
 
Posts: 433
Images: 254
Joined: Sun Nov 08, 2009 1:09 am
Location: Marietta, GA
Top

Postby synaps3 » Sun Jun 19, 2011 9:10 pm

I'm back after almost 9 months of inactivity. In the meantime, I finished rebuilding the bathroom of the house, completely relandscaped the front and backyard, redid the kitchen, bought a boat (anyone want to buy a boat?), got all new furniture for the living room and bedroom, and finally, built a 3-stall carport to park my utility trailer and the Pup's Penthouse under. I've been a bit busy.

I also sold the PC800, I got an offer I couldn't refuse for it ($500 over what I paid for it), so I bought a Honda PCX scooter to replace it:

Image

My fiancee is done with my "scooter swap" routine, especially since I've been through a Honda PC800, two Buddy 125s, a Yamaha Vino, two Honda Sprees, a Reflex, and a Honda Metro in the last 3 years. So, I'm stuck with the PCX, which I'm okay with.

Since the last update, I have eliminated the silly concept of using the trailer to haul my scooter. There is no wide door, ramp, or anything else in the designs any more. We did not get a truck as I implied earlier in the thread (we went with a Honda Pilot instead). I've figured out how to haul both scooter and trailer, but will get to that later.

The camper has been living under our leaky carport for the last 9 months, getting dripped on heavily every time it rained. The water stained all the front, but the lauan plywood I used did not delaminate or disintegrate -- only the surface ply of the wood was damaged at all. For $9 a sheet, this stuff has more than proven its worth.

Here is a front pic of the camper, showing the stains:
Image

Concluding all was well, I looked away from the damaged wood, starting by building the back frame:

Image

I then skinned the inside:
Image

Inside view:
Image

I insulated the wall, then skinned the outside:
Image

Next, my lovely assistant and I started insulating the roof and inside front wall:
Image

Image

We got all the way done with the insulation, but I never got a picture.

Before it got dark, I also completed putting on the roof panels. Previously, the top roof panels didn't go all the way to the back:
Image

I managed to secure almost all the front of the roof, but ran out of screws before I could get to the top panels... They are only screwed on around the edges. I'll be securing them in the middle next, as well as putting up the interior wall/roof panels.

Stay posted for more updates, I'm back! :thumbsup:
-- Dave

Build log: here
User avatar
synaps3
The 300 Club
 
Posts: 433
Images: 254
Joined: Sun Nov 08, 2009 1:09 am
Location: Marietta, GA
Top

PreviousNext

Return to Build Journals

Who is online

Users browsing this forum: No registered users and 14 guests