Weekender status - 1st camping (update 10-21-12)

...ask your questions in the appropriate forums BUT document your build here...preferably in a single thread...dates for updates, are appreciated....

Re: Weekender status - 1st camping (update 10-21-12)

Postby CliffinGA » Mon Oct 22, 2012 9:02 pm

Larry,

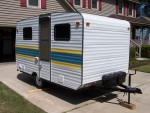
Sheri and I enjoyed meeting you and your lovely wife immensely!! The Super Bee is a very well build tear and shows a lot of craftsmanship that you put in it! Hope we can camp together sometime and meet again.

Cliff :thumbsup:
In God we trust, shoot the rest and he will sort out!

My Build:

viewtopic.php?f=50&t=42628
User avatar
CliffinGA
1000 Club
1000 Club
 
Posts: 1499
Images: 207
Joined: Sat Nov 14, 2009 1:29 pm
Location: Jefferson, GA

Re: Weekender status - 1st camping (update 10-21-12)

Postby WhitneyK » Sat Dec 29, 2012 2:26 pm

Looks great Les!!! :thumbsup:

I like what you did with the galley lid, gives me some ideas on "reworking" mine.(too heavy - 60 lbs)

Hope to run into you next year, we're planning on doing some camping in the Carolina's. :vroom:
Whitney & Tracie
Crothersville, IN

We never really grow up, we only learn how to act in public.

Do not confuse what you hear with what I mean.

My build: http://www.tnttt.com/viewtopic.php?t=41955

160061-------------------------------101114
States we've drug our
li'l camper through. (44 States + Vancouver Island and over 45,000 miles so far)
User avatar
WhitneyK
Gold Donating Member
 
Posts: 559
Images: 412
Joined: Sun Dec 12, 2010 10:28 pm
Location: IN, Crothersville (36mi N or Louisville)

Re: Weekender status - 1st camping (update 10-21-12)

Postby LDK » Tue Jan 01, 2013 10:34 am

I just now discovered your thread and all I can say is, WOW. If I ever build another one I might go this route. :thumbsup:
Your two piece galley lid looks really cool.
LDK
Gold Donating Member
 
Posts: 1419
Images: 1
Joined: Fri Jan 22, 2010 8:29 pm
Top

Re: Weekender status - 1st camping (update 10-21-12)

Postby kd5edj63 » Fri Oct 18, 2013 5:42 pm

Very well done. I like how you modified the fenders. I might have to unmodify mine and do what you did. I might do the 2 piece gally lid and might make the lower part a table top and move the cabinets back a bit. The gears are turning in my head for sure. What grade of plywood did you use. It does not appear to be birch
kd5edj63
Teardrop Master
 
Posts: 130
Joined: Fri Oct 04, 2013 3:17 pm
Top

Re: Weekender status - 1st camping (update 10-21-12)

Postby rebapuck » Fri Oct 18, 2013 11:45 pm

Looks great and camps great. What more can you ask?

Are you happy with putting the coolers under the countertop?
Judy
1966 VW camper
1967 VW singlecab
Image
User avatar
rebapuck
.
 
Posts: 2243
Images: 1
Joined: Thu May 14, 2009 1:55 pm
Location: Chapel Hill NC
Top

Re: Weekender status - 1st camping (update 10-21-12)

Postby les45 » Sat Oct 19, 2013 6:49 am

kd5edj63 wrote:. What grade of plywood did you use. It does not appear to be birch


I just bought what was available at Home Depot. The 3/4" side walls were listed as cabinet grade so they were fairly smooth. The 1/4" on the roof and ends was smooth on both sides but did take a little more filler to smooth out the little cracks and blemishes before painting.
User avatar
les45
500 Club
 
Posts: 974
Images: 605
Joined: Sat Feb 25, 2012 8:57 am
Location: Aiken, South Carolina
Top

Re: Weekender status - 1st camping (update 10-21-12)

Postby les45 » Sat Oct 19, 2013 6:57 am

rebapuck wrote:Are you happy with putting the coolers under the countertop?


The storage under the countertops was a compromise. I wanted to keep the weekender profile look with the bottom bevel on each end and I did not want to make a large, one piece hatch. If you look at my camping pics, you will see that we set up the canopy over the galley and use a table. Everything under the countertops (ice chests, stove, coffee pot) comes out and stores on or under the table while camping. Anything with food goes back on top of the countertops at night with the hatch secured. It is a little more work to take the stuff out each time but it is worth it to me to keep the weekender look that I wanted.
User avatar
les45
500 Club
 
Posts: 974
Images: 605
Joined: Sat Feb 25, 2012 8:57 am
Location: Aiken, South Carolina
Top

Re: Weekender status - 1st camping (update 10-21-12)

Postby kd5edj63 » Sat Oct 19, 2013 9:01 am

Thanks Les. I'll be using alot of your ideas for my build :beer:
kd5edj63
Teardrop Master
 
Posts: 130
Joined: Fri Oct 04, 2013 3:17 pm
Top

Re: Weekender status - 1st camping (update 10-21-12)

Postby Tobit » Thu Feb 13, 2014 8:04 am

What a great Weekender. After seeing this build, along with Whitney's and starleen's, I think I'm going to build one instead of a standy like I was thinking. However, I think I'm going to make mine a bit taller and with a single 30"x75" elevated bunk that I can sit on fully upright like a couch. 58" interior height seems about right. That shouldn't be too tall, eh?
User avatar
Tobit
Teardrop Builder
 
Posts: 30
Joined: Tue Feb 11, 2014 6:42 pm
Location: Southern NH
Top

Re: Weekender status - 1st camping (update 10-21-12)

Postby WhitneyK » Tue Apr 01, 2014 12:18 pm

Tobit wrote:What a great Weekender. After seeing this build, along with Whitney's and starleen's, I think I'm going to build one instead of a standy like I was thinking. However, I think I'm going to make mine a bit taller and with a single 30"x75" elevated bunk that I can sit on fully upright like a couch. 58" interior height seems about right. That shouldn't be too tall, eh?


:oops: Thanks Tobit

58" shouldn't be to bad at all. Look up Little Swiss Tear in the Hall of Fame Gallery, I think they did a 5 W x 5 H and I think it looks good! :thumbsup:
Whitney & Tracie
Crothersville, IN

We never really grow up, we only learn how to act in public.

Do not confuse what you hear with what I mean.

My build: http://www.tnttt.com/viewtopic.php?t=41955

160061-------------------------------101114
States we've drug our
li'l camper through. (44 States + Vancouver Island and over 45,000 miles so far)
User avatar
WhitneyK
Gold Donating Member
 
Posts: 559
Images: 412
Joined: Sun Dec 12, 2010 10:28 pm
Location: IN, Crothersville (36mi N or Louisville)
Top

Re: Weekender status - my Progressive works!! (update 9-6-1

Postby IslandStorm62 » Mon Apr 14, 2014 9:58 am

les45 wrote:No new pics, but I hit a major milestone today while putting everything back together after completing my painting. This was the first time that I had everything in my electrical system connected to my Progresssive 4045 converter/charger. Hooked up my shore power and started flipping breakers and no surprises. Everything worked exactly as it should. AC/DC with and without the battery. It's a little overkill for my 20 amp system, but it sure is nice. I had a bit of a scare when I checked my outlets and they showed an open ground. Turned out it was a faulty extension cord (cheapo from HF; just because you have a ground prong doesn't mean you have a ground). When I connected my new longer/heavier cord that I will be using with the weekender, everything checked out perfectly. I see camping in the near future just in time for the cooler weather.


Excellent work. Unfortunately for me it means I have to rethink everything about life and building a TD...lol. Can you explain how you connected your Shore power to the PD4045. Is it just a Extension cord with the end cutoff or did you build a inlet plug and run a 14/3 cable to the Main 120VAC Breaker in the PD4045? If you don't mind could you list the parts?

Also, going back a few pages, you used fiberglass tape to seal the outside edges of your wall and roof. Can that same technique be used if I was just planning on staining and sealing? Back when I started this project I had planned on just having a woody (stained and sealed). My trailer is being built with Baltic Birch 1/2" and 1"8"...now I am thinking of painting as you did, but I have to check the cost and remain on budget. As a matter of fact, my budget got cut just a wee bit this year. Thanks again.
IslandStorm62
Teardrop Advisor
 
Posts: 90
Images: 13
Joined: Mon May 20, 2013 6:57 pm
Top

Re: Weekender status - heat+rain=humidity (update 8-7-12)

Postby IslandStorm62 » Mon Apr 14, 2014 11:49 am

les45 wrote:... gives me more time to keep filling those little cracks and dings that keep showing up every time you look at it in a different light. I've gotten two coats of Zinsser oil based primer on so far but have sanded half of it off to keep working the little blemishes. Today was another day of 100% humidity so no primer but another day of filler. Good thing I ordered "too much" of the Smith's Fill-it. Weatherman is calling for a dry spell next week so after some more filling and sanding this week, I'll be ready to start slinging paint again. Still gotta get two full coats of primer before the three coats of Rustoleum. It's gonna be a long month.

Primer, sand, fill, and sand some more. Primer, sand, fill, and sand some more, etc. etc.
Image

Good thing I bought too much of this stuff.
Image


I do not recall the material you used for your trailer. My wall is 1/2" Baltic Birch and 1/8" Baltic Birch for the roof/skin. They appear to be fairly smooth. I moght do a light sanding to clean it up. So, I was wondering if you think all the filling you are having to do is related to the material you used or can I expect the same amount of filling sanding and primering?

I'm sure the edges that are sealed with the fiberglass tape will require additional filling and sanding.
IslandStorm62
Teardrop Advisor
 
Posts: 90
Images: 13
Joined: Mon May 20, 2013 6:57 pm
Top

Re: Weekender status - glass tape wetted in (update 5-27-12)

Postby IslandStorm62 » Mon Apr 14, 2014 12:17 pm

les45 wrote: Used Aeromarine 300/21 system (thanks to CliffinGA) with 4" tape. I wetted it in heavy with a 2" chip brush and then rolled it out with a 4" high density foam roller. I don't recall seeing this mentioned anywhere, but you have to use a tipping brush to get all the air bubbles out after you roll out the epoxy (very similar to an epoxy paint). Four and half ounces of mix and about 100" of tape is about all I could get done in each batch before it started setting up. Temp was about 80 degrees. Used a lot of disposable cups, sticks, chip brushes, and rubber gloves. Also used lots of drop cloths because it drips all over, especially working vertical joints and bottom bevels. Acetone cleans up pretty well as long as the stuff is still sticky.
I'll start smoothing it out tomorrow with more coats of epoxy to fill in the fiberglass weave and feather the edges.

Image


Is this fiberglass tape different from the ones used for drywall? And the Aeromarine 300/21 that is epoxy used to wet and seal the fiberglass tape?
IslandStorm62
Teardrop Advisor
 
Posts: 90
Images: 13
Joined: Mon May 20, 2013 6:57 pm
Top

Re: Weekender status - my Progressive works!! (update 9-6-1

Postby les45 » Mon Apr 14, 2014 3:03 pm

IslandStorm62 wrote:
Excellent work. Unfortunately for me it means I have to rethink everything about life and building a TD...lol. Can you explain how you connected your Shore power to the PD4045. Is it just a Extension cord with the end cutoff or did you build a inlet plug and run a 14/3 cable to the Main 120VAC Breaker in the PD4045? If you don't mind could you list the parts?

Also, going back a few pages, you used fiberglass tape to seal the outside edges of your wall and roof. Can that same technique be used if I was just planning on staining and sealing? Back when I started this project I had planned on just having a woody (stained and sealed). My trailer is being built with Baltic Birch 1/2" and 1"8"...now I am thinking of painting as you did, but I have to check the cost and remain on budget. As a matter of fact, my budget got cut just a wee bit this year. Thanks again.


I used a Marinco 20 amp RV inlet from eBay (http://www.ebay.com/itm/Park-Power-By-M ... 88&vxp=mtr). Since I did not plan on an AC unit I thought 20 amps was enough and it allowed me to use a standard 12 ga extension cord to connect to park power. Note that the blades for the 20 amp inlet are perpendicular so this took an adapter for the standard extension cord. I used 12/2 with ground Romex and simply connected the other end to the main breaker in he PD4045. If you look at my picture you will see the hole in my sidewall for the inlet.

I wouldn't think that you would use the fiberglass tape and epoxy on the corners for a woody. You will have a big area under the tape that will not match your wood grain that would be visible under your clear coat. Paint is cheap. I used less than three quarts of Rustoleum for my weekender and that was for three coats.
User avatar
les45
500 Club
 
Posts: 974
Images: 605
Joined: Sat Feb 25, 2012 8:57 am
Location: Aiken, South Carolina
Top

Re: Weekender status - heat+rain=humidity (update 8-7-12)

Postby les45 » Mon Apr 14, 2014 3:11 pm

IslandStorm62 wrote:I do not recall the material you used for your trailer. My wall is 1/2" Baltic Birch and 1/8" Baltic Birch for the roof/skin. They appear to be fairly smooth. I moght do a light sanding to clean it up. So, I was wondering if you think all the filling you are having to do is related to the material you used or can I expect the same amount of filling sanding and primering?

I'm sure the edges that are sealed with the fiberglass tape will require additional filling and sanding.


I used 3/4" cabinet grade plywood for the sidewalls and 1/4" regular good-one-side plywood for the top and ends. I was going for a fairly smooth finish so I filled a lot of little blemishes in the wood, especially the 1/4" stuff. It just depends on the material you buy. Even the cabinet grade sides had little flaws in the grain and handling dings that had to be filled. Note that I treated all the wood with CPES before doing the body work. I used epoxy filler that was compatible with the CPES and I used an oil based primer (Zinsser) that was compatible with the filler and the Rustoleum. You need to make sure that all your components in your system are compatible. Some people use Bondo as a filler and it is not compatible with an epoxy system.
User avatar
les45
500 Club
 
Posts: 974
Images: 605
Joined: Sat Feb 25, 2012 8:57 am
Location: Aiken, South Carolina
Top

PreviousNext

Return to Build Journals

Who is online

Users browsing this forum: Google [Bot] and 15 guests