Hi Kevin,
Your welcome. Since you are new to TTs and all, I'll throw out what
I know of ‘whatever’ whenever I think something could be helpful/useful
for you. I'm not an expert, but do have experience in the subject area. If
that can help someone out, then why not share if it could potentially be useful
to others...that's one of the main benefits in a forum like this - everyone can
learn from one another.
<RE: Your Tue Jun 25, 2013 12:34 am post>
A POSTING HINT that's saved me lot of frustration:
A good posting practice [for one's own sanity] is to compose your
post as a wordprocessing document, and once done, copy it all and
paste it into the TnTTT post composing area. I usually compose the post
in Wordpad, as it's fast to get up on my laptop. The wordprocessing
approach also gives you the option of saving the post as a document in
whichever wordprocessing program you use, which can be usefull if you
have an interruption or need to 'pause' when composing it. You can always
delete the post/document from there later if you don't want to save it there
'permanently'.
I'll try to give a comment on each thing you bring up if I have any info that
could possibly help.
<>
I understand car repair shops will PAINT just about whatever you want as long
as you have the $$$. I see you've checked out Doug Hodder's current build thread
with his self paint startingt now,
http://tnttt.com/viewtopic.php?f=50&t=52665&start=180<>
In that front area, I see there's a good bit of rot on the 'driver's'-side corner to repair.
I meant to include in my earlier post that if you need to do any exterior siding removal
to fix the corners [only do that at the last resort if you have to do so] that doing so
on the front and rear walls would be easier to handle than the sidewalls - smaller size
and all, but that all depends on your total amount and location of damage, I guess,
in the final analysis.
<>
I'd also remove, over just cleaning, any component that has mold and mildew on it - some of the
seat base tops look to have it. It's healthier and easier to just replace the really contaminated
items. The under frame doesn't look too bad so you could just put new plywood on that
to replace the bad. Most 'older', especially smaller TTs, usually had a table for the dinette
that was sized to fit exactly between the bench/seat bases, resting on permanent side
supports at the top of the bench/seat long edge. That combined with the top surfaces of
the seats gave you the bed platform. A futon type mattress might be useful to use for the
combined seating and bed functions. Foam slabs are often used for seat and back cushions
and then combined as the sleep surface but that isn't as comfortable as a folding continuous
one-piece cushion/mattress to me.
<>
One of the videos mentioned using sliding doors to close off an upper full-width storage
area where the bunk bed area is now. Often just 1/4inch plywood alone is used for those
doors. And there are 'tracks' made for them that you can buy at woodworking type
stores/suppliers. It uses a simple bottom and top track. It's basically extruded aluminum,
grooved hardwood, or extruded/molded plastic that looks like a block letter capital "W" [square
bottom corners] if you look at the end of it. It's sold in various lengths and is easier to use than
making your own sliding panel track, but that's aways an option too. Here's an example:
http://www.sears.com/search=stanley%20s ... el%20track<>
Once you get rid of the existing bath setup, you can reposition the toilet if you want to. I
suspect you're going to have to rebuild that corner/room, in total, due to all the wood rot,
so when you rebuild that area, reposition the toilet to where you want it in the room. If
you want a sink in there, do a fold-up sink. It's a shallow sink the folds up against the wall
when not in use and is usually positioned over the toilet. It's a great idea I think. A huge
space saver, why dedicate floor space to a sink and cabinet you only very occasionally use ?
Reposition the toilet in the existing bath footprint and thus give yourself some elbow and
knee room in there, and put a self-made foldup sink above it. You can build in some upper
storage cabinets above and/or on the sides of the toilet too if you want. Here's an example of
such a setup :[From pg14 in my Album, click to enlarge.]

<>
The Tool I mentioned is probably best known as a "Multitool" or "Multi-Tool". It has its
origin [from what I read somewhere] in the oscillating saws medical people used to
remove plaster casts. It is hand-held and is basically an electric motor that oscillates its
attachment head/bit extremely fast [similar to what an oscillating/orbital hand sander
does] which is then also scntillating the clamped/bolted on tool blade/bit. They have several
available types of small saw blades, scrapers, grout remover fitting etc. They are an extremely
handy and useful tool, especially in tight spaces. One would be a godsend for what you
are starting to do. Here's a link to one that looks like the one I have:
http://www.protoolreviews.com/tools/chi ... nction/928After reading that review I'd go for a better quaility one and If you can afford one with a quick
blade/bit change system, go for that. Several manufacturers make them, they're just more $$$.
As I recall now, the one I got was on a half-price sale and is very basic. The higher oscillating
speed and quick change features of a more expensive one would be well worth it. Check some
reviews maybe before you get one. Also, the cheap blades can wear out fast, so get those
made with harder materials. There are many suppliers of those.
<>
There are probably about as many build/structure methods out there as there are brands
of TTs, but a low cost basic method that is widespread in use is called the 'inside out method'. With it, the wall, floor and roof frames/sections are made of smaller dimension 1x or 2x wood
framing members, oriented both vertically and horizontally, per design requirements, and some
kind of batt or foam insulation is put in the voids of that [I'd recommend foam as insulation on
your repairs - easier to install and more R-values in general.], and the interior surface is then
covered with, usually, a plywood or plywood-like panel that is fastened and glued on. The
exterior of the TT body is usually later covered with thin aluminum sheeting after all the
sections are assembled. At the edges, where all the sections come together, an outside corner
molding is usually applied over some kind of a continuous sealing 'tape'. Butyl rubber and a
[generally specific to RVs/trailers] gray putty 'tape' are the more commonly used sealing tapes.
The quality of the exterior aluminum sheeting covering's fit, and the application/installation of
the sealing tape and the molding that covers the edges and thus 'joins' the exterior aluminum sheet edges, is what determines the water-tightness of the trailer covering and corners/edges.
Maintaining this seal is an ongoing maintenance requirement, but this is never really
communicated to buyers/owners very well. Like the older house trailers and mobile homes, TTs
were/are marketed as being pretty much "maintenance free", and most new-to-the-world-of
trailers people believe that. Maintenance neglect starts out as being uninformed of what is
needed to be checked and regularly. That's why most wood framed trailers don't last or have so
much wood rot - they've never really been maintained. Poor design and building method is also
a cause, but that is often hard for an owner to remedy. Unfotrunately, leaks can occur to even the most vigilant of TT 'maintainers' if they miss a problem and thus don't catch the leak's
cause soon enough.
<>
Before I forget about it, I would never use silicone caulk anywhere in the TT. Once on, it is next
to impossible to get it off, and it is way too much work to try to remove, and you usually
end up damaging what you are working on in an attempt to get it off. It can be removed,
grudgingly, with buying the appropriate silicone 'remover' but that is just an extra expense,
and is often not easy to find or effective and is hard work to use - in my experience. I've never
been totally satisfied with it when I have had to use it. Avoid the headache and the work it'll
later cause and just don't use it.
<>
Back to TT construction: As most commercial TTs are built "inside out". All of the interior
cabinets, dividers, components etc. are installed on the completed floor assembly first, then
the mostly completed walls are installed and then the mostly completed ceiling/roof is
installed. The interior cabinets and components etc. are then attached to the walls and
ceiling where they need to be . Then the exterior coverings go on. Then all the openings,
doors and windows and vents etc., are installed and all of those need to be joined and sealed at the edges and wall openings. Also, the floors, walls, ceilings/roof and the other factory made
components are usually built in jigs to insure correct and consistent fit and placement and
are then all joined together to form the trailer body. Since your damage demo and repair will
probably be easiest done from the inside, just keep in mind how it was built as you go about
the work so you can formulate your approach. For example, You may need to cut some
staples/screws/nails to remove something and the multi-tool is great for that.
[TT Trivia: Generally, aircraft method constructed TTs [Using aluminum body structure and
riveted aircraft grade aluminum skins.] have their chassis-floor and the rest of the exterior
body shell completed first, then all the rest of the interior components and systems
are installed. This requires that everything, that needs to be installed, must be able to fit
through the entrance door.]
<>
Windows: The approach to these depends on what kind of them you have. Since the TT has
so much water damage, and leaky windows - both in themselves and in their installation -
allow the water in to cause its damage, I'd take the time to reseal them, even if that'd entail
removing them and reinstalling them with new sealing tapes. Two main methods of window
installation result from how they were designed. Either screwed on through the exterior
window frame, or installed by the clamp ring method, whereby the window has two main
components, the window frame and window, which are installed from the outside, and the
clamp-ring, which acts as the interior window frame and finish, and which fits correspondingly
to the window and is screwed to it through predrilled holes, thus clamping the wall between
the two window sections. Your's look to be that type. They are generally considered more
'modern' and 'better' in-so-far as they have a cleaner appearance and there are no holes from
any exterior screws used to secure them, thus eliminating a major potential water entry point.
If you determine there is no rot around them and the seal is still good on them, maybe just a
touch-up with a non-silicone caulking sealer around them would be in good order. There are
some good marine/boat caulking-sealers you can use for that.
<>
That PIC looks like the trailer's electical panel with circuit breakers. "Tripping' is just when it
pops/turns itself off due to an overload of some kind. If the toggle switch is positioned in the
middle beside "Trip" label, then it cut off the ciruit due to an overload of some kind. To reset,
you ususally turn it to the "off" position, then turn it back to the "On” position. Every TT
electrical panel and system has to meet the RV electrical code at the date/time of the
manufacture. There is a "Main" circuit breaker and one for each circuit that is on the panel.
A BATTERY is not necessary unless you want total self-containment away from hook-ups. If
you'll only be camping in locations with electric power available, then you really don't need one.
Just a good power cord to hook up to the site's power pole panel, and the appropriate adapter
if needed. [There are different amp rated adapters that may be needed to be used per your TT's
electrical set-up and what the site's power pole has.] It'd be best to check out the electrical and
heating-n-plumbing sections here on TnTTT for details on all of this.
As far as AC goes, most likely the TT is prewired with a dedicated circuit to where an AC would
usually be installed on the TT - at the roof vent. That is why there is a circuit breaker labeled
for that. The most common TT ACs are the roof mounted units, as you mentioned, but they
can be pricey, but do have the advantage of not taking up interior or window space. A regular
room AC [usually much cheaper] can also be used if you wanted to mount one in a window or
make a dedicated opening elsewhere for it, but then you have to deal with all the details
involved with installing that. Just remember travel width restrictions and if you'd walk into
it when camping if you go that route.
<RE: Your Tue Jun 25, 2013 10:14 am Post>
Replace part a moldy stud: Replacing just the rotted part [plus maybe an extra inch or so
to ensure you got any that may have migrated upward a bit] is a good approach. Your
thin plywood “splints” would be good attachment supports for the new wood to the existing.
Just remember to glue all such joints [its really a reinforced butt joint] together. If you use
fasteners, screws are easiest and best in my view, but not drywall screws, they’re too brittle.
The exterior screws, and even the coated or deck kinds, are the ones to use. Their little added
cost is worth it. Also, predrill the screw holes. The smaller dimension wood used in TT
construction may split otherwise - your call. The Kreg jig approach is designed to reinforce
the butt joint.
K.C.s half-lap joint recomendation is a good approach too, strong when glued. Just decide
which method is the most doable and time effective for you.
<>
BTW, what tools do you have available to use ? Obviously, that’ll affect what you can do and
how time consuming repairs will be.
It’s nice to see you’re getting some more input now from others too. Let’s consider such to
be The Collective Power Of The TD/TTT Force...
Cheers,
Norm/mezmo
If you have a house - you have a hobby.


 But it's something I want to do and my kids are older....I have no wife or gf...no dog. I have time. Ha ha What's the best saw to use for doing cuts like that?


 ) before you invest any serious coin. The worst thing to do in your situation, IMHO, would be to rush out and drop a lot of jingle on all of the expensive, or even semi-expensive features that you envision.

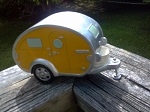
 I tore off most of the ceiling and some of the wall....this is what I found. Check out the videos....