Teardrops n Tiny Travel Trailersor t n ttt for short (tnttt.com) |
M116A3 Build
Re: M116A3 Build
![]() by noseoil » Sat Oct 17, 2015 8:09 am
by noseoil » Sat Oct 17, 2015 8:09 am
I used the torx drive with the center post for my solar panel brackets. I figure that's the "weak point" in my build with respect to what can be stolen on the outside. Everything else is pretty well secured, or at least a PITA to deal with & requiring more time & effort than it's worth. I like the idea of at least slowing things down & making it more difficult. They're not stealing because they're highly motivated individuals usually. If you can place a few hurdles in the path, they will often just choose a different path that's easier. I still use the "multiple layers" of defense approach.
Build log: viewtopic.php?f=50&t=60248
The time you spend planning is more important than the time you spend building.........
The time you spend planning is more important than the time you spend building.........
-

noseoil - 1000 Club

- Posts: 1822
- Images: 670
- Joined: Sun Apr 27, 2014 8:46 am
- Location: Raton, New Mexico, living the good life!
Re: M116A3 Build
![]() by lfhoward » Sat Oct 17, 2015 7:26 pm
by lfhoward » Sat Oct 17, 2015 7:26 pm
Tonight the urethane on the doors and the trailer itself was dry enough to put the doors and windows back on (temporarily until I skin it). I like having them on and locked, because as you say, it's just a little more difficult to get the batteries and electronics if you can't actually see them and can't reach right in.
Tonight is the first frost of the season. It's going down to 32 degrees tonight and 30 tomorrow night. I don't expect the batteries to freeze in that short amount of time, but I have the trailer plugged in and charging overnight. The battery bank was down to 12.4 volts because I had been using the lights for several nights, and I hadn't fully charged it in about a month. The batteries should be topped off by tomorrow morning.
I have a smart onboard charger that won't overcharge the batteries, so I could leave it plugged in all the time if I need to. I'd like to get the trailer skinned and then install the solar panel, so the trailer could maintain itself off the grid.
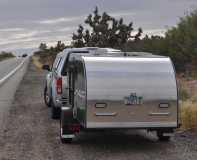
My off-road camper build on an M116A3 military chassis:
http://www.tnttt.com/viewtopic.php?f=50&t=62581
Tow vehicle: 2008 Jeep Liberty with a 4 inch lift.
http://www.tnttt.com/viewtopic.php?f=50&t=62581
Tow vehicle: 2008 Jeep Liberty with a 4 inch lift.
-

lfhoward - 1000 Club
- Posts: 1370
- Joined: Wed Jan 22, 2014 6:10 pm
- Location: Philadelphia, PA


