TwilightLane Cubbie Build

...ask your questions in the appropriate forums BUT document your build here...preferably in a single thread...dates for updates, are appreciated....

Postby TwilightLane » Wed Mar 17, 2010 11:22 pm

So I laid the frame on the ply and lined everything up. I used the clamps to hold everything in place.
Image

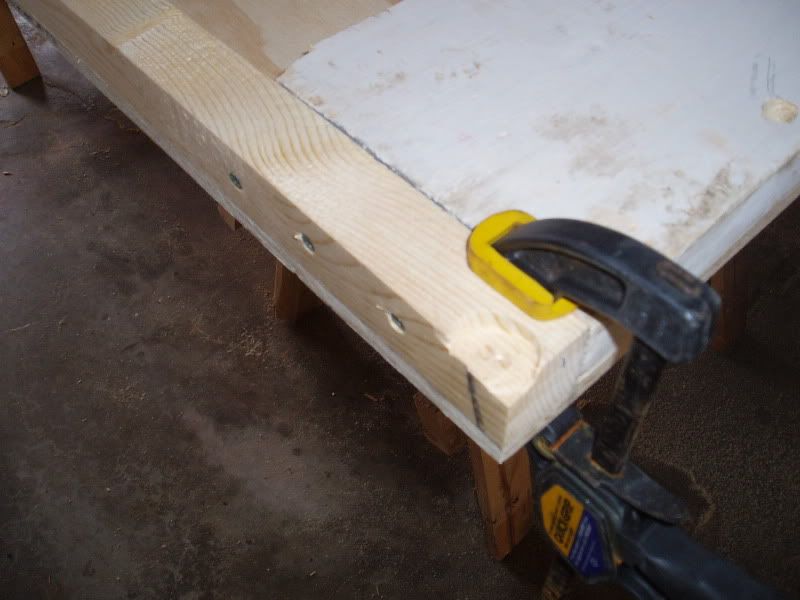
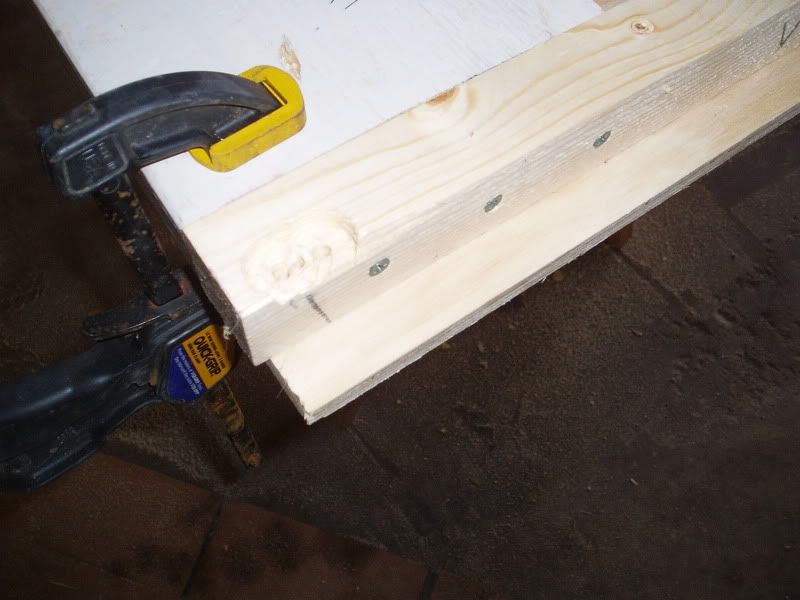
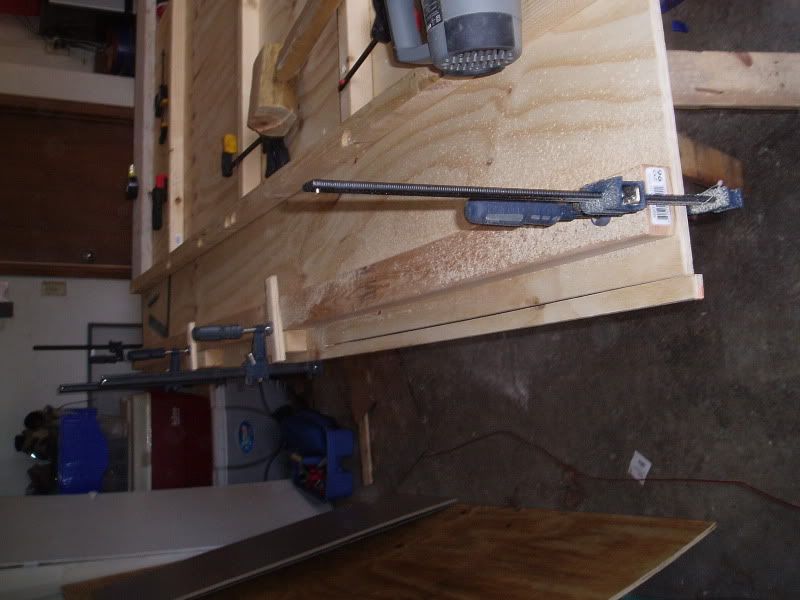
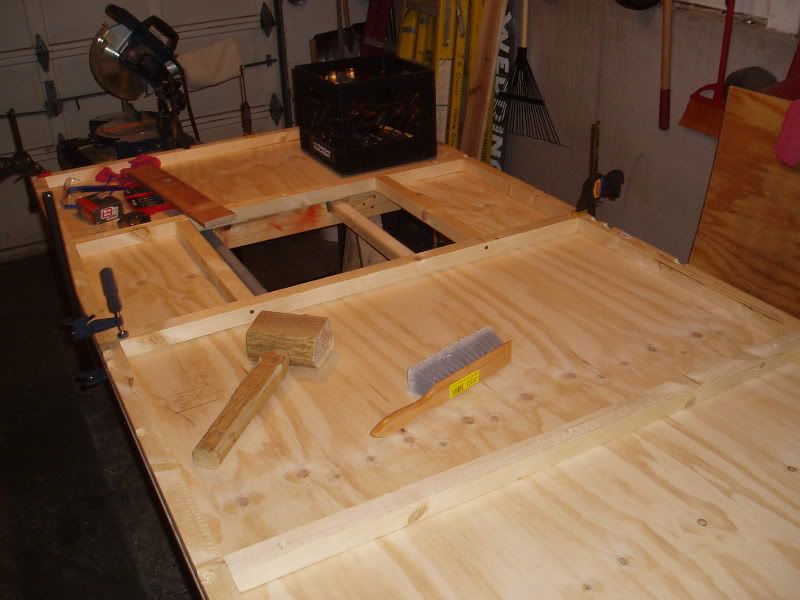
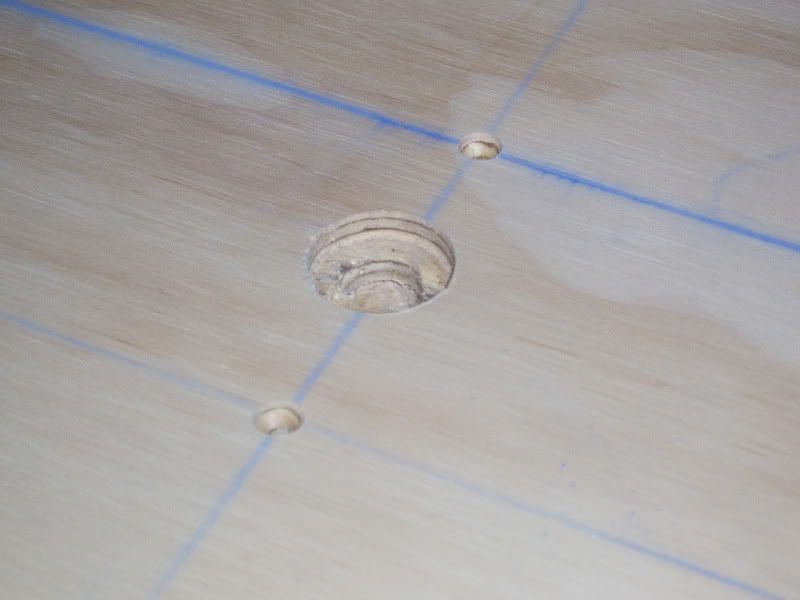
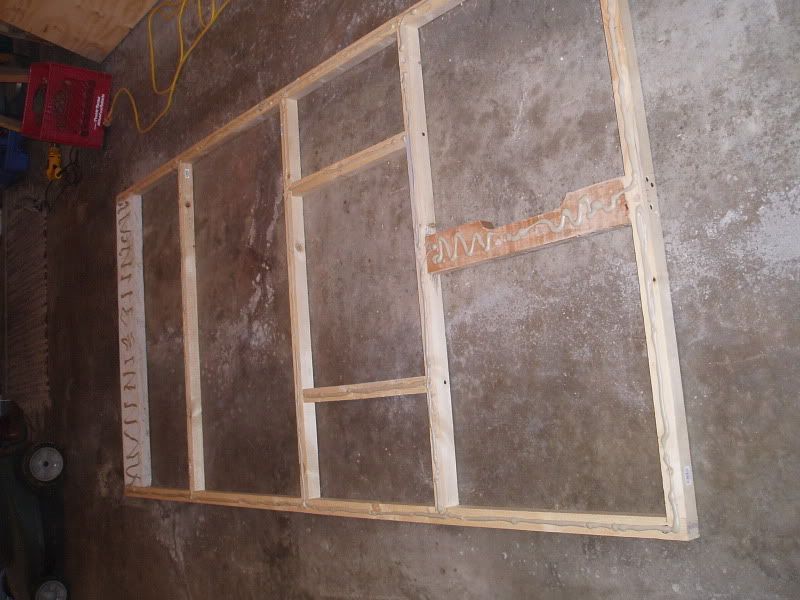
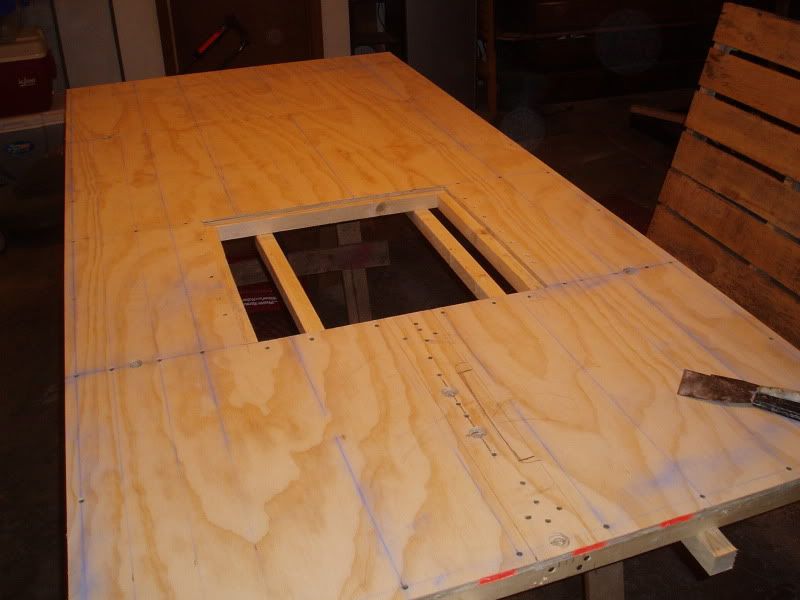
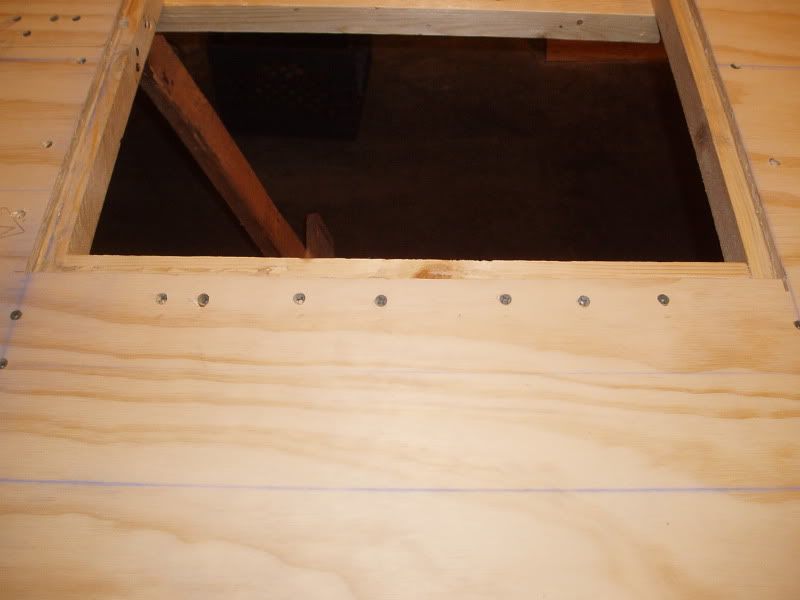
Sure enough, there is about a one inch lip as the frame is narrower than the ply.
Image
.
Image
Rob & Lori
Aspen & Tundra
My Instructable: http://www.instructables.com/id/Teardro ... l-Trailer/
User avatar
TwilightLane
The 300 Club
 
Posts: 484
Joined: Thu May 14, 2009 4:59 pm

Postby TwilightLane » Wed Mar 17, 2010 11:24 pm

So I lined up a 2x3 as a cutting guide to run the circular saw. It had a slight bow in it, so I used several clamps to hold the line.

Image

Image
Rob & Lori
Aspen & Tundra
My Instructable: http://www.instructables.com/id/Teardro ... l-Trailer/
User avatar
TwilightLane
The 300 Club
 
Posts: 484
Joined: Thu May 14, 2009 4:59 pm

Postby TwilightLane » Wed Mar 17, 2010 11:26 pm

I moved and replaced the clamps as I worked down the cut. The two middle clamps actually caught the strip so I didnt have to worry about it tearing or breaking at the end of the cut. Nice...

Image
Rob & Lori
Aspen & Tundra
My Instructable: http://www.instructables.com/id/Teardro ... l-Trailer/
User avatar
TwilightLane
The 300 Club
 
Posts: 484
Joined: Thu May 14, 2009 4:59 pm
Top

Postby TwilightLane » Wed Mar 17, 2010 11:27 pm

Framing out the hatch. Used some scrap 2x2.

Image
Rob & Lori
Aspen & Tundra
My Instructable: http://www.instructables.com/id/Teardro ... l-Trailer/
User avatar
TwilightLane
The 300 Club
 
Posts: 484
Joined: Thu May 14, 2009 4:59 pm
Top

Postby TwilightLane » Wed Mar 17, 2010 11:33 pm

Once I measured and determined where to cut the hatch, I drilled a few tiny holes where I knew I wanted the plunge cuts. Then I set the frame to the side and flipped over the ply. In retrospect, I don't know why I flipped over the plywood. I could have done it from the bottom side.

I used the circular saw to make the plunge cuts. Again I was worried about tear or breaking the edge of the cut as I finished the cut. My solution was to use a crosswise piece to hold the cut out hatch.

Image
Image

That worked really well.
Rob & Lori
Aspen & Tundra
My Instructable: http://www.instructables.com/id/Teardro ... l-Trailer/
User avatar
TwilightLane
The 300 Club
 
Posts: 484
Joined: Thu May 14, 2009 4:59 pm
Top

Postby TwilightLane » Wed Mar 17, 2010 11:35 pm

So the funny thing that happened while I was cutting out the hatch: I didnt want to cut those 2x2s underneath that were supporting the ply. SO I took one out. I _thought_ I had moved the sheet over enough to miss the remaining one when I made my cuts...

Image

Yeah not so much. Genius!!??
Rob & Lori
Aspen & Tundra
My Instructable: http://www.instructables.com/id/Teardro ... l-Trailer/
User avatar
TwilightLane
The 300 Club
 
Posts: 484
Joined: Thu May 14, 2009 4:59 pm
Top

Postby TwilightLane » Wed Mar 17, 2010 11:38 pm

At any rate, a lot of progress today. St Paddy's day.
Image

(Notice the piece of conduit replacing the cut 2x2 :lol: )
Rob & Lori
Aspen & Tundra
My Instructable: http://www.instructables.com/id/Teardro ... l-Trailer/
User avatar
TwilightLane
The 300 Club
 
Posts: 484
Joined: Thu May 14, 2009 4:59 pm
Top

Postby TwilightLane » Thu Mar 18, 2010 1:53 am

I don't know what is going on out on the main 'General Discussion' forum. But clearly there are some ruffled feathers about advice and peoples tone and whatnot.

For the record, I have a very thick skin and can give as well as I get. If you see me doing something wrong or dumb, please pipe up. Don't hold back. We'll have a good laugh, fix it and move on with life. Thanks in advance.

;)
Rob & Lori
Aspen & Tundra
My Instructable: http://www.instructables.com/id/Teardro ... l-Trailer/
User avatar
TwilightLane
The 300 Club
 
Posts: 484
Joined: Thu May 14, 2009 4:59 pm
Top

Postby aggie79 » Thu Mar 18, 2010 8:39 am

Rob,

You're moving right along!

For what it's worth, I think you're doing a great job. (While I'm not new to construction or woodworking, I'm a TD newbie. I guess that label goes away after you finish your first build.)

Keep it going!
Tom (& Linda)
For build info on our former Silver Beatle teardrop:
Build Thread

93503
User avatar
aggie79
Super Duper Lifetime Member
 
Posts: 5405
Images: 686
Joined: Tue Aug 07, 2007 5:42 pm
Location: Watauga, Texas
Top

Postby TwilightLane » Sat Mar 20, 2010 12:11 am

Okay, so I got all the holes drilled and countersunk. I used a chalk line to line up where to attach the ply to the frame.

Image
.
Image

Uh, yeah. I'm a little anal retentive. Why do you ask?
Rob & Lori
Aspen & Tundra
My Instructable: http://www.instructables.com/id/Teardro ... l-Trailer/
User avatar
TwilightLane
The 300 Club
 
Posts: 484
Joined: Thu May 14, 2009 4:59 pm
Top

Postby TwilightLane » Sat Mar 20, 2010 12:17 am

The plans called for a square of ply under the front to reinforce the floor. I didnt have anything that I thought would work. What I did have was a piece of oak. Hard as hell. It came from a pallet that I tore apart. I figured it was stout enough to carry the spare tire.
Image
.
Image

I drilled a couple of holes that lined up to bolt holes on the rim.

Image
Rob & Lori
Aspen & Tundra
My Instructable: http://www.instructables.com/id/Teardro ... l-Trailer/
User avatar
TwilightLane
The 300 Club
 
Posts: 484
Joined: Thu May 14, 2009 4:59 pm
Top

Postby TwilightLane » Sat Mar 20, 2010 12:19 am

Ok. So I've the got the ply and frame all prepped. Now to glue and attach em.

Here is the glue...

Image
.
Image
Rob & Lori
Aspen & Tundra
My Instructable: http://www.instructables.com/id/Teardro ... l-Trailer/
User avatar
TwilightLane
The 300 Club
 
Posts: 484
Joined: Thu May 14, 2009 4:59 pm
Top

Postby TwilightLane » Sat Mar 20, 2010 12:22 am

Lotsa screws. Glue squeezing out.

Image

Overkill you say? Is a pig's butt pork?
Rob & Lori
Aspen & Tundra
My Instructable: http://www.instructables.com/id/Teardro ... l-Trailer/
User avatar
TwilightLane
The 300 Club
 
Posts: 484
Joined: Thu May 14, 2009 4:59 pm
Top

Postby TwilightLane » Sat Mar 20, 2010 12:25 am

Yeah. More screws. I do like my DeWalt drill.

Image
.
Image

All screwed and glued.
Rob & Lori
Aspen & Tundra
My Instructable: http://www.instructables.com/id/Teardro ... l-Trailer/
User avatar
TwilightLane
The 300 Club
 
Posts: 484
Joined: Thu May 14, 2009 4:59 pm
Top

Postby TwilightLane » Sat Mar 20, 2010 12:27 am

Now that is some serious fine craftsmanship. Heh.

Image
Last edited by TwilightLane on Sat Mar 20, 2010 12:41 am, edited 1 time in total.
Rob & Lori
Aspen & Tundra
My Instructable: http://www.instructables.com/id/Teardro ... l-Trailer/
User avatar
TwilightLane
The 300 Club
 
Posts: 484
Joined: Thu May 14, 2009 4:59 pm
Top

PreviousNext

Return to Build Journals

Who is online

Users browsing this forum: No registered users and 15 guests