Wingloader's first build

...ask your questions in the appropriate forums BUT document your build here...preferably in a single thread...dates for updates, are appreciated....

Re: Wingloader's first build

Postby Oldragbaggers » Tue May 28, 2013 9:38 pm

Looks great!!! I am envious of that perfectly consistent and appropriately sized gap between your hatch and galley wall. Boy, the things that will make a girl swoon.
Life is sooooo good.........
Sail...camp....bike...repeat
Becky

Build Journal http://www.tnttt.com/viewtopic.php?f=50&t=45917
Visit our blog at http://www.oldragbaggers.com
Image Image
User avatar
Oldragbaggers
Gold Donating Member
 
Posts: 1842
Images: 331
Joined: Mon Aug 01, 2011 9:22 pm
Location: Essex, MD

6-1-2013

Postby wingloader » Mon Jun 10, 2013 11:47 am

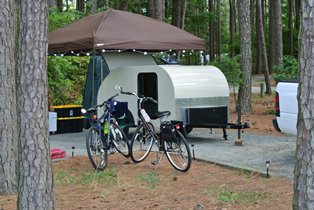
I am FAR from finished with my build, but after twisting a couple of wires onto a battery on Saturday morning, I have a camper I can use. The inside and the galley are completely unfinished. However, it is roadworthy and I can sleep in it!

I drove to Maryland from Buffalo, NY on Saturday for my hang gliding competition. Towed great! If there was any impact on my gas mileage, it was so negligible that I so no measurable effect.

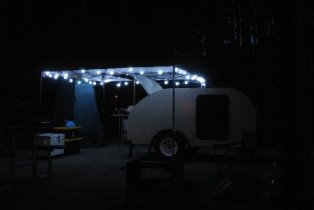
On a few days at the comp we had torrential rain. I was dry and snug as a bug. I felt really badly for all those in tents!

As you can see by the pics, I didn't even have a chance to clean it off before departing. The rain took care of that for me!

I will be working for quite a while now to do the finish work.

Image

Image

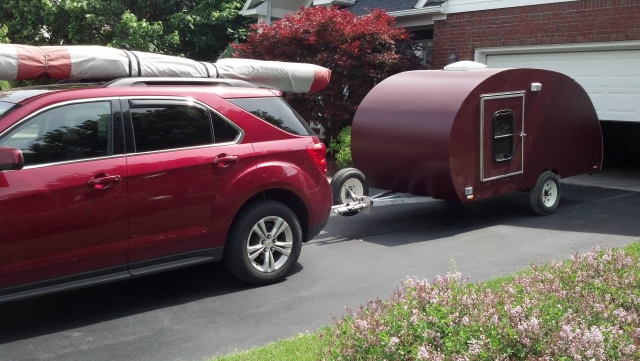
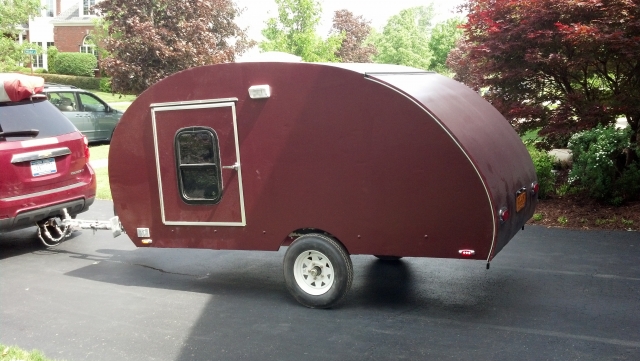
I am going to flip the hitch over on the TV side to raise the tow bar up. It was hanging low which reduced the sex appeal.
User avatar
wingloader
Donating Member
 
Posts: 81
Images: 84
Joined: Tue Feb 26, 2013 4:17 am
Location: Buffalo, NY

Re: Wingloader's first build

Postby PKCSPT » Tue Jun 11, 2013 4:15 am

Like the color can't wait to see the finished product inside.
121172 116946 159644
PKCSPT
Silver Donating Member
 
Posts: 1515
Images: 61
Joined: Wed Mar 31, 2010 11:27 pm
Location: Minnesota
Top

Re: Wingloader's first build

Postby Ron Dickey » Tue Jun 11, 2013 12:14 pm

I have seen a lot of builds on the net but yours offers many good teachings. Thank you for sharing. I notice you do not offer a location did anyone in your town or state help you. Looks like you have built things like this before!

Maybe one day I will see you on the road.
121377......134179
Inside almost done--Trolly top has opening windows & roof.doors need assembling--pictured above waley windows..galley 1/3 done
Cross Bow in Build Journals....http://www.tnttt.com/viewtopic.php?f=50&t=54108
User avatar
Ron Dickey
Silver Donating Member
 
Posts: 3078
Images: 711
Joined: Tue Apr 20, 2004 5:56 pm
Location: Central Coast, CA
Top

Re: Wingloader's first build

Postby wingloader » Tue Jun 11, 2013 12:39 pm

Thanks for the compliments! I am in Buffalo NY. I have some experience with building things as my father and his family were AMISH! No joke. I think it is in the blood/genes.

I've been around carpenters and mechanics my whole life so I have a lot of observed learning over the years to draw from.

I can't wait to get to work on the finishing stuff. I raced to get it weatherproof and road worthy by June 1 so I could take it on a week long trip. I worked every available hour for about 3 weeks and I just got the tail lights installed the night before I left.

This forum was immeasurably helpful and I stole ideas from all over the place. Sketchup was the key to getting the basic dimensions and building plan in place. Once I got the outside dimensions and profile figured out, the rest was by the seat of my pants. Who knew luan was so hard to bend!!!

Thanks again for the compliment. I hope to make it to a TD gathering someday.

Joe
User avatar
wingloader
Donating Member
 
Posts: 81
Images: 84
Joined: Tue Feb 26, 2013 4:17 am
Location: Buffalo, NY
Top

6-30-2013

Postby wingloader » Sun Jun 30, 2013 12:21 pm

absolutsnwbrdr wrote:The mounting points are all based off of the compressed and extended length of the struts. So I got on McMaster-Carr and looked at what they had and just started laying out my options. After about 15 combinations of mounting points, I found the best ones and then had to decide on strength. Took a wild guess and got the 120lb struts.

Yup. 120lbs. Two of them. And 4 mounting plates, and 4 ball sockets for the struts.


I went to Ebay and bought the only pair of new struts that had available that had the "ends" I could use to mount them. So...I bought em' ! :) (no idea if they were the right ones)

I looked at the way you mounted yours and the way that they are mounted on my equinox. I put them on the trailer and Voila! They ripped the door off the hurricane hinge! :x

I had only used about 5 screws to attach the hinge to the hatch so the force pulled them through the aluminum. This time, I made smaller pilot holes in the hinge and screwed it every 3 inches. Yea. That's some serious overkill. But it held up on the next test.

Yay. The hatch stayed attached. However...the gas struts aren't powerful enough to hold the hatch open. :cry: They do a nice job of making it open easily and it only takes a few pounds of force to hold it open when pushing from the outer edge of the door. That still sucks.

So...I wasted 40 bucks on struts. I thought I'd make the best of an angry situation and I fabricated a little rod to hold the door open. It doesn't need much to hold it because the gas struts are doing most of the work. I got to have some fun with my TIG welder and I spend a lot of time bending and making nice holes in my mounting bracket. I attached it this morning and to my dismay, I didn't account for the fact that the gas strut takes up space when the hatch is closed and the bracket blocks the strut so the door can't close all the way.

I took one strut off and put an end of it on my bathroom scale. I pushed down on the strut and noted that the max pressure (weight) I could create was around 15 to 20 pounds.

Here are pics of the mounting of the struts and the brace.

The struts:
Image
Image

The brace to prop the door open:
Image
Image

Note that I intend to put a thin skin of poplar ply over the inside of the hatch to cover all the sloppy work. :D

After digging for info, I found that this strut is for a Mitsubishi Eclipse hatch. No wonder it isn't strong enough. I cannot seem to find any information on that strut as to the opening force so I took one strut off and put an end of it on my bathroom scale. I pushed down on the strut and noted that the max pressure (weight) I could create was around 15 to 20 pounds..

So...what size do I need? I see Zach is using struts that are 120 lbs. That seems like an awful lot of power X 2. I'm afraid if I go with that much power it would tear off my hurricane hinge. Any suggestions on the opening force I might want to try?

I'm seriously disappointed that my struts don't work. I can't give up now. I am determined to get some that will work. It's just too cool to hear that hissing sound when you open the hatch!

Joe
User avatar
wingloader
Donating Member
 
Posts: 81
Images: 84
Joined: Tue Feb 26, 2013 4:17 am
Location: Buffalo, NY
Top

Re: Wingloader's first build

Postby Wolfgang92025 » Sun Jun 30, 2013 12:44 pm

Joe,
I can't help you with pick the right struts, but I found Mc Master Carr to be a real good source.
And best part is, if they don't work you just send them back for a full refund.
No questions asked, and the service for me has always been first rate.

By the way, mine are 120# and are just a touch to weak. I need a stick to help keep the hatch up.
Wolfgang

Image
User avatar
Wolfgang92025
Lifetime member
 
Posts: 1064
Images: 651
Joined: Fri Apr 18, 2008 10:16 pm
Location: Salt Lake City area, Utah
Top

Re: Wingloader's first build

Postby wingloader » Sun Jun 30, 2013 2:44 pm

Wolfgang92025 wrote:Joe,
I can't help you with pick the right struts, but I found Mc Master Carr to be a real good source.
And best part is, if they don't work you just send them back for a full refund.
No questions asked, and the service for me has always been first rate.

By the way, mine are 120# and are just a touch to weak. I need a stick to help keep the hatch up.


Is that 120# each or do you have 2 @ 60#?
User avatar
wingloader
Donating Member
 
Posts: 81
Images: 84
Joined: Tue Feb 26, 2013 4:17 am
Location: Buffalo, NY
Top

Re: Wingloader's first build

Postby Kharn » Mon Jul 01, 2013 12:34 pm

Your strut geometry and hatch weight both factor into what force level you need to hold the hatch open. A few inches different in strut anchor locations can greatly change the force required to hold the hatch open. Ideally, the strut would be positioned such that there is a neutral point a few inches from closing at which the strut is at the most fully compressed point throughout the range of motion of the hatch. That would mean you have to work (in a properly designed system, very slightly) against the strut to open the hatch, plus that below the neutral point, the hatch would close and hold itself closed without needing to be latched (so you would not get hit in the jaw as soon as you unlock it). Above the neutral point, the hatch would open itself. But, without playing around for hours in CAD software, that can be very hard to achieve.

You could try repositioning the strut so it is more vertical, with the wall anchor point further away from the hinge. Also, the vast majority of struts are designed to have the body above the rod, so the oil inside the strut lubricates the seal and prevents the compressed gas from escaping. If you're still not successful, see my post here for a way to make the hatch lock open: Easy way to lock a hatch in the up position with gas shocks.
User avatar
Kharn
500 Club
 
Posts: 655
Images: 1
Joined: Sun Jul 17, 2011 1:54 pm
Top

Re: Wingloader's first build

Postby Junkboy999 » Mon Jul 01, 2013 1:41 pm

Looking great,


Glad to hear you stayed dry at the hanggliding event. Ya I bet those people in the tents were calling you names. I just read back in your log again and was just wonder if you treaded the bottom edge of the side wall plywood with anything besides paint? With the woodworker gene in your blood I’m sure you did, but just checking.

Have a happy fourth.

Image
User avatar
Junkboy999
1000 Club
1000 Club
 
Posts: 1259
Images: 52
Joined: Fri Jul 06, 2012 9:18 pm
Location: Wichita, KS
Top

Re: Wingloader's first build

Postby wingloader » Mon Jul 01, 2013 2:29 pm

Kharn wrote:Your strut geometry and hatch weight both factor into what force level you need to hold the hatch open. A few inches different in strut anchor locations can greatly change the force required to hold the hatch open. Ideally, the strut would be positioned such that there is a neutral point a few inches from closing at which the strut is at the most fully compressed point throughout the range of motion of the hatch. That would mean you have to work (in a properly designed system, very slightly) against the strut to open the hatch, plus that below the neutral point, the hatch would close and hold itself closed without needing to be latched (so you would not get hit in the jaw as soon as you unlock it). Above the neutral point, the hatch would open itself. But, without playing around for hours in CAD software, that can be very hard to achieve.

You could try repositioning the strut so it is more vertical, with the wall anchor point further away from the hinge. Also, the vast majority of struts are designed to have the body above the rod, so the oil inside the strut lubricates the seal and prevents the compressed gas from escaping. If you're still not successful, see my post here for a way to make the hatch lock open: Easy way to lock a hatch in the up position with gas shocks.


Thanks for that info. I did look at the McMaster-Carr site to get some idea of how to calculate the position of the strut. Dang. Complicated stuff!

I am going to try the 90lb strut and position it until I get it right. It is pretty easy to reposition it on my setup for testing. Once I get it right, I will glue everything for a permanent installation. Thanks for the hint about not getting hit in the chin...never even thought about that! :thumbsup:

I'll make sure that whichever position I mount it in that arm of the strut will stay lubricated.

Best,
Joe
User avatar
wingloader
Donating Member
 
Posts: 81
Images: 84
Joined: Tue Feb 26, 2013 4:17 am
Location: Buffalo, NY
Top

Re: Wingloader's first build

Postby wingloader » Mon Jul 01, 2013 2:34 pm

Junkboy999 wrote:Looking great,


Glad to hear you stayed dry at the hanggliding event. Ya I bet those people in the tents were calling you names. I just read back in your log again and was just wonder if you treaded the bottom edge of the side wall plywood with anything besides paint? With the woodworker gene in your blood I’m sure you did, but just checking.

Have a happy fourth.

Image


Thanks! This finishing stuff takes forever! :FNP

As for the bottom edge of the sides, just before I painted, I slopped a coating of fiberglass resin on the bottom edge of the ply. This was just a quick play to get it so I could take the ball slappin' nag for my June trip. I am in the process of using fiberglass cloth and resin to coat the bottom edges and most of the other exposed edges (mostly ply, luan etc.).

I'm working on getting the struts and wiring/electrical stuff done right now.

Thanks again!
Joe
User avatar
wingloader
Donating Member
 
Posts: 81
Images: 84
Joined: Tue Feb 26, 2013 4:17 am
Location: Buffalo, NY
Top

7-2-2013

Postby wingloader » Tue Jul 02, 2013 3:57 pm

Holy mackerel. I order gas struts on Sunday from McMaster-Carr and they arrived already!

So...in less than 10 minutes (I was able to salvage all my previous setup work) I had them installed.

Image

They WORK!!!! :chicken:

Each one is 100lbs. They have NO trouble lifting the hatch and making sure it doesn't come down. I could probably do just fine with the 75 lb'rs. I am also very lucky that when the hatch closes, they don't "bind". I got lucky with my guestimating and it came out PERFECT. I probably don't even have a quarter inch to spare in the travel distance on the push rod.

Also, never ye mind those wires....

As for getting hit in the chin, yea. It's possible, but since I am the dude opening it, I'm not worried. It doesn't open fast, it just has authority.

I'm going to flip them over so that they don't lose their seal too.

Joe (a most happy dude)
User avatar
wingloader
Donating Member
 
Posts: 81
Images: 84
Joined: Tue Feb 26, 2013 4:17 am
Location: Buffalo, NY
Top

7-2-2013

Postby wingloader » Tue Jul 02, 2013 4:17 pm

Quick update...I put a camera on a timer inside the galley and closed the lid. I wanted to be sure the strut wasn't bottomed out.

I think it is just right.

Image

Also, seeing this pic, I'm leaving the struts as they are (not flipping them over) as they are in the right orientation as is.
User avatar
wingloader
Donating Member
 
Posts: 81
Images: 84
Joined: Tue Feb 26, 2013 4:17 am
Location: Buffalo, NY
Top

Re: Wingloader's first build

Postby Kharn » Tue Jul 02, 2013 4:47 pm

Rod up when open is fine if you don't leave the hatch up for days or weeks at a time in the garage.
User avatar
Kharn
500 Club
 
Posts: 655
Images: 1
Joined: Sun Jul 17, 2011 1:54 pm
Top

PreviousNext

Return to Build Journals

Who is online

Users browsing this forum: Wynsome and 14 guests