Un-named Travel Trailer Build - 99% Done! April 18

...ask your questions in the appropriate forums BUT document your build here...preferably in a single thread...dates for updates, are appreciated....

Postby fromeo » Mon Aug 30, 2010 10:35 am

The wife and I took a trip out to Elkhart, Indiana two weeks back to pick up the parts we need to finish up the build. Shopped at Bontrager's Surplus, RV Surplus Salvage, and Factory RV Surplus. Also checked out the RV Hall of Fame and Museum which had some cool stuff to see. Anyway, the shopping trip was a success, picked up a shower surround, fabric for the couch, cabinet hardware, some other misc. stuff, and most importantly the siding and trim. Transporting 16' lengths of siding and trim was a little tricky, but we got it back home safe & sound:

Image

We left on the 13th and got back late in the day on the 20th. On the 21st, it was back to work on the build.


Saturday, August 21:

First was to unload all the goodies we picked up in Elkhart and get them put away. Then we pulled out the countertop frames we had built earlier in the month and got those skinned up with Ply:

Image


Then we "wrapped" the edges of the countertop with 1x2 to give it a built-up look:

Image


Knocked-off the inside corner with a 45* piece, and we're done with that step:

Image


We did the same for the 2 smaller tops, and then made up a countertop for the bathroom:

Image


We finished up that day with some cleanup and planning.


Friday, August 27:

With the countertop frames finished it was time to move onto the Formica laminate. Started off by cutting the strips for the edges of all the tops:

Image

Image

Image


Got the contact cement applied, let it dry and started applying the strips. Once on, they are trimmed flush with a router and a flush trim bit. Shown here is a tool I recently found out about - a laminate trim router with an offset base. The offset base gives a large surface area to keep the router sitting flat and also really helps with getting into those tight corners. A little pricy, but I'll never go back to a regular router for that kind of work again!

Image


Working our way around the tops:

Image


A little love from the sander ensures everything is perfectly flush and even:

Image


More strip work:

Image

Image

Image


Now, we're ready to do the horizontal surfaces. We rough cut the laminate:

Image

And then we packed it in for the day.


Saturday, August 28:

Start with the contact cement:

Image

Image


Let it dry, apply the laminate, and go to work with a J-Roller:

Image


That gives us this:

Image


A little trimming action:

Image


And you get this:

Image

Image

Image


One last step for a real nice job, hand filing the edges:

Image


Then a test fit, because you just have to see how it's going to look!

Image

Image


Now we can move onto some fixtures. The small sink we got for the bathroom did not come with a template, so I had to improvise a little. I covered the section of the countertop with masking tape, centered the sink upside down and traced it. Then I copied that tracing about 1/4" in to make our cut line:

Image


Cut it out, drop the sink in:

Image


Apply the vinyl inside corner trim (you have to look real hard to see it) and put the countertop in where it belongs:

Image


The two smaller tops:

Image

Image


The we cut the holes for the galley sink & cooktop, dropped those in for a test fit:

Image


The insert panel in the fridge was pretty ratty looking.. scratched up and stained. Wanted to go with a black insert but havent been able to locate a small piece of black formica yet. For now, this is an improvement (sorry, the flash really washes the color out - I'm a bad excuse for a photographer):

Image


Last, properly mount the fixtures and install the faucet. Really starting to look like something now!

Image

Image


With that, it was time to clean up. More soon, we're trying really hard to get this thing campable by the week of September 20th to show to some friends. With a little luck, we're less than 2 weeks from siding!


- Frank
fromeo
Teardrop Master
 
Posts: 157
Joined: Tue Feb 27, 2007 2:01 pm
Location: Sicklerville, NJ

Postby Cliffmeister2000 » Tue Aug 31, 2010 8:29 pm

Very impressive build! :applause: :applause:
God Bless

Cliff

♥God. ♥People.
1 John 4:9-11

My Teardrop build pictures
User avatar
Cliffmeister2000
Titanium Donating Member
 
Posts: 3622
Images: 157
Joined: Thu Jul 26, 2007 10:18 pm
Location: Phoenix, AZ

Postby bve » Tue Aug 31, 2010 9:40 pm

Cliffmeister2000 wrote:Very impressive build! :applause: :applause:


No kidding... been enjoying this one for many reasons, build size, build quality, material choices, build documentation, but most of all - ALL the pictures.

Good work Frank and company!
Burke

KISS > COMPLEX
Image
Image

Build threads converted to PDFs.
As of 2008-08-08 I have added more build threads to the pdf collection
User avatar
bve
500 Club
 
Posts: 694
Images: 98
Joined: Sat Aug 25, 2007 1:44 am
Location: Edmonton, Alberta, Canada
Top

Postby fromeo » Tue Aug 31, 2010 10:17 pm

Thanks Cliff and Burke for the compliments!

I know this build is a bit out of the ordinary, so it's good to see people are interested in following along. I've never built a camper before, so if anyone has any ideas/suggestions/questions/whatever, I'm all ears!

I just hope there aren't too many pictures, causing folks problems loading & reading it. I learn best by doing, and next best by seeing, so the posts with lots of pictures and some description are always the most helpful to me. I'm just trying to keep that alive and hope that the information here helps somebody else.

For those really interested in the pictures, I have an album online (http://gallery.shadetree.org/main.php?g2_itemId=4319) with almost 700 pictures from the build so far.

- Frank
fromeo
Teardrop Master
 
Posts: 157
Joined: Tue Feb 27, 2007 2:01 pm
Location: Sicklerville, NJ
Top

Postby danlott » Wed Sep 01, 2010 1:57 am

fromeo wrote:I've never built a camper before, so if anyone has any ideas/suggestions/questions/whatever, I'm all ears!


Most people would never believe that you have never built a camper before. You have certainly built many things before, maybe not a camper though. Your work clearly shows that you think things through, research and plan ahead.

I have enjoyed watching your build. Thank you for taking the time to post the pictures.

Dan
Hoplite Traveler Build thread
Image Image
Life is what happens to you while you're busy making other plans.
User avatar
danlott
Donating Member
 
Posts: 874
Images: 264
Joined: Fri Mar 06, 2009 2:18 pm
Location: Winnemucca, Nevada
Top

Postby azmotoman » Wed Sep 01, 2010 8:14 am

Very nice. You guys do EXCELLENT work. I was always a better framer than a finish carpenter.

You make me look like a hack.
:cry:
Money isn't everything, but it keeps the kids in touch!
*************
Dinero isn' ¡t todo, pero él mantiene el interés de los niños!
User avatar
azmotoman
Silver Donating Member
 
Posts: 165
Images: 10
Joined: Fri Jul 02, 2010 10:07 am
Location: AZ ('bama transplant)
Top

Postby fromeo » Wed Sep 01, 2010 10:28 am

danlott wrote:
fromeo wrote:I've never built a camper before, so if anyone has any ideas/suggestions/questions/whatever, I'm all ears!


Most people would never believe that you have never built a camper before. You have certainly built many things before, maybe not a camper though. Your work clearly shows that you think things through, research and plan ahead.

I have enjoyed watching your build. Thank you for taking the time to post the pictures.

Dan


Thanks Dan. Yep, built all kinds of weird things and done a lot of home remodeling since I was a teenager. Also a big car nut which really helps in odd times.

There was certainly a lot of thinking involved on this one. Lots of time tossing and turning in bed thinking about the best way to go about doing whatever. Also spent many hours reading here and other forums, looking at repair and rebuild posts for instance.


azmotoman wrote:Very nice. You guys do EXCELLENT work. I was always a better framer than a finish carpenter.

You make me look like a hack.


I'm also much better at rough work than finish work. You don't want to see me trying to hang crown molding or build a real cabinet. To make things look as good as possible, I adopted a lot of things the commercial builders do - the plastic edge trim, the vinyl welt bead, etc. That kind of stuff really hides a lot of sins, all while being cheap and light. Just need to work hard to keep those sins within a reasonable tolerance - say 1/16-1/8..


Thanks guys!

- Frank
fromeo
Teardrop Master
 
Posts: 157
Joined: Tue Feb 27, 2007 2:01 pm
Location: Sicklerville, NJ
Top

Postby parnold » Wed Sep 01, 2010 1:21 pm

Just got caught up on your build progress.

You continue to amaze me!

Fantastic work!

:applause: :applause: :applause:
User avatar
parnold
Donating Member
 
Posts: 2344
Images: 302
Joined: Mon Feb 08, 2010 4:49 pm
Location: Northwest New Jersey
Top

Postby Sam I am » Thu Sep 02, 2010 8:54 pm

Wow! Excellent work on those counter tops - and everything else! Looks great!
User avatar
Sam I am
500 Club
 
Posts: 770
Images: 106
Joined: Sun Jul 02, 2006 9:19 pm
Location: Central PA
Top

Postby fromeo » Fri Sep 03, 2010 2:22 pm

parnold wrote:Just got caught up on your build progress.

You continue to amaze me!

Fantastic work!

:applause: :applause: :applause:


Thanks Paul!

Not sure where you are at in NW Jersey, but when completed this thing will be at home with my brother, which is about 20-30 minutes into PA from the I80 bridge. I'm sure he'll be hitting a couple of the NJ parks up north there.

- Frank
fromeo
Teardrop Master
 
Posts: 157
Joined: Tue Feb 27, 2007 2:01 pm
Location: Sicklerville, NJ
Top

Postby fromeo » Fri Sep 03, 2010 2:29 pm

Sam I am wrote:Wow! Excellent work on those counter tops - and everything else! Looks great!


Thanks Sam. I just checked out your photo album - your modeling work is absolutely incredible!

- Frank
fromeo
Teardrop Master
 
Posts: 157
Joined: Tue Feb 27, 2007 2:01 pm
Location: Sicklerville, NJ
Top

Postby jjohnston » Tue Sep 14, 2010 9:15 pm

Read through this whole build over two nights. I'm very impressed with the speed and quality of your work. that is going to be one professional looking trailer! Just when I think I know what I want to build, someone comes along and makes me rethink my design. :thinking:


Good thing I haven't started yet... :D
Jason Johnston
User avatar
jjohnston
Teardrop Inspector
 
Posts: 19
Images: 11
Joined: Sun May 10, 2009 10:20 pm
Location: Valley Mills, Texas
Top

Postby S. Heisley » Tue Sep 14, 2010 10:27 pm

Excellent workmanship! Looking forward to your next update!
User avatar
S. Heisley
Super Lifetime Member
 
Posts: 8775
Images: 495
Joined: Mon Sep 17, 2007 10:02 am
Location: No. California
Top

Postby fromeo » Sun Sep 26, 2010 8:15 pm

We've been working hard on the build the last 4 weeks, but are at that stage where you do a bunch of stuff and don't wind up with much to look at. I had thought we could have it ready this past week to take it out and show some friends that were camping nearby, but things lately have just taken up a whole lot more time than I had anticipated. Right now my brother has some days off for the weekend of October 15th, so we're trying to get it together by then.

Here's an update to show some of what we got done the past few weeks.

September 4:

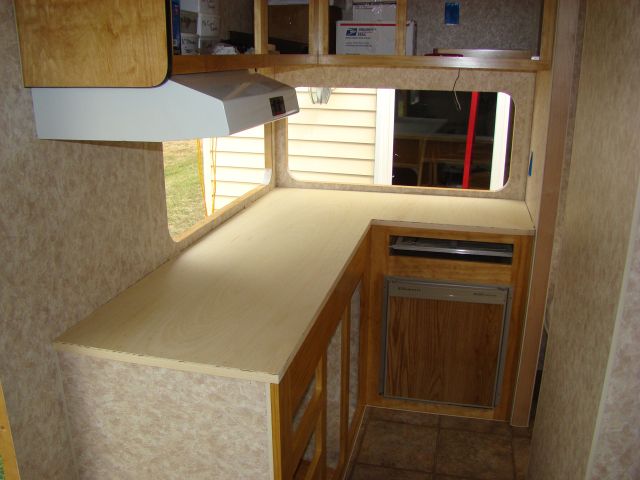
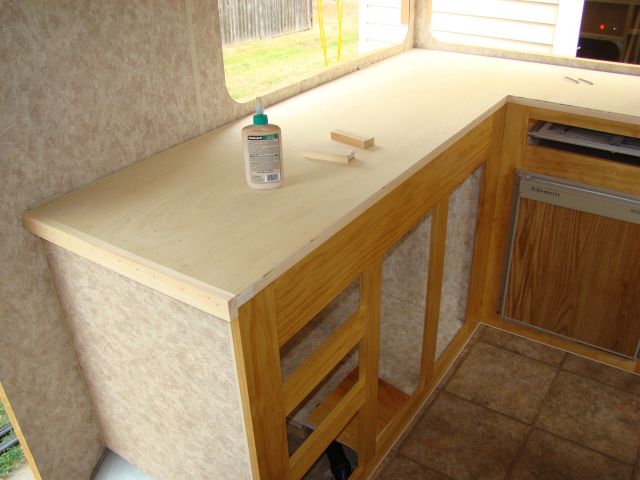
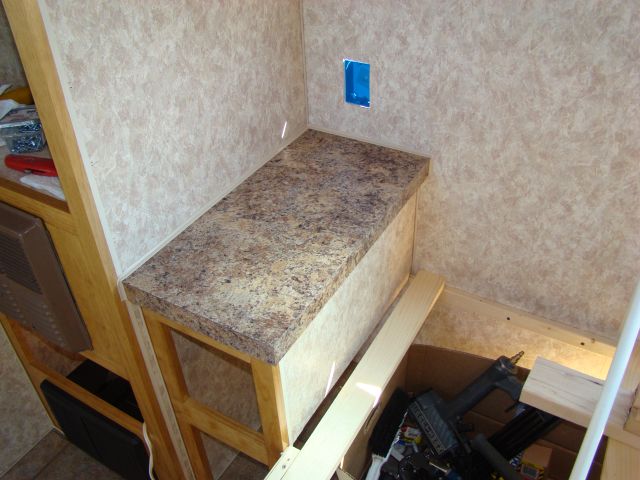
During the week after we did the countertops, my brother built a medicine cabinet carcass at home and got it finished up. Here's the bare frame ready to go in:

Image

And mounted up on the wall, above the toilet:

Image


After that cabinet was in, my brother started working on the door and drawer frames. He got all the stock cut to size and marked, and started cutting the tongue & grooves with the router table. The doors will all be shaker style. I sent him home with the stock, the router table and a pile of clamps. He's been plugging away at the doors a few hours after work here and there. They should be done within a week or two. Unfortunately, I didn't get any pictures of that since I was in the trailer working on the electrical.

I got the light fixtures wired and mounted up. Here's a shot from the middle looking forward. There's a double fixture on the ceiling above the seating area and two reading lamps over the couch:

Image


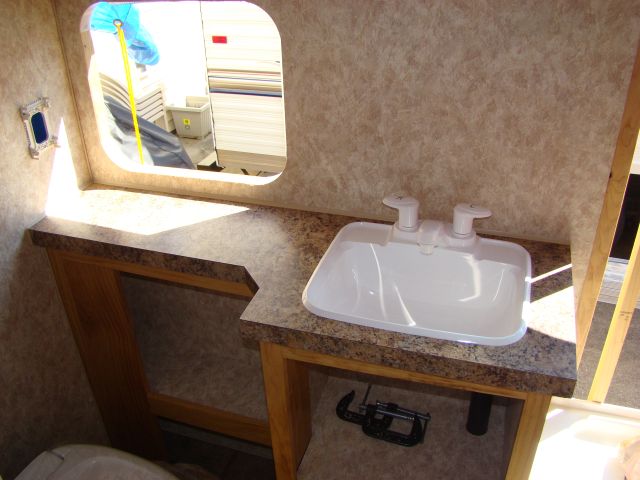
A double in the bathroom centered over the sink. There's a second single fixture over the shower, but that one has to wait until the surround goes in:

Image


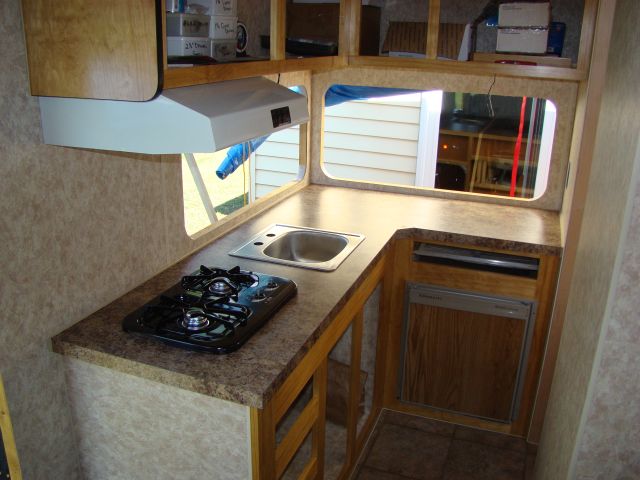
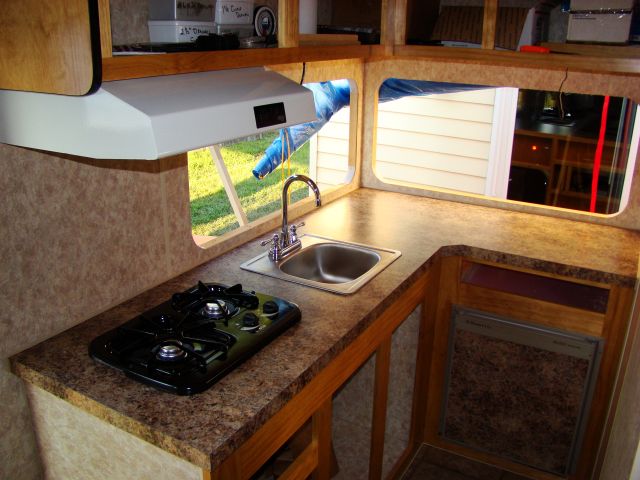
Looking towards the back there's a double fixture over the galley:

Image


And two doubles over the countertop for work lighting:

Image


Testing the fixtures:

Image

Image

Image


September 5:

My brother was back home at work, but I wanted to get a little more done. I wired and mounted a pair of 12V lighter sockets on the wall next to the bed for cell phone charging or whatever:

Image


Mounted the tank monitor panel:

Image


Mounted & wired up the thermostat:

Image


Finished wiring and mounting the light switches. First, the bathroom ones:

Image

And these handle the outside porch light, a small step light, and a single fixture mounted directly over the door inside:

Image


I then wired and mounted some single fixtures in the storage compartments. One on each end up front:

Image

Image

And one under the counter in the rear:

Image


September 6:

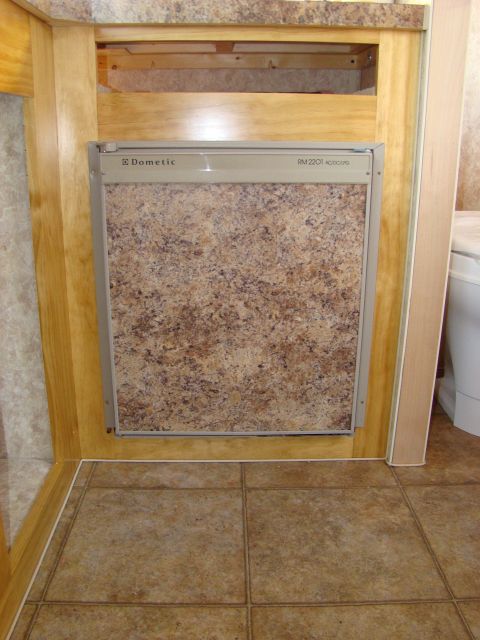
Started on the AC wiring that day. Here's the outlet for the fridge:

Image


The road side wall, where all the wiring heads to the converter panel:

Image


Most of the wiring is ran through the roof, keeping the runs as short as possible:

Image

Image

Image

Yeah, there's just a little bit of copper in this thing.. :)


Once the wires were run and secure, I moved inside and started installing outlets:

Image

Image

Image

Image


September 11:

With the wiring ran, it was time to move towards closing this up. We built a small platform in the roof for the crank-up TV antenna, and dry-fit that to make sure it would sit level. We also test-fit the A/C at the same time to make sure it would sit within the manufacturer's specs for level. Good thing we did, the level was fine but I found that the grey tank vent was just about under the shroud. Turns out the shroud was much wider than I had thought. We relocated the vent and solved that problem fairly easily. Would have been a nightmare if the roofing was on..

Image

With the antenna down:

Image


From the inside, the interior half of the A/C and the handle for the antenna. Plenty of clearance for both:

Image


I also started terminating the wiring at the converter and getting things cleaned up. If you look off to the left of this picture you can see the combination LP Gas and CO detector mounted in the wall:

Image


My brother made up a cover for the wheel well:

Image


And enclosed and lined the two storage cubbies on each end of the couch/bed:

Image

Image


Before we pulled the antenna and the A/C off the roof, I grabbed the TV out of our camper so we could test the antenna wiring:

Image


Built a small box for under the couch, ran the 7 pin connector and started working on that portion of the DC:

Image


Installed a support block on the road side for the city water inlet:

Image


And framed out the opening for the water heater:

Image

From the inside (it took a beating in that pop-up, it will need to be replaced next year):

Image


September 17 & 18:

I spaced out these two days and forgot to grab the camera. :( We made up a frame for the fresh water tank and got that hung, then pulled it back down for some touch-up painting. I'll get some pictures of the tank once it's back in. We also pulled wire for all the trailer lighting - the tails and the 11(!) required marker lights. We also got the shower surround cut down to size and had to re-do the tub platform to drop it 3/4" closer to the floor. Doing so was the only way to make the surround work, since it has a design cast into it. I'll get some pictures of this later in the week when the surround is hopefully permanently installed.


September 24 & 25:

During the week I picked up the supplies for the fresh water plumbing and on Friday we ran out for insulation. Wound up with 1 3/8" foil faced "Tuff-R" foam board as it was the thickest (and highest R) we could fit in the wall cavities.

My brother worked outside cutting and installing the insulation. Started Friday on the door side:

Image

Image


Then Saturday he started on the roof:

Image

Image


The he moved to the rear wall:

Image


And finally the road side:

Image

Image


He worked on that right until dark and got it about 90% complete. There's 6 or 8 more little pieces of insulation cut and ready to install on the road side. Then the gaps for wiring and blocking need to be filled with some thinner material and spray foam.


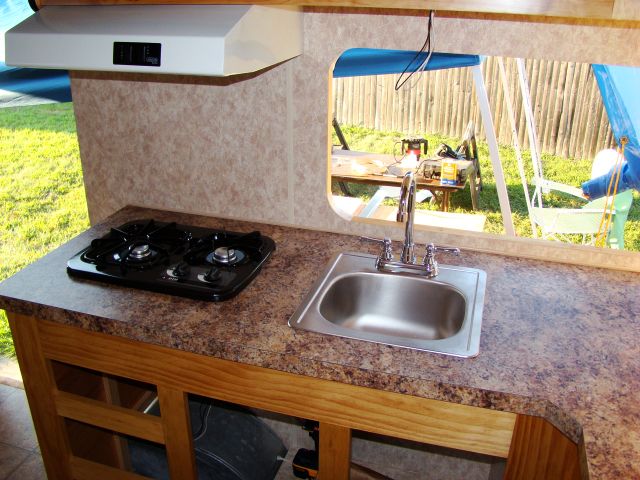
Meanwhile, I was inside working on the fresh water plumbing. Started with the Galley sink:

Image

Image


..And worked my way around. Snakes through the rear storage compartment:

Image


Under the refrigerator:

Image


Through the wall into the bathroom:

Image


Where it feeds the bathroom sink. The valves and pipes through the floor are to drain the pipes. The open Tee is for the City water inlet.

Image


I ran the pipes through into the shower and towards the water heater and water pump, but haven't taken pictures there yet because I didn't finish up all the connections. I'll get that done a couple of nights this week after work.

All the plumbing is 1/2" pex and the foam insulation is really on it to stop vibration. The RV pumps tend to make the pipes vibrate at anything less than full flow, and it really gets annoying. I'm hoping the foam will keep the noise down.


I'll be putting in as much time as possible this week after work (weather permitting) because I am really trying to get the siding on this thing on Saturday.


- Frank
fromeo
Teardrop Master
 
Posts: 157
Joined: Tue Feb 27, 2007 2:01 pm
Location: Sicklerville, NJ
Top

Postby TheOtherSean » Sun Sep 26, 2010 10:28 pm

Wow! That's impressive work. It looks at least as good as the mass production models - probably better.
User avatar
TheOtherSean
The 300 Club
 
Posts: 407
Images: 111
Joined: Sun May 11, 2008 9:42 pm
Location: Ohio
Top

PreviousNext

Return to Build Journals

Who is online

Users browsing this forum: No registered users and 7 guests