Cider House...some finishing touches, 9.27.10

...ask your questions in the appropriate forums BUT document your build here...preferably in a single thread...dates for updates, are appreciated....

Postby John T. Hodgen » Tue Mar 30, 2010 8:44 pm

Hey JiffyPop207,
I've been following your build in silence...BUT...That Ceiling is...HOTTTT!!!! :applause: Good job :thumbsup:
Til later by the fire--John T. & Linda 8)
User avatar
John T. Hodgen
The 300 Club
 
Posts: 415
Images: 8
Joined: Thu Jul 24, 2008 5:50 am
Location: Summersville, West Virginia

Postby vwbeamer » Tue Mar 30, 2010 10:04 pm

Wow, that ceiling is nice. :applause:
vwbeamer
Teardrop Master
 
Posts: 192
Joined: Fri Dec 18, 2009 8:34 pm
Location: Macon, Georgia

Postby Wolfgang92025 » Tue Mar 30, 2010 10:38 pm

Jiffypop207.

That one heck of a nice ceiling........... :thumbsup: :applause: :thumbsup:

Wolfgang
Wolfgang

Image
User avatar
Wolfgang92025
Lifetime member
 
Posts: 1098
Images: 660
Joined: Fri Apr 18, 2008 10:16 pm
Location: Salt Lake City area, Utah
Top

Postby S. Heisley » Wed Mar 31, 2010 9:45 am

Ditto the applause above. :applause: That is one very clever ceiling.

(I wish I had your wiring skills and building know-how, too.)
User avatar
S. Heisley
Super Lifetime Member
 
Posts: 8867
Images: 495
Joined: Mon Sep 17, 2007 10:02 am
Location: No. California
Top

Postby Jiffypop207 » Wed Mar 31, 2010 9:08 pm

Thanks for all the kind words.

Adam
User avatar
Jiffypop207
Teardrop Master
 
Posts: 205
Joined: Wed Sep 09, 2009 8:39 pm
Location: Old Orchard Beach, ME
Top

Postby Jiffypop207 » Tue Apr 13, 2010 9:30 am

Got some more work done. A couple hours here...a couple there. Slowly but surely it is starting to really take shape. I got the walls and ceiling all insulated.
Image
Image
Image
Image

Sunday evening I attacked the big roll of aluminum that has been sitting in the middle of my garage for some time.

Here it is rolled out on the swept, scraped, and then leaf blower cleaned garage floor. One side cut out.
Image

I cut out both side pieces, the cabin piece, and the hatch piece. I had enough leftovers to be able to make my counter tops as well as some narrower material to be bent into galley wall covers etc.

Shot of the material with my HF shear that worked superb!
Image

Trimmed the excess spray foam insulation down. Last night I got the outer plywood sides on. Man that surely stiffens thing up.

Here you can see the plywood waiting to go on
Image

Here you can see my switches protruded through the framing layer a tad
Image

Nothing my trusty circular saw planer can't fix in a jiffy. Marked there general locations and took off a couple plys resulting in this
Image

Pictures of the sides on
Image
Image
Image
Image
Image

That the beast to date.

More to follow!

Adam
User avatar
Jiffypop207
Teardrop Master
 
Posts: 205
Joined: Wed Sep 09, 2009 8:39 pm
Location: Old Orchard Beach, ME
Top

Postby parnold » Tue Apr 13, 2010 1:23 pm

Wow!

:thumbsup:
User avatar
parnold
Donating Member
 
Posts: 2344
Images: 302
Joined: Mon Feb 08, 2010 4:49 pm
Location: Northwest New Jersey
Top

Postby grizz » Thu Apr 15, 2010 4:07 pm

parnold wrote:Wow!

:thumbsup:


WOW !! Indeed, Nicola looked at the detail earlier on and asked me why my build was not so complex ;)

Lovely.
Greetings from England.

Rian.


Hoping to get it all done in time.
User avatar
grizz
1000 Club
1000 Club
 
Posts: 1210
Images: 29
Joined: Mon Sep 21, 2009 2:37 pm
Location: Rochester, Kent, UK
Top

Postby Miriam C. » Thu Apr 15, 2010 10:01 pm

Image

Oh my! I would love a tutorial on this ceiling.......Just fantastic.
:thumbsup:

Image
“Forgiveness means giving up all hope for a better past.â€
User avatar
Miriam C.
our Aunti M
 
Posts: 19675
Images: 148
Joined: Wed Feb 15, 2006 3:14 pm
Location: Southwest MO
Top

Postby Jiffypop207 » Tue Apr 27, 2010 5:04 am

I got some more done last night. I sealed the plywood with CPES last week. I bent up a piece of black aluminum trim metal to finish off the edge where the hatch will meet the cabin. I then used some Grace Vyor that is 6" to run along the edges of the cabin as well and the plywood seems.
Image
Image
Image

Then I got some metal on. I put the roof piece on, floated, and fastened the edges. I also cut the hole in the aluminum for the fantastic vent. Really starting to take shape.
Image
Image
Image

More to follow.

Adam
User avatar
Jiffypop207
Teardrop Master
 
Posts: 205
Joined: Wed Sep 09, 2009 8:39 pm
Location: Old Orchard Beach, ME
Top

Postby S. Heisley » Tue Apr 27, 2010 8:05 am

Hi, Jiffypop207:

You are doing an awesome job! :thumbsup:

...By the way, your build hasn't been "meager" for a long time.
User avatar
S. Heisley
Super Lifetime Member
 
Posts: 8867
Images: 495
Joined: Mon Sep 17, 2007 10:02 am
Location: No. California
Top

Postby Jiffypop207 » Thu Apr 29, 2010 6:10 am

Not meager anymore...retitled. Here is the tutorial on the ceiling. Very easy. I went to Home Deposition and picked up enough of these peel and stick vinyl tiles to cover the square footage on my ceiling.
Image

Choose the style of your liking. Peel and and stuck them on the ceiling starting on the center line working towards the sides to keep the side pieces equal width. Then picked up the ones that fell off overnight and stuck them back on. Bought enough lineal feet of 1 1/4" pine lattice to cover the joints of the tile squares. Cut the required pieces and that is the outcome. For the pieces on the radius at the front of the cabin I had to frequently scar the back side to ease the bend. Halfway through I started scarring even deeper with a much better result.
Image

Adam
User avatar
Jiffypop207
Teardrop Master
 
Posts: 205
Joined: Wed Sep 09, 2009 8:39 pm
Location: Old Orchard Beach, ME
Top

Postby Jiffypop207 » Thu Apr 29, 2010 6:27 am

We have aluminum! The past two nights I was able to get one side of aluminum on each night. Looking fantastic. I had 1 mishap....re-drilling a hole for one of my side marker lights the drill grabbed through the aluminum skin much faster than any time prior and I ended up mangling the wire. I was able to hold the aluminum back and "dig" out some plywood to get enough wire to splice the tail back on, solder it, and then apply a piece of shrink wrap on both the feed and ground wire. Ample caulking in my "dig-site" and back to applying the skin I went. The skin got a slight bend at the last nail I had placed before holding it back creating a slight wave on the side of the trailer. Oh well. It will make for a good story.

So here are the two sides and roof skinned
Image
Image

I just place the roof vent there to see if the hole was correct and see how it looked.
Image

Next up is some bottom trim, then build the doors and hatch. While the doors and hatch are in their poly/CPES drying phases I will get the front box mounted, cut in the exterior outlet and shore-power connection hole so I can wrap up the electrical. After that I can get the fender mounts doped out so I can send the mounts off to be powder coated and the fenders off to be Rhino-lined. Getting there....slowly but surely there will be an end.

It's nice to have to floor around the soon to be trail cleaning up as things get used. It is scary to look at the begin and not to long ago pictures at how the areas around the trailer changed in volume of clutter.

Adam
User avatar
Jiffypop207
Teardrop Master
 
Posts: 205
Joined: Wed Sep 09, 2009 8:39 pm
Location: Old Orchard Beach, ME
Top

Postby Hitec4you » Mon May 03, 2010 3:27 pm

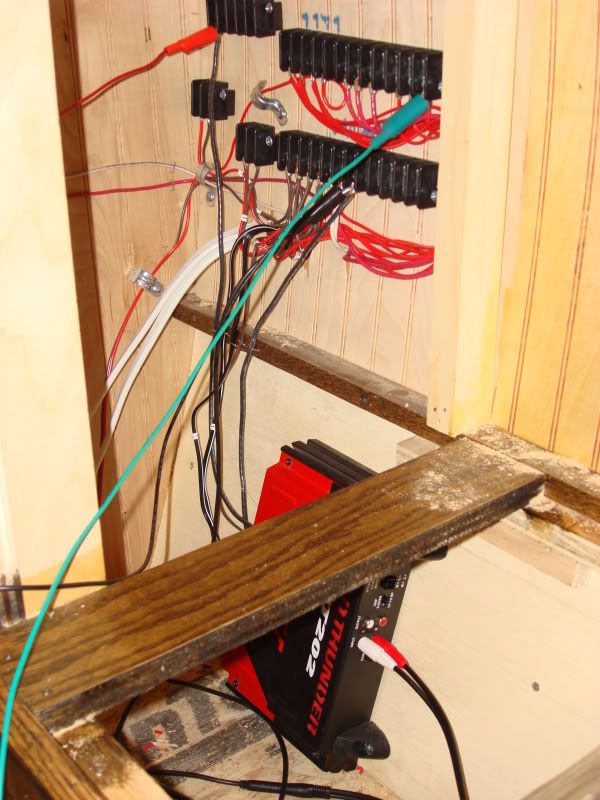
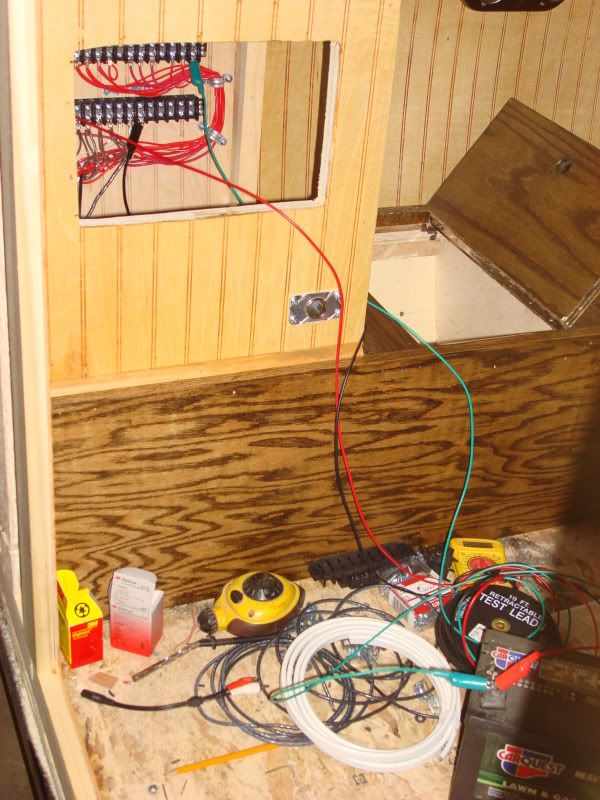
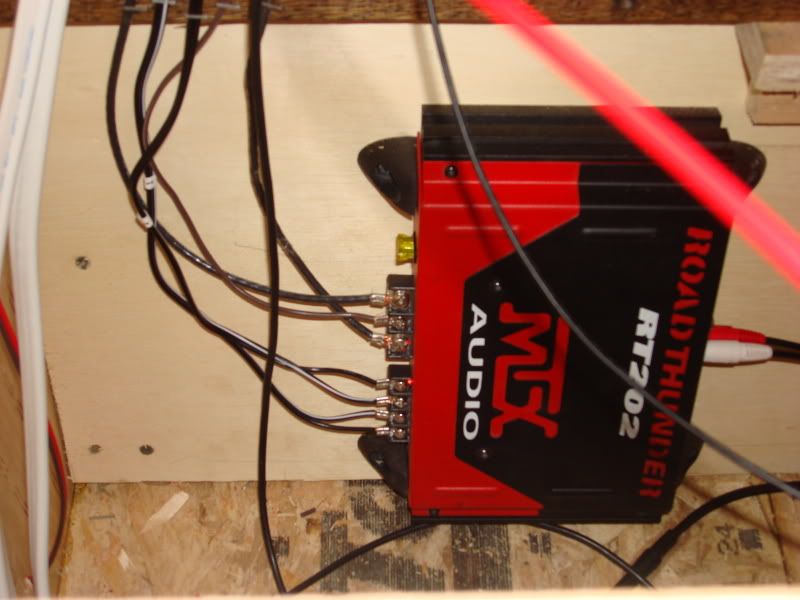
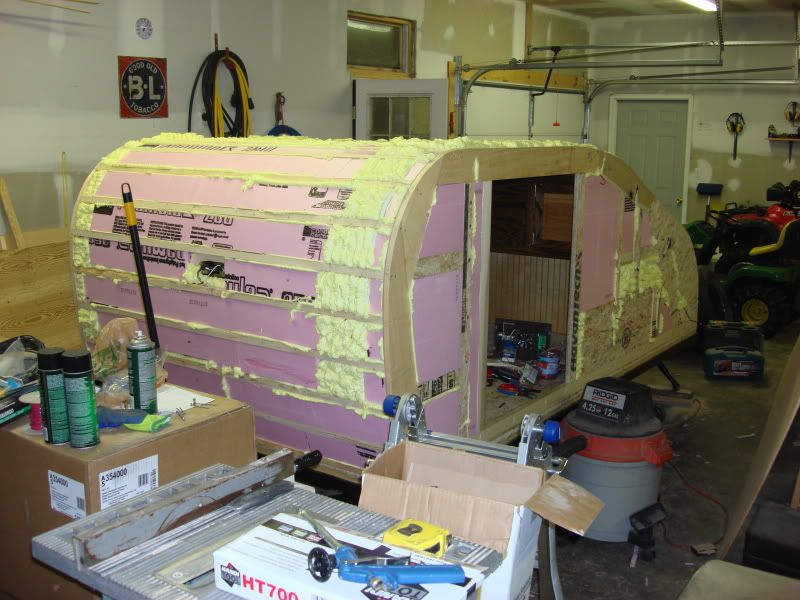
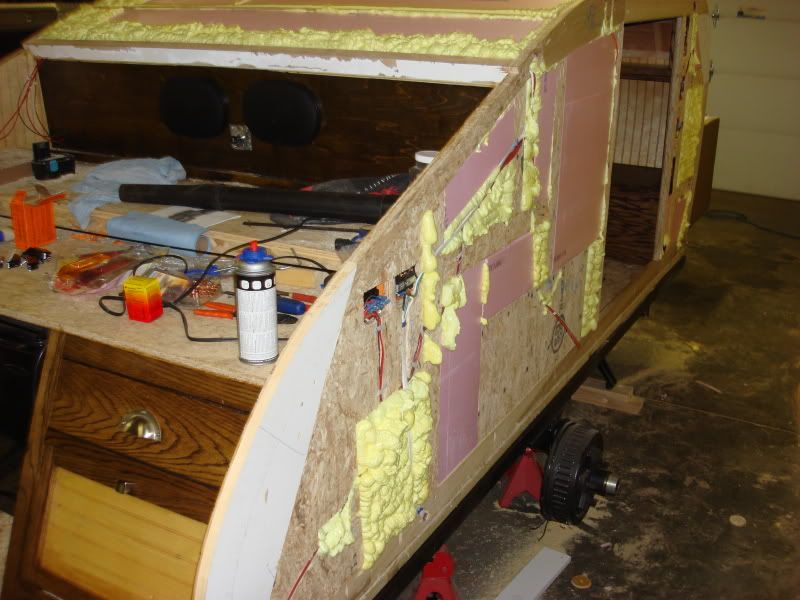
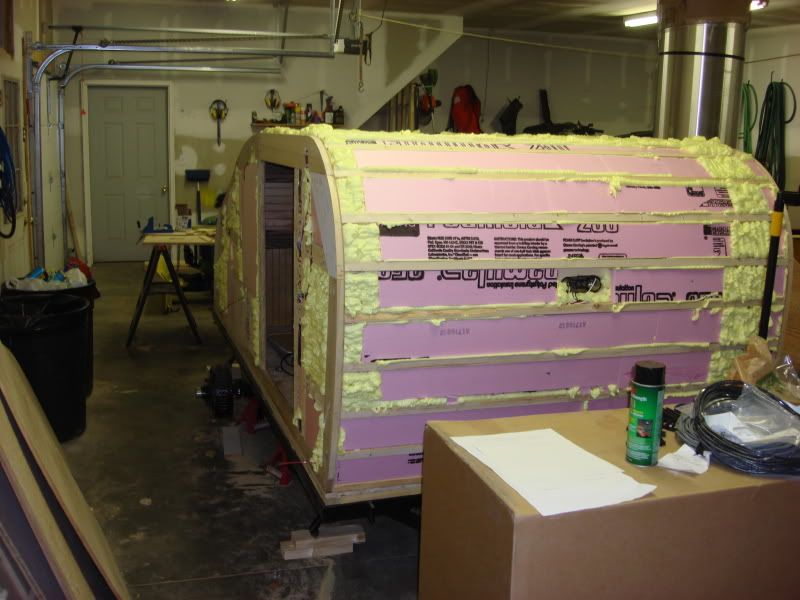
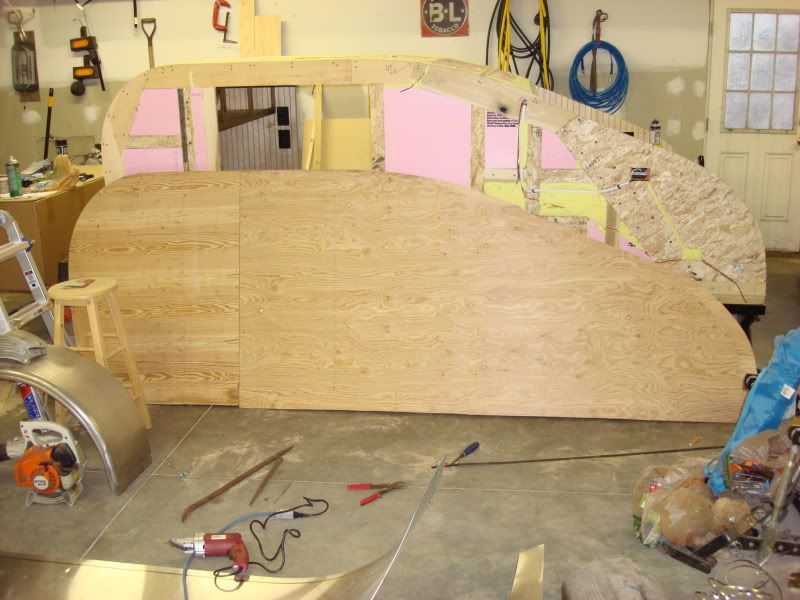
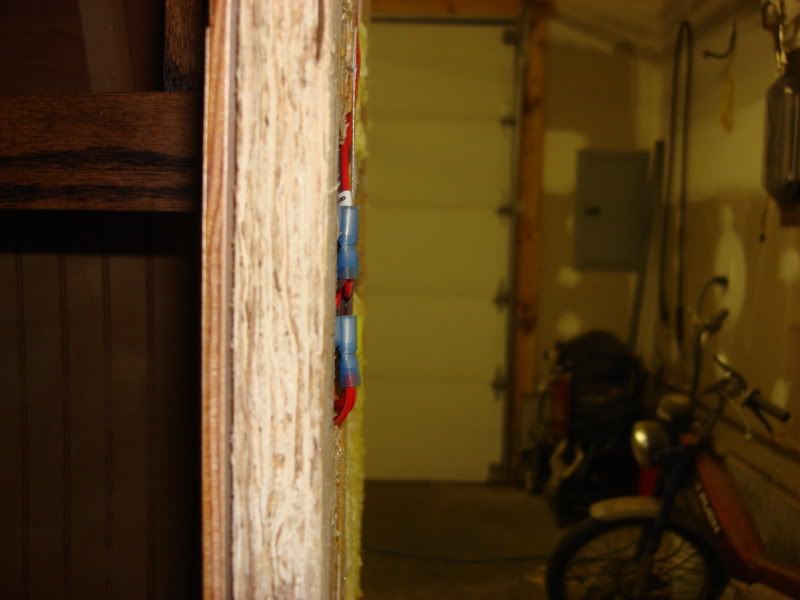
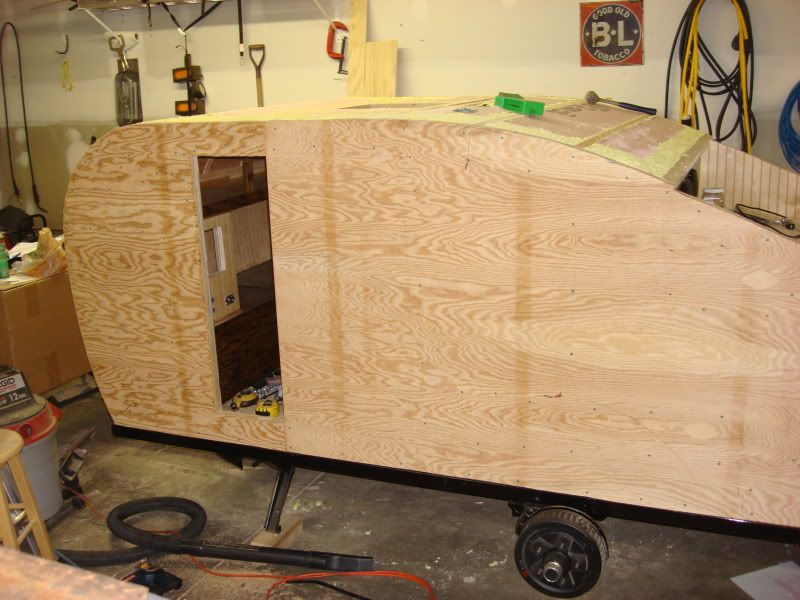
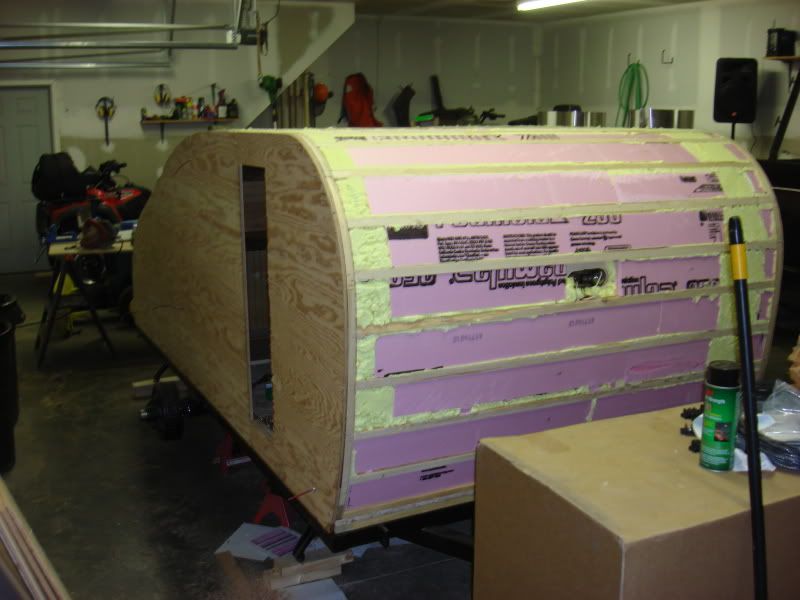
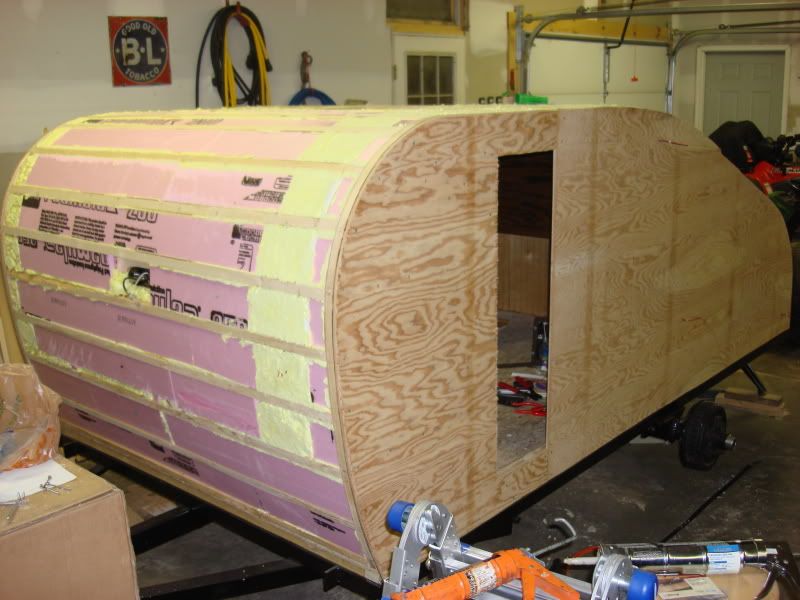
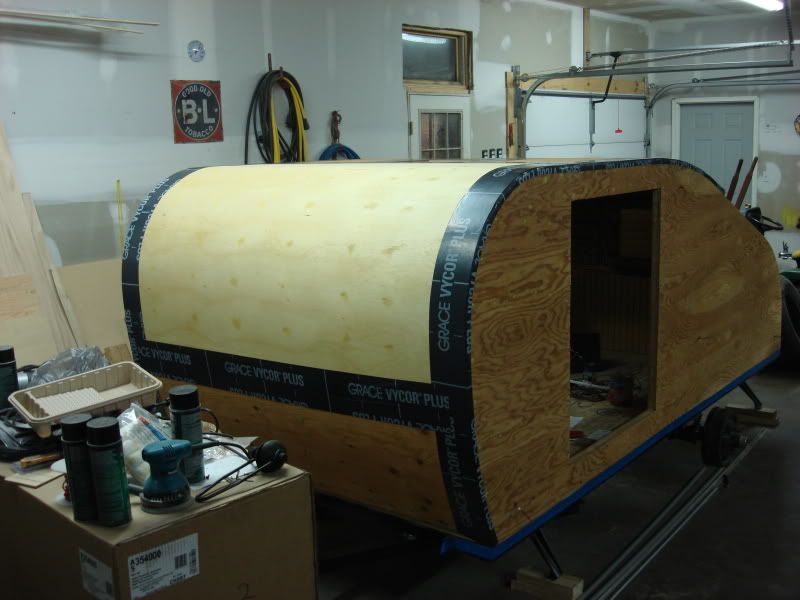
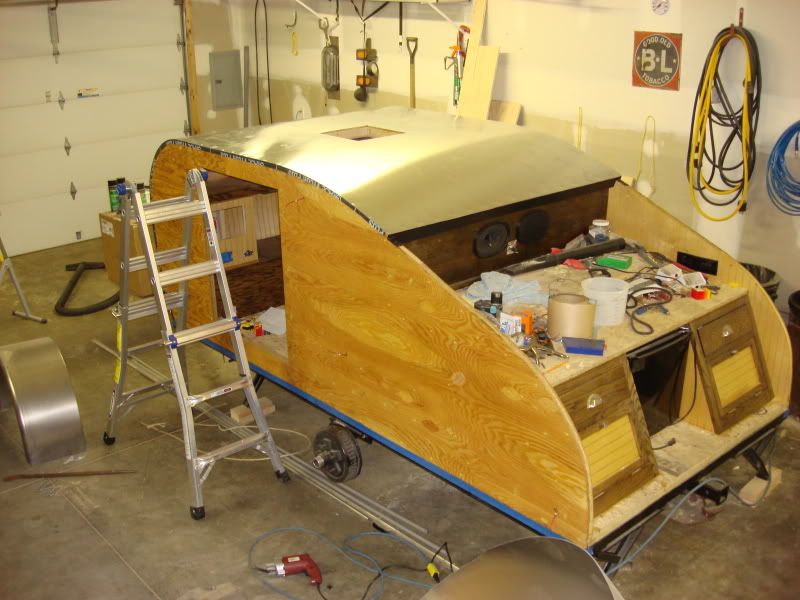
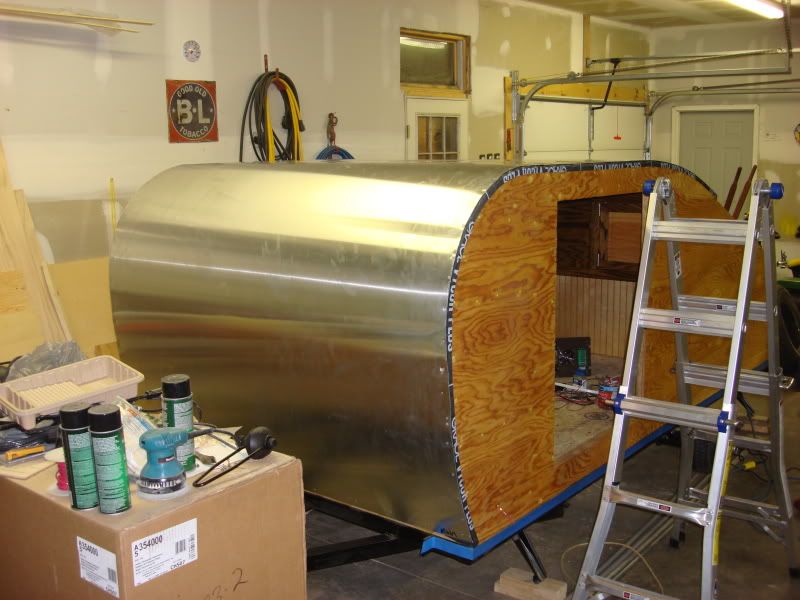
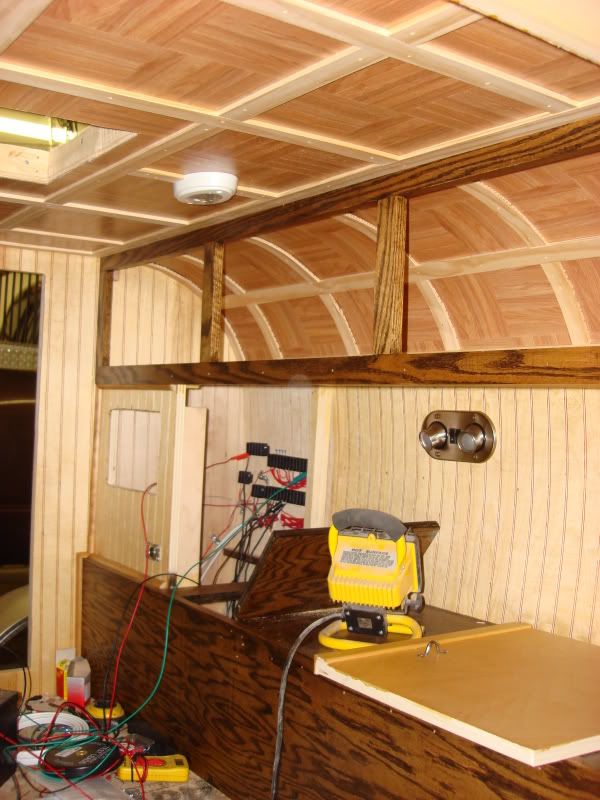
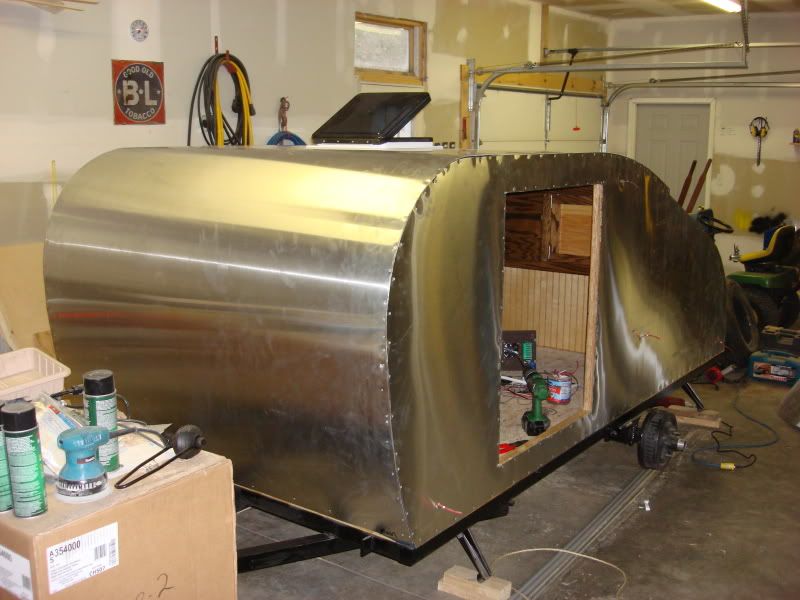
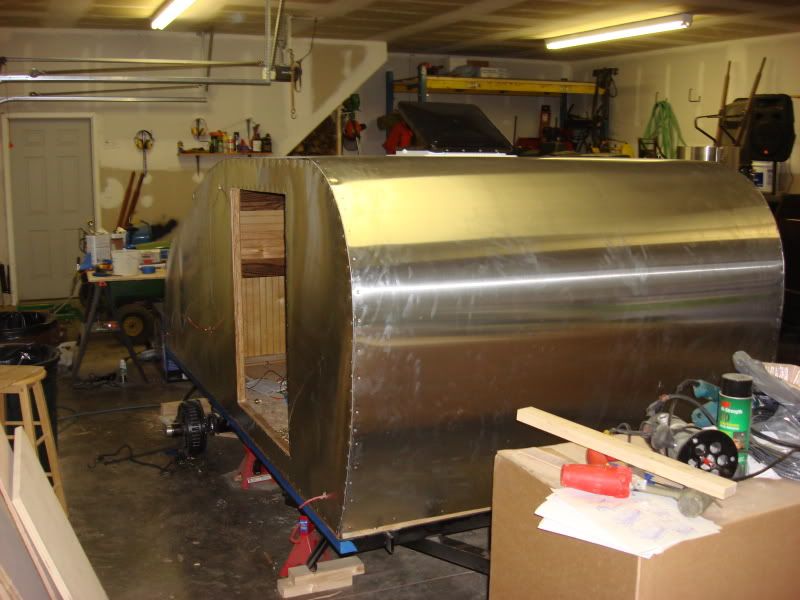
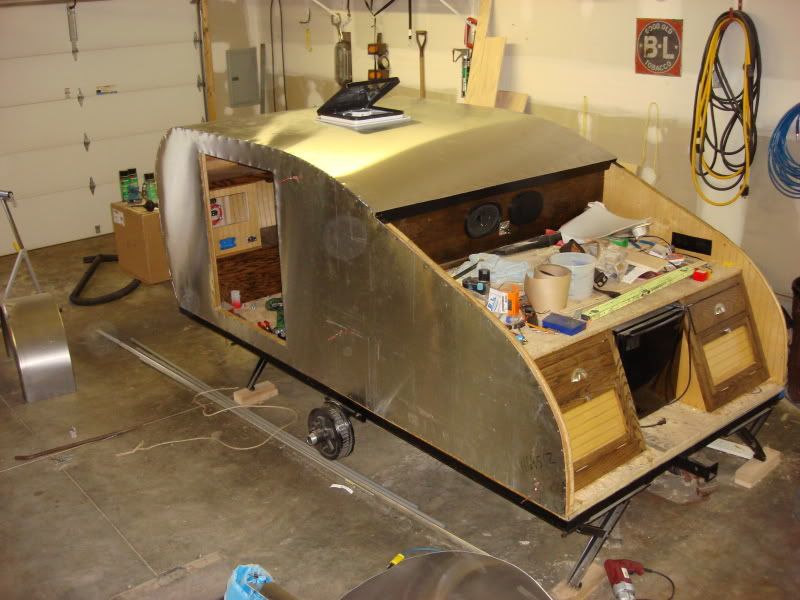
Jiffypop207 wrote:A little here and a little there allows things to progress. I got the wiring terminated. I am at the point that I am ready to insulate and then put the outer plys of sheathing on.

Here are some pictures of the wiring terminations. I still have to build and install the runs to link all wires together on there respective circuits, but that is no a top the priority list at the moment.
Image
Image
Image

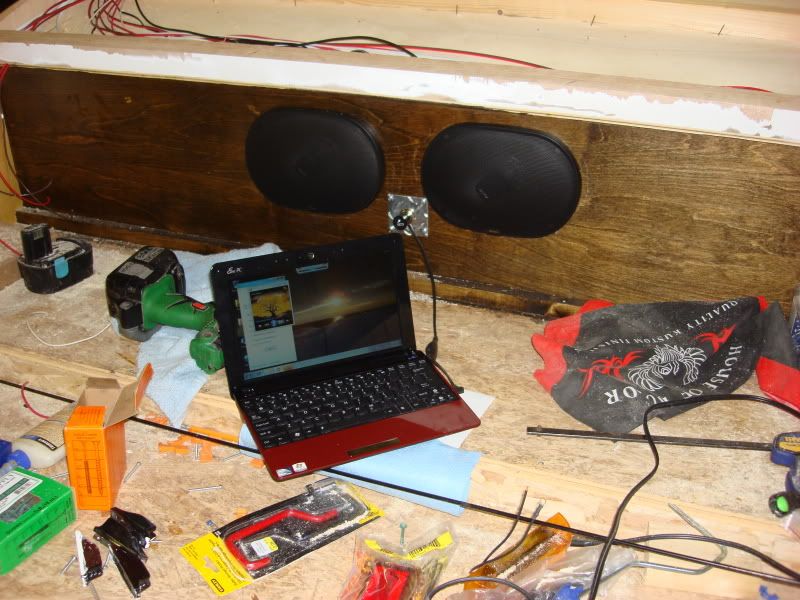
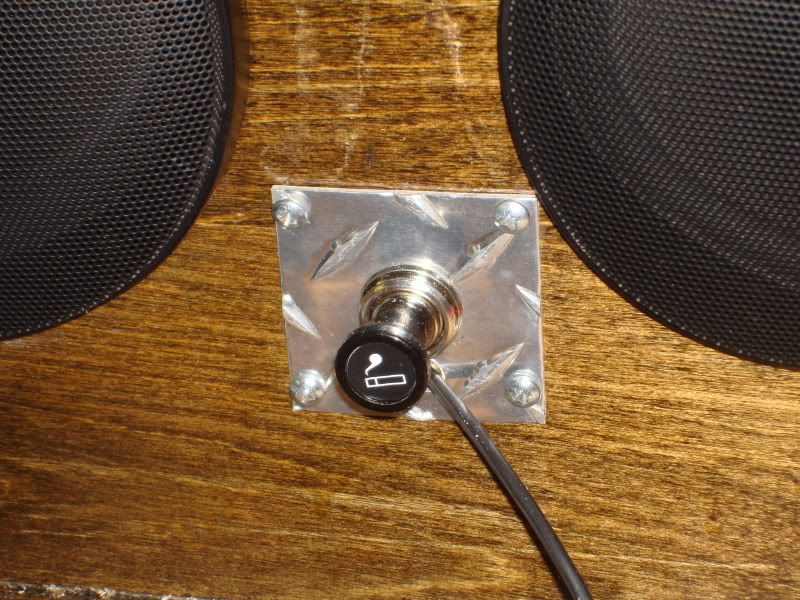
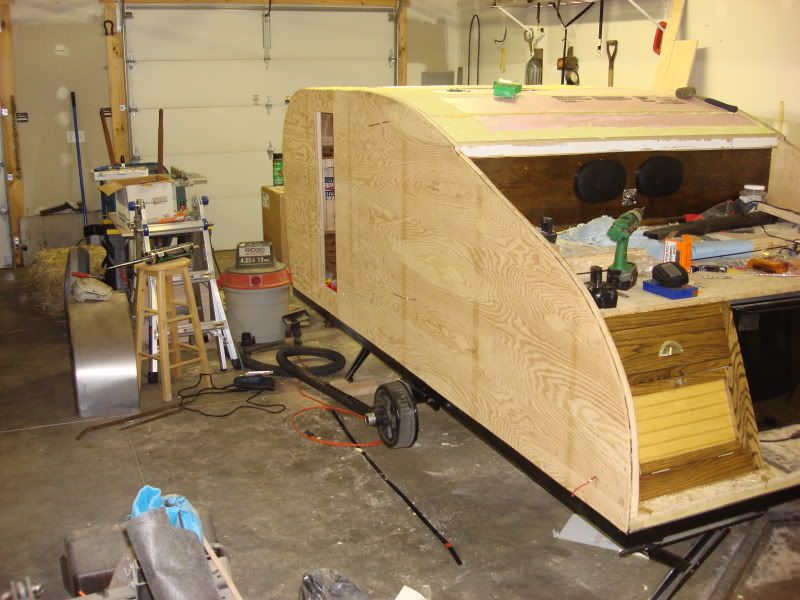
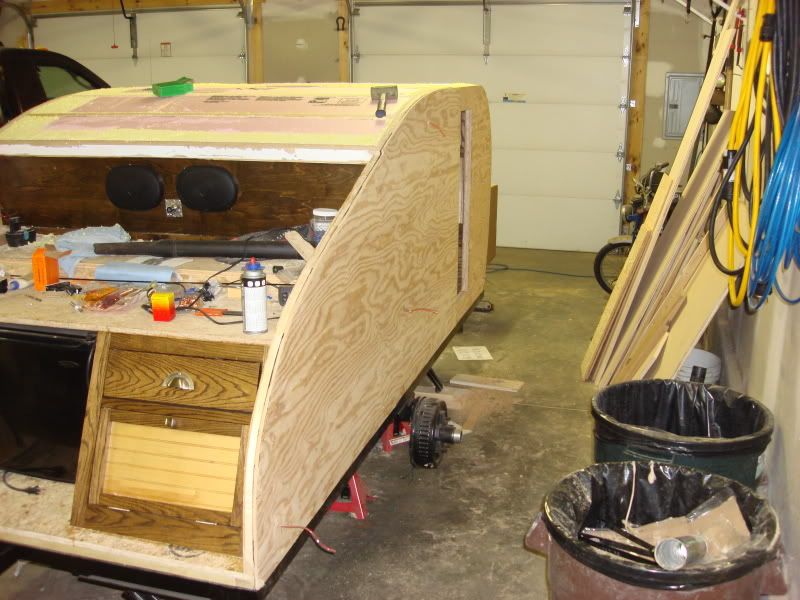
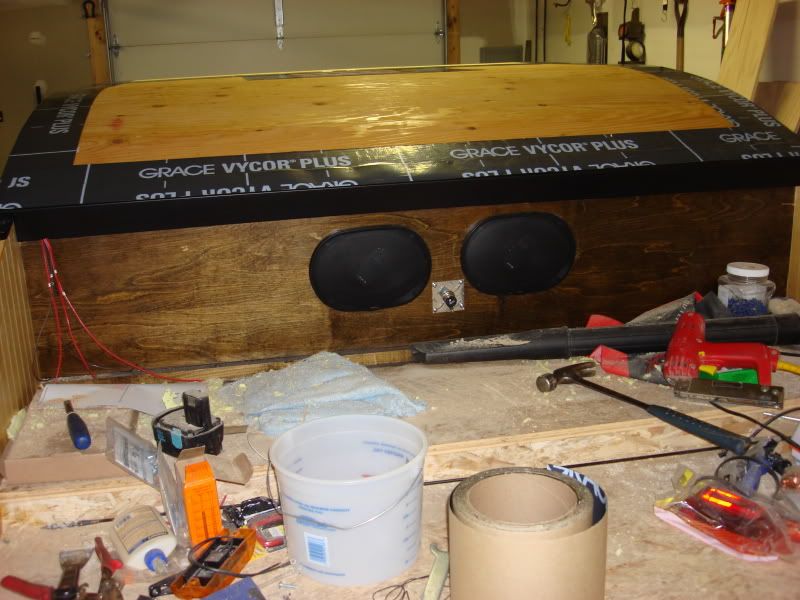
Hooked up my netbook to the stereo mini jack I put in the galley and used a temporary battery to test the sound system and adjust the gain on the amp. Those 2 6"x9" speakers sound pretty sweet and can put out some decent volume.
Image
Image
Image
Image

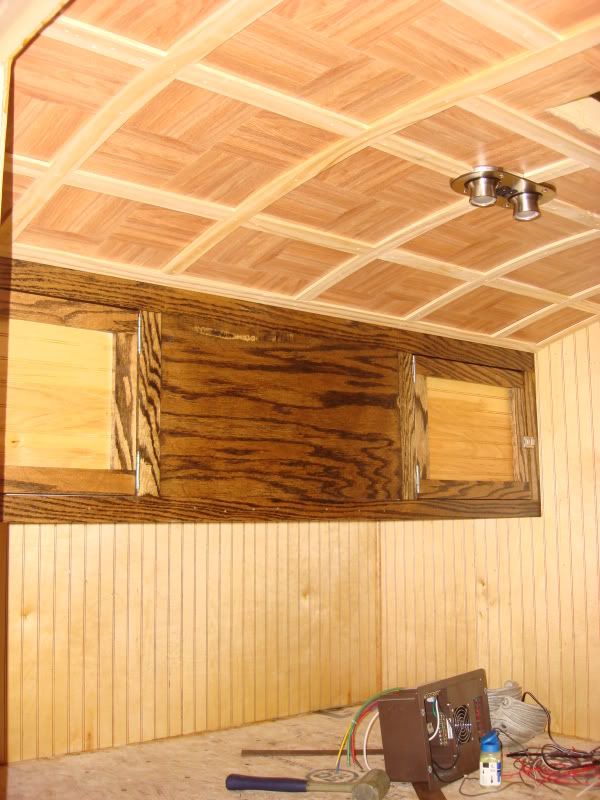
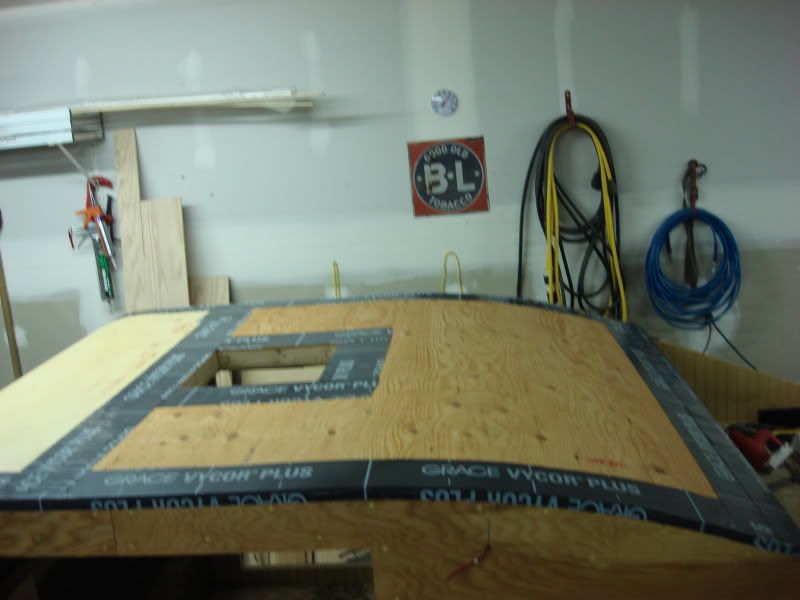
Here are some pictures of how my finished ceiling turned out.
Image
Image

I vacuumed all the areas in between the spars on the roof so that I can start insulating when I get a chance.

That's all for now. More to follow when time permits.

Adam


Love the ceiling! Great work.
User avatar
Hitec4you
Teardrop Builder
 
Posts: 26
Images: 1
Joined: Mon May 03, 2010 1:41 pm
Location: Lavon, TX
Top

Postby Rigsby » Mon May 03, 2010 5:48 pm

This build is fantastic, Keep up the good work :applause:
DOOIN IT THE YAARKSHA WAY--FA NOWT, THA NUS !!
User avatar
Rigsby
500 Club
 
Posts: 587
Joined: Sun Aug 31, 2008 12:21 pm
Location: Doncaster, England
Top

PreviousNext

Return to Build Journals

Who is online

Users browsing this forum: No registered users and 13 guests