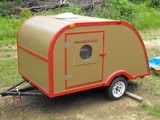
1947 Kit Rebuild Update as of 23 February 2011

...ask your questions in the appropriate forums BUT document your build here...preferably in a single thread...dates for updates, are appreciated....

Postby Classic Finn » Mon Nov 29, 2010 11:44 am

doug hodder wrote:Heikki....think about your camping conditions. Is it going to be used for winter camping? With a body or 2 in it overnight, it will be fine...it's the getting outdoors temps. in the morning that is going to be your problem....get a fire going right away! If it isn't planned to do the really cold camping...just do up the ceiling like Gage mentioned (I'd do that anyway) and go for the solid walls like it was originally constructed.

With decent bedding I've camped down to the lower 20's F with ply construction walls no heat and been fine. If you want lower than that...I'd plan on going with some wall insulation, which will involve either cutting down on the inside space, or cutting into the clearance on the tires, your choice. It kinda comes down to how much room you have to work with side to side and how low do you want to go. Just my opinion.

PS...dogs are great heaters! Doug


Thank You Doug. :thumbsup: It wont be camped in under real cold conditions unless of course we go someplace special, I dont want to go any narrower or or any lower than what the cross beams (or are they called ribs,) that came with them .. looked like 1 x 2 inch? Gage does have his built very nicely, course we always have known Gage builds top notch as do you also. I really appreciate your advice as well as Gage and many others. Besides its the Good Ol Boys who taught me all I know about teardrops. :shake hands: :yes: :applause:

Many Thanks again Doug.
Royal Teardrop Society Scandinavian Bureau Chief of Staff

Image
User avatar
Classic Finn
Midnight Sun Voyager
 
Posts: 17488
Images: 146
Joined: Fri Apr 29, 2005 4:29 am
Location: Country of Finland

Postby Classic Finn » Mon Nov 29, 2010 4:54 pm

Question for Gage if I may. :D

I borrowed your photo of the floor and skirt.

Image

That skirt is that just plywood? The reason Im asking is the Teddy Kit has that same skirt but it looks as though it is just 2 x 2.

Is it installed with just nails or screws and glue? Id rather build that skirt such as you did if that is ply? What thickness ply is that? Is 3/4 ply too heavy or even necessary? on this specific tear it may be 1/2 inch.
Royal Teardrop Society Scandinavian Bureau Chief of Staff

Image
User avatar
Classic Finn
Midnight Sun Voyager
 
Posts: 17488
Images: 146
Joined: Fri Apr 29, 2005 4:29 am
Location: Country of Finland

Postby Classic Finn » Fri Dec 10, 2010 4:09 pm

Recent update on the 47 restoration or rebuild, call it what you may. ;)

Its been a chilling -20 to -30 celcius outside with no garage at present so Ive done a few things at work and our Kit windows was one project.

Ive gone thru a full paint removal and mig rewelding of the hinges on the windows. And to my surprise they are in very good shape with no rust anywhere,s. They will lightly be bead blasted yet, primered and repainted. Good chore but a lot of fun. These windows are once again better than brand new. Window glass according to EU Standards will be installed on all 4.

The inner trim to hold the glass in the window frame is wood so I will make them out of oak or teak. We,ll see.

Also there is a mosquito screen on each that will be replaced. These will turn out very nice once all has been complete.

Dont know what kind of paint was used on these in the 40,s but it was baked on solid. The strongest of paint remover was used and it didnt even work. So a lot of elbow grease was used with an electric steel brush.

Here,s a couple of pics of the windows as what they look like now. I dont see the need to buy new windows when the old can be repaired and reused. Time consuming yes but worth it in the end. :thumbsup:

Before pic as they were and after.
Image
Image

Image
Last edited by Classic Finn on Fri Dec 10, 2010 4:20 pm, edited 1 time in total.
Royal Teardrop Society Scandinavian Bureau Chief of Staff

Image
User avatar
Classic Finn
Midnight Sun Voyager
 
Posts: 17488
Images: 146
Joined: Fri Apr 29, 2005 4:29 am
Location: Country of Finland
Top

Postby parnold » Fri Dec 10, 2010 4:18 pm

I have to agree on the re-use of the old windows! Great job cleaning them up!

:thumbsup:
User avatar
parnold
Donating Member
 
Posts: 2344
Images: 302
Joined: Mon Feb 08, 2010 4:49 pm
Location: Northwest New Jersey
Top

Postby Classic Finn » Fri Dec 10, 2010 4:25 pm

parnold wrote:I have to agree on the re-use of the old windows! Great job cleaning them up!

:thumbsup:


Thank You Paul. Im glad I restored them. I,ll get pics of what they look like soon with the new window glass as they had some cheap plexi in them. Just didnt look good to me.
Royal Teardrop Society Scandinavian Bureau Chief of Staff

Image
User avatar
Classic Finn
Midnight Sun Voyager
 
Posts: 17488
Images: 146
Joined: Fri Apr 29, 2005 4:29 am
Location: Country of Finland
Top

Postby Lookfar » Fri Dec 10, 2010 5:54 pm

It's always a pleasure to watch this thread. The windows are great.
Butch
Image
User avatar
Lookfar
Donating Member
 
Posts: 225
Images: 22
Joined: Sun Jan 31, 2010 9:58 am
Location: Arkansas
Top

Postby Classic Finn » Fri Dec 10, 2010 5:58 pm

Lookfar wrote:It's always a pleasure to watch this thread. The windows are great.


Butch thank you :shake hands: . Its this kind of comment that keeps me keepn on :lol: . Nice to hear from you.

Sending you all our best.
Royal Teardrop Society Scandinavian Bureau Chief of Staff

Image
User avatar
Classic Finn
Midnight Sun Voyager
 
Posts: 17488
Images: 146
Joined: Fri Apr 29, 2005 4:29 am
Location: Country of Finland
Top

Postby Classic Finn » Thu Jan 06, 2011 3:09 pm

Been doing some small resto work which at the moment includes the back galley license plate & light restoration. Paint removal which on top was an ugly and unprofessionally painted brown and under it a black color.

The glass is not broken but with a few surface cracks but if its original let it be. :lol:

Here,s a couple of pics.

Image

Image

And with the Red Lens on which will be ropolished with a special polishing compound to get the scratches out. :) I noticed letters on the lens that say PMCO and then a number 420-15. Does anyone know what these markings mean?
Image
Royal Teardrop Society Scandinavian Bureau Chief of Staff

Image
User avatar
Classic Finn
Midnight Sun Voyager
 
Posts: 17488
Images: 146
Joined: Fri Apr 29, 2005 4:29 am
Location: Country of Finland
Top

Postby Classic Finn » Thu Jan 06, 2011 3:48 pm

Also the galley hatch is under resto. And Im glad the Mrs isnt home at the moment since the entire hatch is in the Living Room :lol: :twisted: Jest cant help myself. 8)


Here sits the galley hatch with a lot of souvenirs on it. Previous owner must enjoy Country Music and Bluegrass. :) But off they come.

Image

Here is the galley hatch with the ol 3mm old rotted ply off. Low & Behold that inner side of the aluminum is still quite polished looking.

Here is a pic of the inside hatch. To my surprise I found "shims under the ribs.. for what I havent a clue but lots of them glued on with a form of silicone. :thinking:

Image

Also the Old hatch frame is real dry rotted however no worries as templates are done & are at my friends shop having new wood made but we are using oak this time for it. The innerside directly under the aluminum will have 3mm Marine Ply with Oak Veneer or if I get real enthused it will be Mahogany :R which I just love playing with. ;)
Royal Teardrop Society Scandinavian Bureau Chief of Staff

Image
User avatar
Classic Finn
Midnight Sun Voyager
 
Posts: 17488
Images: 146
Joined: Fri Apr 29, 2005 4:29 am
Location: Country of Finland
Top

Postby YuGun » Thu Jan 06, 2011 4:16 pm

:thumbsup: :applause: :applause:
İt is a very good and useful work is give a new life to an old teardrop,
Have good changes of your build.
User avatar
YuGun
The 300 Club
 
Posts: 445
Joined: Sun Apr 11, 2010 1:25 pm
Location: Turkey
Top

Postby Classic Finn » Thu Jan 06, 2011 4:19 pm

YuGun wrote::thumbsup: :applause: :applause:
İt is a very good and useful work is give a new life to an old teardrop,
Have good changes of your build.


Thank You Kindly YuGun.. these comments such as yours keeps me going. Yours is turning out real nice as well my friend. :thumbsup: :thumbsup:
Royal Teardrop Society Scandinavian Bureau Chief of Staff

Image
User avatar
Classic Finn
Midnight Sun Voyager
 
Posts: 17488
Images: 146
Joined: Fri Apr 29, 2005 4:29 am
Location: Country of Finland
Top

Postby Classic Finn » Thu Jan 06, 2011 4:21 pm

This is what my passion is: Meaning using veneers as what I did with my 1st build. Here,s my Mahogany work. Below is the Mahogany Veneer glued and ready for the huge hot press.

Image

And this is the outcome with deep rich colors of the grain after applying 2 or 3 coats of Marine Urethane. ;)

Image

And the same method but window cut outs transformed into a couple of nice side tables.

Image
Royal Teardrop Society Scandinavian Bureau Chief of Staff

Image
User avatar
Classic Finn
Midnight Sun Voyager
 
Posts: 17488
Images: 146
Joined: Fri Apr 29, 2005 4:29 am
Location: Country of Finland
Top

Postby Ageless » Thu Jan 06, 2011 5:36 pm

The PMCD is ref to manufacturer. 420-15 is a standard round taillight dating back to the 1960; notable as being used on Harley-Davidson Sprint models. Should be available anywhere
Strangers on this road we are on; we are not two, we are one - Raymond Douglas Davies
User avatar
Ageless
Platinum Donating Member
 
Posts: 1603
Images: 8
Joined: Tue Aug 04, 2009 8:34 am
Location: Pt. Orchard, WA
Top

Postby Classic Finn » Thu Jan 06, 2011 5:54 pm

Ageless wrote:The PMCD is ref to manufacturer. 420-15 is a standard round taillight dating back to the 1960; notable as being used on Harley-Davidson Sprint models. Should be available anywhere


Gee a reply sooooo fast. :lol: Thank You Kindly. So its an early 1960 light then & not 40,s ? :thinking:

Ageless since youve worked with aluminum and rivets.. do you possibly know where these rounded top rivets can be found? Reason being is on the hatch moulding there are rivets which are round headed holding the moulding onto the aluminum. Here I cant find anything as such.
Royal Teardrop Society Scandinavian Bureau Chief of Staff

Image
User avatar
Classic Finn
Midnight Sun Voyager
 
Posts: 17488
Images: 146
Joined: Fri Apr 29, 2005 4:29 am
Location: Country of Finland
Top

Postby Ageless » Thu Jan 06, 2011 6:15 pm

Finn; doe these rivets just join aluminum to aluminum or do they hold the AL parts to wood?
Strangers on this road we are on; we are not two, we are one - Raymond Douglas Davies
User avatar
Ageless
Platinum Donating Member
 
Posts: 1603
Images: 8
Joined: Tue Aug 04, 2009 8:34 am
Location: Pt. Orchard, WA
Top

PreviousNext

Return to Build Journals

Who is online

Users browsing this forum: No registered users and 10 guests