"gnome, sweet, gnome" (oldie)
"gnome away from home" (meh)
"Wherever I roam, I'm never far from gnome" (meh)
"Sweet cheeks of gnome, er home"
"Watch out for rogue blue angels!" (something done by trolls in elevators)
"Insert coin in slot to leave message"
Bah, I'm totally off my gnome game this afternoon! Clearly, I need some coffee.
Hugs,
Ratkity
![]() by WhitneyK » Mon Oct 10, 2011 12:01 am
by WhitneyK » Mon Oct 10, 2011 12:01 am
OK Folks, here goes, this post may get a little long winded, so bare with me...
The material I'm using to skin the outside is .042 aluminum, mill finish (soft as all get out and easy to scratch ) that came off a roll 103" wide. It was purchased from Apex trailer repair in Clarksville IN. It sells for around $13 a running foot, I purchased 22', only needed 20', but have extra 'cause I'm going to make my own trim, or that's the plan anyway.
With that said, on with the show.
I sanded (used the da) the outside surfaces to make sure there was nothing sticking up to cause a bump in the al. Mental note to self; make sure porch light wires are tucked in far enough so you don't sand the insulation off of them, OOPS! And that is why I try to allow a little extra
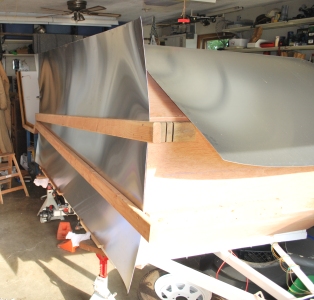
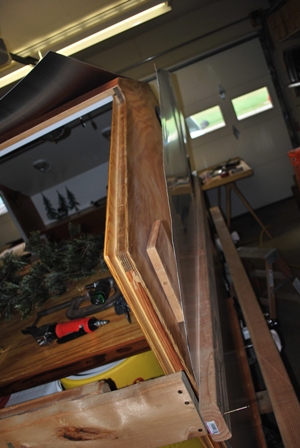
As a rule, I normally have to work by myself, therefore I have to make provisions to accomidate for that. To start with, I "slabbed down" the large roll of aluminum to the appropriate sized needed for each side of the camper. Now, how ya gonna hold that thing up there by yourself and get it marked? I screwed a 2x4 to the back of the camper and a couple scrap pieces to 2x to the front. Sanded my 10' 2x's and fastened them to the previously mentioned 2x's. Stick with me, I'll try to explain as I go. Any ways, it looked like this. I made sure to leave enough gap to get the al slipped in behind the 2x's

Clamped some small boards along the bottom to rest the sheet on
Once the al was slipped behind the 2x, resting on the bottom stops, and slid into position front to back, I tightened the screws down so that they would "pinch", "clamp", "hold", or whatever you'de like to call it, the al
Next I marked all the outlines where I needed to cut out the profile. Like I said, I'm used to working alone and holding these big sheets of metal is difficult at times, an extra hand sure is nice at times. So, when someone "drops" in on me, I'll take all the help I can get, no matter who (or what) it is...
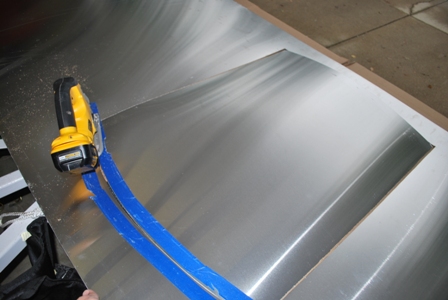
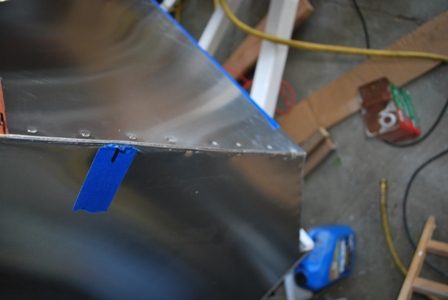
After trying different methods to cut the sheets, my big snips worked best, took some time & effort, but I got there (eventually). The best way to cut out the door opening for me was to use the sabre saw. Used carboard underneath for support, cut through al & cb at the same time. Taped to keep from scratching (even though it was the back side) & used a shop vac to keep the al chips away (worked pretty slick)
Now that all the cuts have been made, de-burred (I'll have to get a pic of that, works nice, you machine shop guys know what I'm talkin' about), checked for fit, it's time to silicone and staple the sheet to the side of the camper. With the al clamped in place, I rolled the top half out a bit, placed a 1x scrap in there to hold it out until I got the silicone around the outer edge, removed the 1x's and started stapling away. I used 1/2" staples, ran out, then used 3/4", no problem, ran out, 1" should work fine ... wrong! Wadded 'em up pretty good. Went to HF and bought the 5000 pack of 1/2" this time.
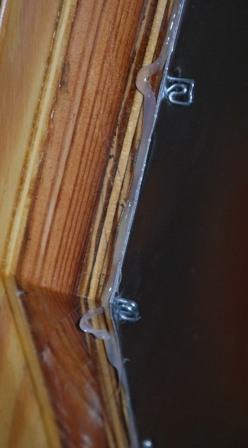
How much silicone to you apply? Yep, that's probably enough
After I got the first side cut & stapled up, my neighbor stopped by to borrow my 16' step ladder. He stated;"I've got a new set of air shears & a air nibbler at the house if you'd like to use 'em" Well, DUH! I'm here to tell ya, the air shears are the berries. Didn't really care for the nibblers much. Got the other side up, marked, cut (with the air shears of course), & stapled in about 1 1/2 hrs. I like them there air shears!
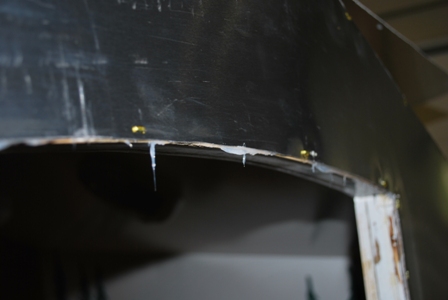
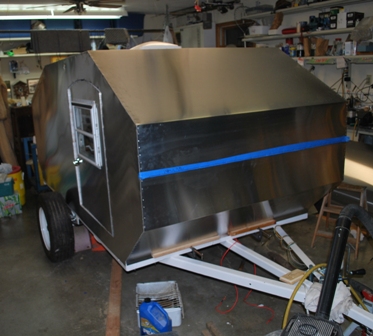
I left the roof metal a little wide (about a 1/2" on each side) so I could "trim to fit" once it was installed. Looks alot better after the fat is trimmed.
There goes another one of my 'dew's I can't complain about my neighbor / friend, he donated the windows for the camper & brought over a 800 watt 12V to 110 converter for me today along with other numerous items. He also helps out with the "mental" support.
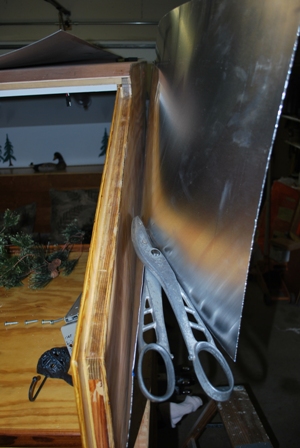
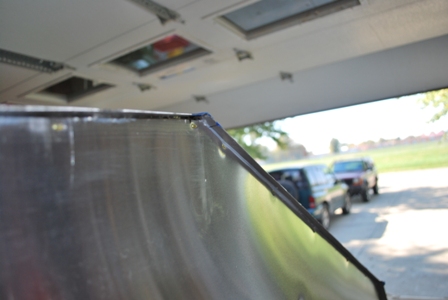
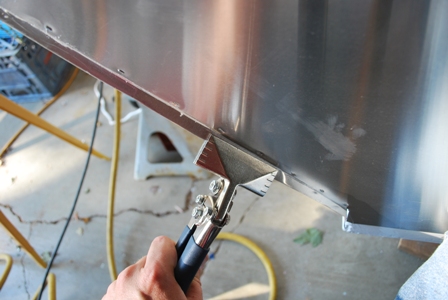
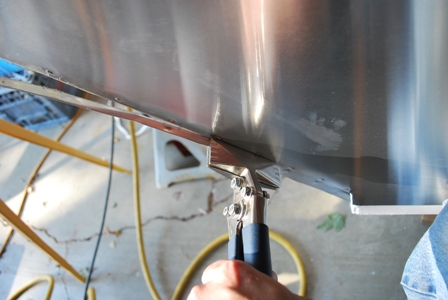
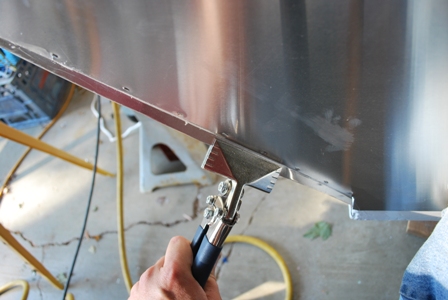
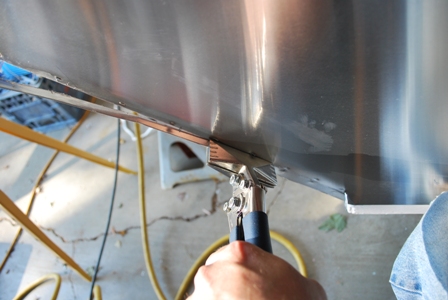
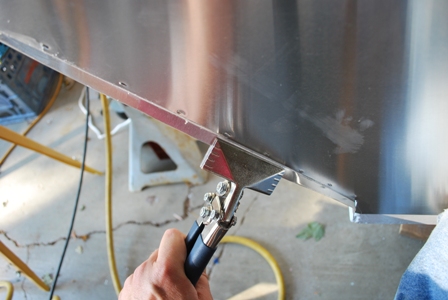
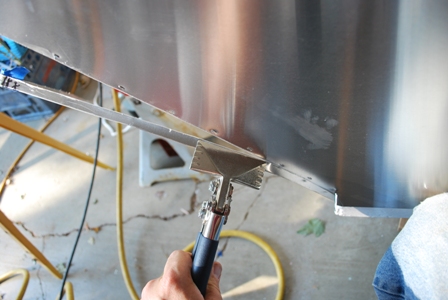
So, you may be asking yourself, "how'd he trim the excess off?" If not, I'm gonna show you anyway. First I scored the al with a utility knife (ya, sometimes they let me play with sharp objects), made about 3 or 4 passes to get a good "groove". Grabbed it with my wide tin bending thingy pliers and worked it back and forth about 3 times, then it just breaks loose. It's as easy as 1, 2, 3... and you don't have all the metal shavin's everywhere.
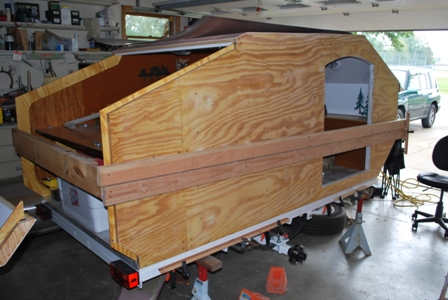
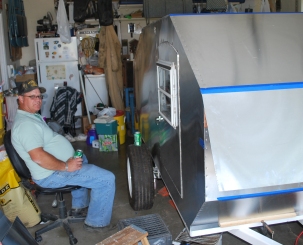
Anysomeway, after driving 40 miles to do a festival inspection (for 1 booth) and stopping by a yard sale, at the end of Saturday evening, this is what I ended up with
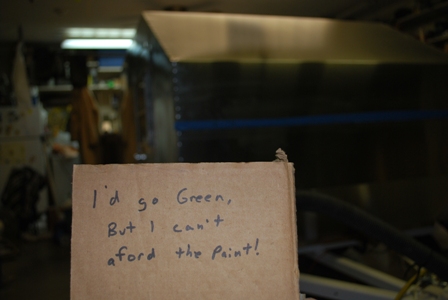
The "mental" part of the neighbors visit was, he came up with a saying for a back of the camper
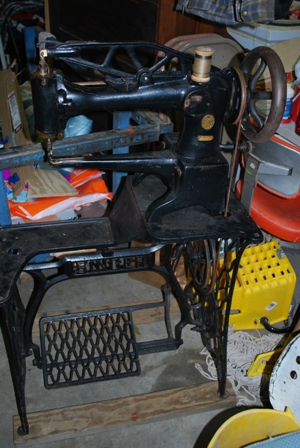
Oh, and by the way, here's my $50 (cut into my camper money) yard sale find. An industrial treadle Singer sewing machine. It will sew leather, canvas, apolstery, etc. Goin' on eBay for $300-500. Always wanted one, not sure how much I'll use it, but I've got one anyway.

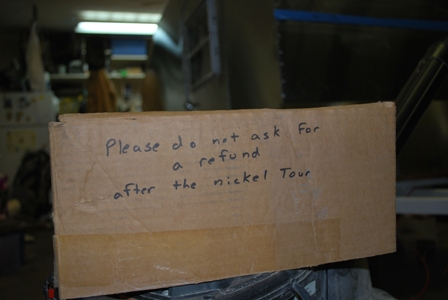
Since Monday's a Holiday (remember, I work for the government, I'm here to help) I'm going to try to get the trim bent and ready to install. Maybe I'll try to stay away from the build long enough to mow my yard, gosh it's only been 2 or 3 weeks. (Maybe the neighbor will come do it for me?) That's all for now folks, I'll leave you with the sign I had to post in my garage
The material I'm using to skin the outside is .042 aluminum, mill finish (soft as all get out and easy to scratch
) that came off a roll 103" wide. It was purchased from Apex trailer repair in Clarksville IN. It sells for around $13 a running foot, I purchased 22', only needed 20', but have extra 'cause I'm going to make my own trim, or that's the plan anyway.
With that said, on with the show.
I sanded (used the da) the outside surfaces to make sure there was nothing sticking up to cause a bump in the al. Mental note to self; make sure porch light wires are tucked in far enough so you don't sand the insulation off of them, OOPS!
And that is why I try to allow a little extra
As a rule, I normally have to work by myself, therefore I have to make provisions to accomidate for that. To start with, I "slabbed down" the large roll of aluminum to the appropriate sized needed for each side of the camper. Now, how ya gonna hold that thing up there by yourself and get it marked?
I screwed a 2x4 to the back of the camper and a couple scrap pieces to 2x to the front. Sanded my 10' 2x's and fastened them to the previously mentioned 2x's. Stick with me, I'll try to explain as I go. Any ways, it looked like this. I made sure to leave enough gap to get the al slipped in behind the 2x's
Clamped some small boards along the bottom to rest the sheet on
Once the al was slipped behind the 2x, resting on the bottom stops, and slid into position front to back, I tightened the screws down so that they would "pinch", "clamp", "hold", or whatever you'de like to call it, the al
Next I marked all the outlines where I needed to cut out the profile. Like I said, I'm used to working alone and holding these big sheets of metal is difficult at times, an extra hand sure is nice at times. So, when someone "drops" in on me, I'll take all the help I can get, no matter who (or what) it is...
After trying different methods to cut the sheets, my big snips worked best, took some time & effort, but I got there (eventually). The best way to cut out the door opening for me was to use the sabre saw. Used carboard underneath for support, cut through al & cb at the same time. Taped to keep from scratching (even though it was the back side) & used a shop vac to keep the al chips away (worked pretty slick)
Now that all the cuts have been made, de-burred (I'll have to get a pic of that, works nice, you machine shop guys know what I'm talkin' about), checked for fit, it's time to silicone and staple the sheet to the side of the camper. With the al clamped in place, I rolled the top half out a bit, placed a 1x scrap in there to hold it out until I got the silicone around the outer edge, removed the 1x's and started stapling away. I used 1/2" staples, ran out, then used 3/4", no problem, ran out, 1" should work fine ... wrong! Wadded 'em up pretty good. Went to HF and bought the 5000 pack of 1/2" this time.
How much silicone to you apply? Yep, that's probably enough
After I got the first side cut & stapled up, my neighbor stopped by to borrow my 16' step ladder. He stated;"I've got a new set of air shears & a air nibbler at the house if you'd like to use 'em" Well, DUH! I'm here to tell ya, the air shears are the berries. Didn't really care for the nibblers much. Got the other side up, marked, cut (with the air shears of course), & stapled in about 1 1/2 hrs. I like them there air shears!
I left the roof metal a little wide (about a 1/2" on each side) so I could "trim to fit" once it was installed. Looks alot better after the fat is trimmed.
There goes another one of my 'dew's
I can't complain about my neighbor / friend, he donated the windows for the camper & brought over a 800 watt 12V to 110 converter for me today along with other numerous items. He also helps out with the "mental" support.
So, you may be asking yourself, "how'd he trim the excess off?" If not, I'm gonna show you anyway. First I scored the al with a utility knife (ya, sometimes they let me play with sharp objects), made about 3 or 4 passes to get a good "groove". Grabbed it with my wide tin bending thingy pliers and worked it back and forth about 3 times, then it just breaks loose. It's as easy as 1, 2, 3... and you don't have all the metal shavin's everywhere.
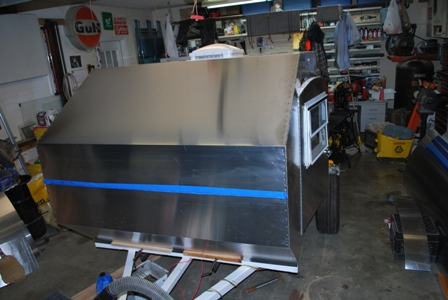
Anysomeway, after driving 40 miles to do a festival inspection (for 1 booth) and stopping by a yard sale, at the end of Saturday evening, this is what I ended up with
The "mental" part of the neighbors visit was, he came up with a saying for a back of the camper
Oh, and by the way, here's my $50 (cut into my camper money) yard sale find. An industrial treadle Singer sewing machine. It will sew leather, canvas, apolstery, etc. Goin' on eBay for $300-500. Always wanted one, not sure how much I'll use it, but I've got one anyway.
Since Monday's a Holiday (remember, I work for the government, I'm here to help) I'm going to try to get the trim bent and ready to install. Maybe I'll try to stay away from the build long enough to mow my yard, gosh it's only been 2 or 3 weeks. (Maybe the neighbor will come do it for me?) That's all for now folks, I'll leave you with the sign I had to post in my garage
Whitney & Tracie
Crothersville, IN
We never really grow up, we only learn how to act in public.
Do not confuse what you hear with what I mean.
My build: http://www.tnttt.com/viewtopic.php?t=41955
 -------------------------------
States we've drug our
li'l camper through. (44 States + Vancouver Island and over 45,000 miles so far)
Crothersville, IN
We never really grow up, we only learn how to act in public.
Do not confuse what you hear with what I mean.
My build: http://www.tnttt.com/viewtopic.php?t=41955
States we've drug our
li'l camper through. (44 States + Vancouver Island and over 45,000 miles so far)
-

WhitneyK - Gold Donating Member
- Posts: 559
- Images: 412
- Joined: Sun Dec 12, 2010 10:28 pm
- Location: IN, Crothersville (36mi N or Louisville)


 and this morning, "monsoon time"! Man did it poor this morning!
  ... and just when you're ready to leave for work.