Here's Humphrey..Now a trolly top..Finished!!

...ask your questions in the appropriate forums BUT document your build here...preferably in a single thread...dates for updates, are appreciated....

Here's Humphrey..Now a trolly top..Finished!!

Postby 3nero » Thu May 30, 2013 6:17 pm

So I've been looking at teardrops for a few years and thinking to myself that i would like to have one some day. But i drive a camper van so never really had the need for one.
A few weeks ago me and the GF went to a festival with her son in tow.

Here we are with a gang of musicians hanging out with us...

Image

The van only sleeps two so a tent was needed. She normally camps in tents so this was her first time in a van. She was instantly converted to the ways of the instant set up (park it and you're done) she was also well impressed with little things like.. if she asked for a spoon i just opened a drawer and there is was...no rummaging through bags and cool boxes for stuff. She spent the weekend looking at all the vans and trailers and announced "I NEED ONE". Her heart was set on a cheap van to convert until i pointed out the yearly upkeep with tax and tests...so the van idea was dropped...Her car is tiny so that put paid to the idea of a normal size caravan...So i showed her some pictures and models of teardrops :twisted:

It took about 3 mins for her to see the light.

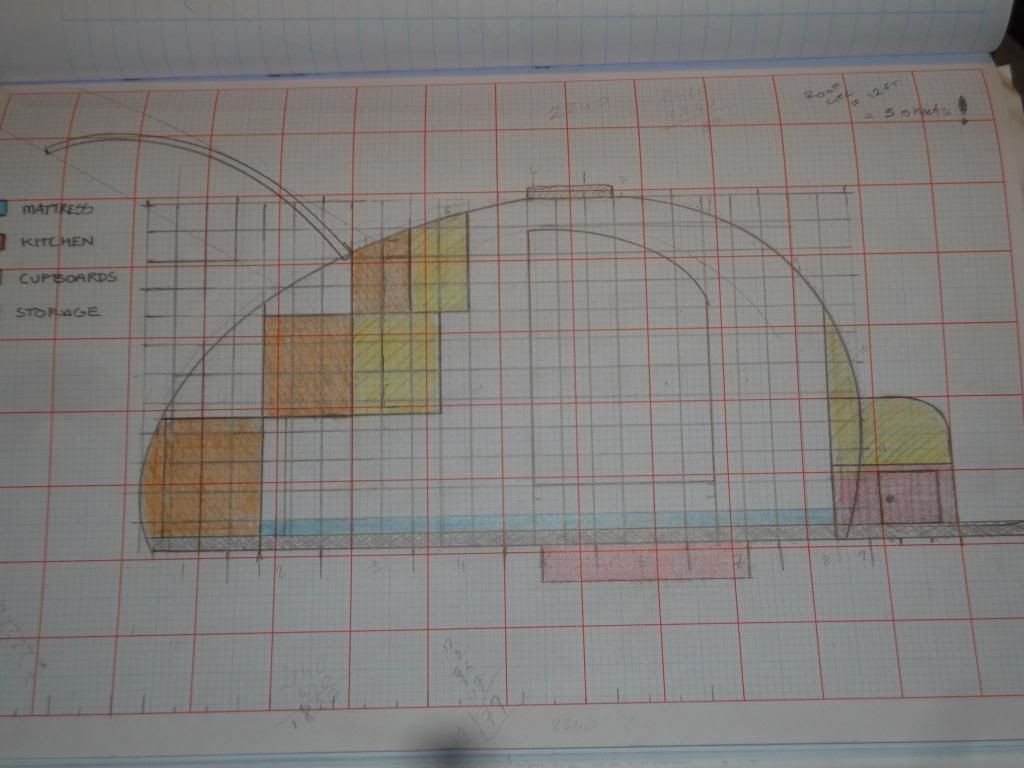
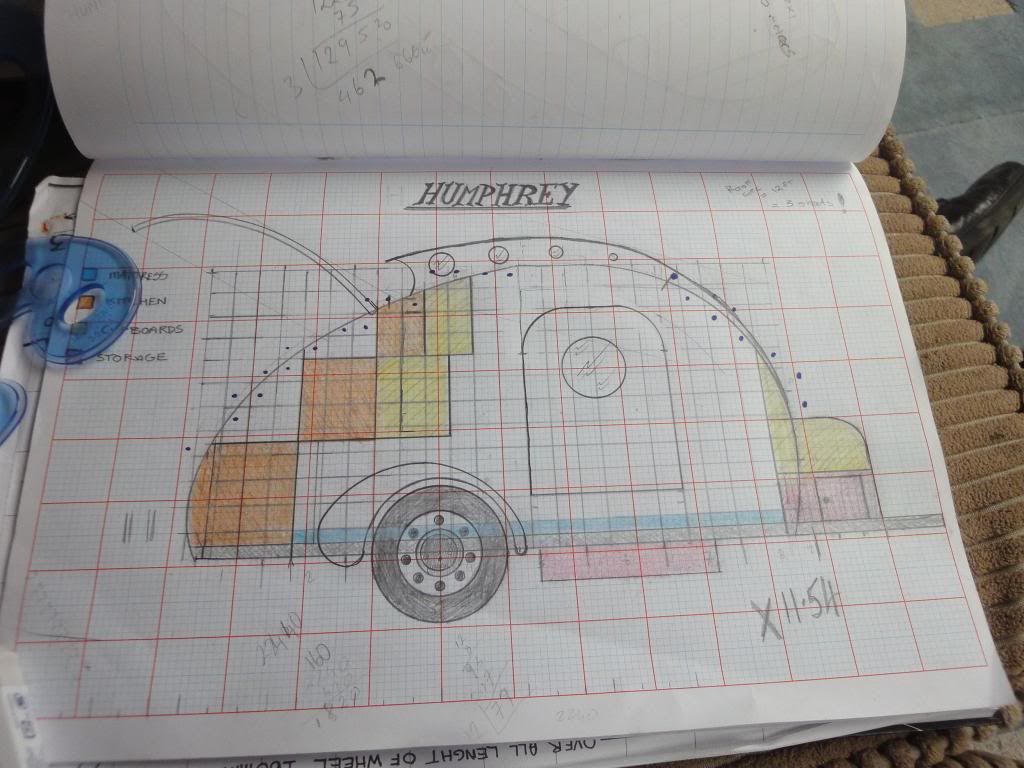
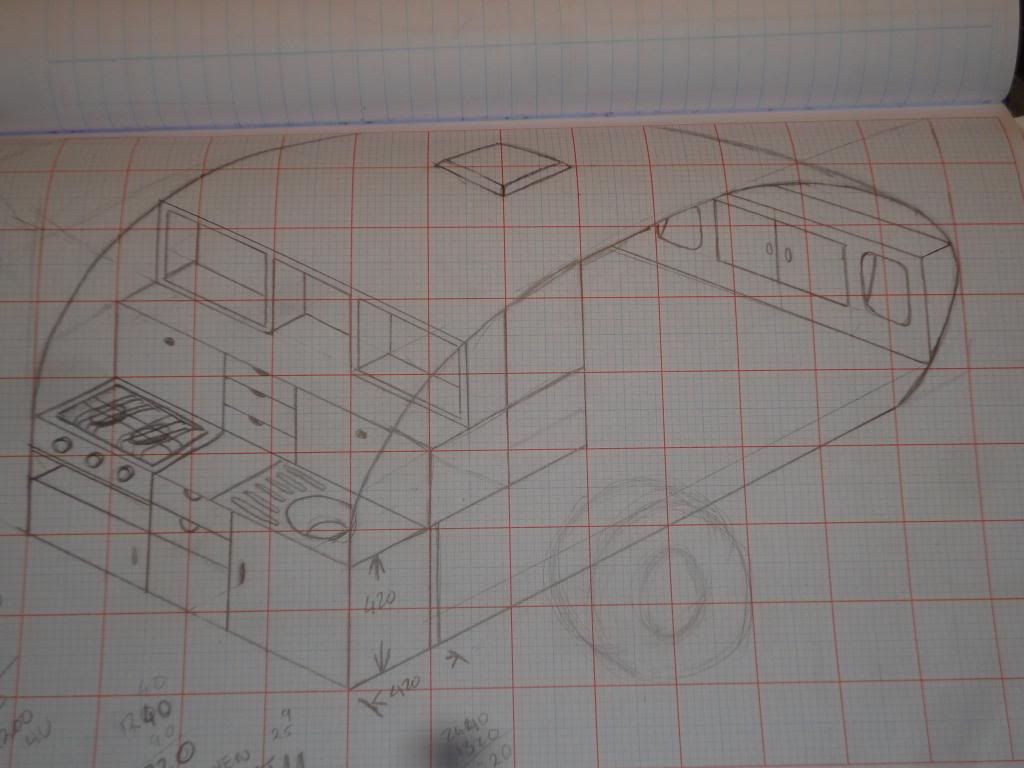
I then drew a few sketches....

Image

Image

...And was told "Get it built!!" and her 7 year old informed us it was called Humphrey. the design is based on an 8x4 chassis so i can getaway with using one sheet of ply per side and on the top and bottom.

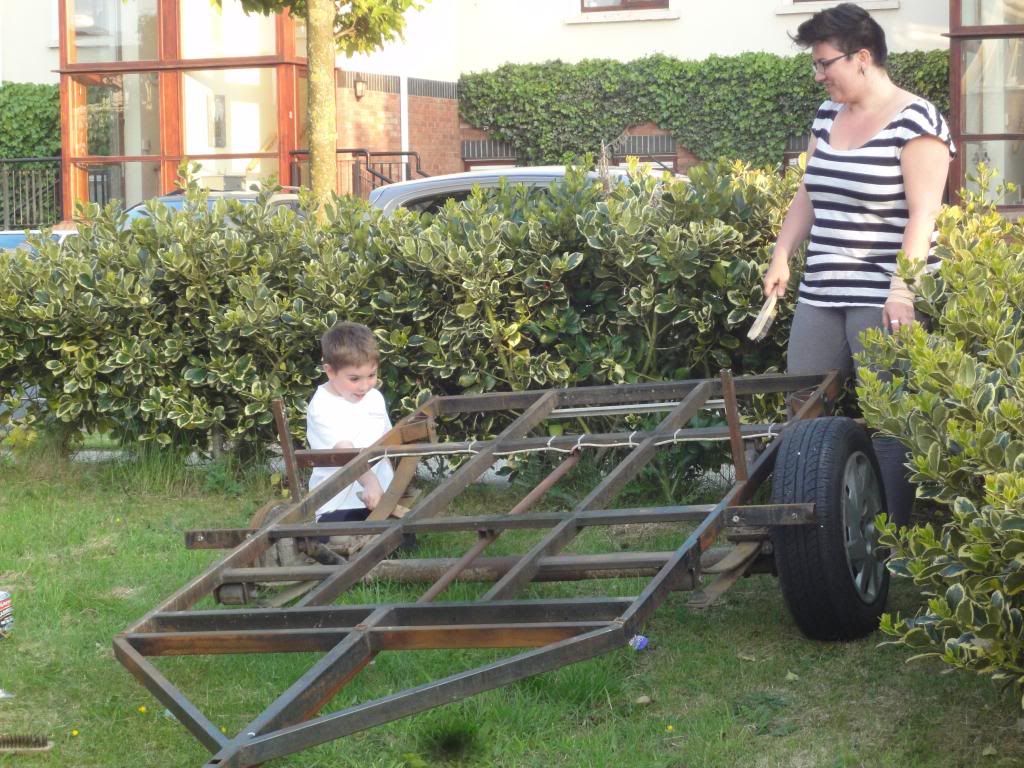
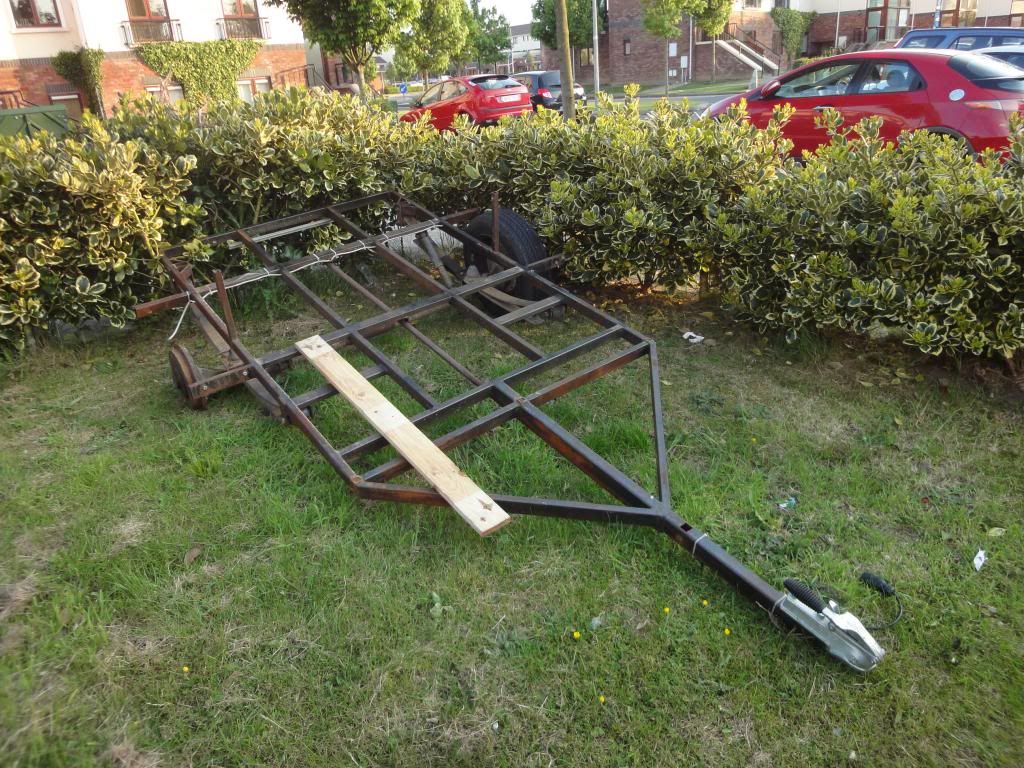
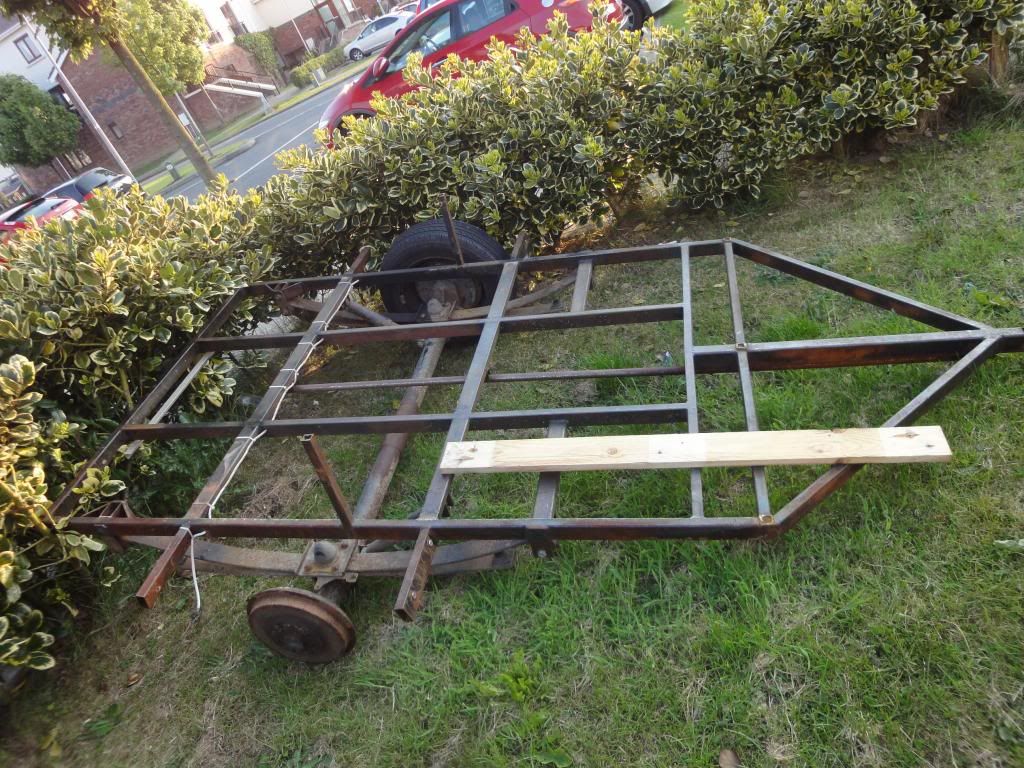
So we spent a few weeks watching the local classified sites for a cheap trailer and after missing a few finally managed to snag this last night for €60.
(wheel removed to make sure it stays where we left it)
Image

Image

A quick go with the measuring tape says the frame is 4'3" wide and 6'6" long..so the plans changed allready.

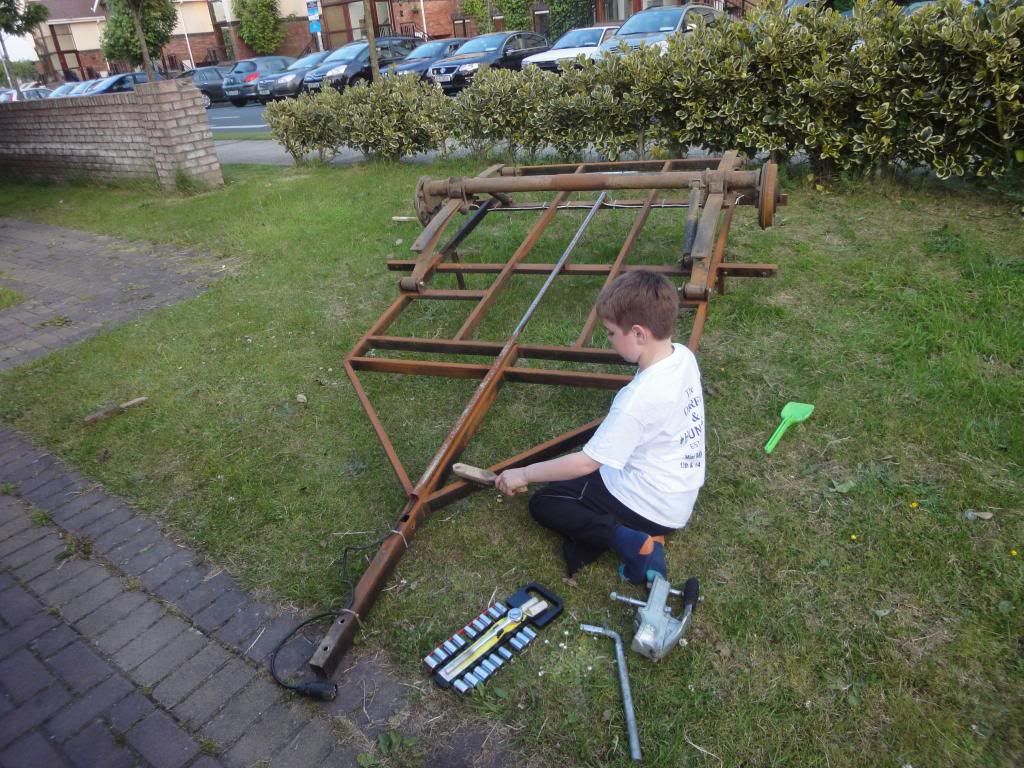
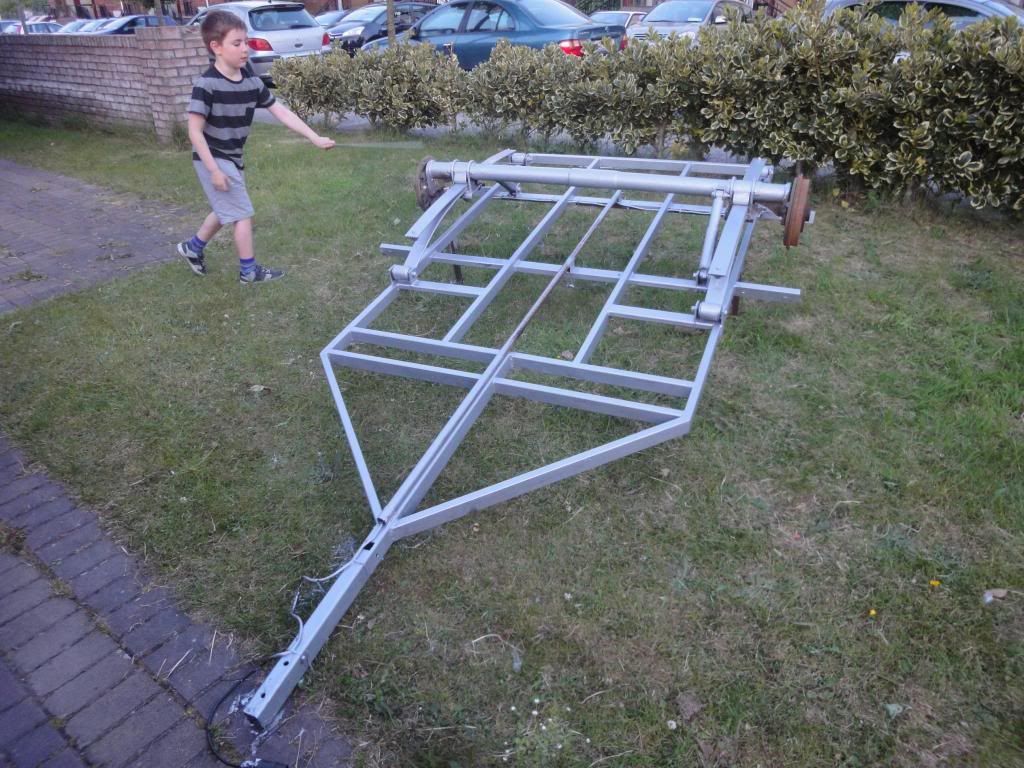
So tonight we started the clean up of the new frame..
Because of the low budget we used some cheap child labour. :R

Image

Image

a few hours and some silver hammerite later
Image

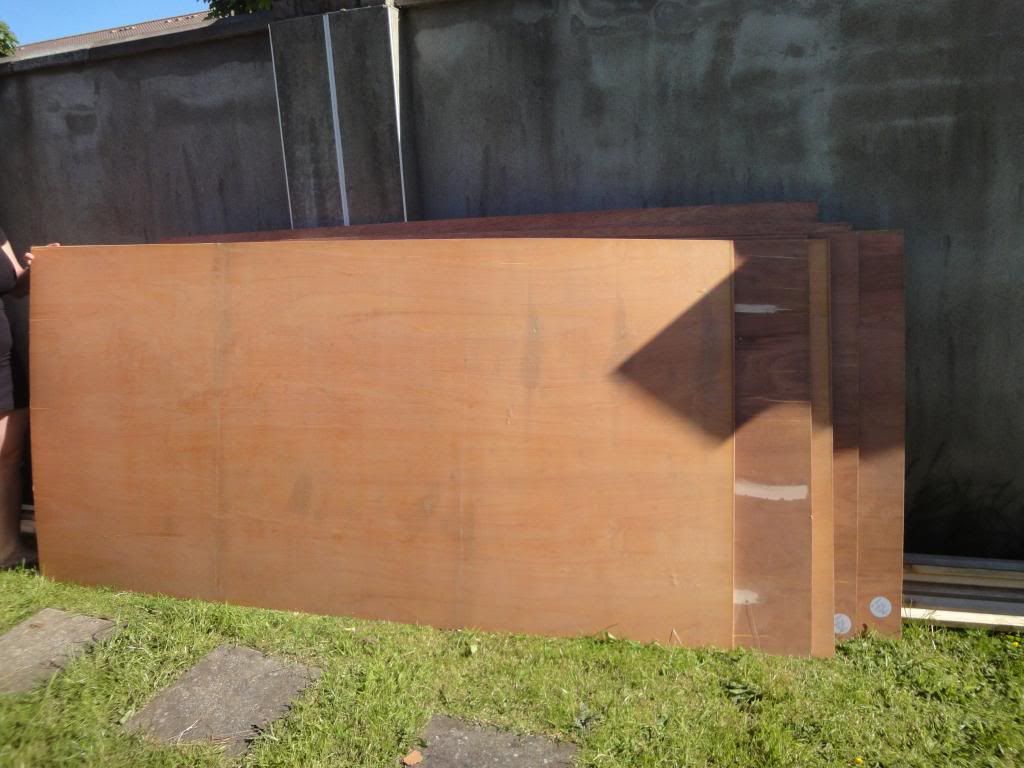
All the wood was then ordered, so we just have to wait now until the truck arrives in a few days time with our supply of building materials 8)
Last edited by 3nero on Thu Jun 19, 2014 7:07 pm, edited 2 times in total.
Measure once, cut twice....throw away and repeat.
Image Image

http://www.tnttt.com/viewtopic.php?t=55971
3nero
Teardrop Master
 
Posts: 129
Joined: Mon May 13, 2013 3:40 pm
Location: Co.Wicklow Ireland

Re: Here's Humphrey..

Postby Ben » Thu May 30, 2013 8:58 pm

You can't beat that cheep labor. Teach them young and you'll be a lot better off. You have a good start, take lots of pics and enjoy your self. :thumbsup:
Going broke quick fixing a bad start!
Ben
Teardrop Master
 
Posts: 200
Images: 221
Joined: Sun Aug 05, 2012 8:39 pm
Location: Hocking hills Ohio

Re: Here's Humphrey..

Postby KCStudly » Thu May 30, 2013 9:08 pm

Nice! That frame has some great features; brakes, shocks, bump stops and overload springs. The tongue looks like it will be easy to shorten, too (if needed).

You can still go 4 ft wide if you want to. There are a couple of builds here that used a filler... call it a step, or porch rim if you like, to make up the difference.

Sorry, I don't remember the references at the moment; maybe one of GPW's efforts (?).

Welcome to the forum and good luck! :thumbsup:
KC
My Build: The Poet Creek Express Hybrid Foamie

Poet Creek Or Bust
Engineering the TLAR way - "That Looks About Right"
TnTTT ORIGINAL 200A LANTERN CLUB = "The 200A Gang"
Green Lantern Corpsmen
User avatar
KCStudly
Donating Member
 
Posts: 9613
Images: 8169
Joined: Mon Feb 06, 2012 10:18 pm
Location: Southeastern CT, USA
Top

Re: Here's Humphrey..

Postby Ron Dickey » Sun Jun 02, 2013 11:47 pm

Hope you checked all welds before painting.

nice drawing looks like a good size. Check the bearings and regrease them or replace them first before you get any weight on it. It is easyer to work with when there is little or no weight.

good luck on your build 8)
121377......134179
Inside almost done--Trolly top has opening windows & roof.doors need assembling--pictured above waley windows..galley 1/3 done
Cross Bow in Build Journals....http://www.tnttt.com/viewtopic.php?f=50&t=54108
User avatar
Ron Dickey
Silver Donating Member
 
Posts: 3075
Images: 711
Joined: Tue Apr 20, 2004 5:56 pm
Location: Central Coast, CA
Top

Re: Here's Humphrey..

Postby donal94 » Mon Jun 03, 2013 3:31 am

Looking good how wide is it?
donal94
Teardrop Builder
 
Posts: 48
Joined: Tue May 17, 2011 10:59 am
Top

Re: Here's Humphrey..

Postby 3nero » Mon Jun 03, 2013 9:59 am

Thanks guys. It's good to see a chassis sitting in the garden after the long search for one.

@KCstudly.. It has all the stuff you mentioned except for brakes. It was a home made trailer. The axle has german marks and probably came of an Opel the hubs are spanish probably from a Fiat..and the metal was welded in Ireland. It was well made by whoever made is but i guess they figured brakes were overkill. I wont be shortening the tounge, if anything it may need a longer one. The filler/step thing sounds like something i could use, but i can't picture it in my head...Is it like a fillet running along the bottom of the outer wall?

@ Ron Dickey Thanks i can't use any of those auto sketch cad things..way to slow...pencils and paper are the way for me. I cheaked the welds and they all look good so far. And i did the bearings the other night.. also gave the frame a second coat of paint..Not much point in posting pics because it still looks the same.

@Donal94 It's an awkward 4 foot 3 inches wide.

Not much else to report for this weekend, it's a bank holiday here so the wood won't be delivered until Tuesday at the earliest. So instead of building things i filled my camper with balls :roll:

Image

Image

Image

Don't worry I haven't lost it....there was a good reason.

Image

It took some balls to pull that stunt off :)
Measure once, cut twice....throw away and repeat.
Image Image

http://www.tnttt.com/viewtopic.php?t=55971
3nero
Teardrop Master
 
Posts: 129
Joined: Mon May 13, 2013 3:40 pm
Location: Co.Wicklow Ireland
Top

Re: Here's Humphrey..

Postby KCStudly » Mon Jun 03, 2013 3:16 pm

The filler piece was more like a 1x6 plank surrounding the base of the cabin on two or three sides making up the difference from a 5 ft trailer to a 4 ft cabin. Knowing now that your trailer is only 4'-3" yours would be more like a filler piece or trim board.

GPW (hangs out on the Foamie forum) has quite a few concept sketches, and I think he had one that might work for you. let me take a minute to look...

Okay, here's the GPW sketch that I was thinking of..
Image

IIRC he was just thinking up a way to reinforce the wall to floor join (Foamies use fabric saturated in glue or paint as a structural laminate and sealing method, similar to glass reinforced epoxy, only thrifty).

The wall he shows is thicker because it is foam (the blue) and the trim board is thin because it is wood (tapered tan), but you could reverse this. Use ply for your walls and a thick piece of foam tapered on top to shed the water; glue it on as a cover up and skin it with canvas and paint. So long as you have a decent cleat well fastened (the 2x2 on the inside corner) it shouldn't matter that much if the main portion of the side walls are not over the steel frame rails. IMO.
KC
My Build: The Poet Creek Express Hybrid Foamie

Poet Creek Or Bust
Engineering the TLAR way - "That Looks About Right"
TnTTT ORIGINAL 200A LANTERN CLUB = "The 200A Gang"
Green Lantern Corpsmen
User avatar
KCStudly
Donating Member
 
Posts: 9613
Images: 8169
Joined: Mon Feb 06, 2012 10:18 pm
Location: Southeastern CT, USA
Top

Re: Here's Humphrey..

Postby 3nero » Mon Jun 03, 2013 5:21 pm

Ok.. now i get you...Thanks. it's kind of what i had in my head with the fillet filling the return but with a horizontal plank under the wall and fillet. It still looks like a water trap to me and I'm in Ireland, but it hasn't rained here for at least 20 minutes so i might be ok...That's considered a good summer :lol:
I already went ahead and ordered the wood and ordered an extra 2 sheets of ply to deal with the 3 inch oversize frame. One 18mm(3/4") for the floor and one 4mm(1/6") for the roof, it means i'm going to have to have a join running the length of the roof but i work with a lot of resins in my day job so i can deal with that later. I'd rather have the exterior walls come down passed the trailer frame to allow for water run off. my sketches mainly help me work out how much materials i will need to buy. I spend my work days building stuff from other peoples plans and it's great to be just able to wing it and have a flexible plan once in a while. I said i was going to let Humphrey design himself and he's already started doing that. I can't wait to see what he decides to look like :lol:
Measure once, cut twice....throw away and repeat.
Image Image

http://www.tnttt.com/viewtopic.php?t=55971
3nero
Teardrop Master
 
Posts: 129
Joined: Mon May 13, 2013 3:40 pm
Location: Co.Wicklow Ireland
Top

Re: Here's Humphrey..

Postby Junkboy999 » Mon Jun 03, 2013 5:47 pm

So it gonna be called Humphrey?

Look out, Look out, there's a Humphrey about. :lol:


My favorite add is this one

http://www.youtube.com/watch?v=EOeL18BFc0o

GL on your build.
:thumbsup:
User avatar
Junkboy999
1000 Club
1000 Club
 
Posts: 1259
Images: 52
Joined: Fri Jul 06, 2012 9:18 pm
Location: Wichita, KS
Top

Re: Here's Humphrey..

Postby 3nero » Wed Jun 05, 2013 5:41 pm

Junkboy999 wrote:So it gonna be called Humphrey?

Look out, Look out, there's a Humphrey about. :lol:


My favorite add is this one

http://www.youtube.com/watch?v=EOeL18BFc0o

GL on your build.
:thumbsup:


Never seen that add before...I was trying to think of a famous Humphrey but only came up with Bogart.

Well this lovely pile of new wood arrived yesterday.

Image

The 4mm sheets are not the best but at €8 per sheet i can work around any defects.

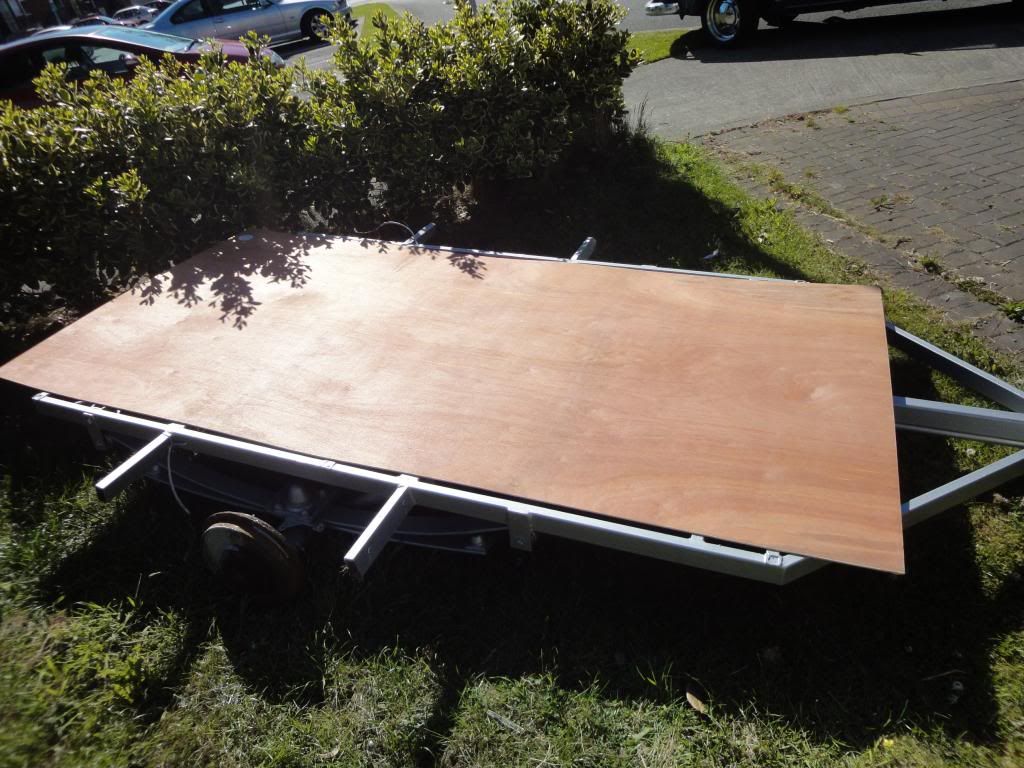
I threw one sheet on the chassis just to get an idea of the size.

Image

Going to have about a 6 inch overhang at the back and still room up front for a belly box or tongue box.

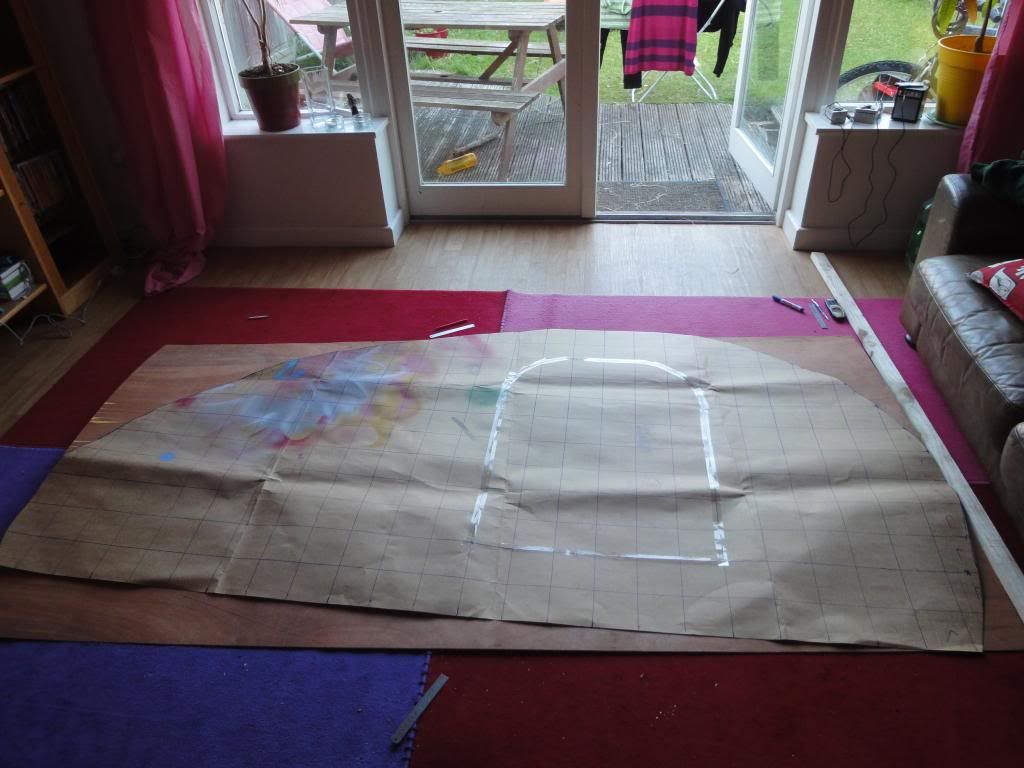
Today we started on the template. Just a big piece of 8x4 cardboard.

Drawing the grid to transfer the profile...

Image

profile cut out and door reattached because it was in the wrong place and would have bumped off the wheel..Needs to move forward a few inches.

Image

Forgot to take a pic while it was held up on the chassis :roll:

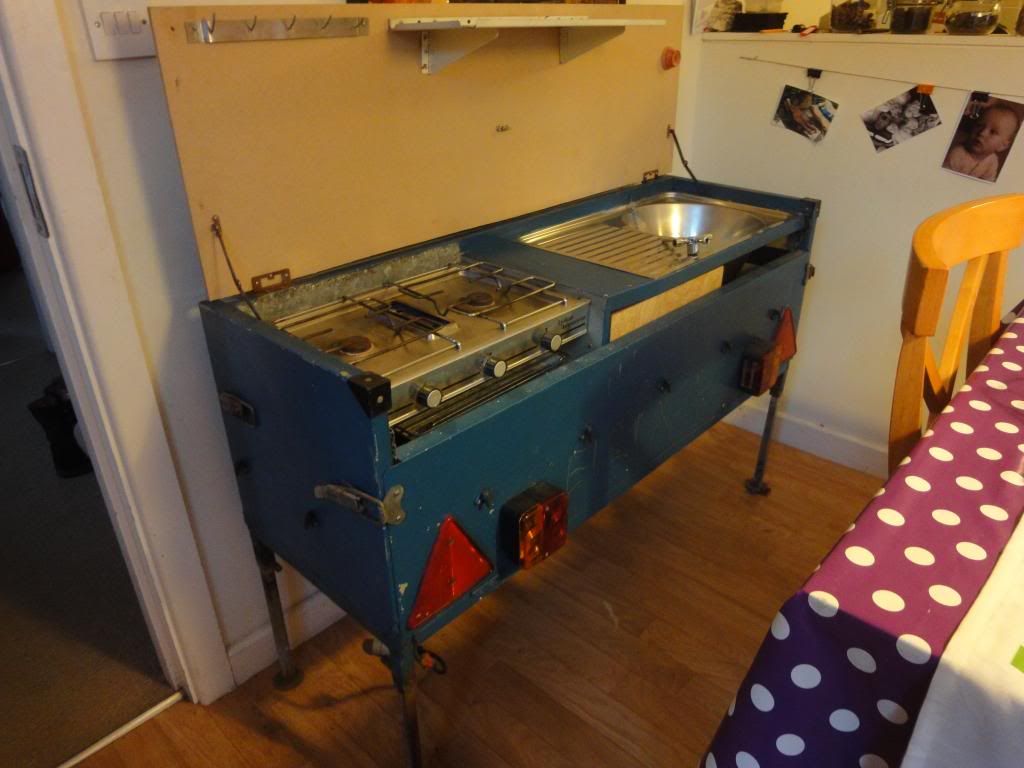
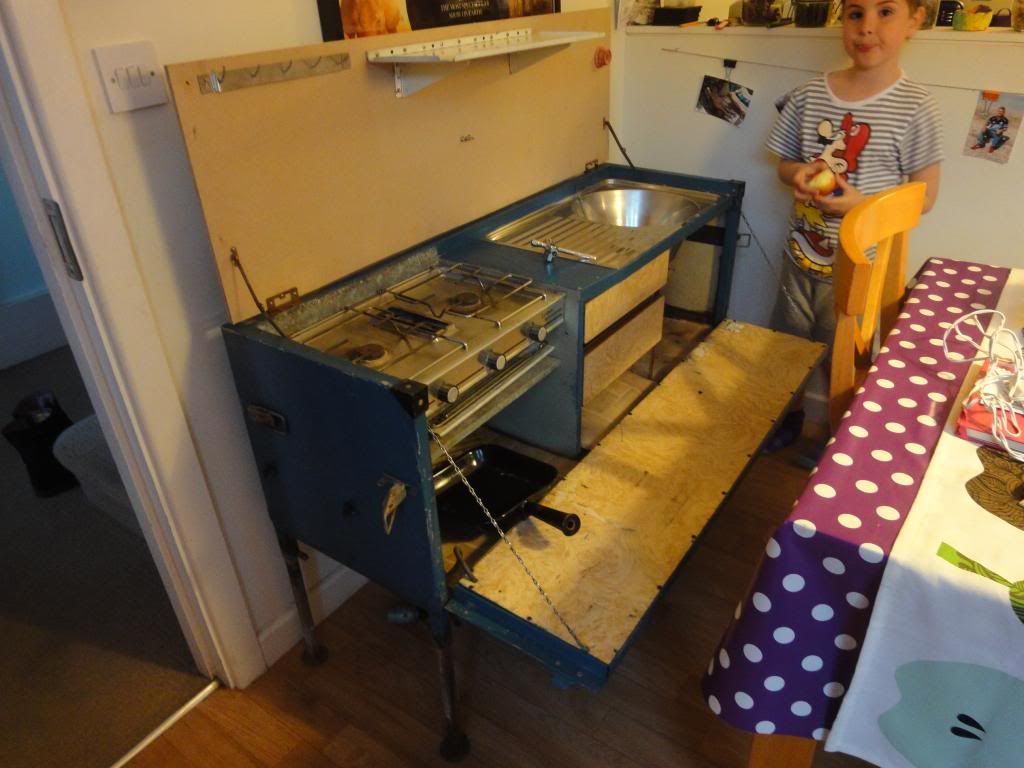
Here's the old tent trailer galley we snagged cheap of a local classified site. This will be stripped down and most parts used in the build.

Image

Image

In the pics it's set to the height it will be once in the teardrop to see if it's comfy to use. those adjustable legs came in handy for height testing.

Going to start annoying the neighbours tomorrow with the lovely sounds of power tools :twisted:
Measure once, cut twice....throw away and repeat.
Image Image

http://www.tnttt.com/viewtopic.php?t=55971
3nero
Teardrop Master
 
Posts: 129
Joined: Mon May 13, 2013 3:40 pm
Location: Co.Wicklow Ireland
Top

Re: Here's Humphrey..

Postby donal94 » Thu Jun 06, 2013 4:06 pm

Looks great kitchen looks really cool
donal94
Teardrop Builder
 
Posts: 48
Joined: Tue May 17, 2011 10:59 am
Top

Re: Here's Humphrey..

Postby 3nero » Fri Jun 07, 2013 7:06 am

Cheers Donal, that the one i told you about from Adverts.ie. Lot's of reusable bits on it.

Well Humphrey gone and changed again. Because of the awkward extra 3 inches in width not matter what i do i'm going to have to have a join in the roof sheet. I was trying to figure how to do the join in my head and taught of lots of ways it could be done. But all those ideas involved trying to make the join invisible. Then i taught...Well why not just save time filling and sanding by making the join a feature.

So now Humphrey has a hair style.. 8)

Image

You guys call it a trolley top...we call them Molly Croft Roofs.
Now i don't have to try and hide the join. And i will use the sheet that covers the top to overlap the joins on the front end giving a kind of swage line that will go around the tounge box. Hard to explain...better do another sketch...
Measure once, cut twice....throw away and repeat.
Image Image

http://www.tnttt.com/viewtopic.php?t=55971
3nero
Teardrop Master
 
Posts: 129
Joined: Mon May 13, 2013 3:40 pm
Location: Co.Wicklow Ireland
Top

Re: Here's Humphrey..

Postby 3nero » Fri Jun 07, 2013 7:15 am

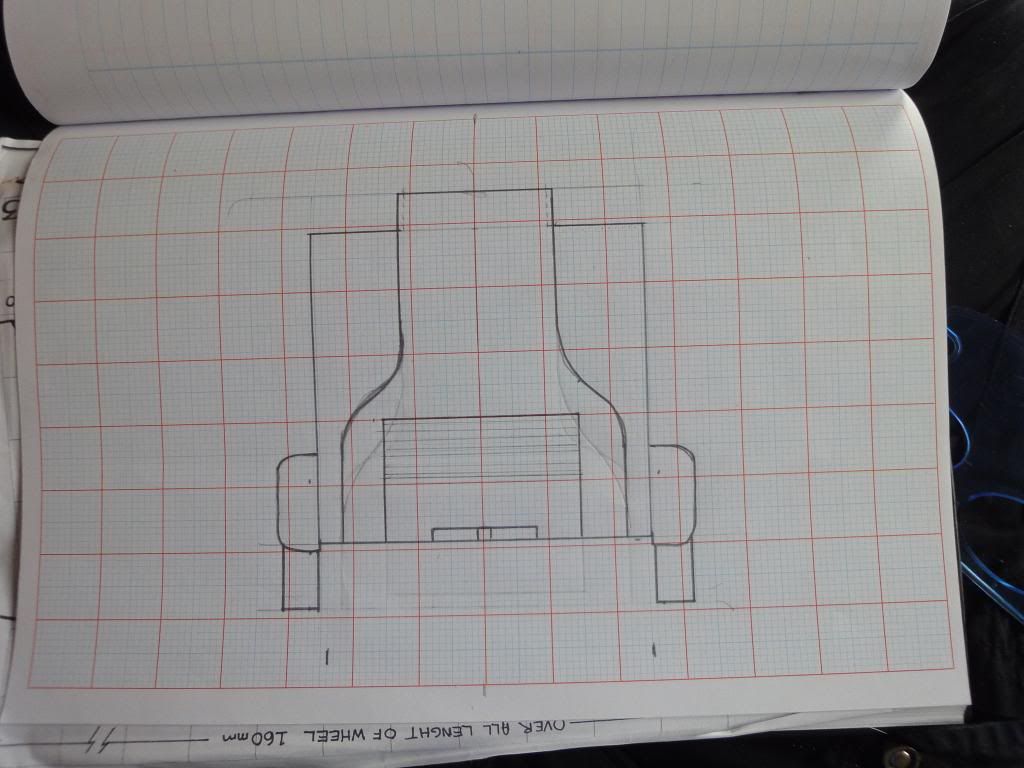
Ok sketched up

Front view...

Image

The roof will overhang the walls of the top by about an inch giving me plenty of wood to glue/screw to where it folds around the front.

I think it should work...But let me know if you see any glaring mistakes.
Measure once, cut twice....throw away and repeat.
Image Image

http://www.tnttt.com/viewtopic.php?t=55971
3nero
Teardrop Master
 
Posts: 129
Joined: Mon May 13, 2013 3:40 pm
Location: Co.Wicklow Ireland
Top

Re: Here's Humphrey..

Postby danlott » Fri Jun 07, 2013 12:07 pm

Always great to see a new trolley top "Molly Croft Roof" idea. Will be watching your build progress.

Dan
Hoplite Traveler Build thread
Image Image
Life is what happens to you while you're busy making other plans.
User avatar
danlott
Donating Member
 
Posts: 874
Images: 264
Joined: Fri Mar 06, 2009 2:18 pm
Location: Winnemucca, Nevada
Top

Re: Here's Humphrey..

Postby donal94 » Fri Jun 07, 2013 4:29 pm

Are the 4mm sheets from goodwins I can't see them for €8
donal94
Teardrop Builder
 
Posts: 48
Joined: Tue May 17, 2011 10:59 am
Top

Next

Return to Build Journals

Who is online

Users browsing this forum: No registered users and 43 guests