My Foamie Build--Updated --Jul 3 I'm eating an elephant

Canvas covered foamies (Thrifty Alternatives...)

Moderator: eaglesdare

Re: My Foamie Build--Updated 6 MAY 2012--Made saw and foam d

Postby PcHistorian » Mon May 07, 2012 2:35 pm

sweet. looks fantastic. I got a look at your central mechanism in there too. :-)
:applause:

access to mechanism: My advice is that they only need fiddling with about once every "coon's age" but that might be longer than your trailer will last and it might not be. So, make it with screws so that if and when need be you can dismantle it without too much hassle, but I don't think you need it to be readily accessable or anything like that. If you are worried about that then I'd say put a hatch on the center, with the whole cover unscrewable, but use it for something else too. Like lights on the outside center of your door, and upper inside of the door (for interior light) or something like that. Then that way you have a double excuse for having it and it's there for the access to the latch mechanism if you need it, or wiring to the lights... (Once again, what can you imagine for the door? Mirror on the inside? Running water through the door for the 2" flower box on the outside so the flowers grow up to cover up the latch/knob?
:twisted:

But I wouldn't make it a "permanent glue shut to the whole surface." It would be smart to have the removable panel, at least in the center over the mechanism, however you do it, easy swing open latched panel or lots of screws.

Um, being in a position to advise about cabinets in small tight areas, like walls... You could hinge and latch a mirror over the center, and have a removable say, piece of tarp or plastic to cover the mechanism at the back wall of the compartment to keep the oil and grease and stuff off of the real use of the compartment for things like pens and pencils and paper. (business cards for the "Bonnie Built" tiny travel trailer company. cards for contact info for those who want future advice on their own build. ;-)
:)

p.s. can I get you to add a second line in your "forum signature" to link to your picture gallery? that way I look over any part of it for quick reference, in a "new tab" while still keeping this tab open and just switch back and forth. I'm still trying to get organized with the albums here for myself and I'm having a heck of a time. I wanted my build as one, next build as two, odd info as three, designs for others as 4, ... etc... I'm not getting there though. (it is probably organized too easy for me to understand. :-S
Elf Cottage
Image

Build Documentary
https://sites.google.com/site/pchistorian/home/hobby/camping/elf-build
Build Forum
http://www.tnttt.com/viewtopic.php?t=48462
Build Album
http://www.tnttt.com/gallery/album.php?album_id=42

progress is progress. (don't look a gift "progress" in the mouth.)
User avatar
PcHistorian
The 300 Club
 
Posts: 354
Images: 198
Joined: Fri Dec 09, 2011 1:06 pm
Location: S.E. Michigan

Re: My Foamie Build--Updated 6 MAY 2012--Made saw and foam d

Postby GPW » Mon May 07, 2012 3:37 pm

Bonnie , be sure to use SS screws on your hinges , my cheap screws are showing signs of rust .. :o 
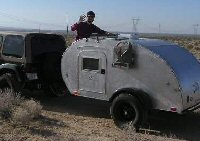
The Only problem so far ... but then I let mine sit outside all the time ... 8)
There’s no place like Foam !
User avatar
GPW
Gold Donating Member
 
Posts: 14920
Images: 546
Joined: Thu Feb 09, 2006 7:58 pm
Location: New Orleans

Re: My Foamie Build--Updated 9 May

Postby bonnie » Wed May 09, 2012 10:04 pm

Quick update. Had to go get glue and a 1/2" spade bit to get my trailer chores done tonight.

First, drilled the rod support holes in the door bottom supports. Then I clamped the two skins good sides together and drilled the door handle hole and sanded the bottom edge a bit smoother. I put aside one door skin. Then I screwed the latch mechanism in place; tilted the door up on end and clamped it to my work table. One of the latch rods was put in place and I locked the mechanism. Then I marked the rod on either side of the support pieces. In the locked positon, you can see the marking. While I may place some sort of runner between the two support pieces, it doesn't look like the rod will travel enough to come out.

Here's the :pictures:

The door and latch setup:
91812

The latch rod in the closed and open positions, respectively:

91810

91811

That's the upside, alas, I think my drill is expiring. :cry: Here's hoping it hangs in there a bit more...

And tonight's question is:

If I were to use a garage door bottom seal to finish the outside edge of the actual door, would GG or TBII be better? It says to nail them, but I'm thinking a killer glue would be better. Think weather seal between the two door skins and riding on the foam and wood pieces. The door seal would be applied to a finished (canvas or fiberglass tape) door edge and act as a weather strip and to hide the internals on the door. The final step in the door process would be to finish the skins with the cedar planks I was talking about.
Remember, the turtle won. :)
User avatar
bonnie
Donating Member
 
Posts: 1390
Images: 107
Joined: Sun Jul 24, 2011 4:14 pm
Location: Roxana, IL
Top

Re: My Foamie Build--Updated 9 May

Postby Papi » Wed May 09, 2012 11:55 pm

Your experience may vary, but I used GG to attach the seal to the bottom of my garagee door and it lasted about 2 weeks.
I dream of a day when a chicken can cross the road without having his motives questioned.
User avatar
Papi
Teardrop Master
 
Posts: 177
Images: 50
Joined: Thu Jul 29, 2010 9:07 am
Location: North GA
Top

Re: My Foamie Build--Updated 9 May

Postby bonnie » Thu May 10, 2012 5:38 am

Papi wrote:Your experience may vary, but I used GG to attach the seal to the bottom of my garagee door and it lasted about 2 weeks.


Well, that's good to know. I'll have to think about it some more. :thinking: :thinking:
Remember, the turtle won. :)
User avatar
bonnie
Donating Member
 
Posts: 1390
Images: 107
Joined: Sun Jul 24, 2011 4:14 pm
Location: Roxana, IL
Top

Re: My Foamie Build--Updated 9 May

Postby PcHistorian » Thu May 10, 2012 9:00 am

I'm using the thick "felt" like strips to seal my doors and used a staple gun. (one of the new sears models, where the staple goes in more than half way...) I've also used that to put rubber seal on a garage door.

Damn, Girl, you ROCK! That looks great & great progress!
Elf Cottage
Image

Build Documentary
https://sites.google.com/site/pchistorian/home/hobby/camping/elf-build
Build Forum
http://www.tnttt.com/viewtopic.php?t=48462
Build Album
http://www.tnttt.com/gallery/album.php?album_id=42

progress is progress. (don't look a gift "progress" in the mouth.)
User avatar
PcHistorian
The 300 Club
 
Posts: 354
Images: 198
Joined: Fri Dec 09, 2011 1:06 pm
Location: S.E. Michigan
Top

Re: My Foamie Build--Updated 9 May

Postby bonnie » Thu May 10, 2012 3:03 pm

Thanks all. Really enjoying the building process.
Remember, the turtle won. :)
User avatar
bonnie
Donating Member
 
Posts: 1390
Images: 107
Joined: Sun Jul 24, 2011 4:14 pm
Location: Roxana, IL
Top

Re: My Foamie Build--Updated 9 May

Postby wagondude » Thu May 10, 2012 7:24 pm

Look for 3M automotive weather strip adhesive at your local auto parts store. The garage door seal is similar to the stuff used on cars.

Bill
Bill

TnTTT ORIGIONAL 200A LANTERN CLUB
101137
User avatar
wagondude
1000 Club
1000 Club
 
Posts: 1535
Images: 35
Joined: Sun Jan 16, 2011 7:41 pm
Location: Land of the Jayhawks
Top

Re: My Foamie Build--Updated 9 May

Postby bonnie » Thu May 10, 2012 9:10 pm

Thanks all for the comments and kindness. :applause:

PcH, I am going to use the felt on the inside seal, I think. Looked like good stuff.

Wagondude, wow thanks for the tip. I'll tuck that away for when I get close to the last stages of the door build.

Not as much done tonight, the hinges didn't come today. :cry:

I did get the galley rod assembly for the top of the door glued together. No :pictures:

I had originally thought to build the door from the inside out. Now, with PcH's suggestion for a hatch of some sort to access the latch innerds, I had to sit for a bit and think through how I could make that happen. I have it planned.

I'm going to glue together 1/2 ply pieces to make the hinge supports for the door. 2" is hard to come by and I've got the ply laying about. Just need the hinges to show up, so I know how wide and long to make everything. I think for this part of the door, I'm going to sacrifice one of my space bags and vacumn the ply pieces together. Enough glue and pressure and they should stick forever. So do I need to wrap the pieces in wax paper to keep them from gluing to the vacumn bag? :thinking: :?

I've got almost all the door structure done. Pretty soon, I can start adding the foam. Can't wait. It's pretty darned exciting to see it starting to actually look and act like a door.
Remember, the turtle won. :)
User avatar
bonnie
Donating Member
 
Posts: 1390
Images: 107
Joined: Sun Jul 24, 2011 4:14 pm
Location: Roxana, IL
Top

Re: My Foamie Build--Updated 9 May

Postby PcHistorian » Fri May 11, 2012 1:59 pm

how about a mirror on the inside (people compartment of the trailer, side of the door) that has a hinge at the top so you can open it and access the inside of the door? Then you wouldn't really need a latch, maybe just some velcro at the bottom edge. AND you'd have a big mirror for yourself which would make the place look larger... (oh wait, inside door knob in the center of the door too. hmmm...)
Elf Cottage
Image

Build Documentary
https://sites.google.com/site/pchistorian/home/hobby/camping/elf-build
Build Forum
http://www.tnttt.com/viewtopic.php?t=48462
Build Album
http://www.tnttt.com/gallery/album.php?album_id=42

progress is progress. (don't look a gift "progress" in the mouth.)
User avatar
PcHistorian
The 300 Club
 
Posts: 354
Images: 198
Joined: Fri Dec 09, 2011 1:06 pm
Location: S.E. Michigan
Top

Re: My Foamie Build--Updated 9 May

Postby bonnie » Fri May 11, 2012 2:30 pm

PcHistorian wrote:how about a mirror on the inside (people compartment of the trailer, side of the door) that has a hinge at the top so you can open it and access the inside of the door? Then you wouldn't really need a latch, maybe just some velcro at the bottom edge. AND you'd have a big mirror for yourself which would make the place look larger... (oh wait, inside door knob in the center of the door too. hmmm...)


the knob will help hold the access hatch in place, but no mirror.
:)
Remember, the turtle won. :)
User avatar
bonnie
Donating Member
 
Posts: 1390
Images: 107
Joined: Sun Jul 24, 2011 4:14 pm
Location: Roxana, IL
Top

Re: My Foamie Build--Updated 12 May

Postby bonnie » Sat May 12, 2012 8:07 pm

So, how's your Saturday? Mine is fantastic. The hinges showed up. :)

This may be the longest door build in history, but I'm pretty sure it will stay together and shut going down the road. :D :D

Today, I added the framing to make the access hatch for the galley mechanism. I also finished the latch run for the top of the door. Part of this process was breaking out the cedar wall slats I had tucked away and measuring to make sure one width would work to close the galley mech area. It did. It does. It will!

Here's the :pictures: It shows not only the wonderful pavers used for weight, but my new hinge and my diltz ruler. It's a quilter's ruler, but it just as handy for building.

91881

Next up is the deadbolt frame for the door. It will be finished like a box and then glued into the edge of the foam in the door. The face plate for the deadbolt will need bent a bit to match the curve. Should keep it secure, yet easy to remove if needed sometime down the road. I will be adding enough wood to make the key hole access wood instead of foam.

91883

I then cut up some 1/2" ply into 4.25" strips to glue together to make the hinge supports in the door. I'll be gluing these down to the outside door skin and the facing the rest with foam. That should give 1.5" for the hinges to be fastened to, once the door is fully skinned. To test something we had discussed in the big thread, I used a space bag and vacu sealed the strips instead of clamping them. Seems to have worked.

before:
91885

after:
91886

Of course, no report or build would be 'real' without a sawdust shot:
Don't mind the dead plant.
91884

And finally, a shot of the cedar strip sitting against the door skin. The cedar is a bit long for the door. I'll trim them all, once everything is glued down

91882

Whew! That's a lot of work for so few steps. I did one other thing today, I now have the bed frame for the inside of the trailer. A neighbor up the street from me was having a yard sale and I walked up to take a look. Low and behold she had the same bed frame I'm using with my own queen size bed. They are made really well and are configured to make two different sizes of bed. The one she had was a twin/full. Got it for $15. The neat thing is I can make it benches during the day; add the cross pieces and have a full bed at night, or just push the two benches together and have a twin bed. That's a lot of functionality and they weigh very little--no more than 20 pounds. 8) 8)

In the picture you can see it in bench form, with the end wall placed at the head of the bed:

91890
Remember, the turtle won. :)
User avatar
bonnie
Donating Member
 
Posts: 1390
Images: 107
Joined: Sun Jul 24, 2011 4:14 pm
Location: Roxana, IL
Top

Re: My Foamie Build--Updated 12 May

Postby PcHistorian » Sun May 13, 2012 8:53 am

You know you should save the saw dust, stuff it into used coin rollers (shapped) where the ends fold over, then drop them into a double boiler with the inside can full of scraps of old used candles, to make fire starters when you take them out and let them cool. (nothing like good ole, American made sawdust.)

Great work. I might have added some weights on top of the vacuum bag, books. I wonder if the vacuum of the bags helped the glue to dry quicker?

I guess I hadn't realize how wide you were planning to make the trailer inside. (Or is my sense of scale off for that last picture of the bed/bench? Oh wait, chair to the right, Ah, right, so that's the scale. :-)

A tiltie-foamie, with a Hobbit door. :-)
Elf Cottage
Image

Build Documentary
https://sites.google.com/site/pchistorian/home/hobby/camping/elf-build
Build Forum
http://www.tnttt.com/viewtopic.php?t=48462
Build Album
http://www.tnttt.com/gallery/album.php?album_id=42

progress is progress. (don't look a gift "progress" in the mouth.)
User avatar
PcHistorian
The 300 Club
 
Posts: 354
Images: 198
Joined: Fri Dec 09, 2011 1:06 pm
Location: S.E. Michigan
Top

Re: My Foamie Build--Updated 12 May

Postby bonnie » Sun May 13, 2012 9:17 am

PcHistorian wrote:You know you should save the saw dust, stuff it into used coin rollers (shapped) where the ends fold over, then drop them into a double boiler with the inside can full of scraps of old used candles, to make fire starters when you take them out and let them cool. (nothing like good ole, American made sawdust.)

What a great idea. I think I'll give that a go.

Great work. I might have added some weights on top of the vacuum bag, books. I wonder if the vacuum of the bags helped the glue to dry quicker?

Lack of oxygen meant slow dry time, but I took them out and they dried overnight. It really worked well. I think I have a pin hole leak on the right side of the bag. I went on and glued them to the door. :)

I guess I hadn't realize how wide you were planning to make the trailer inside. (Or is my sense of scale off for that last picture of the bed/bench? Oh wait, chair to the right, Ah, right, so that's the scale. :-)

5x8 overall trailer width and length. The bed looks really long in the picture. With sofa cushions (6"?) I can just reach the top of the foam wall while lying down. The bed's length is 74" and I will have about 18" or so for a cupboard or something at the end.

A tiltie-foamie, with a Hobbit door. :-)
Remember, the turtle won. :)
User avatar
bonnie
Donating Member
 
Posts: 1390
Images: 107
Joined: Sun Jul 24, 2011 4:14 pm
Location: Roxana, IL
Top

Re: My Foamie Build--Updated 12 May

Postby PcHistorian » Sun May 13, 2012 3:10 pm

Oh and my first look at the hinges. wow, that's going to look great. I can see why you had to do an extensive search. Can't wait to see the final door hung.
Elf Cottage
Image

Build Documentary
https://sites.google.com/site/pchistorian/home/hobby/camping/elf-build
Build Forum
http://www.tnttt.com/viewtopic.php?t=48462
Build Album
http://www.tnttt.com/gallery/album.php?album_id=42

progress is progress. (don't look a gift "progress" in the mouth.)
User avatar
PcHistorian
The 300 Club
 
Posts: 354
Images: 198
Joined: Fri Dec 09, 2011 1:06 pm
Location: S.E. Michigan
Top

PreviousNext

Return to Foamies

Who is online

Users browsing this forum: DrAlvarez and 10 guests