The Poet Creek Express - Foamie Hybrid

Canvas covered foamies (Thrifty Alternatives...)

Moderator: eaglesdare

Re: The Poet Creek Express - Foamie Hybrid

Postby KCStudly » Thu Jul 11, 2013 9:00 am

If you were to level the trailer fore and aft, and side to side, you could just measure once and use a spirit level on your template!

On the other hand, sometimes the best thing to do is to just stand back and look. Regardless of the measurements, if it doesn't look right it isn't. Glad you had an easy fix.

For my little bumps and blemishes the old "rub your hand along it" trick tells quite a bit about what the surface is doing. My problem was that the differences were greater that the thickness of the top ply, so I couldn't sand thru it to get it level. Either I had some glue pile up under the edge, or more likely the butt edges of the panels glued themselves together before I had got the panels all snug down 100/ct. (I did put a generous helping of glue around all of the edges before butting up, trying to be sure that the joints would be tight.)

Yup, we're learning something new everyday. I can go home now? :lol:
Last edited by KCStudly on Thu Jul 11, 2013 10:03 am, edited 1 time in total.
KC
My Build: The Poet Creek Express Hybrid Foamie

Poet Creek Or Bust
Engineering the TLAR way - "That Looks About Right"
TnTTT ORIGINAL 200A LANTERN CLUB = "The 200A Gang"
Green Lantern Corpsmen
User avatar
KCStudly
Donating Member
 
Posts: 9617
Images: 8169
Joined: Mon Feb 06, 2012 10:18 pm
Location: Southeastern CT, USA

Re: The Poet Creek Express - Foamie Hybrid

Postby Mary C » Thu Jul 11, 2013 9:24 am

cute toes!!! Really I really like that lighted jig saw, my next one will have that!! The Light! The Light!!! KC you are really doing a craftsman job I am so glad you have the place to do that kind of work. My back porch is my work station and it has an old 20 year old, old, out of shape picnic table. and not level but it is all I have. Some day I will have a work shop with lots of lights and lots of heat and air conditioning. but Mostly I envy your patience. I have reached the time in life for some reason I want it now. You are doing such a great job!!

Mary C. :)
User avatar
Mary C
1000 Club
1000 Club
 
Posts: 1776
Images: 473
Joined: Mon Oct 15, 2012 6:29 pm
Location: Waco, Georgia

Re: The Poet Creek Express - Foamie Hybrid

Postby KCStudly » Thu Jul 11, 2013 10:18 am

Thank you Mary. I do so much appreciate the kind words. If it were not for my friend Karl I would not have the luxury of the fabulous work shop, that is for sure!

I'll have to talk to him about the lack of insulation, heat and AC!!! :lol: :lol: :lol:

When he comes up to visit me, about the time his head breaches the floor level he says, "uuugh" when he reaches that hot thermal layer. He asked the other day, "do you think running an AC (window unit) would do anything other than burn electricity?", and I said, "nope". I have a window unit framed into the back wall of my uninsulated 2-car garage and it can't compete with the lack of insulation.

(That unit was a thrifty score. My across the street neighbor had set it out to the curb. He had dropped it out of his first floor window, twisted the shell and condenser frame enough to rack the frame into the fan. When he plugged it in it shorted out the cord and fried his wall outlet. After he let me have it, I took it apart, used my cutoff wheel on the die grinder to clearance the frame a little for the fan, put a new cord on it and it works fine! He looked on in amazement that I was able to resurrect it. ...maybe I've told this story already? Brain cells are getting grayer every day.)
KC
My Build: The Poet Creek Express Hybrid Foamie

Poet Creek Or Bust
Engineering the TLAR way - "That Looks About Right"
TnTTT ORIGINAL 200A LANTERN CLUB = "The 200A Gang"
Green Lantern Corpsmen
User avatar
KCStudly
Donating Member
 
Posts: 9617
Images: 8169
Joined: Mon Feb 06, 2012 10:18 pm
Location: Southeastern CT, USA
Top

Re: The Poet Creek Express - Foamie Hybrid

Postby GPW » Thu Jul 11, 2013 3:04 pm

KC, I’m always Amazed by what people toss out ... good stuff that just needs a little adjusting ... :o
There’s no place like Foam !
User avatar
GPW
Gold Donating Member
 
Posts: 14912
Images: 546
Joined: Thu Feb 09, 2006 7:58 pm
Location: New Orleans
Top

Re: The Poet Creek Express - Foamie Hybrid

Postby KCStudly » Thu Jul 11, 2013 10:10 pm

Got two more hrs of productive work in.

Started by securing the bulkhead wall to the edge of the floor/table for orientation. Clamped a 2x4 chunk down as a cleat then clamped the bulkhead to that.
Image
This allowed me to work on the “top” edge using gravity to help trickle glue down behind the rear panel and “reglue” the edges that had lifted during the bad vacuum bag event.
Image
Image
Image

While that was setting up I loaded the new 1/8 inch round over bit into the router and set the depth using a scrap block as a guide.
Image

While I was browsing around the mall waiting on the new tires for the Ford (last week?) I noticed that the Craftsman router bits were $8 less than the Ho-de-po Freud bits and I had a coupon from buying the tires. Quality looked to be the same. So I decided to take the Foamie Father’s (GPW’s) advice (…and Karl’s) and round over the bottom edge of the floor so that the canvas will wrap under neatly. I hope 1/8 inch is enough cuz’ I don’t want to open the joint between the bottom of the wall and the radius on the frame rail tube any more than necessary. {Hey Geep, what do you think? 1/8th inch enough for #12 (8.5 oz) duck?} I did get a 3/16 round over bit, too, and already have a 1/4, but don’t want to run into the staples along the edge of the floor.

Here is the rounded over edge, bottom side up. I did the front and both sides, but not the rear where there is no canvas over the galley floor at the rear.
Image

Moved the bulkhead over to the out feed table, rolled to another side, and “reglued” another section, freeing up the floor so that I could complete the round over operation.
Image

Since the round over operation breached the glue seal on the underside of the floor, I went back around with some watered down TB2 and chased around the edge twice brushing it on (wiping the excess that wanted to drizzle onto the floor or bead up with a paper shop towel). Followed this directly with a full strength coat where I paid particular attention to the front edge of the floor (even though the whole thing will be wrapped in canvas and paint later).
Image

All in all, progress is progress!
KC
My Build: The Poet Creek Express Hybrid Foamie

Poet Creek Or Bust
Engineering the TLAR way - "That Looks About Right"
TnTTT ORIGINAL 200A LANTERN CLUB = "The 200A Gang"
Green Lantern Corpsmen
User avatar
KCStudly
Donating Member
 
Posts: 9617
Images: 8169
Joined: Mon Feb 06, 2012 10:18 pm
Location: Southeastern CT, USA
Top

Re: The Poet Creek Express - Foamie Hybrid

Postby kudzu » Thu Jul 11, 2013 10:33 pm

Great progress, KC, especially considering the heat & humidity you're working in.

KCStudly wrote:Image

So after that last set of pictures it FINALLY dawned on me what KC stands for. You're the King of Clamps. :R
kudzu
Donating Member
 
Posts: 439
Images: 16
Joined: Wed Mar 27, 2013 3:20 pm
Top

Re: The Poet Creek Express - Foamie Hybrid

Postby KCStudly » Thu Jul 11, 2013 10:47 pm

Thanks Kudzu. Tonight was still humid, but not nearly as hot. It was overcast most of the day with a big (short) downpour mid morning.

King of Clamps? :thinking: Good one :lol: , but not hardly; I am merely an amateur. ;)
KC
My Build: The Poet Creek Express Hybrid Foamie

Poet Creek Or Bust
Engineering the TLAR way - "That Looks About Right"
TnTTT ORIGINAL 200A LANTERN CLUB = "The 200A Gang"
Green Lantern Corpsmen
User avatar
KCStudly
Donating Member
 
Posts: 9617
Images: 8169
Joined: Mon Feb 06, 2012 10:18 pm
Location: Southeastern CT, USA
Top

Re: The Poet Creek Express - Foamie Hybrid

Postby GPW » Fri Jul 12, 2013 8:34 am

OK, how about the Prime Administer of Clamps ... :thumbsup: 8) :lol:

Looking SUPER as usual KC !!!!! ...those details ... :?
There’s no place like Foam !
User avatar
GPW
Gold Donating Member
 
Posts: 14912
Images: 546
Joined: Thu Feb 09, 2006 7:58 pm
Location: New Orleans
Top

Re: The Poet Creek Express - Foamie Hybrid

Postby eaglesdare » Fri Jul 12, 2013 8:47 am

Another vote for King of Clamps! :lol:
Louella
May the foam be with you.
User avatar
eaglesdare
Donating Member
 
Posts: 3168
Images: 13
Joined: Tue Aug 26, 2008 7:06 pm
Top

Re: The Poet Creek Express - Foamie Hybrid

Postby Mary C » Sat Jul 13, 2013 8:45 am

Yep Yep, King of Clamps !!!!!!!! 8) Got my vote too!!!

Mary C. :)
User avatar
Mary C
1000 Club
1000 Club
 
Posts: 1776
Images: 473
Joined: Mon Oct 15, 2012 6:29 pm
Location: Waco, Georgia
Top

Re: The Poet Creek Express - Foamie Hybrid

Postby CampsALot » Sun Jul 14, 2013 5:33 pm

ClampsALot ??

:lol: :lol: :lol:

Warren
Foam Away From Home
106754106755
Start of Build Thread viewtopic.php?f=50&t=55752
New Build Thread viewtopic.php?f=55&t=56489
User avatar
CampsALot
Teardrop Advisor
 
Posts: 79
Images: 74
Joined: Sun May 12, 2013 12:16 pm
Location: Nova Scotia, Canada
Top

Re: The Poet Creek Express - Foamie Hybrid

Postby KCStudly » Sun Jul 14, 2013 7:18 pm

I'll accept the moniker, even though I believe that I have very few clamps compared to the masters.

Campsalot, I see the connection, King of clamps and Sir Camps A Lot, but no. I would like to remedy that, tho. Haven't been camping since before getting married; maybe 16 years? Maybe I can "convert" the wife. She does like the outdoors and walking in nature, but she is pretty serious about indoor plumbing. :roll: :thinking: :frightened:

Stay tuned, I need to get caught up on the weekend exploits.
KC
My Build: The Poet Creek Express Hybrid Foamie

Poet Creek Or Bust
Engineering the TLAR way - "That Looks About Right"
TnTTT ORIGINAL 200A LANTERN CLUB = "The 200A Gang"
Green Lantern Corpsmen
User avatar
KCStudly
Donating Member
 
Posts: 9617
Images: 8169
Joined: Mon Feb 06, 2012 10:18 pm
Location: Southeastern CT, USA
Top

Re: The Poet Creek Express - Foamie Hybrid

Postby KCStudly » Sun Jul 14, 2013 11:38 pm

Well I’ve been burning the candle at both ends and have kind of lost track of the days.

Wish I could sleep like my Muggie (Maggie).
Image
Note the road kill skunk toy (cat nip long since depleted) under her arm… and the dark spot on the hassock where she drooled previously.

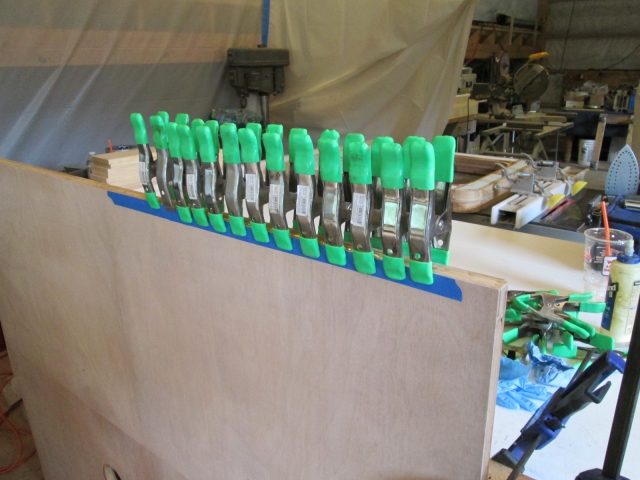
Last of the bulkhead skin regluing (Hodder method), King of Clamps.
Image

I am pretty sure that I have decided to screw the side walls into the bulkhead from the outside in thru the bulkhead blocking, rather than have Kregg pockets showing thru the back of the bulkhead wall. This means that I will have to fill the foam where the screws go and apply the canvas after. Won’t have to fuss with the extra canvas during erection, at the compromise of applying the canvas in the vertical (but GPW makes that look easy, so…).

However, for the joint between the bulkhead and floor I don’t really want to screw up from the bottom of the floor and risk the sealing issues that might present themselves. So I decided to have Kregg pocket screw holes along the bottom rear of the bulkhead down into the floor.
Image
Image

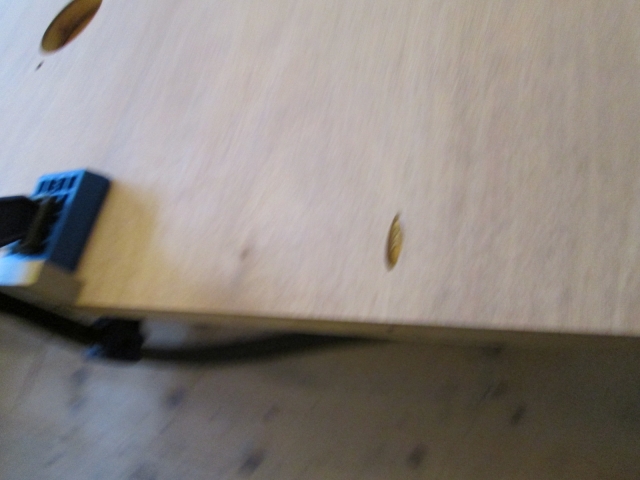
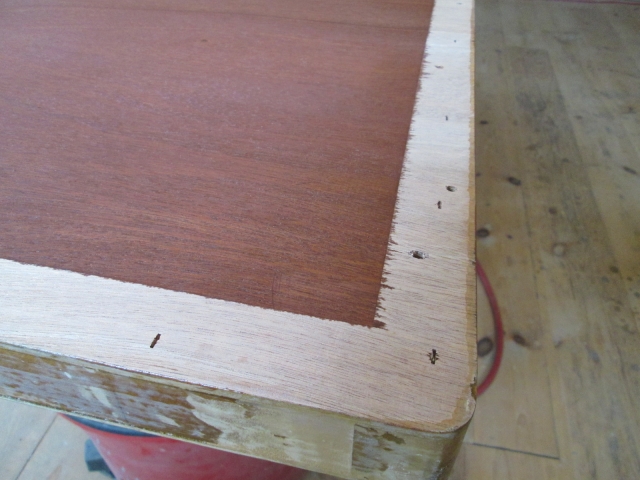
Three holes, one through each vertical member in the field of the bulkhead frame. At least one of these will be hidden by the under cabinet divider for the cooler bay; maybe a second if I decide to add the other divider. If not, this and the middle one can be filled with a plug and stained to try and hide them. They are at the bottom under the counter, so will not be obvious either way.

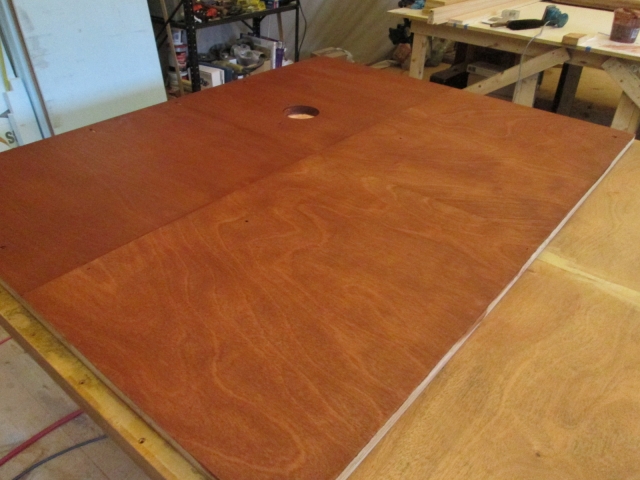
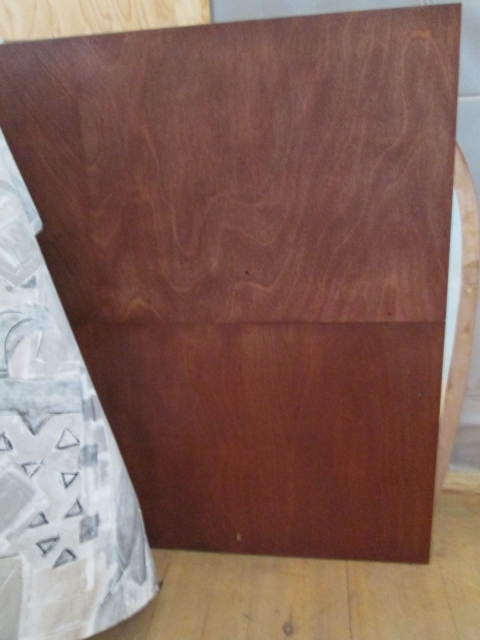
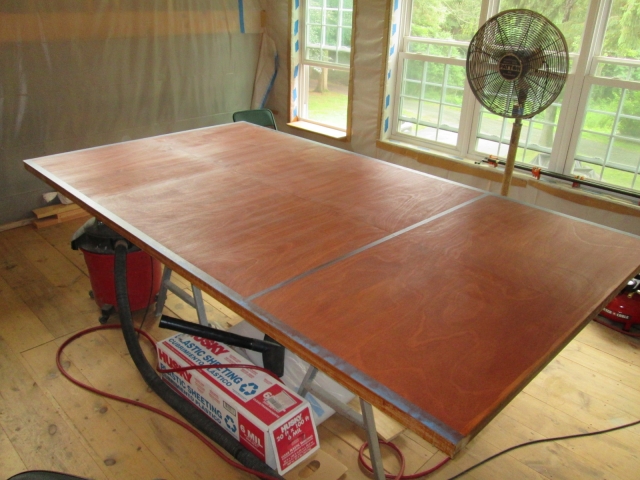
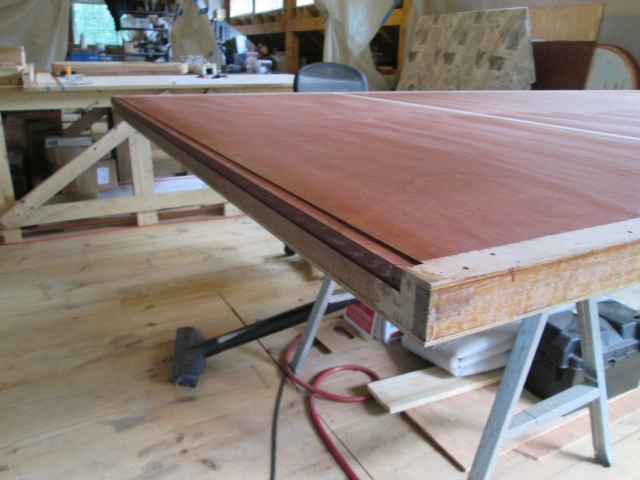
Then I stained the rear face of the bulkhead. The colors are not true in the pics. In the flash they look orange, and without they look more brown, but w/o the flash you can see the grain better.
Image
Image
Image
Image

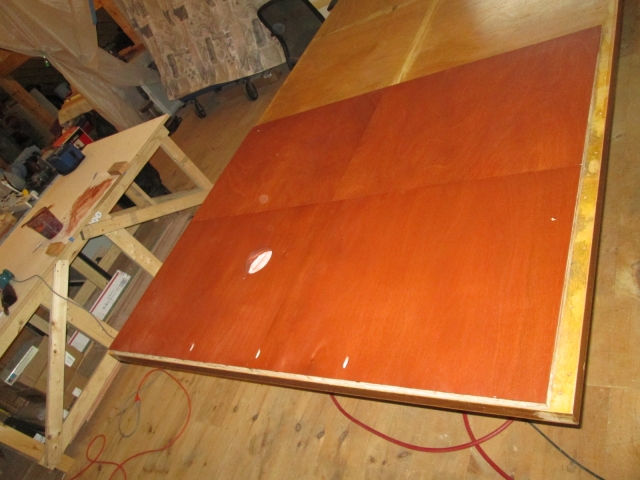
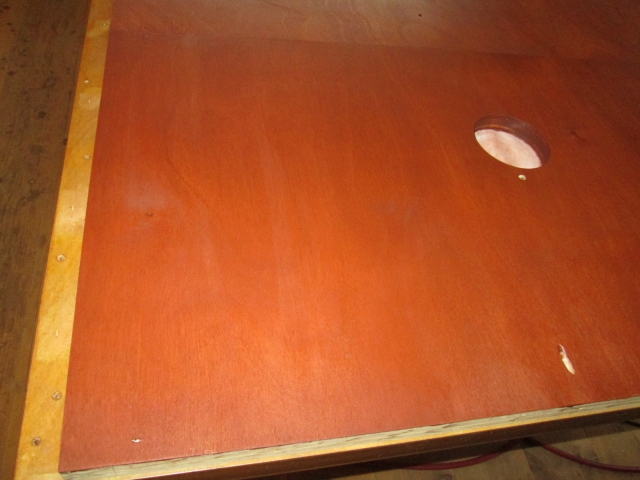
The upper two panels were naturally a lighter color than the lower two; more pink and paler, whereas the lower two were darker, more brown. So the stain ended up lighter on top (lower right in pic).
Image
Image
Image

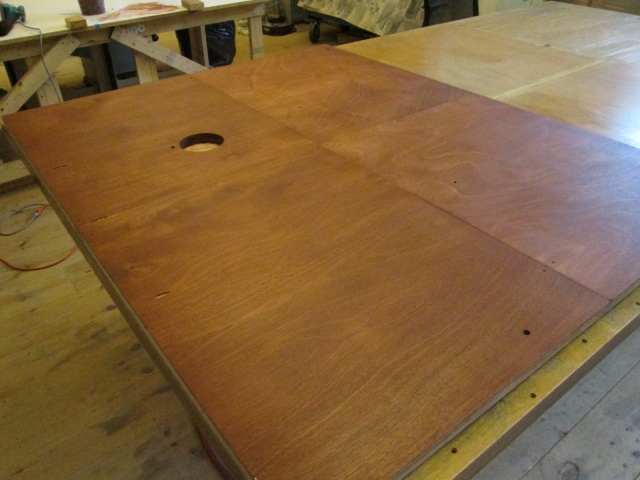
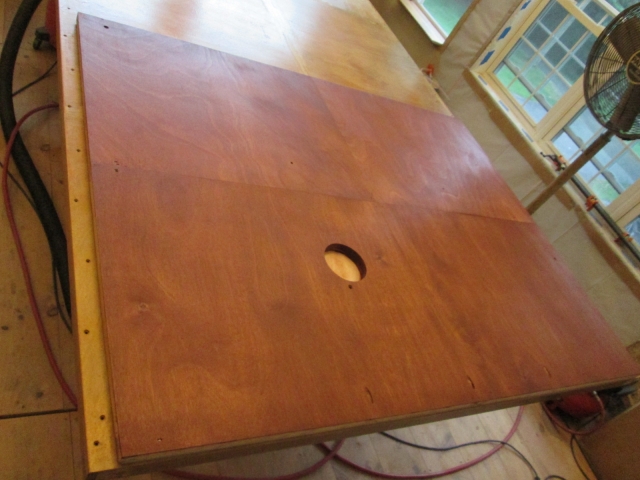
So I rubbed some more stain on just the top and made it a bit more even.
Image

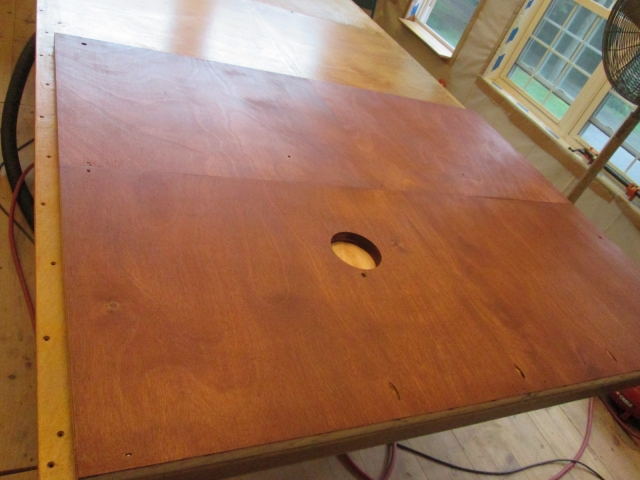
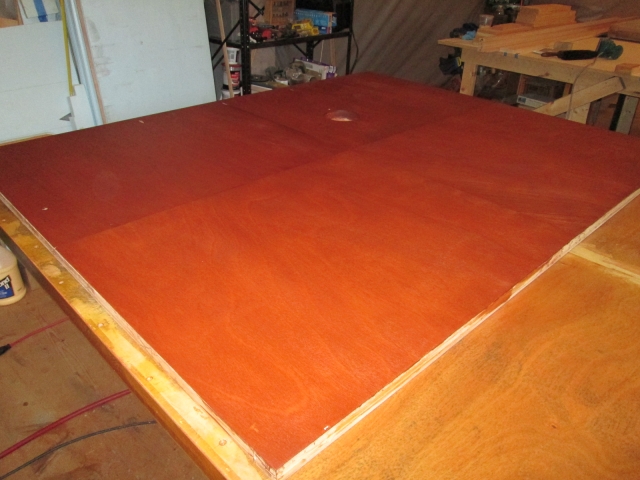
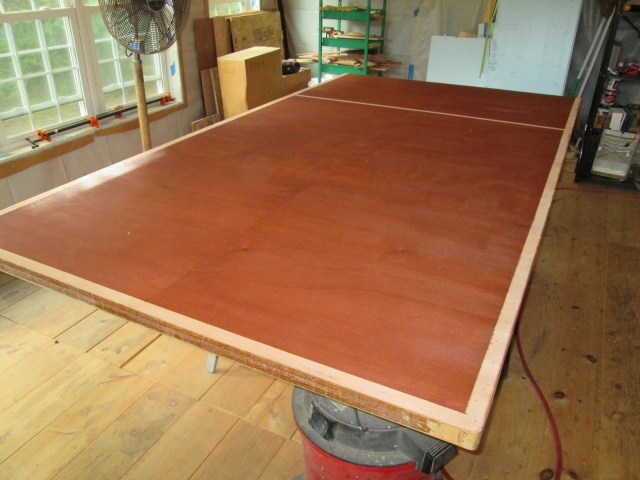
Still lighter on top (to left in this pic).
Image

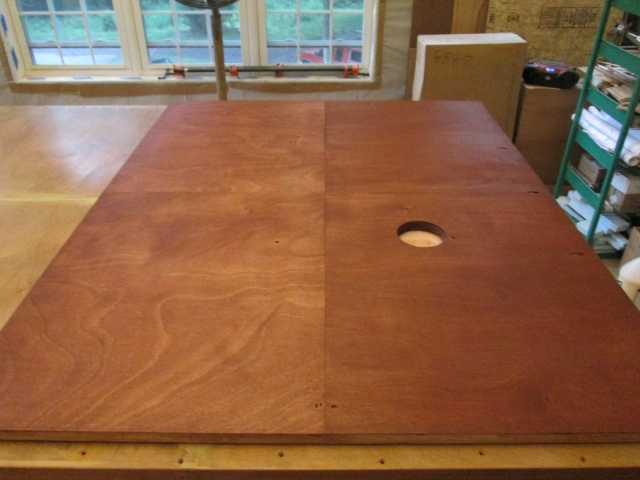
In the vertical in natural light it doesn’t look too bad. With the parting line slightly above the counter top level it might look like a back splash, or be hidden in the shadow of the upper shelves.
Image

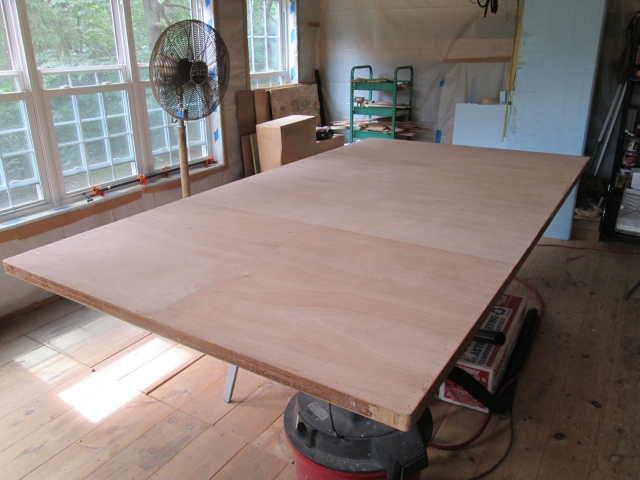
That must have been the 3 hrs I put in on Friday. On Saturday I spent a bunch of time sanding the underside of the floor where the canvas will get glued under, and along the edges.

I was a little surprised that the last coat of TB2 (sealing the rounded over bottom edge) seemed to peel up easily from the previous layers. All future overcoats will get a scuff coat first. Spent quite a bit of time scuffing off the flaky layer and re applying another full coat on the radius.

Once that was done I managed to flip the floor over by myself, tho had to struggle a bit when it wanted to crash into the fan. :?
Image

Spent a bunch of time commiserating with Karl, casually hand sanding with 220 grit and the small block and discussing the options for a hard edge along the rear of the galley floor. Then, after he beat feet back to the comfort of his air conditioned house, I ran the RO sander with 320 grit.

Next I masked off the line under the bulkhead (.94 tape on 1.125 wide bulkhead) and under the walls (1.5 tape on about 1.875 thick walls).
Image
Image
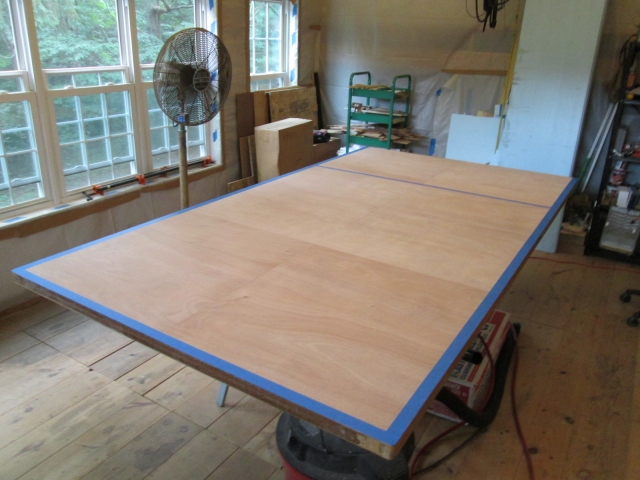
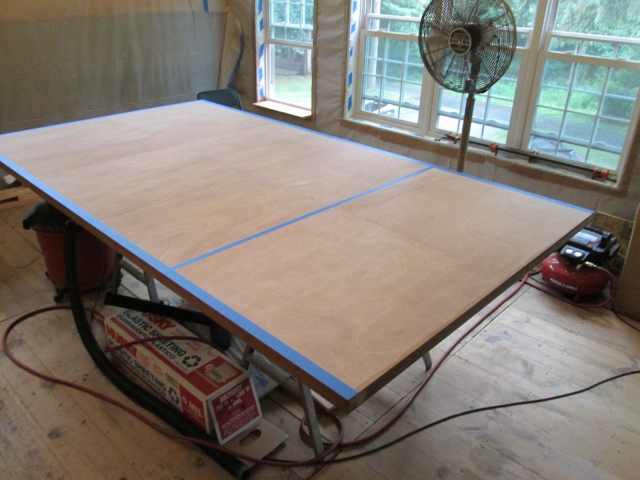
This will ensure that the stain runs all the way under the walls, but will leave plenty of raw wood for the construction adhesive to grab.

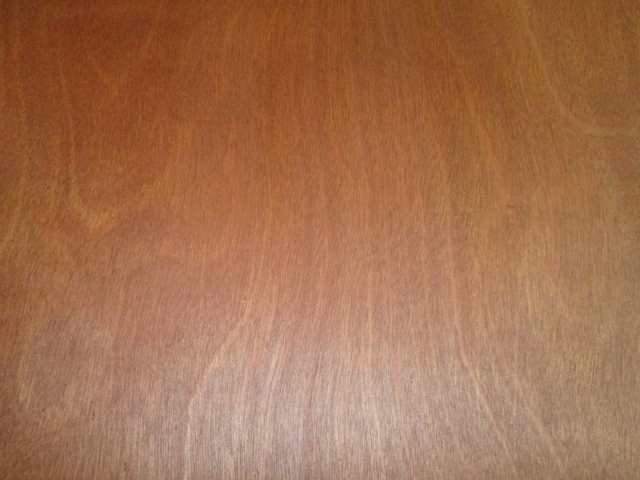
Next I rubbed on the stain (the first pic is a pretty good color rendering).
Image
Image
Image

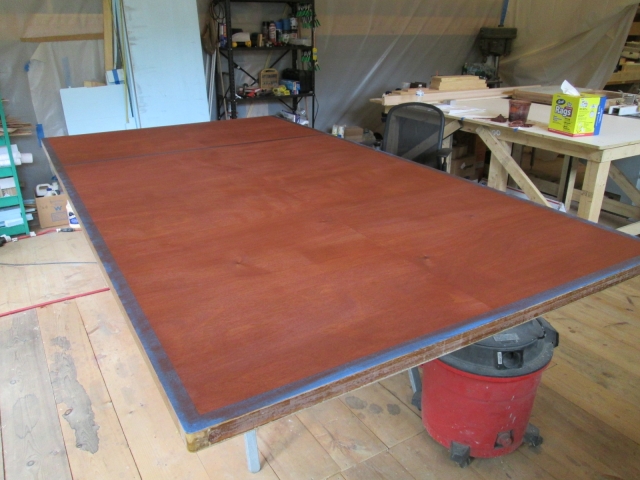
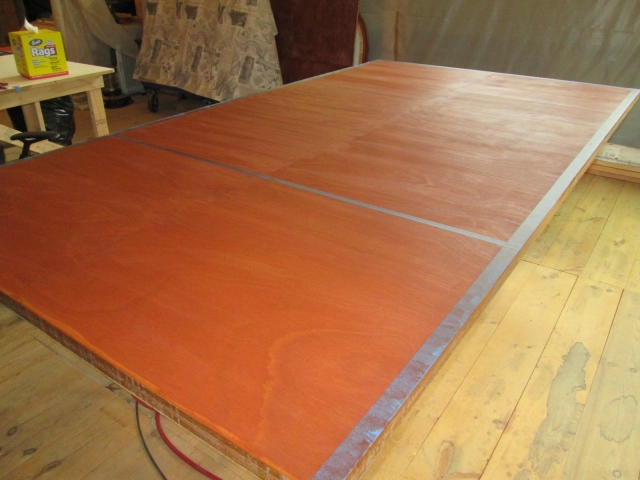
Rubbed on it some more to get the color even, and then some more to remove any excess stain.
Image

And removed the masking tape.
Image
Image

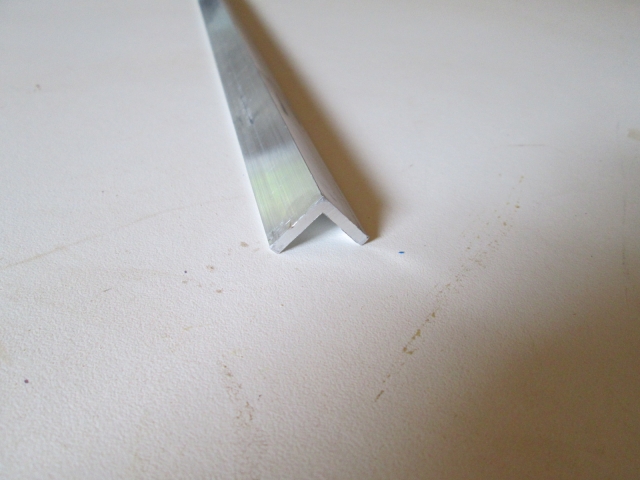
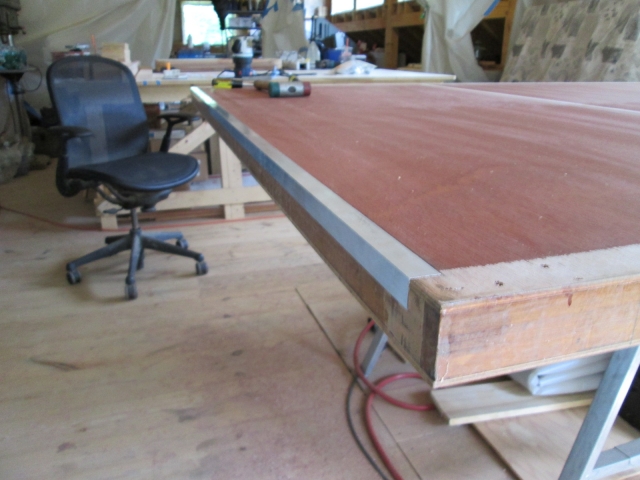
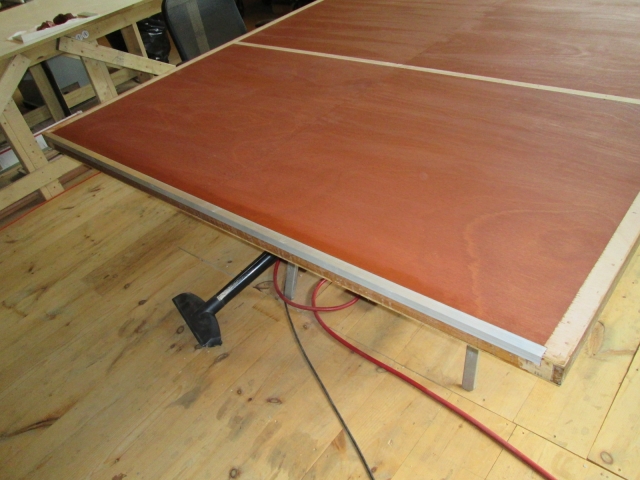
I wanted a hard aluminum edge on the rear corner of the galley floor to keep plastic totes or whatever from wearing away at the edge of the plywood top skin. However, I had not designed this in and had not allowed for the thickness of this in my seal arrangement.

I didn’t want it to sit proud of the top surface (at least not by much) because I didn’t want things to hang up on it when sliding out; and I had not allowed for any additional thickness between the rear of the floor and the hatch seal. It would have been nice to use a 2x2x1/8 thk aluminum angle shape, but the floor is only 1-7/8 thk (plus a skotch) and the 3/16 ply deck only overlaps the rear subframe 2x by 1-1/2 inch; wouldn’t want to weaken the skin joint too much by routing it away. Thought about using the 2x2x1/8 and ripping it to 1/2x1-7/8, but that seemed complicated having to cut 1/8 inch off the back of the floor and notch the 1/2 inch top leg in from under the walls. Karl seems to be wanting me to wrap this up, so all of his suggestions lately have been that which cut corners (“sanding? Heck just slap the stain on… it will be hidden under the mattress… hard edge? How many times do you plan on using this thing anyway? It will be fine, just poly it.”) I think it is his state of mind after dealing with the nut cases on the high end bronze railing and the subsequent add on work that they have given him. His customers have no sense of reality of what quality really is because they just throw money at things. So long as the spec sheet says they are getting top quality materials and the architect sells them a concept on a print, they don’t really know what quality is. Don’t get me wrong, Karl does first rate work, but he can get frustrated by idiots just the same as you and me.

So after sleeping on it and browsing my options while standing at the metal rack at Ho-de-po this morning (Sunday), I decided to let in a 3/4 x 3/4 x 1/8 aluminum angle. That way I could use the rabbeting router bit on the rear edge of the floor without having to clear off the whole thing, and I could cut the relief in the top surface w/o cutting away all of the join between the top skin and the rear subframe member.

Here is the angle section for the hard edge.
Image

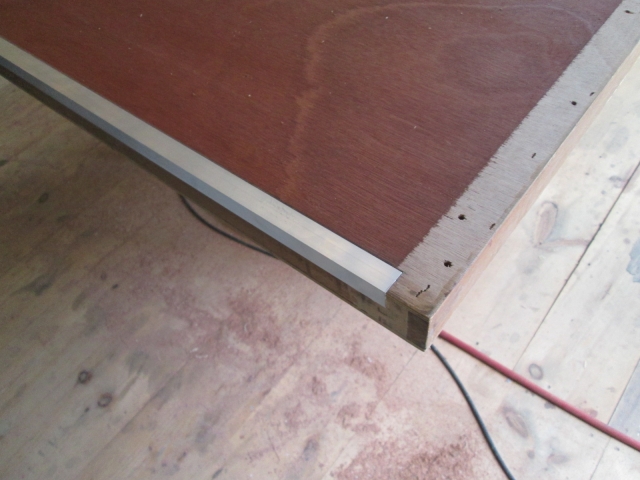
Here I have laid out the cut in pencil. The aluminum will extend under the walls by just a little, about 1/4 inch, will be flush to the rear of the floor, and just a tad above flush with the top surface of the floor.
Image

Next I set the router up with the rabbeting bit. It is a 1-1/4 diameter cutter, 1/2 inch tall, and accepts bottom bearings of various diameters to set the amount of offset that the cutter will take. By using a 1 inch bearing along the rear of the floor I can chase a 1/8 inch deep cut however far down the rear edge of the floor I want merely by changing the depth of the router plunge setting.

In order to help support the router I clamped some 2x2’s onto the underside of the floor, used two shims equal the floor plys, and a 1x2 on edge to act as an outrigger supporting the overhanging portion of the router shoe.
Image
Image

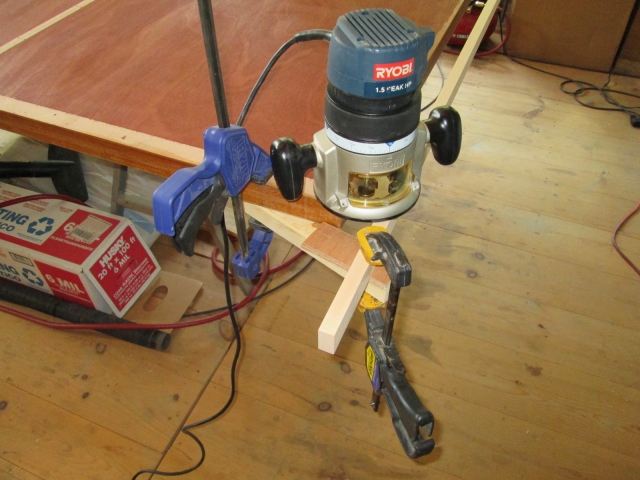
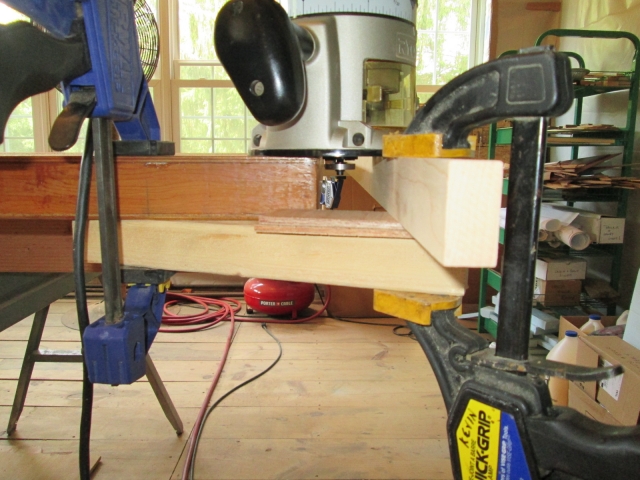
This made it ridiculously simple to run the router across the rear edge of the floor, taking an 1/8 of an inch per pass without having to worry about tipping the router. The stability also helped me concentrate on the start and end of the cut, minimizing the amount of hand chiseling that I would have to do to remove the cutter radius.

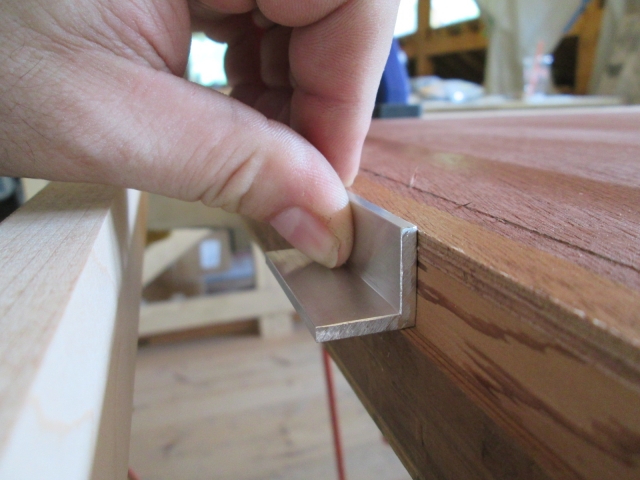
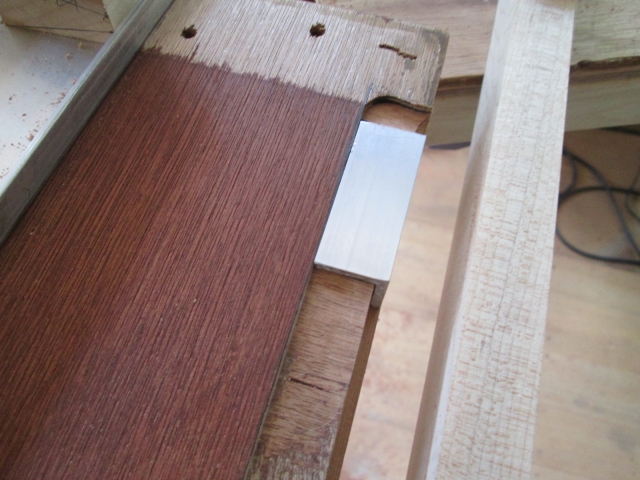
I made several passes until I was able to fine tune the final pass so that the top surface of the aluminum would be just a whisker above the finished floor. Here I have cut a small piece of the angle aluminum to use as a gauge to check fit. You can also see the score line that I made for the top cut (to follow) using the extruded aluminum straight edge.
Image
Image

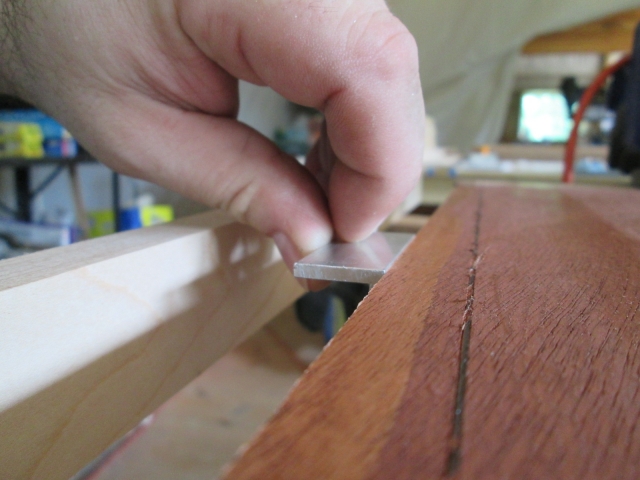
The lead in to the cut will have to be chiseled out by hand.
Image

Next I moved the outrigger in a bit, set the straight edge to guide the top cut, and set the router up for the straight cutting bit. Here I have run the router into the top surface of the floor and cleared out a section to check my setup.
Image
Looked pretty good so I went ahead and made the cut.

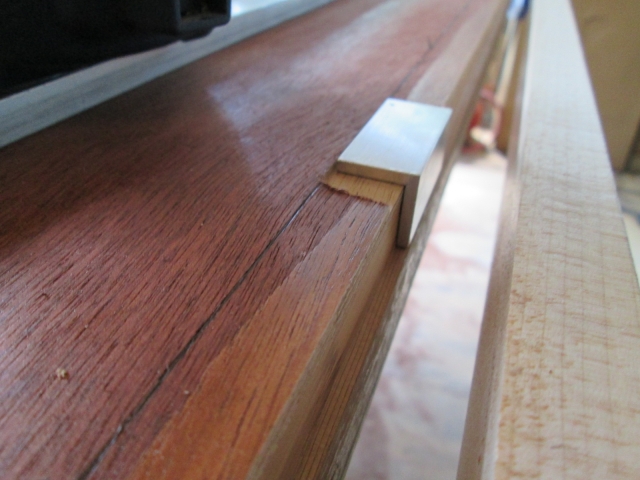
Fit nice and tight at the street side.
Image

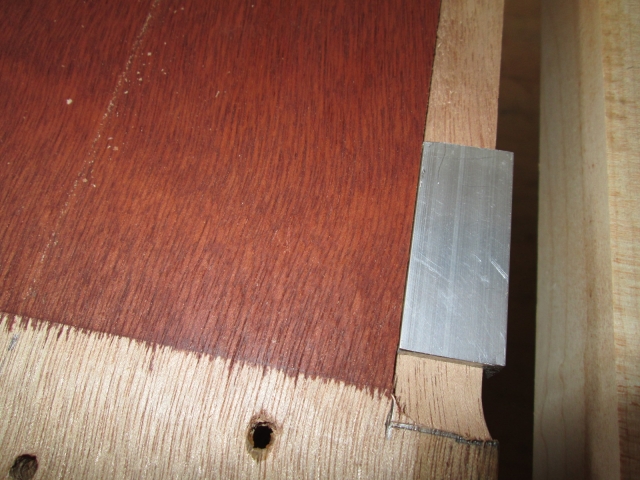
And nice and tight at the curb side.
Image

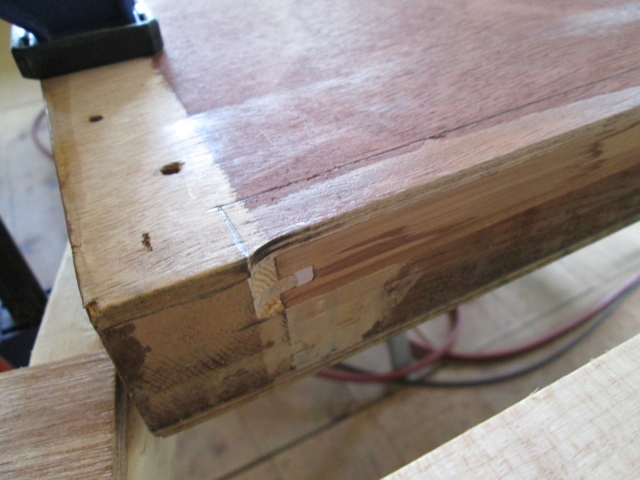
But in the middle there was a 1/16 plus overcut.
Image
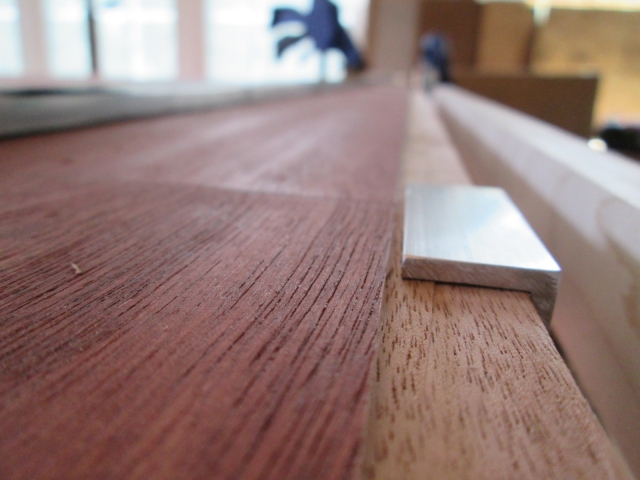
The straight edge guide must have bowed in the middle. Drat. :thumbdown: :roll: :?

Not too bad, but not perfect. I can stain the cut edge and bed the trim in caulk. The trim will get counter sunk holes to accept flat head screws alternating in spacing along the top and rear edge. Might even have it powder coated, schmaybe.

Chiseled out the street side.
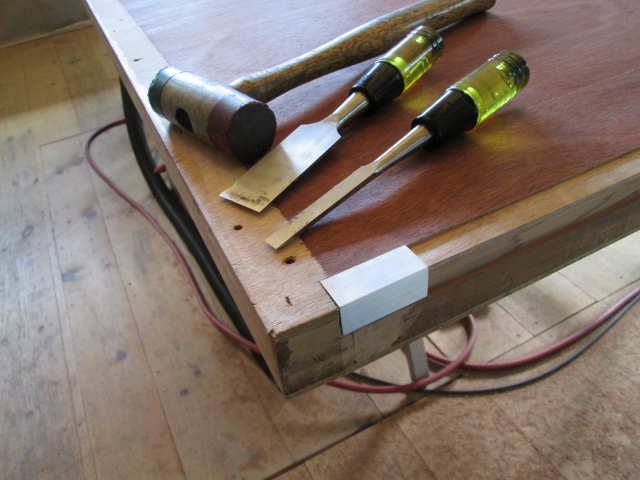
Image

And the curb side.
Image

And cut the shape to fit.
Image
Image

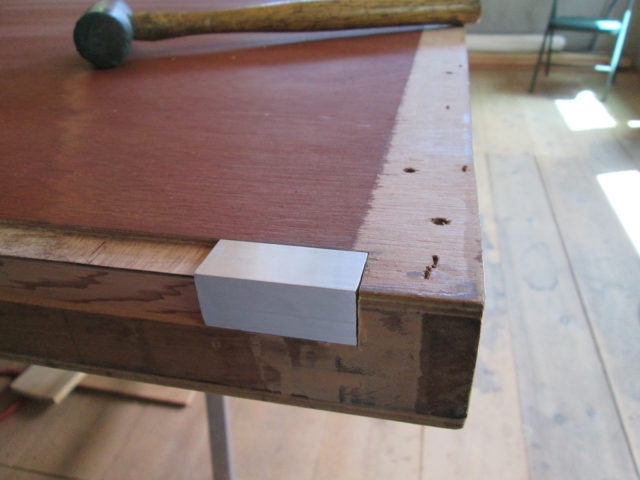
To help hide the little gap in the middle I masked off the fresh cut…
Image

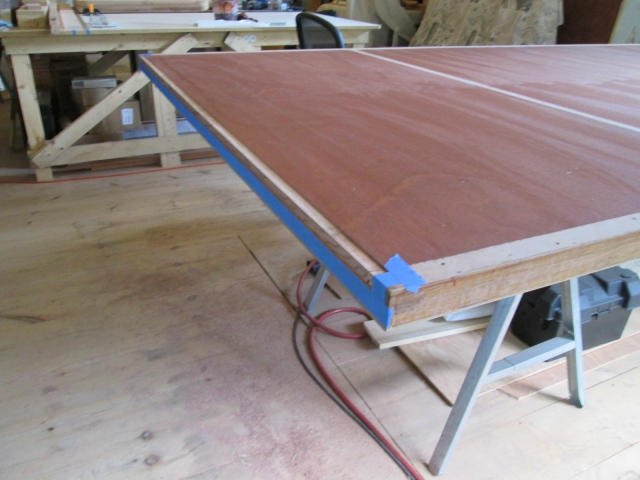
… and stained the exposed edges.
Image
Image

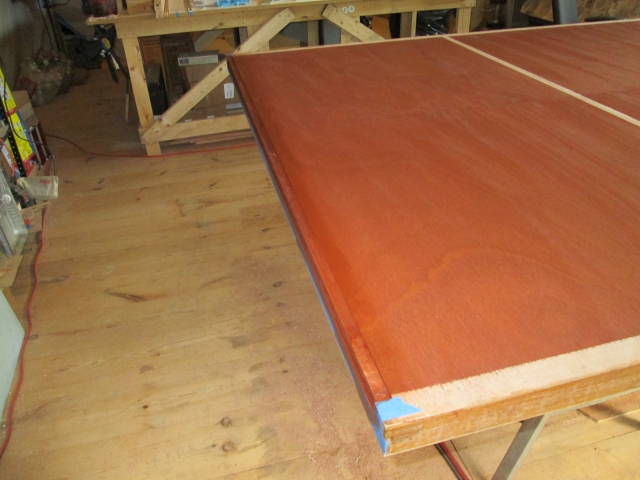
A couple more looks at the trim just dry fit.
Image
Image
Image

That was only about 3 hrs on Sunday, but the loft temp had got to 90 deg F and humidity was over 60/ct. I was drenched and fading fast so went for cold :beer: and AC :fan: .
KC
My Build: The Poet Creek Express Hybrid Foamie

Poet Creek Or Bust
Engineering the TLAR way - "That Looks About Right"
TnTTT ORIGINAL 200A LANTERN CLUB = "The 200A Gang"
Green Lantern Corpsmen
User avatar
KCStudly
Donating Member
 
Posts: 9617
Images: 8169
Joined: Mon Feb 06, 2012 10:18 pm
Location: Southeastern CT, USA
Top

Re: The Poet Creek Express - Foamie Hybrid

Postby Heifer Boy » Mon Jul 15, 2013 5:10 am

I did the exposed front edge of my camper in the same way but was routing out 1/2" ply so had no issues with possibly removing too much. I used a straight cutter though and had to be really careful with the guide and depth gauge. A dado cutter would be nice.

I have two heavy drawer slides running over the edge on UHMWPE slides and it holds up very well. It's also the bottom edge of my back door so has the seal pressing against it. I have I just screwed the angle down with some countersunk head SS screws spaced so the slides wouldn't catch and it means I can remove and replace the angle in the future if required. It's a nice detail too.

Good job :thumbsup:

HB
Heifer Boy
Teardrop Builder
 
Posts: 38
Joined: Mon Feb 28, 2011 1:51 am
Location: Woolamia, NSW
Top

Re: The Poet Creek Express - Foamie Hybrid

Postby KCStudly » Mon Jul 15, 2013 8:41 am

Thanks HB.
:thumbsup:
KC
My Build: The Poet Creek Express Hybrid Foamie

Poet Creek Or Bust
Engineering the TLAR way - "That Looks About Right"
TnTTT ORIGINAL 200A LANTERN CLUB = "The 200A Gang"
Green Lantern Corpsmen
User avatar
KCStudly
Donating Member
 
Posts: 9617
Images: 8169
Joined: Mon Feb 06, 2012 10:18 pm
Location: Southeastern CT, USA
Top

PreviousNext

Return to Foamies

Who is online

Users browsing this forum: No registered users and 6 guests