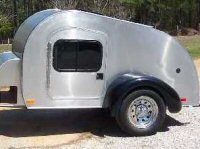
My Foamie Build--Updated --Jul 3 I'm eating an elephant

Canvas covered foamies (Thrifty Alternatives...)

Moderator: eaglesdare

Re: My Foamie Build--Updated 15 May

Postby bonnie » Wed May 16, 2012 6:48 am

Should really have more coffee before I post. :) Norm, I think you've already answered my question about what to cover with. Still wondering if bondo would work. Too bad I'don't have any of the Foam Factory's stuff; bet it would work, too.

GPW, that's really an interesting idea. What's a little hard work, eh? I've spent more time on this door than I thought I would. Want it right and sturdy. :)

Oh, has anyone used interior paint leftovers for the canvas application? I have tons of it, but no exterior paint. I would prime and paint over it of course. And, do you think I could use upholstery material instead of canvas? I have a ton from a project I never finished. Maybe enough to do the entire trailer! Just thinkin outloud. Input, I need input. (best robot voice).

Thanks everyone!
Remember, the turtle won. :)
User avatar
bonnie
Donating Member
 
Posts: 1390
Images: 107
Joined: Sun Jul 24, 2011 4:14 pm
Location: Roxana, IL

Re: My Foamie Build--Updated 15 May

Postby GPW » Wed May 16, 2012 7:15 am

Interior paint.... why take the chance ... :thinking:

Upholstery fabric .... some of that is More substantial than canvas , and a lot more “decorative “... If I had it, I’d Use it !!! :thumbsup: 8)
Bonnie on old Kustom vans we built , we’d use upholstery fabric , and a thin 1/2” padding underneath , all attached to a thin paneling and then screwed to the walls ... Looked Good , outlasted the Vans ... Cozy!!! :thumbsup:
There’s no place like Foam !
User avatar
GPW
Gold Donating Member
 
Posts: 14920
Images: 546
Joined: Thu Feb 09, 2006 7:58 pm
Location: New Orleans

Re: My Foamie Build--Updated 15 May

Postby KCStudly » Wed May 16, 2012 2:51 pm

On the circumference, I'm with Norm. I would not leave this raw or just canvas and glue. A little more tricky now, than if you had planed and added before glue up, but still doable.

If in your shoes, I would consider the following;
1. Cut a strip of thin plywood (one long strip or a few shorter ones) to go all the way around.
2, Rabbet both long edges of this strip leaving about 1/8 thckness x the thickness of you door skins.
3. Kerf the plywood strip acrosswise many times, thru all but that same 1/8 inch thickness.
4. If you have a router you could set the depth and route out the foam all the way around so that it is recessed by the depthe of the kerfed portion of the ply strip(s).
If you do not have a router its a little trickier, but you could set a utility knife to the depth, score all around and cross way, then use a wood chisel to gouge out the foam as evenly as possible.
5. Test fit the strip(s) and make any cut outs and adjustments.
6. Use GG or other expanding glue to glue the strips in place, holding with a few brads or staples. (You will need more clamps, but you're going to need those anyway, right?)

There's probably an easier way, but that's what I came up with. Is your wall made, framed, cut out yet (sorry i don't have time right now to go back and look)? If not, just adjust the door frame opening to accomodate the little extra thickness.
Last edited by KCStudly on Wed May 16, 2012 10:30 pm, edited 2 times in total.
KC
My Build: The Poet Creek Express Hybrid Foamie

Poet Creek Or Bust
Engineering the TLAR way - "That Looks About Right"
TnTTT ORIGINAL 200A LANTERN CLUB = "The 200A Gang"
Green Lantern Corpsmen
User avatar
KCStudly
Donating Member
 
Posts: 9640
Images: 8169
Joined: Mon Feb 06, 2012 10:18 pm
Location: Southeastern CT, USA
Top

Re: My Foamie Build--Updated 15 May

Postby Wobbly Wheels » Wed May 16, 2012 4:19 pm

There's probably an easier way...

Just throwing this out there, but multiple laminations of unglued wooden edge banding (like you'd use around the edge of a tabletop) might work. Secure one end to the foam and keep wrapping it around the circumference of the door, gluing it as you go and clamping with packing tape or a ratchet strap once you've built up your desired thickness.
Image

Aluminum roll flashing might work too.

BTW, Bondo will indeed melt the foam.
User avatar
Wobbly Wheels
Donating Member
 
Posts: 1080
Joined: Tue Mar 15, 2011 9:51 am
Top

Re: My Foamie Build--Updated 15 May

Postby bonnie » Wed May 16, 2012 8:46 pm

Great suggestions! I'm off thinking about things. That's -- :beautiful: and dangerous. :)
Remember, the turtle won. :)
User avatar
bonnie
Donating Member
 
Posts: 1390
Images: 107
Joined: Sun Jul 24, 2011 4:14 pm
Location: Roxana, IL
Top

Re: My Foamie Build--Updated 15 May

Postby mezmo » Thu May 17, 2012 2:20 am

Hi bonnie,

Just a few thoughts based on the comments/suggestions
for your consideration:

1- Bolt the hinges through the door for the extra strength It'll give.
Use a fender washer on the back to spread the forces and a lock
washer a/o nut. You can probably find/make something to cover
that up on the inside that would match/blend in with your door facing [cedar is it?].
or just do that to the plywood and put a corresponding hole on the
underneath of the cladding to mate up with and thus cover the washer and nut.
2- I'd use exterior paint. Maybe you could find some color mix rejects at the
paint store/counter. They're supposed to be quite cheap if available.
3- Using the aluminum flashing in one or a couple strips/thicknesses around
the door may be the easiest way without adding too much extra diameter length/dimension.
It is easy to cut with an utility knife believe it or not - no need to
use metal shears. Determine the circumference and the depth/width/
door thickness needed [@2&1/2in if used with two 1/4in skins and 2in
foam?]. Mark with a fine point sharpie that measurement along the
determined circumference length needed and connect the measurement
points with a single thin line to delineate the @2&1/2in strip width
needed. Alternately, if you have an adjustable square, you can set it
to the @2&1/2in width length and use the thin sharpie point in the
end detent and mark the width of the circumference strip length by
running the sliding/adjustable edge along the factory edge. Using a
metal framing square edge, or something similar, [an 18in x 24in
framing square works well] held just on the thin sharpie line you've drawn
on the flashing, score the flashing with a new sharp blade in a utility
knife, holding it perpendicular to the flashing surface and against the
metal square edge [as a guide] using moderate pressure about 3-4 times,
and proceed along the total length until done. The piece should easily
and cleanly snap off. I always wear leather work gloves and score it nice
and steadily, not forcing it. It is not too time consuming or very difficult
to do. Then glue that to the outside edge/end of the plywood and foam sandwich.
[It just occurred to me; that you may want to have the width of the circumference
strip be just shy of the total door thickness - say 1/16th or 1/8thin less - to
avoid having it wider than the door thickness and thus interfering with the cladding.]
I Googled glues and found this:
http://www.liquidnails.com/products/pro ... oductId=78 .
It says it works with metal, foam and wood. I have no experience with
it but it'd be a start perhaps. Maybe you could do a small experimental
piece and make a small cross section like the edge of the door from scraps
and see if you can glue a small piece of aluminum flashing like you would be doing
on the door. The one thing I would do, though, would be to try and ensure the glue
is spread evenly on the surface/surfaces - [however it says to apply it
- on one or both surfaces as it instructs], maybe by using a notched trowel
[I have seen small plastic notched applicators by the glues/mastics in some
stores] or even a plastic knife perhaps.

Not trying to make your life with this too difficult or complicated! Ha! Just thought the
above may be a method that would work. The glue may also possibly be able to
attach the circumference weather strip seal for you too. One tube shouldn't be too expensive
to get to do a little experimenting with I'd hope.

'Continued good luck, you're doing great so far.

Cheers,
Norm/mezmo
If you have a house - you have a hobby.
User avatar
mezmo
1000 Club
1000 Club
 
Posts: 1817
Images: 194
Joined: Fri Jan 01, 2010 4:11 am
Location: Columbia, SC
Top

Re: My Foamie Build--Updated 15 May

Postby bonnie » Thu May 17, 2012 6:40 am

Norm, thank you for the tutorial on cutting the flashing. I spent some quality time at the big box store last night. I thought the alumimun would be better than the copper, though that copper is purty -- they had both. :) Since I'm waiting to cut out the entry shape in the end wall until the door is complete, I can make adjustments. I figure it will be easier to do that way. One thing your post got me thinking about is whether I should also brace the inside edge of the door frame with aluminum, too. Sort of like a door jam?

Bolts though the door it is.

The big box store had 5 gallons of mis-tinted exterior paint/primer for $75. It was a weird white/grey color. Was tempted. No $$. Something else will show up, later, when I need it.

Once I get all the bills paid, we'll see if I can sqeak out some more trailer funds. :) Gotta love it. I am really excited to have this part of the build so close to being done.

Have a great day, everyone!
Remember, the turtle won. :)
User avatar
bonnie
Donating Member
 
Posts: 1390
Images: 107
Joined: Sun Jul 24, 2011 4:14 pm
Location: Roxana, IL
Top

Re: My Foamie Build--Updated 15 May

Postby GPW » Thu May 17, 2012 7:26 am

Bonnie , just a tip ... you Can “haggle” with them about the price of that paint ... Good for at least another 10% off... They can’t sell it , you want it ... Make a Deal !!! ( I tried it many times ... it works !!! ) :thumbsup: Thrifty eh !!! 8)

Ps. with a light “off” color you can always mix in a small can of straight color to tint it in any direction you want ...just make sure you use the same kind/brand of paint ... ;)
There’s no place like Foam !
User avatar
GPW
Gold Donating Member
 
Posts: 14920
Images: 546
Joined: Thu Feb 09, 2006 7:58 pm
Location: New Orleans
Top

Re: My Foamie Build--Updated 15 May

Postby PcHistorian » Fri May 18, 2012 9:22 am

well I do love the idea of a copper strip around the outer edge of the door, I just can't decide about put in on the door edge and fold over to the front and back, or put it on the front and back as separate pieces and fold over to the rim. You can always carve out notches in the foam to slip in pieces of 1x2 and then nail screw the rim skins to them but make is so the sides of the pieces are flush with the door edge and attach the door edge that way. I know they do make stuff for like table edges that match laminations for table tops and counters, but like you say they might not be wide enough. You could always do two strips and overlap or cut off and then glass over. I suppose you could do the edge first then make cuts around the edge as you lay the overlap onto the front and back of the door. Glue and/or tack down then clear glass/epoxy the door over and that down with it. (paint and/or stain the door surfaces before this stage, so there is no tell tale along the copper's edge. And before you screw down the hinge.

I was going to say, "You know. looking at that 'door layout' picture I realize you are forgetting something. A door knocker. And, if you do the copper edge then the door knocker should match."

As for the door bracing, (now that you have the two halves glued together.) you could have cut out circles through the foam and gotten like 1" dowels to slip in and then screw front to back, where the hinges screws go in the door. I think your 1" reinforced inner panel should be fine.

I REALLY think you need to examine this other guy's build closely.
viewtopic.php?f=55&t=44522&p=935618#p935618
this guy is doing the whole thing out of foam, NO SANDWICH! Then just glassing and painting the exterior. Of course my opinion is, if you are going to skin in wood, don't paint it, poly it. There's stuff on that page about that too. (although being the owner of the "Elf Cottage" I would not be opposed to a nice Elf (hunter green) light wood stain, THEN poly. I think the copper is my favorite so far for side/rim/edge of the door. The rest of the foamie you can just foam and then glass, and paint. This guy is doing something less expensive than bondo, I think. (unless you have lots of free bondo. hard to beat free.) He is using fiberglass cloth and clear epoxy resin. So clear the cloth becomes transparent. So even your wood grain would come through with a really tough epoxy (w/cloth) shield. (rocks, etc on the road)) You'd have to see it to believe it. I see it and still don't believe it, but there it is in black and white and green and blue and pink ...

@GPW, yes, others may follow but like Columbus, he (She) was first. (I was the first to say, "I'm next", neener, neener, LOL) That Hobbit, could get to be a habit. And link please on the faux wood. I've tried it but not much luck. Too faux and not enough wood. LOL "Distance was in its favor."
Elf Cottage
Image

Build Documentary
https://sites.google.com/site/pchistorian/home/hobby/camping/elf-build
Build Forum
http://www.tnttt.com/viewtopic.php?t=48462
Build Album
http://www.tnttt.com/gallery/album.php?album_id=42

progress is progress. (don't look a gift "progress" in the mouth.)
User avatar
PcHistorian
The 300 Club
 
Posts: 354
Images: 198
Joined: Fri Dec 09, 2011 1:06 pm
Location: S.E. Michigan
Top

Re: My Foamie Build--Updated 15 May

Postby GPW » Fri May 18, 2012 11:49 am

PC, it’s as Easy as this ... http://www.youtube.com/watch?v=MGMNc9BZqK8 Then you can paint in panel lines ,cracks , splits, spots, nail and wormholes , wear patterns around the handle , rust stains from the hinges , etc. etc. ...... or even subtle shadings to indicate the slightly more greenish tint to the bottom of the door ... all done in layers of glazes, paint thinned with clear medium (the glue) ... all how far you want to take it ... :thinking:
Warning !!! :o Wood graining can become Addictive!!! I’ve mentioned that before ... :frightened:
There’s no place like Foam !
User avatar
GPW
Gold Donating Member
 
Posts: 14920
Images: 546
Joined: Thu Feb 09, 2006 7:58 pm
Location: New Orleans
Top

Re: My Foamie Build--Updated 15 May

Postby Wobbly Wheels » Sat May 19, 2012 3:14 am

GPW wrote:Then you can paint in panel lines ,cracks , splits, spots, nail and wormholes , wear patterns around the handle , rust stains from the hinges , etc.


Pop culture influence alert: When I read that, I automatically thought about the 'space/time continuum'....

PcHistorian wrote:I REALLY think you need to examine this other guy's build closely.
viewtopic.php?f=55&t=44522&p=935618#p935618


That's my build but I would suggest no one examine anything I do very closely :lol: - appreciate the boost PcH !
Yup, I'm using glass inside and out without any wood sheathing and if anyone's interested then I'm happy to share what I've figured out so far. Check the thread and shoot me any questions.

Bonnie, I hear you on the build progress. I'm getting a bit stalled right now because my budget isn't aligning with my objectives at the moment....
User avatar
Wobbly Wheels
Donating Member
 
Posts: 1080
Joined: Tue Mar 15, 2011 9:51 am
Top

Re: My Foamie Build--Updated 15 May

Postby PcHistorian » Sun May 27, 2012 12:26 pm

How you coming Bonnie? (boy even if you didn't finish your build, you could always put that door up on the wall as a piece of art. :-)
Anytime to get any more progress...

-----------------
@wobbly, I just think you are doing some really great stuff there, and it makes sense for us to watch what you are doing. (even if it's just to learn from your mistakes. although I don't see any, I'll with-hold judgement until you are finished.) We can learn while we are doing if I watch what you are doing.)
Elf Cottage
Image

Build Documentary
https://sites.google.com/site/pchistorian/home/hobby/camping/elf-build
Build Forum
http://www.tnttt.com/viewtopic.php?t=48462
Build Album
http://www.tnttt.com/gallery/album.php?album_id=42

progress is progress. (don't look a gift "progress" in the mouth.)
User avatar
PcHistorian
The 300 Club
 
Posts: 354
Images: 198
Joined: Fri Dec 09, 2011 1:06 pm
Location: S.E. Michigan
Top

Re: My Foamie Build--Updated 15 May

Postby bonnie » Sun May 27, 2012 10:50 pm

Just some minor stuff. Found cotter pins small enough to hold the door rods secure and I also found keyhole covers! The next step for me is to get the cedar glued up and the edge finished. Gotta finish the build --- can't show off the door, otherwise. :yes: Did end up cleaning the garage and getting things a bit more organized. I hope to work a bit tomorrow. The heat's not helping, either.
Remember, the turtle won. :)
User avatar
bonnie
Donating Member
 
Posts: 1390
Images: 107
Joined: Sun Jul 24, 2011 4:14 pm
Location: Roxana, IL
Top

Re: My Foamie Build--Updated 28 May

Postby bonnie » Tue May 29, 2012 6:55 am

Snuck out to the newly clean garage and started laying out the cedar for the door. Which of course meant sawdust on the floor. :lol: I'm working on the inside face right now. Too hot to do much, but the weather is cooling down here, so I'm going to try and do a bit more tonight. Will post pics then too. :)

Quick question: If I'm putting in a floating wood floor over the sub floor can I sandwich just 1/4" ply and 1/2 foam and 1/4" ply? The actual flooring is thick (5/8") and heavy -- don't think it's going to bend anywhere. What do ya think? I will probably use some sort of frame for the outside of the floor for attachment purposes.
Remember, the turtle won. :)
User avatar
bonnie
Donating Member
 
Posts: 1390
Images: 107
Joined: Sun Jul 24, 2011 4:14 pm
Location: Roxana, IL
Top

Re: My Foamie Build--Updated 28 May

Postby wagondude » Tue May 29, 2012 10:22 am

As long as the ply is fully bonded to both sides of the foam, you should be OK. You could do a test piece to be sure.

Bill
Bill

TnTTT ORIGIONAL 200A LANTERN CLUB
101137
User avatar
wagondude
1000 Club
1000 Club
 
Posts: 1535
Images: 35
Joined: Sun Jan 16, 2011 7:41 pm
Location: Land of the Jayhawks
Top

PreviousNext

Return to Foamies

Who is online

Users browsing this forum: No registered users and 5 guests