The Poet Creek Express - Foamie Hybrid

Canvas covered foamies (Thrifty Alternatives...)

Moderator: eaglesdare

Re: The Poet Creek Express - Foamie Hybrid

Postby GPW » Wed Nov 20, 2013 12:39 pm

Cold Snap !!! :frightened: It was COLD here this morning too ... 54F ... BRRR!!!!

Did you check the fuel lines ? We had a pin hole in a fuel line on my trimmer that spit gas like that ( and ran like ****) ... drove me Crazy till I replaced all the lines ... The new Yellow stuff is much nicer than the old black tubing ...
There’s no place like Foam !
User avatar
GPW
Gold Donating Member
 
Posts: 14920
Images: 546
Joined: Thu Feb 09, 2006 7:58 pm
Location: New Orleans

Re: The Poet Creek Express - Foamie Hybrid

Postby KCStudly » Wed Nov 20, 2013 2:18 pm

Fuel lines all look good and it runs fine. I can see where it is coming out; looks like a sintered bronze breather vent in the bottom of the carburetor. I am assuming that this is the air intake for an internal emulsion tube, or maybe just a bowl vent that runs up an internal tube to the top of the bowl. It only leaks a drop when it is moved, as if splashing up into this (supposed) tube and running down and out.

Move it once and you get a drop. Let it sit for hours with no leak. Move it again and another drop. Bopping around town in the back of my car it probably spit out several each day, but I never found a wet spot because it was never a steady drip/leak.
KC
My Build: The Poet Creek Express Hybrid Foamie

Poet Creek Or Bust
Engineering the TLAR way - "That Looks About Right"
TnTTT ORIGINAL 200A LANTERN CLUB = "The 200A Gang"
Green Lantern Corpsmen
User avatar
KCStudly
Donating Member
 
Posts: 9640
Images: 8169
Joined: Mon Feb 06, 2012 10:18 pm
Location: Southeastern CT, USA

Re: The Poet Creek Express - Foamie Hybrid

Postby RandyG » Wed Nov 20, 2013 4:43 pm

Could you perhaps cover the leaking spot with a small balloon or ziplock bag? Just for transport... wait till it cools before putting a balloon on it... ya know it may melt on a hot piece of metal, and then stink. Not sayin from experience... :roll:
Randy
Aircraft fabricator, novice carpenter, electrical apprentice, audio engineer dropout.
Build thread - http://www.tnttt.com/viewtopic.php?f=50&t=54126
User avatar
RandyG
500 Club
 
Posts: 695
Images: 115
Joined: Thu May 10, 2012 6:52 pm
Top

Re: The Poet Creek Express - Foamie Hybrid

Postby KCStudly » Wed Nov 20, 2013 7:35 pm

Thanks for the suggestion, Randy, but I don't think it will be necessary now that I have it at home.

The problem with the Jeep was two fold. There is a whacky looking device in the evap system near the gas tank, some sort of breather device, that was leaking sending trouble codes and causing the check engine light to come on periodically. They used what he called "a smoke test" to flood the evap system a check for leaks. Where the smoke comes out is your leak. :roll: Not something one can do in their driveway, now is it?

The other issue was rough running. Turned out to be the spark plugs. One of them had lost about half of the insulator cone around the center electrode. Here's hoping it was harmlessly pulverized by the piston and made it past the exhaust valve without doing any damage.

Soooo, long story short I may get to work on the camper tomorrow.
Last edited by KCStudly on Wed Nov 20, 2013 9:58 pm, edited 1 time in total.
KC
My Build: The Poet Creek Express Hybrid Foamie

Poet Creek Or Bust
Engineering the TLAR way - "That Looks About Right"
TnTTT ORIGINAL 200A LANTERN CLUB = "The 200A Gang"
Green Lantern Corpsmen
User avatar
KCStudly
Donating Member
 
Posts: 9640
Images: 8169
Joined: Mon Feb 06, 2012 10:18 pm
Location: Southeastern CT, USA
Top

Re: The Poet Creek Express - Foamie Hybrid

Postby Mary C » Wed Nov 20, 2013 9:54 pm

Yea!!!! :applause: I hope, I hope, :worship: I know how it is life keeps getting in the way!!!

you are doing such a great job too!! I am watching with interest!!!!!

Mary C. :)
User avatar
Mary C
1000 Club
1000 Club
 
Posts: 1776
Images: 473
Joined: Mon Oct 15, 2012 6:29 pm
Location: Waco, Georgia
Top

Re: The Poet Creek Express - Foamie Hybrid

Postby KCStudly » Thu Nov 21, 2013 11:48 pm

Camera dump so let’s get caught up!

Here’s that little delamination on the edge of the lower rear cabinet floor panel.
Image

Simple method to hold the panel on edge while gluing was to put a clamp on the opposite edge.
Image

Here it is glued and clamped. Note the clamp blocks and blue tape (tamped on t-shirt before sticking on).
Image

Then I switched gears and put together a patch cord for the generator; SOOW 6 AWG cord.
Image

The solar panel came a while back and rode around in my car until I finally took a minute to haul it up to the loft. The box came with really solid corner protectors on it, though there was a gouge in the face of the box. Here it is after I removed all of the plastic band strapping.
Image

Out of the box, it was shipped in the included carry satchel.
Image

This became a bit of a disappointment later when I tried to put the panel back in the satchel. Rather than sliding it in while lying on the table, I wanted to simulate how I would do it in the field. I figured that I would not want to lay the satchel down in the dirt, so I held the folded panel by its handle and the satchel by its handle and tried to slide the panel in. Of course one corner went in but the other got hung up in the crotch of the opposite side zipper flap. So the bag was just floppy enough, and fits the panel just snugly enough that it is not a slam dunk to slip the panel into the bag without using both hands to line it up and pull the bag onto the panel. When I grabbed the end of the open zipper to try and stretch the bag over the corner of the panel, the stitches in the end of the zipper ripped out with ease. :x

Back in the bag, I closed the zipper, and of course, the slider came right off the ripped out end of the tape. The slider wouldn’t go back on from the top of the tape, so I grabbed the bottom and easily ripped the stitches across that end so that I could slide the slider back on with the teeth in sync. The issue is that there just wasn’t any extra zipper tape at the ends, and the ends of the zipper tape weren’t bound together, either. When I stitch it back up I will do a much better job of locking them in.

Here’s the panel as it came out of the bag. I was happy to see that the glass was intact.
Image

Another sign of questionable quality, on the charge controller, the second wire from the left, the insulation has been cut down to the wire where they stripped the outer jacket with a sharp bladed tool, leaving exposed wire.
Image
There is plenty of slack in this wire pair that I can strip a bit more of the jacket off and shorten the lead enough to fix the problem. Also note that the orange flip down cover over the terminal screws was left open.

Back of the panel.
Image

Stand extended and set up.
Image
Image

Here are the wire connections and patch cord that comes with the panel. A 12v socket style plug, and a pair of battery charger style clamps.
Image
The instructions say to always use the cord and to not plug the connectors directly into the leads on the charge controller. I’m not sure why that would be.

Also interesting is that there is one set of charging terminals that it says to connect to the battery, and another set that it says are for the load. The instructions are lacking and are not translated to English well at all. Does it mean that the battery(ies) cannot be connected directly to the fuse panel and all loads must go thru the charge controller? That complicates things when going back and forth between using the panel and not. I'm thinking it might make more sense to mount the charge controller in the tongue box hard wired into the battery and fuse panel, then just plug the panel into a jack when I want to use it.

I’ve been following the furnace idea thread over on the General forum and decided to salvage some aluminum heat sinks out of the scrap bin at work. Related post with pics here.

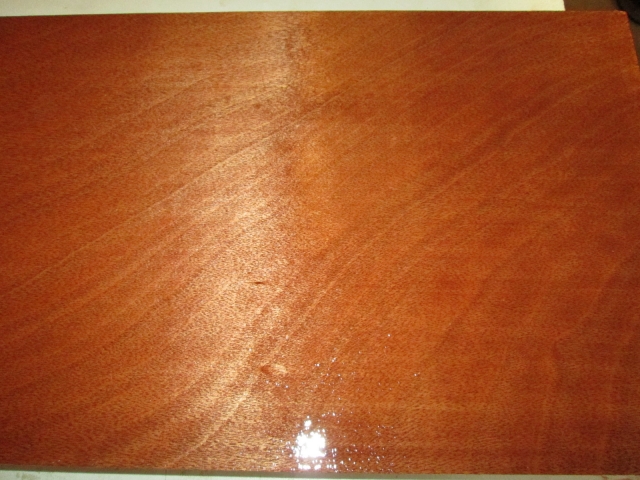
Tonight I used the corner protectors from the solar panel shipping as churches to hold the rear cabinet floor panels up off of the work table while I laid on the first coat of poly. Worked great!
Image
Image
Image

Ride in to work this AM was 27 deg F. 48 F in the loft when I arrived; 52 F after running both heaters and the turd for a couple hours. I expect it to take much much longer for the poly to dry than it did this past summer.

All for now.
KC
My Build: The Poet Creek Express Hybrid Foamie

Poet Creek Or Bust
Engineering the TLAR way - "That Looks About Right"
TnTTT ORIGINAL 200A LANTERN CLUB = "The 200A Gang"
Green Lantern Corpsmen
User avatar
KCStudly
Donating Member
 
Posts: 9640
Images: 8169
Joined: Mon Feb 06, 2012 10:18 pm
Location: Southeastern CT, USA
Top

Re: The Poet Creek Express - Foamie Hybrid

Postby GPW » Fri Nov 22, 2013 6:35 am

... a little COLD eh ? :o You may want to warm up the loft before trying to paint ... what does the can say ?

Cool Solar panel !!! 8)
There’s no place like Foam !
User avatar
GPW
Gold Donating Member
 
Posts: 14920
Images: 546
Joined: Thu Feb 09, 2006 7:58 pm
Location: New Orleans
Top

Re: The Poet Creek Express - Foamie Hybrid

Postby KCStudly » Fri Nov 22, 2013 7:47 am

I'm quite comfortable working when the thermometer reads 52 deg F; it feels warmer to me. The trouble is it takes time to build that heat up, and we don't want to leave the heaters running unattended for various reasons. So I get what I get.

Here is what it says on the can about application temps: "Dry times are based on good ventilation, temperature of 77°F and 50% relative humidity. Lower temperature, higher humidity, lack of ventilation or application of thick coats will extend dry time." Not much. I could juice it with more spirits but then it will just take more coats to get the desired finish.

We'll see how it did on Saturday; no work tonight because we have a dinner get together with friends from out of town... T's 50th!
KC
My Build: The Poet Creek Express Hybrid Foamie

Poet Creek Or Bust
Engineering the TLAR way - "That Looks About Right"
TnTTT ORIGINAL 200A LANTERN CLUB = "The 200A Gang"
Green Lantern Corpsmen
User avatar
KCStudly
Donating Member
 
Posts: 9640
Images: 8169
Joined: Mon Feb 06, 2012 10:18 pm
Location: Southeastern CT, USA
Top

Re: The Poet Creek Express - Foamie Hybrid

Postby GPW » Sun Nov 24, 2013 7:27 am

Just a note on solar .... we’re current ly (excuse the pun) working on an electronics project to allow the batteries to work more efficiently in the trailers... allowing the use of smaller storage batteries , and being usable even at lower than normal voltages... We’ll report as soon as the testing is complete ... ;)
There’s no place like Foam !
User avatar
GPW
Gold Donating Member
 
Posts: 14920
Images: 546
Joined: Thu Feb 09, 2006 7:58 pm
Location: New Orleans
Top

Re: The Poet Creek Express - Foamie Hybrid

Postby KCStudly » Tue Nov 26, 2013 1:11 am

I made some really good progress tonight in the 2-1/2 hrs that I put in. But first let’s get caught up on the weekend’s efforts.

Saturday I started by replacing the tongue jack on The Charcoal Briquette.

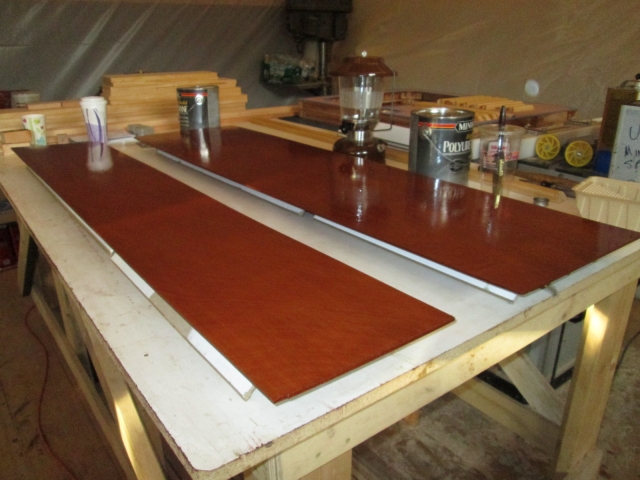
Then I very carefully scraped a few drips of poly off of the bottom side of the rear cabinet floor panels. Wiped around these areas with a rag just damped with mineral spirits a little to smooth the edges of poly left by the scraper. I didn’t want to build up a real thick coat where it tends to collect at the edges, lest not be able to slide the panels into the ledgers after all of the coats go on.

Then I laid the first coat of poly on the second side.
Image
Image

Sunday it was still cold out. I scuffed up the first side of the cabinet panels in prep for a second coat, but didn’t want to risk a failure by putting the second coat on in too cold conditions.

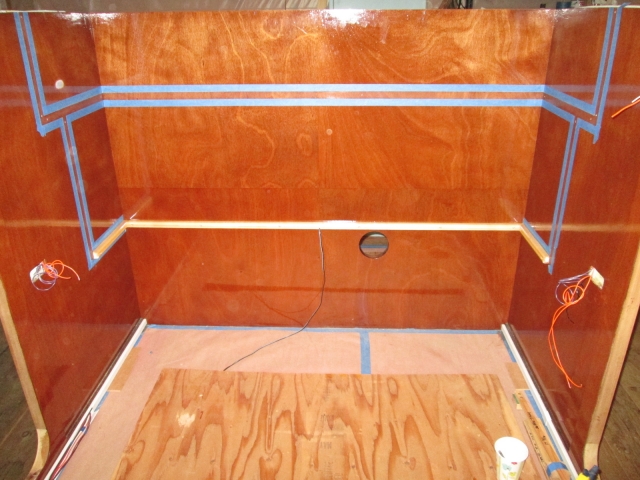
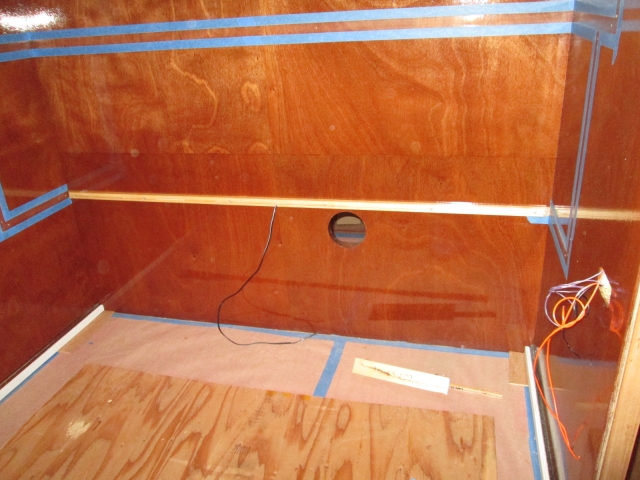
By this time the temp in the loft had come up some to where I felt comfortable starting to glue and screw the ledgers in for the rear cabinets. Bottom rear first.
Image

Then the lower rear sides.
Image

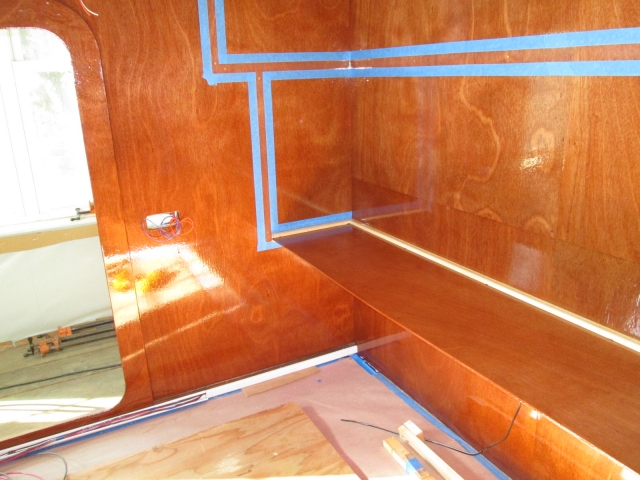
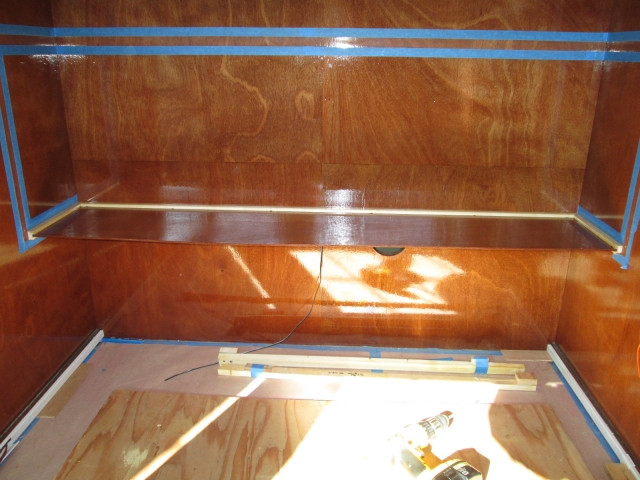
I couldn’t resist checking out how it will look with a panel in the ledgers.
Image
Image

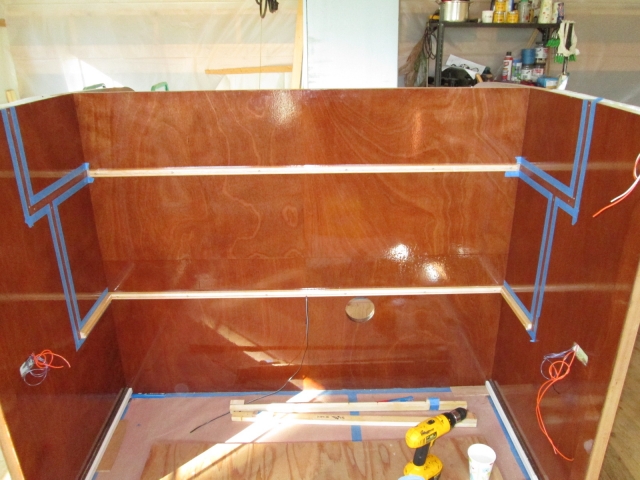
Then I glued the upper rear ledger in.
Image
Image
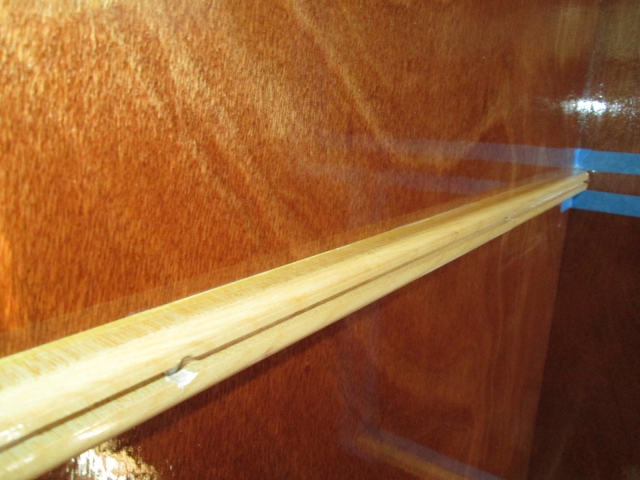
The tape really did a great job masking the glue. I was able to wipe the joint with a damp shop towel to remove excess w/o it hazing the nice finish. The upper side ledgers will have to wait until the lower panel and face frame have been installed for good.

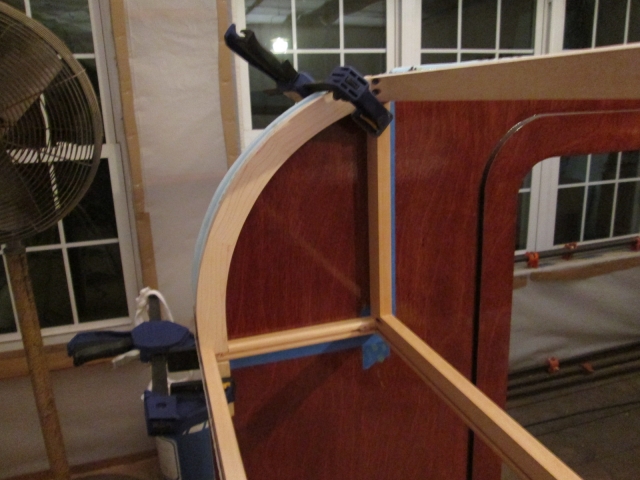
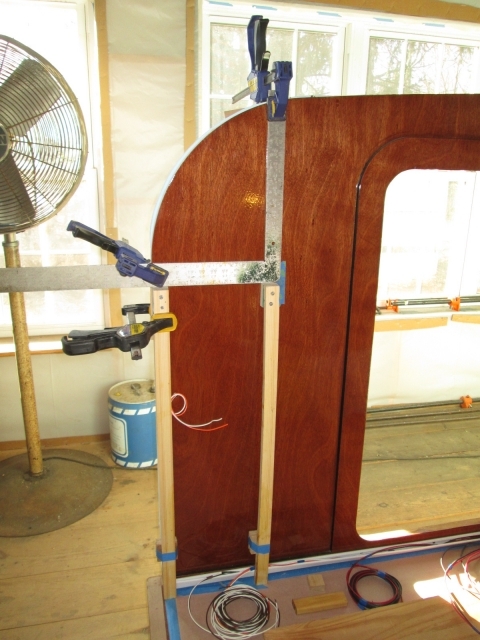
Still had some daylight, so I started to layout the location of the front cabinet face frame. I cut down the story poles I had been using at the rear and used those to set the framing square representing the front and bottom of the frame and side ledgers.
Image

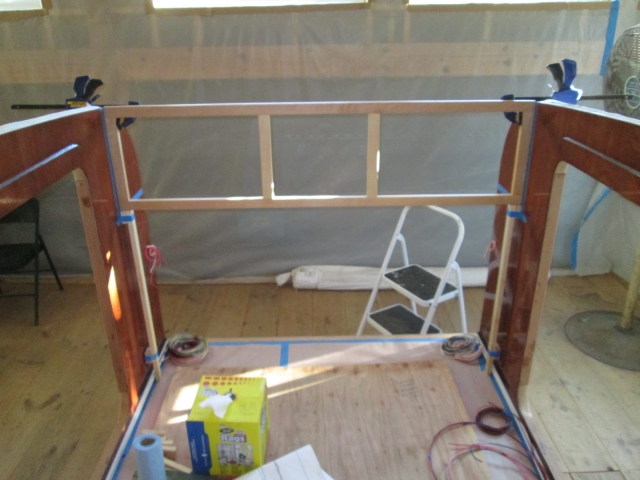
By clamping the square in place I was able to mask the “front” of the face frame against the side wall and use that and the story poles to help align the frame.
Image

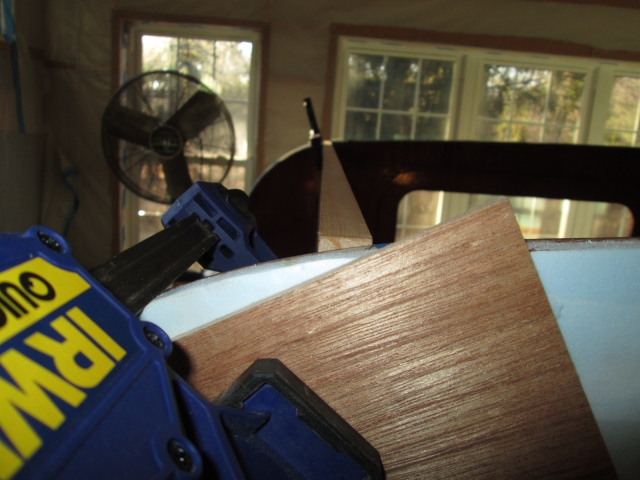
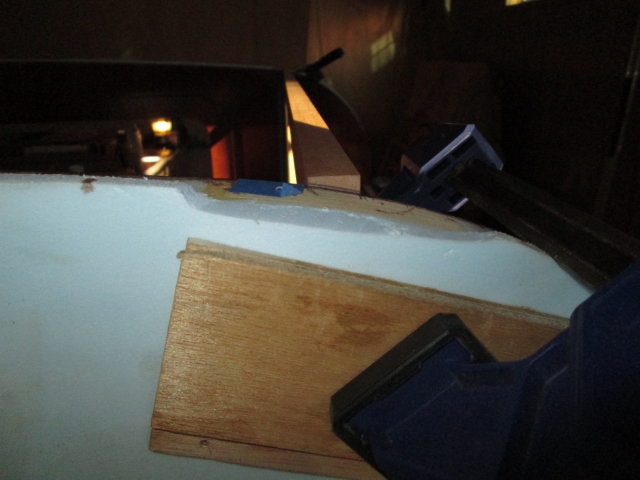
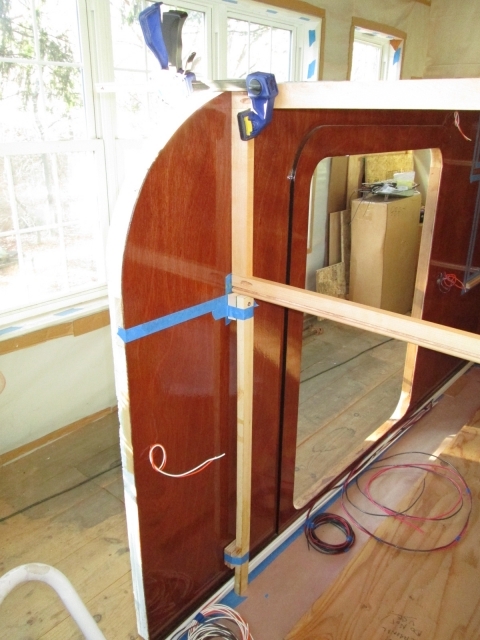
The walls both seemed to be leaning out at the top so I used the quick clamps to pull them in snug to the frame (with pieces of ply on the outside to spread the clamp load onto the foam).
Image

That still didn’t pull the wall in snug at the bottom of the frame. Street side gap.
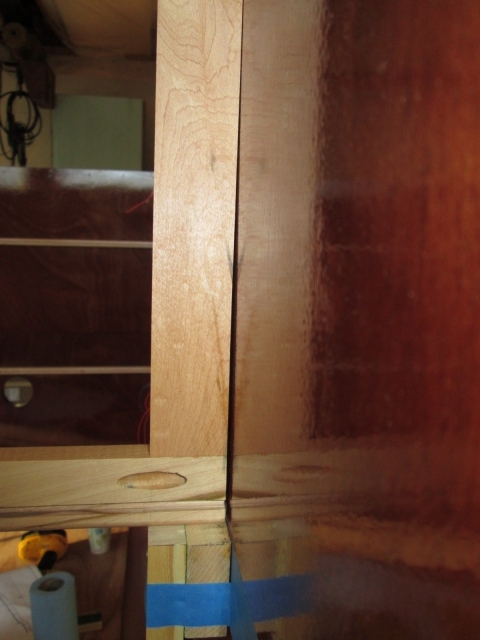
Image

And curb side gap.
Image

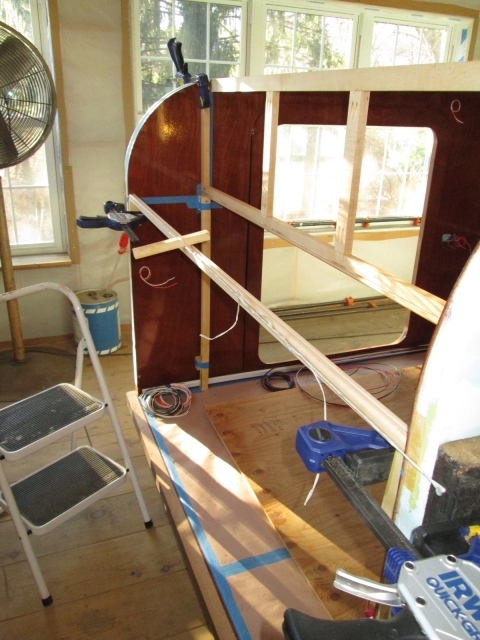
I didn’t have a long enough pipe clamp up in the loft (didn’t occur to me at the time to look downstairs, doh), so I bodged up a twisted twine clamp to pull the middle of the wall together. Here I have clamped a small block on the inside of the wall to set the front ledger on (to act as a spacer), and a larger block on the outside to spread the clamp load.
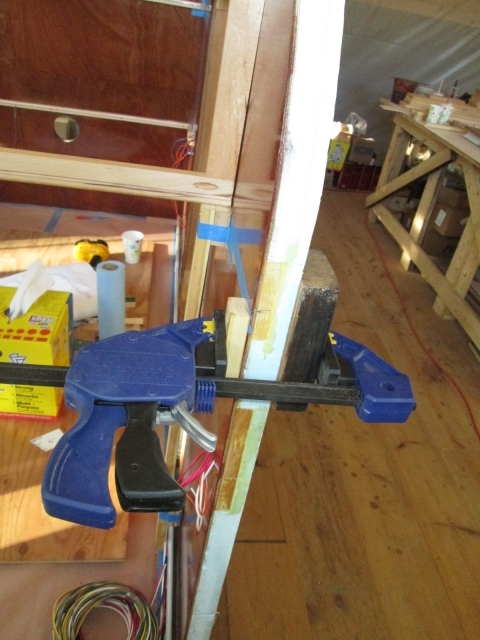
Image

Here is the ledger (not in the correct orientation) just acting like a spacer of the correct width for now.
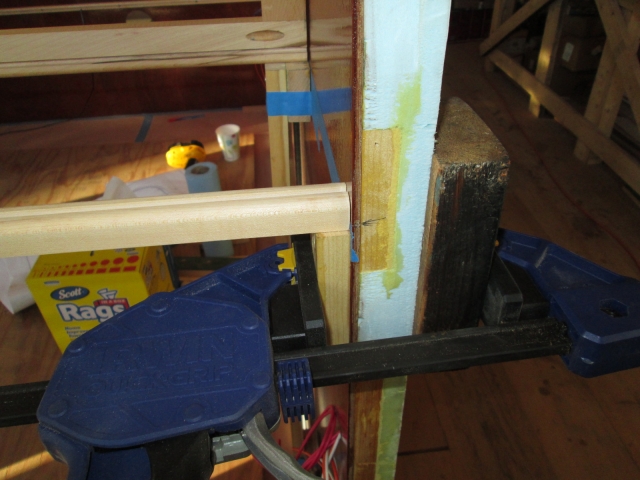
Image

Here is the same arrangement on the curb side, but you can see the gap between the ledger and the inside face of the wall.
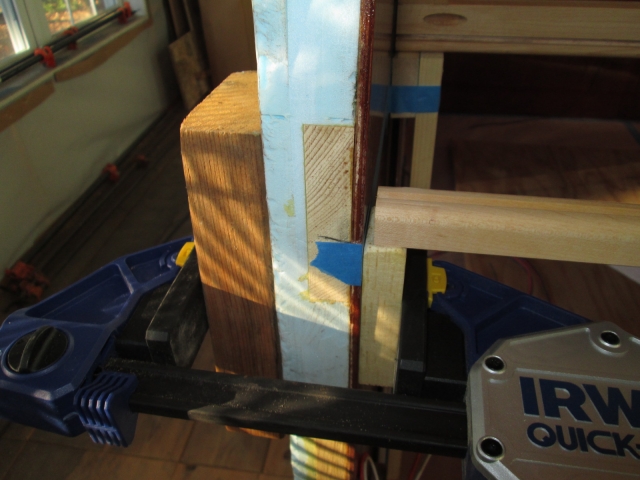
Image

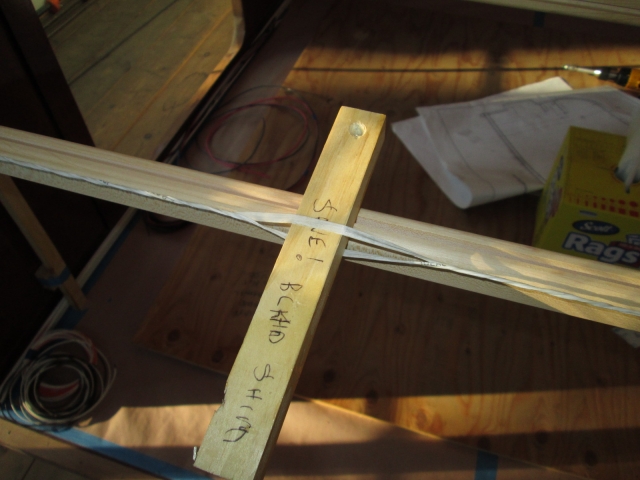
Next I drove a screw with the head sticking out into each of the outer clamp blocks, tied a piece of twine around the heads of the screws, and twisted it up using the small stick of wood in the middle.
Image

Resting the twisting stick on the ledger prevented it from unwinding.
Image

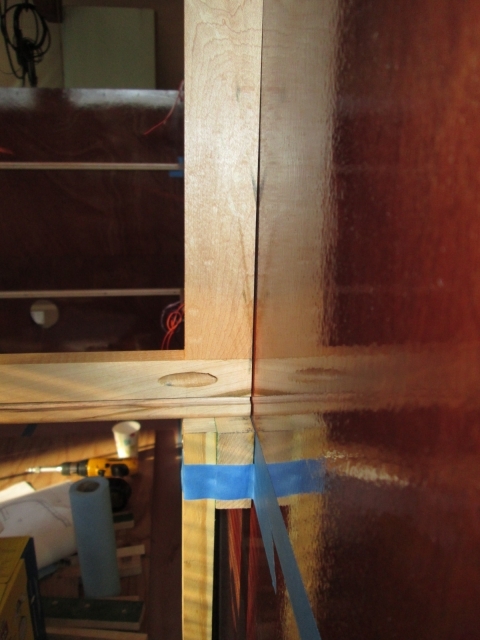
I was able to pull the walls in enough to comfortably draw the walls in the rest of the way by driving the Kregg screws in (temporarily) from the “back” side of the face frame. Here are the gaps after drawing the walls in with the twine, but before driving the screws. Street side first, then curb side.
Image
Image
Once I drove the screws the gaps closed up entirely.

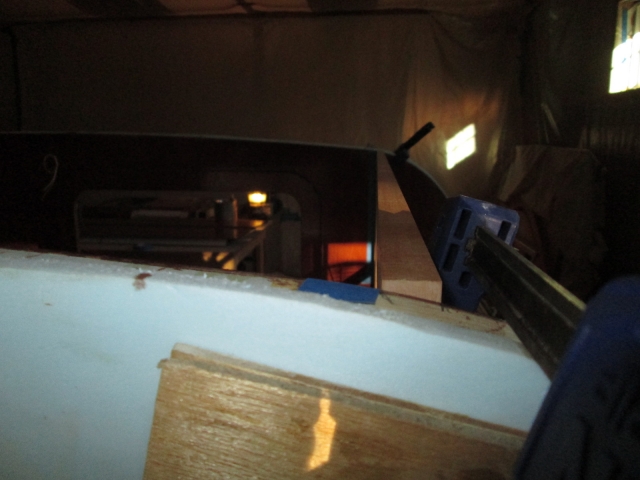
Next up was matching the top of the frame to the ceiling profile. Here’s what we have to deal with.
Curb side.
Image
Street side.
Image

I thought about taking an angled skim cut on the table saw, but it was still missing its drive belt at that point. So I trimmed the little lip of foam on the outer edge of the wall so that the plane could pass by readily.
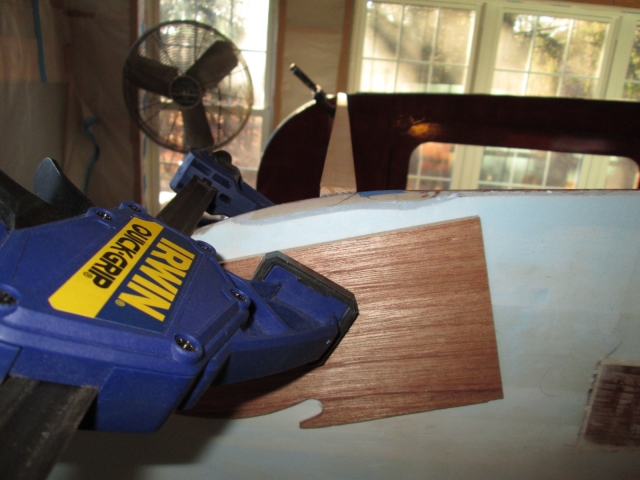
Image
Image

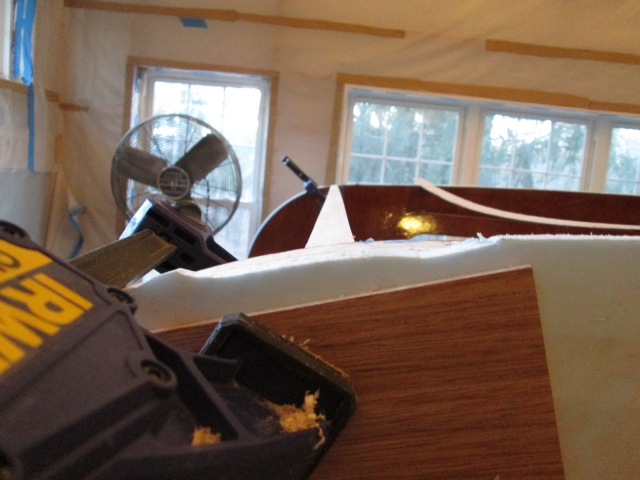
Next I laid the aluminum straight edge across the tops of the walls and clamped it to the face frame so that I could trace a reference line on the front and rear of the frame. Then a combination of the block plane, the Surform rasp, and the small sanding block, and you get this.
Image
Image
Image

The thin slat lying across the walls was used as a fairing strip to help check the fit.

And now today, Monday. Still too cold.

Knowing that I would eventually need to use the table saw again, and I not knowing when Ben might be back out, I went ahead and ordered a new belt and a spare. Turns out that Ben had been there today and installed a new belt. Doh.

I started by screwing a piece of welding wire with a carabineer clip to the ceiling joist so that I could hang the turd up; should have done that ages ago.
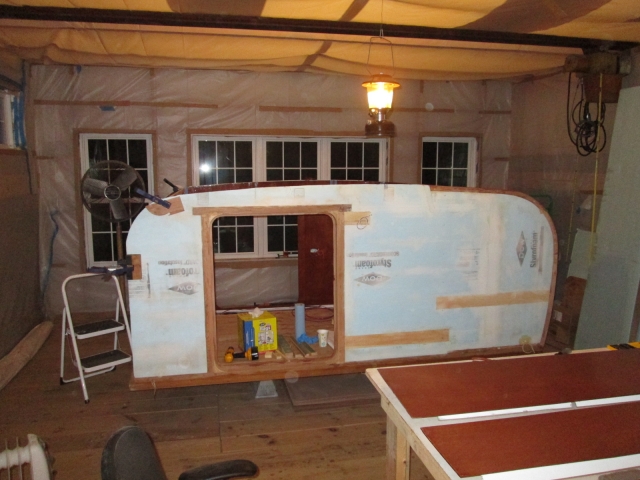
Image

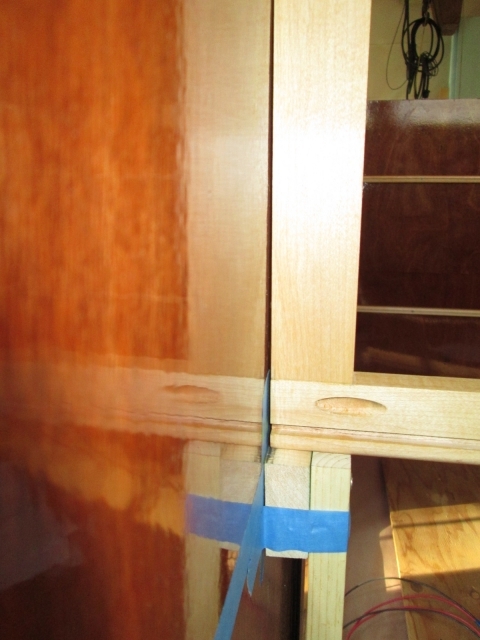
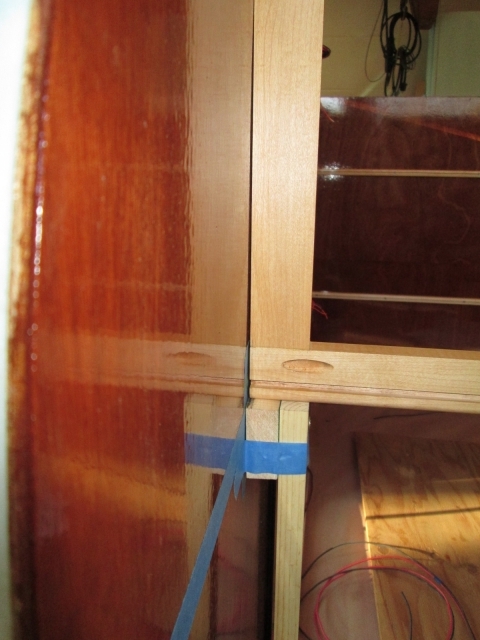
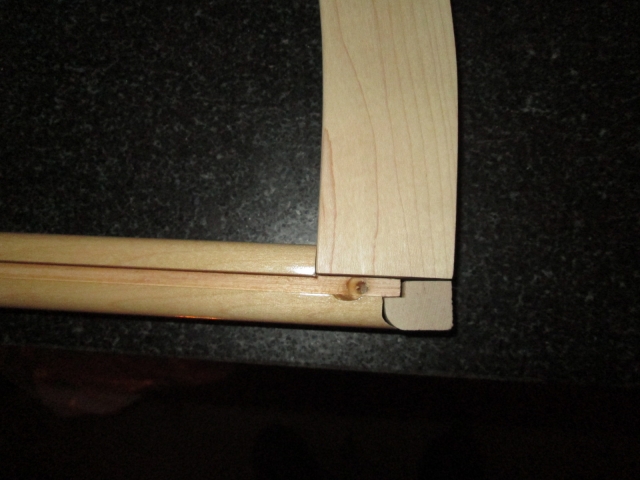
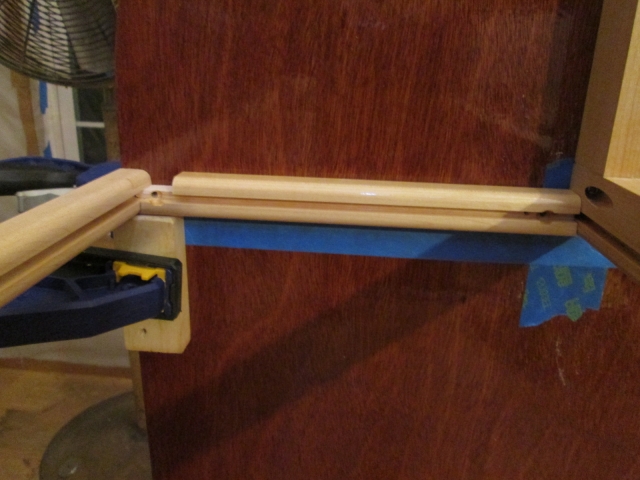
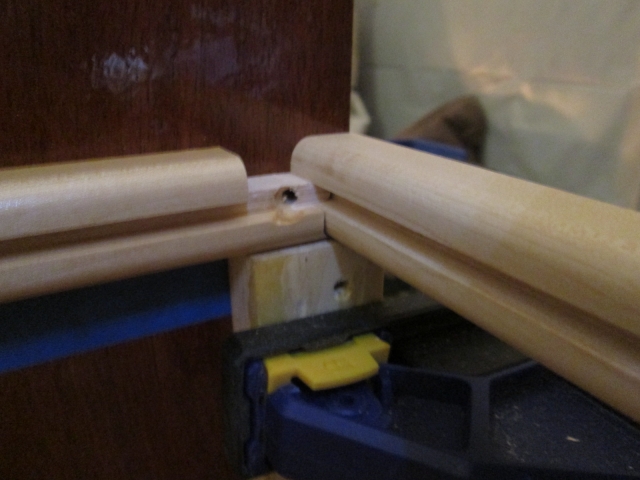
Next I noodled out how I was going to join the small front “riblets” to the cabinet ledgers. It’s a tricky little cope, considering that I do not have a big honking profile router, nor profile blades. Here is a mockup showing how I removed the top lip of the side ledger (so that the riblet takes its place in the front corner of the cabinet), and have coped the bottom lip so that it nests under the front ledger. The remaining wood behind the panel groove in the side ledger would key into the groove in the front ledger, except that the ends of the front ledger will be rabbeted to receive the very front of the riblet.
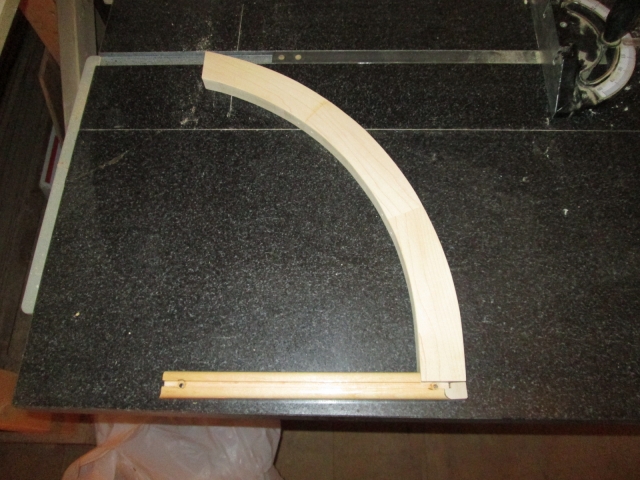
Image
Image

Here is the street side being dry fit, before rabbeting the front ledger.
Image

Same thing on the curb side.
Image

A little better detail shot of the curb side where you can see how the cope on the bottom of the side ledger wraps around the radius of the front ledger, and how it keys into the front groove.
Image

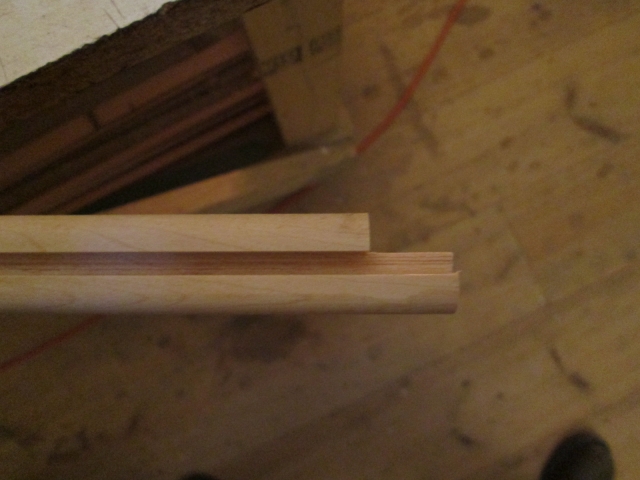
Then I put the rabbets in the ends of the front ledger. Here is the curb side.
Image

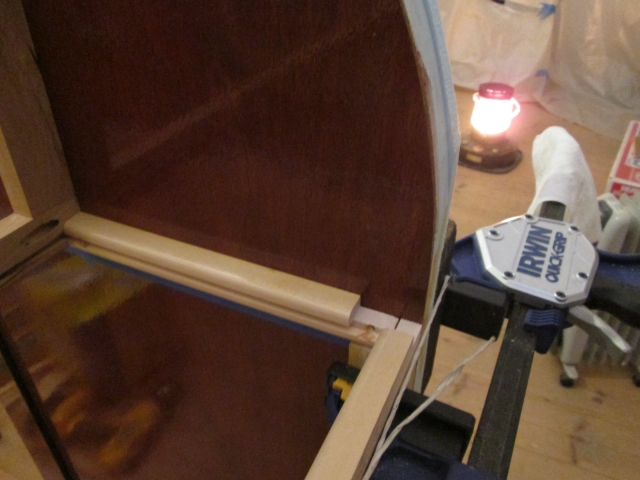
Here is the pocket that is formed for the riblet to key into (street side).
Image

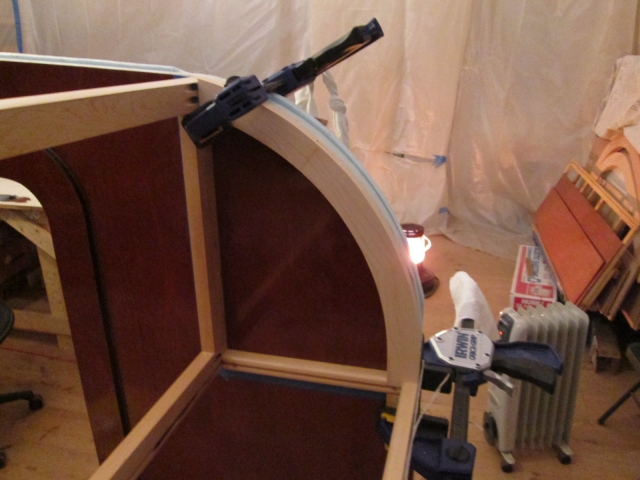
And the riblets starting to be dry fit.
Image
Image
Image

Between the frigid weather we are having, wearing the headlamp instead of a hat, and turning the electric heater off now and again to plug the table saw in, it was cold and the temps in the loft only ever got up to 43 deg F tonight. I’m going to need some warmer weather to get through the next big steps. I can switch back to working on the electrical for a while, if I need to, and some of the trim (switch blocks and plates); and that makes sense to get done before the roof goes on, but the cabinets need to be finished and done to get to that next major hurdle.
Last edited by KCStudly on Tue Nov 26, 2013 7:22 am, edited 1 time in total.
KC
My Build: The Poet Creek Express Hybrid Foamie

Poet Creek Or Bust
Engineering the TLAR way - "That Looks About Right"
TnTTT ORIGINAL 200A LANTERN CLUB = "The 200A Gang"
Green Lantern Corpsmen
User avatar
KCStudly
Donating Member
 
Posts: 9640
Images: 8169
Joined: Mon Feb 06, 2012 10:18 pm
Location: Southeastern CT, USA
Top

Re: The Poet Creek Express - Foamie Hybrid

Postby grantstew8 » Tue Nov 26, 2013 4:20 am

Great to see the photos and inspiring to see the outstanding workmanship.

It's so cold in my workshop I stopped building and made a woodburning stove....I filled them with water before using an angle grinder...one for the body and another for the door.
When I get some 6" steel pipe for the chimney, I can then start using it.

User avatar
grantstew8
The 300 Club
 
Posts: 448
Images: 77
Joined: Tue May 28, 2013 5:26 pm
Location: Dunfermline, Scotland
Top

Re: The Poet Creek Express - Foamie Hybrid

Postby GPW » Tue Nov 26, 2013 6:54 am

Looking really SUPER KC !!! .... coming along now ... Beauty wood finish !!! :dancing


GS8, nice stove ... is that a peat fire?
There’s no place like Foam !
User avatar
GPW
Gold Donating Member
 
Posts: 14920
Images: 546
Joined: Thu Feb 09, 2006 7:58 pm
Location: New Orleans
Top

Re: The Poet Creek Express - Foamie Hybrid

Postby KCStudly » Tue Nov 26, 2013 7:57 am

Thank you for the nice compliments, Grant and GPW.

Regarding the stove: I actually have a small CI wood stove that I got for free for hauling it off. (I had put a want ad for kitchen cabinet takeouts on the bulletin board at EB when I worked there... to use in my garage as work benches and storage... and got a whole kitchens worth of solid wood cabinets for free, but part of the deal was I had to haul the stove off. Kept it but didn't want to give up that much space in my garage to install it there.) "In the beginning", I asked Karl if he was interested in me installing it in the loft, but he was more interested in sealing up the eaves and insulating, and wasn't too keen to have me poking another hole in the roof for the flue. Can't blame him.
KC
My Build: The Poet Creek Express Hybrid Foamie

Poet Creek Or Bust
Engineering the TLAR way - "That Looks About Right"
TnTTT ORIGINAL 200A LANTERN CLUB = "The 200A Gang"
Green Lantern Corpsmen
User avatar
KCStudly
Donating Member
 
Posts: 9640
Images: 8169
Joined: Mon Feb 06, 2012 10:18 pm
Location: Southeastern CT, USA
Top

Re: The Poet Creek Express - Foamie Hybrid

Postby Bogo » Tue Nov 26, 2013 6:51 pm

lloyd wrote:While the edgestar units appear to be good value, they are not nearly as power efficient as the arb (and equivellent) units. It's the power efficiency and general owner satisfaction that keeps bringing me back to arb. They are outrageously expensive, but when you compare them to an "rv" fridge they seem more reasonable.
:lol: You obviously haven't priced National Luna's 12VDC portable refrigerators.
User avatar
Bogo
500 Club
 
Posts: 658
Images: 39
Joined: Tue Oct 02, 2012 4:32 pm
Location: The land between two rivers.
Top

Re: The Poet Creek Express - Foamie Hybrid

Postby KCStudly » Tue Nov 26, 2013 7:45 pm

Forgot to mention that I used the old vertical band saw to form the copes in the side ledgers. Just plunged into the end grain repeatedly to my mark. For as old as it is, that thing will take a sliver the width of the blade every time! Then it was just a matter of cleaning things up with a utility knife and some 220 grit wrapped around a carpenter's pencil.
KC
My Build: The Poet Creek Express Hybrid Foamie

Poet Creek Or Bust
Engineering the TLAR way - "That Looks About Right"
TnTTT ORIGINAL 200A LANTERN CLUB = "The 200A Gang"
Green Lantern Corpsmen
User avatar
KCStudly
Donating Member
 
Posts: 9640
Images: 8169
Joined: Mon Feb 06, 2012 10:18 pm
Location: Southeastern CT, USA
Top

PreviousNext

Return to Foamies

Who is online

Users browsing this forum: No registered users and 8 guests