The Poet Creek Express - Foamie Hybrid

Canvas covered foamies (Thrifty Alternatives...)

Moderator: eaglesdare

Re: The Poet Creek Express - Foamie Hybrid

Postby KCStudly » Fri Aug 22, 2014 9:34 pm

Thanks for the kind words, Wagon. I guess it's partly the mechanical aptitude ("The Knack", as GPW would call it) and partly just time with the tools exercising the old gray cells.

Hey Randy, you must be itching to get out there on the playa, huh? That really is a huge event. Looks way bigger than the chunk, I guess 'cuz everyone who goes stays there on site(?). I hope everybody has a safe trip.
KC
My Build: The Poet Creek Express Hybrid Foamie

Poet Creek Or Bust
Engineering the TLAR way - "That Looks About Right"
TnTTT ORIGINAL 200A LANTERN CLUB = "The 200A Gang"
Green Lantern Corpsmen
User avatar
KCStudly
Donating Member
 
Posts: 9640
Images: 8169
Joined: Mon Feb 06, 2012 10:18 pm
Location: Southeastern CT, USA

Re: The Poet Creek Express - Foamie Hybrid

Postby Wolffarmer » Fri Aug 22, 2014 9:46 pm

The vast majority stays there. 70 miles to nearest lodging. A few celebrities fly in, get driven around and then fly out. ( they have an airport there also ) Then they can say they been to Burning Man. pffffffffffffffffffffft. bunch of air headed fakers.

Yeah I am itching. have only worked 2 days this month. If lucky we will get some done tomorrow afternoon. This rainy weather has really screwed us up. Set us back more than 2 weeks. I been packing the vehicle today. If no work tomorrow will probably ease on down the road a bit after noon tomorrow. Hope the motor on my TV makes it. LOL.

I have my OBDII tool with me so I can make that blasted light go away. :FNP

Randy
"these guys must be afraid of the dark"
User avatar
Wolffarmer
Donating Member
 
Posts: 4612
Images: 309
Joined: Wed May 02, 2007 1:32 pm
Location: Idaho Rupert

Re: The Poet Creek Express - Foamie Hybrid

Postby KCStudly » Sat Aug 23, 2014 9:29 pm

Take a roll of electrical tape with you. If the light doesn't go out, just put a little piece of tape over it! :lol: :lol: :lol:
Last edited by KCStudly on Sat Aug 23, 2014 11:44 pm, edited 1 time in total.
KC
My Build: The Poet Creek Express Hybrid Foamie

Poet Creek Or Bust
Engineering the TLAR way - "That Looks About Right"
TnTTT ORIGINAL 200A LANTERN CLUB = "The 200A Gang"
Green Lantern Corpsmen
User avatar
KCStudly
Donating Member
 
Posts: 9640
Images: 8169
Joined: Mon Feb 06, 2012 10:18 pm
Location: Southeastern CT, USA
Top

Re: The Poet Creek Express - Foamie Hybrid

Postby KCStudly » Sat Aug 23, 2014 9:45 pm

I finished masking off the cabin today. Blue tape around the top edges of the cabin and cabinets, then rosin paper taped on and draped in such a way that any runs will be deflected inwards onto the rosin paper on the floor.

The front cabinet area.
Image

Cabin as seen from the front looking rearward.
Image

Curb side looking over the street side wall.
Image

Rear upper cabinet from street side top; looks kind of like a big window box planter.
Image

Looking forward from over the galley bulkhead.
Image

Karl gave me a hand lifting the ceiling assembly up so that I could check things out and mask along the top rear edge of the bulkhead where the hinge spar will cap the rear edge of the ceiling skin (I wanted to preserve this raw for the glue bond that will come later). Just put a few screws back in to fix the position while I taped it.
Image

Had to take the opportunity to check out the inside (despite all of the masking paper) to get an idea of how it will be with the finish on. I also checked around the edges to see if I got all of the masked areas of the ceiling (the unfinished glue areas) in the right spots.

Looking up from my pillow.
Image

Looking up from rear.
Image

There were a few spots where I could see the raw edge of the glue areas, especially along the top of the front cabinet, but I think this will work itself out once everything is socked down and the panel inches forward as the slack is removed.

Rather than use stickers all the way across, and worry about scratching the ceiling, or smearing glue as I pulled them out, I decided to use small chunks of cedar 2x2 that I had saved for just such an occasion. Here I am testing the idea with the ceiling raised up on 6 blocks. This will allow me to have the glue in place and help align the ceiling to get me started screwing without moving the ceiling around and smearing the glue all over everywhere. The second pic shows the 2 rear spacers removed and the rear of the skin held down where I will start screwing along the bulkhead.
Image
Image

I’m not sure that I am going to bother trying to mask the underside of the panel. If I don’t screw the whole panel back down I would be working from my measurements alone, and I’m just not that confident that I can do that accurately enough to avoid having tape trapped under the joint. My reasoning is that I have gravity working on my side and any squeeze out is more likely to run down the rosin paper than to squeeze out onto the ceiling. Also, by having most of the cabin masked off, I have cut down the task of chasing glue squeeze out significantly, so I think what is left on the ceiling is more reasonable for the amount of time I will have during this assembly step.

On the other hand, if I should happen to manage to shift the panel around once it is sitting down on the glue, that could create a real mess. I’ll stew on this tonight and decide what to do in the morning; whether to dry screw the ceiling down and mask it off in place, or just go for it.

The plan right now, if I don’t mask the ceiling, is to use PL spread along the tops of the walls and bulkhead, and TB2 along the tops of the cabinet face frames. Then I will glue and wrap the front radius in a secondary operation.

Again, all of this extra effort is the “curse”, the flip side of having applied the finishes in the flat and trying to preserve that finish during assembly. Still I think it is less work and easier to get nice results than trying to apply the finish from the inside after assembly. It is tedious, tho. Next time, if there is a next time, I will just build it out of underlay ply, slobber some paint on and be done!

Thanks for watching!
KC
My Build: The Poet Creek Express Hybrid Foamie

Poet Creek Or Bust
Engineering the TLAR way - "That Looks About Right"
TnTTT ORIGINAL 200A LANTERN CLUB = "The 200A Gang"
Green Lantern Corpsmen
User avatar
KCStudly
Donating Member
 
Posts: 9640
Images: 8169
Joined: Mon Feb 06, 2012 10:18 pm
Location: Southeastern CT, USA
Top

Re: The Poet Creek Express - Foamie Hybrid

Postby KCStudly » Sun Aug 24, 2014 8:47 pm

After getting everything ready, the PL loaded into the caulk gun, gloves, spreader, paper towel damped with mineral spirits, cordless drill, screws, …everything ready?... I had to stand there like an idiot and worry. I mean, this is a big glue up. This is the culmination of a lot of hours of work. What if I screw it up?

Ah heck, let’s go! Once into it I decided to just stick with the PL and smear that onto the tops of the cabinet face frames using a scrap of thin ply as a palette and a credit card as a squeegee. I had decided I needed a little more room to work, so had lifted the panel up onto some chunks of 2x3’s, but was still a little afraid that I would smudge up against the unmasked ceiling panel. At one point I did reach thru the gap were I had already applied a bead and got PL all over my wrist, but managed to clean that up w/o tracking it too far.

By the time I got to the front I’m sure I was bumping up against the open time for the PL, but still had signs of squeeze out, so I guess it all worked out okay.

So without further ado, here are some pics of the ceiling panel glued and screwed to the main cabin section (the front radius will get done in a separate operation and is just floating out there for now).

Image
Image

After getting all of the screws in, I jumped inside with a chisel shaped stick and a paper towel damped with mineral spirits, pulled the drape sections of rosin paper down and “scraped” away the small areas of squeeze out while the PL was still pliable. Here is the result after pulling most of the tape off.

Rear of cabin looking thru the street side door.
Image

Rear of cabin looking thru the curb side door.
Image

At the front of the cabin (looking thru the street side door) you can see that I left some of the masking tape in place. I’ll get to that in a minute. You can also see the daylight and unmasked areas of the front radius where I haven’t formed the panel to the front curve yet.
Image

Same thing from the curb side.
Image

This one without the flash gives a little better color rendition of the panels, but not so much the maple.
Image

Here is why I left the tape on the front. This is looking up from the bottom of the front cabinet face frame. Where the tape meets the ceiling a little bit of the raw masked area is peeking out. It almost matches the light color of the face frame so it is kind of hard to see.
Image

I think I’m going to mask the face frame again and wipe some stain on this (hopefully make it disappear altogether), then not bother trying to touch up the poly.

Bonus pics, no flash.
Image
Image
KC
My Build: The Poet Creek Express Hybrid Foamie

Poet Creek Or Bust
Engineering the TLAR way - "That Looks About Right"
TnTTT ORIGINAL 200A LANTERN CLUB = "The 200A Gang"
Green Lantern Corpsmen
User avatar
KCStudly
Donating Member
 
Posts: 9640
Images: 8169
Joined: Mon Feb 06, 2012 10:18 pm
Location: Southeastern CT, USA
Top

Re: The Poet Creek Express - Foamie Hybrid

Postby capnTelescope » Sun Aug 24, 2014 9:57 pm

Lookin' good, KC! :applause: These big glue-ups are real nail biters. Nice job. :thumbsup:
I'll burn that bridge when I come to it.

Brad
ImageImageImage

Building the Bed & Breakfast
User avatar
capnTelescope
Lifetime member
 
Posts: 1222
Images: 368
Joined: Sun Jun 27, 2004 3:44 pm
Location: Round Rock, TX
Top

Re: The Poet Creek Express - Foamie Hybrid

Postby Heifer Boy » Sun Aug 24, 2014 10:01 pm

Nope. Don't like it ;) Oh no wait... I got that wrong... I love it :lol:

Great job KC. Closing up a camper is a big step. A step closer to camping in it. Keep it up.

HB
Heifer Boy
Teardrop Builder
 
Posts: 38
Joined: Mon Feb 28, 2011 1:51 am
Location: Woolamia, NSW
Top

Re: The Poet Creek Express - Foamie Hybrid

Postby wagondude » Mon Aug 25, 2014 4:26 am

I don't know how you're going to be able to sleep in that thing with all that beautiful wood to look at and admire. You will need blackout shades to kill the shine. :thumbsup:
Bill

TnTTT ORIGIONAL 200A LANTERN CLUB
101137
User avatar
wagondude
1000 Club
1000 Club
 
Posts: 1535
Images: 35
Joined: Sun Jan 16, 2011 7:41 pm
Location: Land of the Jayhawks
Top

Re: The Poet Creek Express - Foamie Hybrid

Postby GPW » Mon Aug 25, 2014 5:50 am

Looking GOOD !!! 8)
There’s no place like Foam !
User avatar
GPW
Gold Donating Member
 
Posts: 14920
Images: 546
Joined: Thu Feb 09, 2006 7:58 pm
Location: New Orleans
Top

Re: The Poet Creek Express - Foamie Hybrid

Postby KCStudly » Mon Aug 25, 2014 6:14 am

Gentlemen, Thank you! I do appreciate the kind words of encouragement. :)
KC
My Build: The Poet Creek Express Hybrid Foamie

Poet Creek Or Bust
Engineering the TLAR way - "That Looks About Right"
TnTTT ORIGINAL 200A LANTERN CLUB = "The 200A Gang"
Green Lantern Corpsmen
User avatar
KCStudly
Donating Member
 
Posts: 9640
Images: 8169
Joined: Mon Feb 06, 2012 10:18 pm
Location: Southeastern CT, USA
Top

Re: The Poet Creek Express - Foamie Hybrid

Postby bonnie » Mon Aug 25, 2014 6:30 am

The day has started out with a great shot of a fantastic build closed in! Way to Go!
Remember, the turtle won. :)
User avatar
bonnie
Donating Member
 
Posts: 1390
Images: 107
Joined: Sun Jul 24, 2011 4:14 pm
Location: Roxana, IL
Top

Re: The Poet Creek Express - Foamie Hybrid

Postby KCStudly » Mon Aug 25, 2014 6:34 am

Thank you Bonnie. :coffee: I'll drink to that! :thumbsup:
KC
My Build: The Poet Creek Express Hybrid Foamie

Poet Creek Or Bust
Engineering the TLAR way - "That Looks About Right"
TnTTT ORIGINAL 200A LANTERN CLUB = "The 200A Gang"
Green Lantern Corpsmen
User avatar
KCStudly
Donating Member
 
Posts: 9640
Images: 8169
Joined: Mon Feb 06, 2012 10:18 pm
Location: Southeastern CT, USA
Top

Re: The Poet Creek Express - Foamie Hybrid

Postby KCStudly » Wed Aug 27, 2014 10:08 pm

On Sunday we went up to Mom and Bill’s place and had a nice dinner out on the porch with family to celebrate my birthday last week. Strap on you food porn goggles!!!

My sister has a sensitivity to vegetables in the nightshade family, so mom usually avoids those when she is there, however, sis didn’t make it this time. Mom had gone a little nutty buying a big selection of different tomato varieties from the Bozrah Farmer’s Market and she was happy to include them throughout the meal.

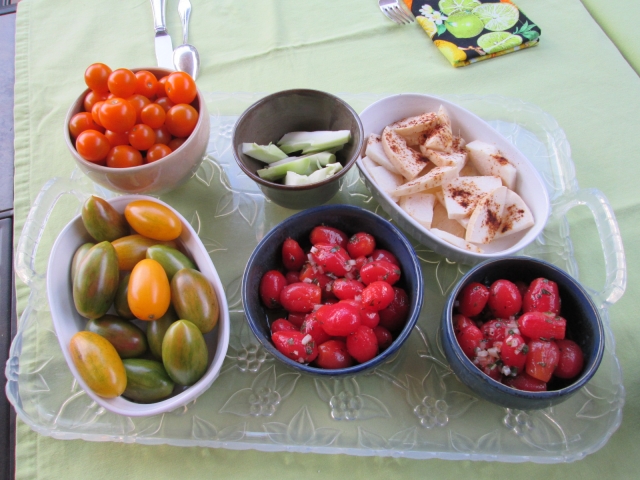
For starters there was a veggie platter with orange cherry tomatoes, broccoli stems, jicama with a little chili powder sprinkled on, some heirloom tomatoes (sort of shaped like small Roma’s, but ripe when green and had a little tiger stripe pattern), and two bowls of marinated grape tomatoes (blanched to remove skins, red wine vinegar, diced red onion, and basil). With the exception of the white ramekins, these ‘pots’ (pottery bowls) were spun and glazed by my wife, Yvette.
Image

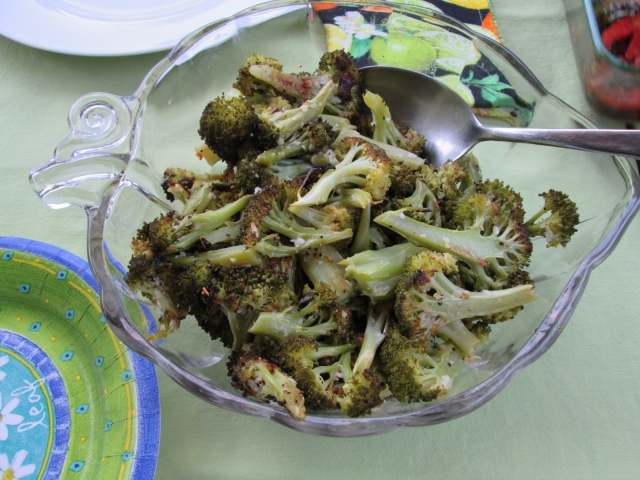
For the main course there was a side of roasted broccoli and garlic.
Image

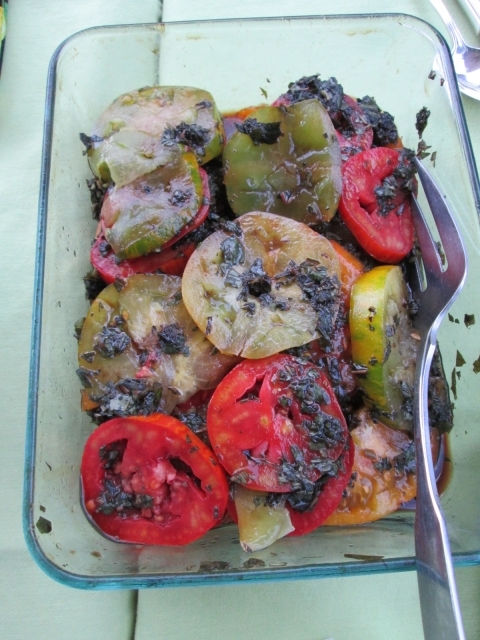
Marinated tomatoes, this time with balsamic vinegar and mint leaves.
Image

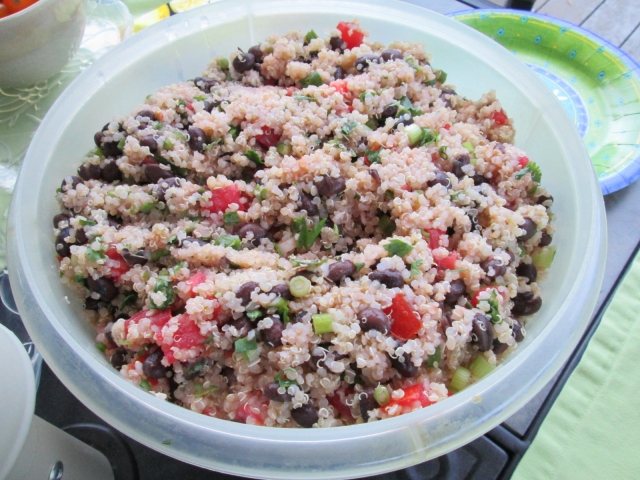
Quinoa and black bean salad (you’ve seen this one before!).
Image

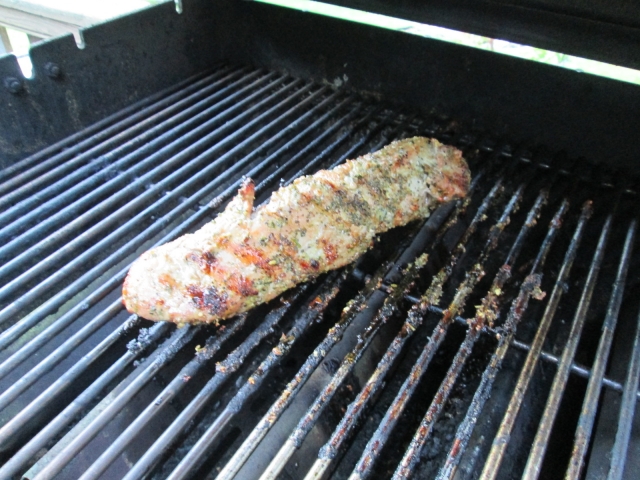
Pork tenderloin (one had already been removed from the grill when I took this pic).
Image

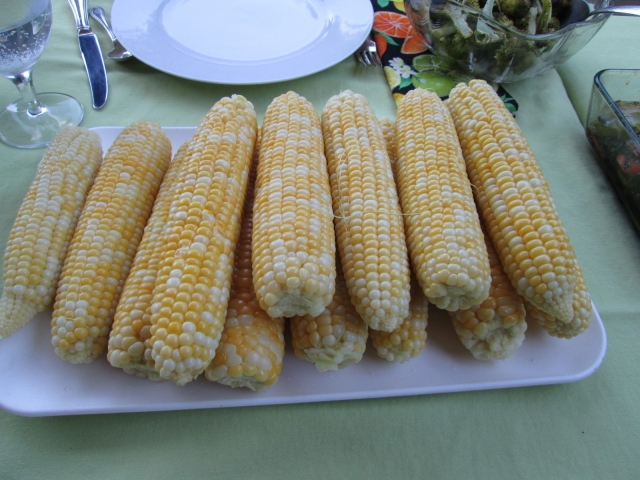
Fresh Bread and Butter corn on the cob, locally grown. Get your corn as fresh as you can (Bill drives to the farm stand right before dinner) and only boil it for 3 min’s, no longer. Sweet, crispy and delicious with a little mop in butter and a pinch of salt.
Image

Let’s pull this all together for a group photo op!
Image

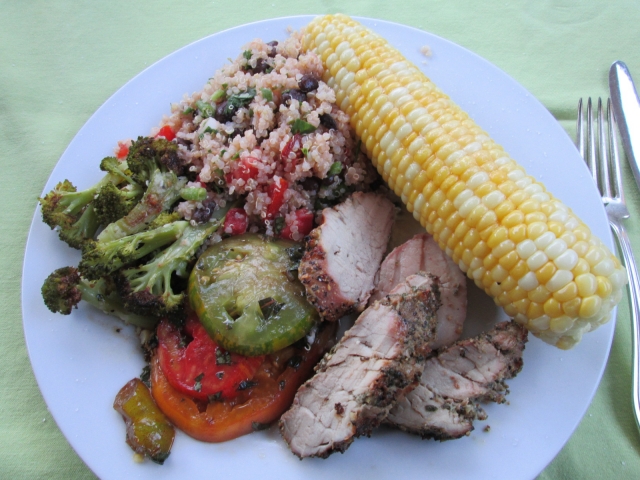
Delicious all around, nice fresh flavors and a good meal pairing. Thanks again mom!

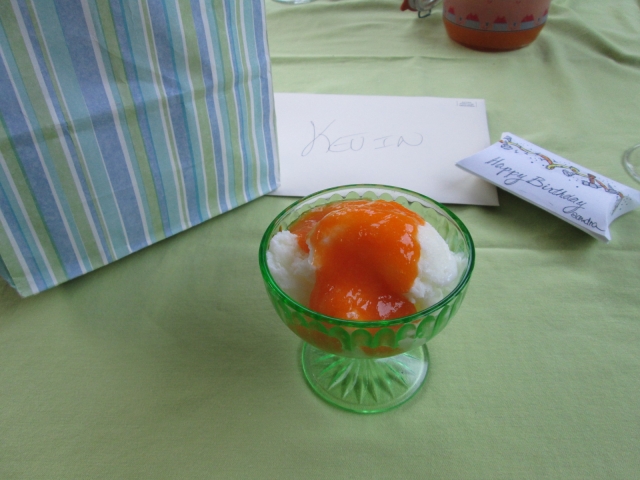
For dessert, Aunt Sandra made hand churned frozen yogurt with a nectarine sauce. The sweetness of the nectarines played nicely with the slight tartness of the yogurt. Very nice and simple.
Image


Aunt Sandra is heavy into paper crafts, including rubber stamps and gift card making. The ho-de-po gift card came in this neat little box with hand stamped and colored tool banner.
Image

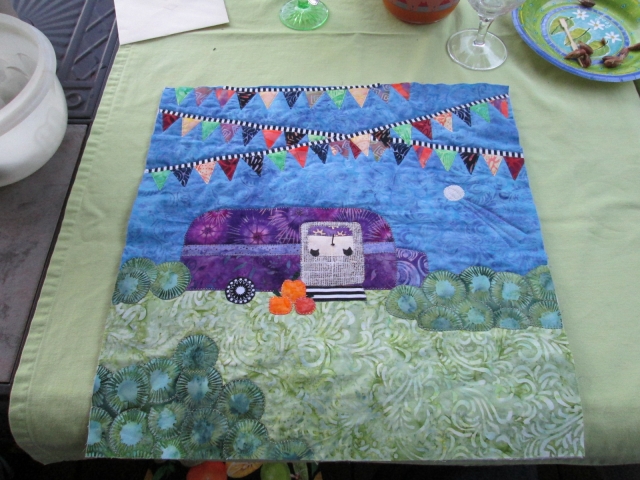
Bill’s Daughter Jessica and her friend Rick gave me a big bag of medjool dates (yum), and mom presented this work in progress; a camper quilt wall hanging. She lifted the profile from one of my build drawings; included pumpkins, both orange and a white lumina in flight; and two little kitty silhouettes in the window, representing Maggie and Rocky.
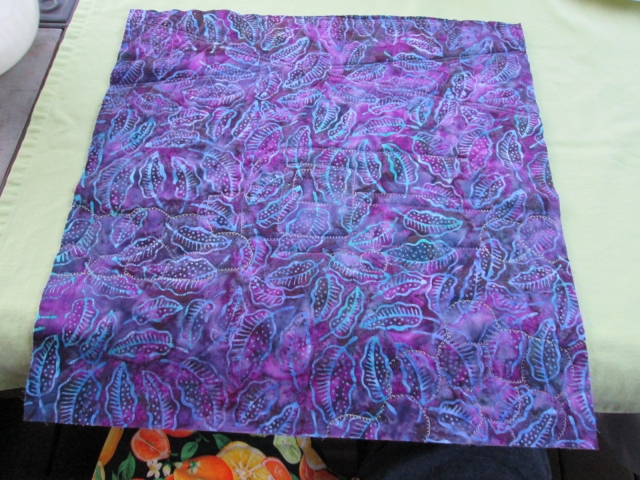
Image
And the back.
Image

Monday was a tough day at work and I didn’t feel like working further.

Back at the build tonight, I removed the wooden washers from along the top of the front cabinet face frame and ran the screws there back in without the washers. Some of the washers were starting to pull thru from repeated use, so I culled thru them and made more to replace the ones that had given up. I also pulled the temporary dry wall screws along the edges of the ceiling. I had used these in between the blocking locations directly into the foam to give a little bit extra hold while the adhesive set.

Next Karl and I contemplated how to proceed with the front end of the ceiling. Should we just wet it down, glue it up, and pull it into place all in one go (I was leaning this way at first); or should we do a “wet/dry” run without glue and re-train it before trying to glue it? We decided to retrain it first on the premise that if it wanted to take its sweet time reforming, then it would be better not to have the glue kicking off part way. We gave it a little push by hand (dry/dry) just to kind of judge, and stopped when we heard a little pop. Not that unusual, been there and done that.

Decided to wet the outside down and do a “dry” run (no glue), which went fairly quickly, only heard one disturbingly loud ‘pop’ noise. Wished that we had gone ahead and used the glue. Oh well.
Image
Image
Image

All was not roses. If I offered you a little buckle, you might think that I was cooking a fruit crumble dessert in a DO, like a brown Betty, or crisp, but no.

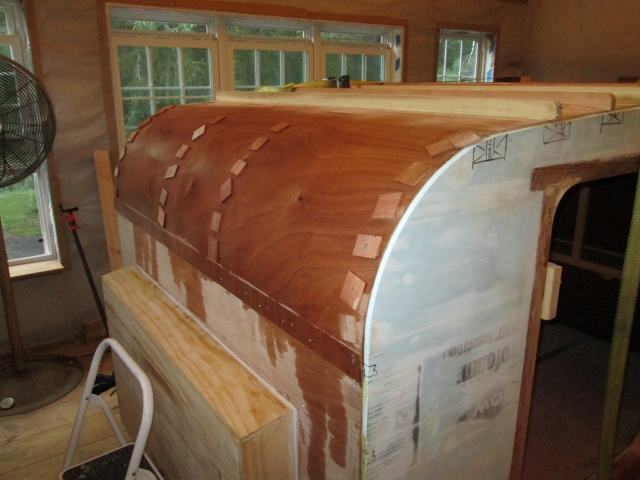
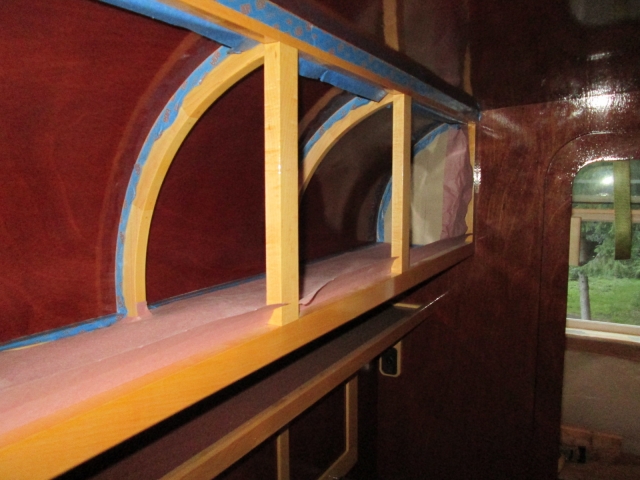
When I got inside with a light to check for any gaps, I spotted a crease reflected in the inner surface on the curb side. Checking the outside it was plain that some fibers had broken and there is an area about 6 to 8 inches long that has buckled out from the true profile. If you look closely at the outside picture above you can see an area that has light glare above and almost a dark line above a decidedly non-glary area (middle of the curbside section of the panel between the 3rd and 4th rows of wooden washers).

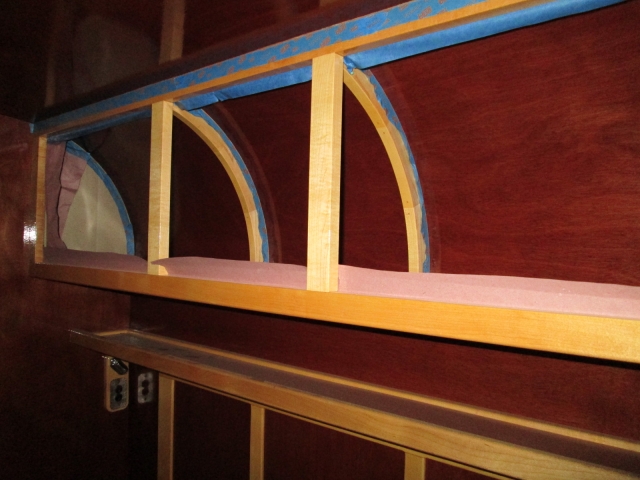
In this look from the inside, it doesn’t really show up in the picture too well, but if you look at the reflection of the temporary end mask on the curved panel you can see how it changes in a sharp line about halfway up. It is much more obvious in person. Ouch.
Image

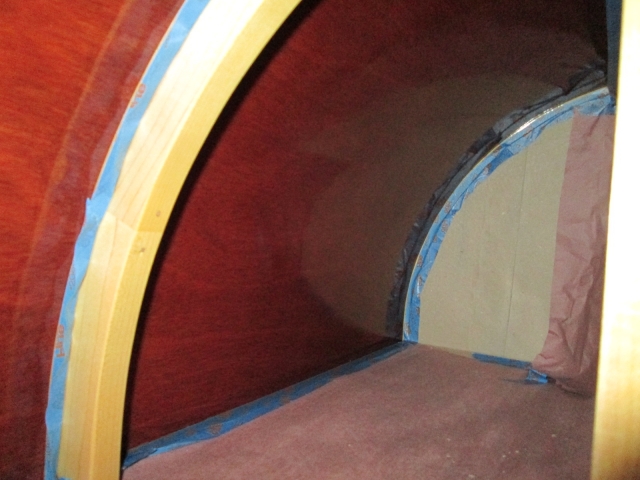
It doesn’t look that bad in the pics, and I suppose it isn’t that bad in person, but you certainly don’t have to look that hard to see it (at least in good light). Frankly, I’m frustrated because I worked so hard to make it come out a certain way, and this makes me feel like it hasn’t.

Nothing really can be done on the inside except maybe store the spare blanket on that side. On the outside, if it doesn’t burst open overnight, or while I am lifting it up and gluing it back down again, I will reinforce the whole front radius with epoxy and glass weave fabric.

There is a good bump there, so I may also have to scallop out a little of the foam that will go over that area so that it doesn’t telegraph up thru to the final profile.

Hind sight, maybe GPW’s idea of adding chip board may have helped, but maybe not being able to soak it down with water would have created more issues.

Maybe if I had gone slower and soaked it longer it would have been okay, maybe not.

If I knew… what I know now… when I was younger I may have used two layers of thinner ply.

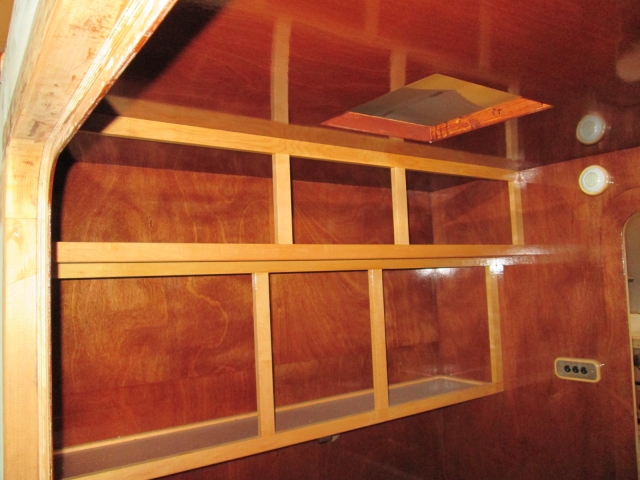
I'm sure I'll get used to it and the 'warty-ness' will fade into the background eventually, so I will stop whining. Let’s leave tonight on a high note. I’m happy with this end. :D
Image
Last edited by KCStudly on Thu Aug 28, 2014 8:47 pm, edited 1 time in total.
KC
My Build: The Poet Creek Express Hybrid Foamie

Poet Creek Or Bust
Engineering the TLAR way - "That Looks About Right"
TnTTT ORIGINAL 200A LANTERN CLUB = "The 200A Gang"
Green Lantern Corpsmen
User avatar
KCStudly
Donating Member
 
Posts: 9640
Images: 8169
Joined: Mon Feb 06, 2012 10:18 pm
Location: Southeastern CT, USA
Top

Re: The Poet Creek Express - Foamie Hybrid

Postby KCStudly » Wed Aug 27, 2014 10:25 pm

Strange. The pic of the plate full of food is cropped compared to what is loaded to my gallery. I wonder what is causing that.

Edit: Looks okay now. :thumbsup:
Last edited by KCStudly on Thu Aug 28, 2014 8:30 am, edited 1 time in total.
KC
My Build: The Poet Creek Express Hybrid Foamie

Poet Creek Or Bust
Engineering the TLAR way - "That Looks About Right"
TnTTT ORIGINAL 200A LANTERN CLUB = "The 200A Gang"
Green Lantern Corpsmen
User avatar
KCStudly
Donating Member
 
Posts: 9640
Images: 8169
Joined: Mon Feb 06, 2012 10:18 pm
Location: Southeastern CT, USA
Top

Re: The Poet Creek Express - Foamie Hybrid

Postby atahoekid » Thu Aug 28, 2014 12:13 am

Wolffarmer wrote:But you all ought to see my 64th birthday party next week.

Image


:D :D The people do appreciate me.


I see we have a "burner" in our group. I live in Northern Nevada where the Burning Man Festival is held every year (as we speak) and have never been nor do I have the desire. I guess I'm too mainstream.... :thinking: :roll: :oops:
Mel

"Believe in your abilities... Remember amateurs built the ark, professionals built the Titanic"

"Indecision may or may not be my problem" Jimmy Buffet

Image

The Road Foamie Build Thread: viewtopic.php?t=45698
User avatar
atahoekid
Platinum Donating Member
 
Posts: 1773
Images: 158
Joined: Sat Jul 24, 2010 2:49 am
Location: Incline Village, NV
Top

PreviousNext

Return to Foamies

Who is online

Users browsing this forum: No registered users and 6 guests