The Poet Creek Express - Foamie Hybrid

Canvas covered foamies (Thrifty Alternatives...)

Moderator: eaglesdare

Re: The Poet Creek Express - Foamie Hybrid

Postby GPW » Fri Sep 05, 2014 5:57 am

If it’s slow to dry , try a little Heat ... That used to work on fiberglassing model planes ... :thinking:
There’s no place like Foam !
User avatar
GPW
Gold Donating Member
 
Posts: 14920
Images: 546
Joined: Thu Feb 09, 2006 7:58 pm
Location: New Orleans

Re: The Poet Creek Express - Foamie Hybrid

Postby kayakdlk » Fri Sep 05, 2014 2:29 pm

Instead of roller or chip brushes which to me always seem to pull the fiberglass cloth away from the plywood use a plastic 6" wide spatula (better to hold and less messy than an old credit card) and scrape the epoxy into the wood or cloth. It will keep from putting to much on at one time, push it into the cloth and make a nice even flat coat of epoxy. A foam roller can be used to get epoxy on a large area but I still scraped it with a spatula because the rollers always left too much excess epoxy. using the spatula will keep from having the cloth floating in too much epoxy. The cloth will be nice and tight to the wood surface. You may get a few area that ball up with strings from the cloth but they can be scraped off once the epoxy firms up (Still green) before it fully hardens.

I believe the West Systems epoxy is a 5:1 ratio. Looks like you mixed 4:1 a little less and used slow hardener. Should actually dry faster but the slow hardener task quite a while to cure. Their web site say 10-15 hours for firm green stage and longer to fully cure. Temperature and humidity are also a big factor in the cure time

Dan
User avatar
kayakdlk
Platinum Donating Member
 
Posts: 310
Images: 392
Joined: Wed Jun 27, 2012 9:02 pm
Location: Foothills of Colorado

Re: The Poet Creek Express - Foamie Hybrid

Postby KCStudly » Fri Sep 05, 2014 8:37 pm

I can’t tell you all how happy I am to report that the only thing screwed up is my recollection! The epoxy cured splendidly! :phew:

No disaster and no need to resort to heat. Thank goodness I didn’t have to scrape it all back off; that would have been horrible (…and expensive).

KayakDan, thanks for the tips. After the fact I went back and refreshed my memory by reading the West System info on-line. I could have done a few things better. First, for a larger sheet like this they would prefer putting the wet coat on top and pushing it thru the cloth; less chance of having problems with the cloth sticking in the wrong place or having to shove it around to get it lined back up. Karl would have done it that way, but I had my mind on rolling it on first. I thought it would get an even coat on faster and I was worried about pot time; once poured into the roller tray I needn’t have been.

Having decided to put the wet on first, rather than just flipping the cloth back willy nilly, or folding it, they advise rolling it up like a window shade, then rolling it back out. Makes sense and I can see how that would have been better.

I only used the roller to put the base coat on, so had no issues with the cloth lifting or pulling threads due to that; once the glass went down we switched to the chip brushes, mostly dabbing, but some gentle stroking to remove excess. In the end I did have a few areas where it was a little heavy, but overall I am very happy. When I asked about the pour and spread method Karl seemed to think that it was less controlled and would use more epoxy, so I just followed his lead on that. In hindsight I can see your logic and perhaps why they recommend this method. The roller did seem to put a thick-ish coat on. If there is a next time I will try pushing thru from the top with a spreader. :thumbsup:

On to the pics.
Here I have trimmed around the edges to remove any stray hairs and lightly sanded the little spikes that formed in the fray.
Image

The surface was wonderfully hard, but did have a slight oily feel due to the amine blush; kind of like nose oil. Having read the recommended procedure, I scrubbed it down with an abrasive pad and water, and then dried it with paper shop towels.
Image
Image

There were a bunch of small droplets of epoxy on the top of the locker that had flung off of the roller, so I scraped those off carefully with a paint scraper.

Back to the back.
I temporarily installed the galley shelf face frame and the counter rail. I had to spread the ‘wings’ of the walls a tad with some effort to get them in. Taking some measurements the tops of the walls were bowed in about 1/8 inch. Putting the frame and rail in brought this out pretty close to the plan’s 64 inches most everywhere except the farthest/highest part of the rear radius. Much better to have these in place while building the hatch.
Image

Here you can see one of the temporary story poles used to help position the counter rail (green stick taped on to the wall). The front of the counter face frame will actually sit 3/4 inch further away from the hatch rib, so you can see that I will have plenty of clearance without having much reach (or shin knocking) relative to the rear edge of the floor.
Image

Tomorrow I will start looking at the hinge to make sure that the provided screw pattern in that doesn’t interfere with any of the screw locations between the hatch spar and ribs. Need to cut the rabbets in the spars and round over the top ends; then I can start fitting them into place.

Train kept a rollin’.
Last edited by KCStudly on Sat Sep 06, 2014 8:50 am, edited 1 time in total.
KC
My Build: The Poet Creek Express Hybrid Foamie

Poet Creek Or Bust
Engineering the TLAR way - "That Looks About Right"
TnTTT ORIGINAL 200A LANTERN CLUB = "The 200A Gang"
Green Lantern Corpsmen
User avatar
KCStudly
Donating Member
 
Posts: 9640
Images: 8169
Joined: Mon Feb 06, 2012 10:18 pm
Location: Southeastern CT, USA
Top

Re: The Poet Creek Express - Foamie Hybrid

Postby atahoekid » Fri Sep 05, 2014 11:48 pm

The argument about which tool to use to apply epoxy is apparently as old as epoxy itself. While many dislike the roller method, I prefer it. I use the very thin foam rollers. Works great for me!! I never did like the spreader method since I had a hard time getting even coats and the chip brush method takes way too long on any piece of decent size. I guess it's a case of to each his or her own. Glad it cured!!! :D

As far as faulty recollections, it amazes and amuses me how I can confuse myself.... Did I or didn't I?, Was that three or four? I'm sure it was three or did I count wrong??? ARRRGGGHHH.... :NC :shock: :?
Mel

"Believe in your abilities... Remember amateurs built the ark, professionals built the Titanic"

"Indecision may or may not be my problem" Jimmy Buffet

Image

The Road Foamie Build Thread: viewtopic.php?t=45698
User avatar
atahoekid
Platinum Donating Member
 
Posts: 1773
Images: 158
Joined: Sat Jul 24, 2010 2:49 am
Location: Incline Village, NV
Top

Re: The Poet Creek Express - Foamie Hybrid

Postby Heifer Boy » Sat Sep 06, 2014 9:00 pm

I settled on the plastic spreader method for my first coat of epoxy when laying down cloth on the Camper Box. I also laid the cloth on dry and just poured on the epoxy mix and spread it out. It's amazing how far it goes but ensure that the cloth is fully wetted down when you do it. Subsequent coats were rolled on with a short nap roller as it's fast and a little thicker which is what you want to fill the weave. I struggled with it too as it was my first time fibreglassing anything but read a huge amount (thank you BoteCote and West Systems) and watched a lot of youtube videos. Boat building sites are a wealth of information on this stuff. Especially the Kayak guys. :thumbsup:

I also used an Australian epoxy called BoteCote which is a 2:1 mix. This means that minor variations in the ratio have little effect on the final product. You have to be VERY accurate with a 5:1 mix which is why weighing the ingredients is always wise. It looks like you either lucked out or did a perfect job. I'll assume the latter... ;)

Loving the progress KC :beer:

HB
Heifer Boy
Teardrop Builder
 
Posts: 38
Joined: Mon Feb 28, 2011 1:51 am
Location: Woolamia, NSW
Top

Re: The Poet Creek Express - Foamie Hybrid

Postby KCStudly » Sat Sep 06, 2014 9:07 pm

Thanks for the input, Mel. It turns out that my recollection on the ratio wasn't wrong after all; Karl also remembered it as being 400/100 grams, so it looks like I dodged a bullet. :worship:

Today I spent a bunch of time using these tools to drill recessed screw holes for the hinge spars.
Image

After positioning the hatch side spar flush to the outside of the cabin walls and the fronts of the clamped ribs, I transferred the rib locations to the top, and marked the screw locations. Then it was a multi-step operation to drill the holes. First I used the countersinking bit and 'V' guide block to drill a pilot hole. By burying the countersink to the step…
Image
… the head of the screw will be well below the surface of the spar. My thinking is that this will give a little more bite with the 2-1/2 inch deck screws that I will be using, and will give a nice positive recessed area to fill (no chance of a high screw or the filler popping out).

Next I would switch to the larger bit and enlarge the countersink (the heads of the deck screws were just a little bit larger in diameter than the countersinking bit). Then I used the smaller drill bit to open up the pilot hole matching the diameter of the screw threads. This so the threads of the screw wouldn’t fetch up in the spar, ensuring a tightly clamped joint.

The razor knife and sanding block were used to clean up any splinters or small blowouts.

Back at the hatch (for what it is at the moment) I lined the spar back up and used a screw down thru the hole to mark the rib for a pilot hole. Because the pilot drill was not long enough to drill deeply enough for the screw in one operation, I did these one at a time, removing the spar for each hole, then repositioning it and affixing the screws until I had all four installed (just dry fitting for now… needs to come back off later to round over the ends and for the rabbet where the skin slips under).
Image
Image
Image
Image

Next I switched my attention to the cabin side hinge spar. I started by clamping it to the hatch side spar with 1/4 inch spacers. This gave me a reference for the size of the rabbet, allowing the spar to cap the end of the ceiling ply.
Image
Image
Image

After getting the hinge out of its shipping tube and wiping the manufacturing lube and grime off of it, I mocked it into place and traced the rough location of the screw holes (the little circular marks every 2 inches). Then I laid out a second set of holes between each of these. These marks (with the ‘S’ designations) represent where the screws will be for the trim that will clamp the rubber membrane seal over the hinge. Then I split the difference every 4 inches (black dots) to mark where it was safe to run the deck screws down into the top of the bulkhead and checked these against the screws holding the back of the ceiling panel down.
Image

Here’s one of the holes in close up.
Image

When I went to screw the spar down to the top of the bulkhead I found that the screws would be running very close to the joint between the rear bulkhead skin and its internal framework (thought I had figured better than this, but I guess not :roll: ). So I moved the centerline deeper onto the bulkhead, flipped the pattern “over” to the other side of the seal trim hole marks and drilled another series of holes. This set was better aligned on the bulkhead center, but I had forgotten to double check against the ceiling skin screws.
:x :(

I had to relocate several of these again where the 4 inch on center spar screws coincided with the 3 inch on center ceiling screws, so I ended up with a bunch of extra holes to fill later. The ones with the heavy pencil lines will get screws. The spar mounting pattern ended up uneven, but there will be plenty of screws, it will all get covered up, and in the end it will allow the hinge seal trim to have a nice even screw pattern.
Image
Image

Tomorrow I plan on removing these, adding the radii to the ends, drilling the hatch side spar for the middle pair of ribs, and cutting the rabbet for the hatch skin.
Last edited by KCStudly on Sat Sep 06, 2014 11:01 pm, edited 1 time in total.
KC
My Build: The Poet Creek Express Hybrid Foamie

Poet Creek Or Bust
Engineering the TLAR way - "That Looks About Right"
TnTTT ORIGINAL 200A LANTERN CLUB = "The 200A Gang"
Green Lantern Corpsmen
User avatar
KCStudly
Donating Member
 
Posts: 9640
Images: 8169
Joined: Mon Feb 06, 2012 10:18 pm
Location: Southeastern CT, USA
Top

Re: The Poet Creek Express - Foamie Hybrid

Postby KCStudly » Sat Sep 06, 2014 9:14 pm

Thanks HB. I guess our posts crossed.

I had read this stuff all before, and have watched many of the kayak builds, but I should have gone back and read up on this stuff again. I also need to stop allowing myself to rush when I have Karl's help.

Experience is key. :thumbsup:
KC
My Build: The Poet Creek Express Hybrid Foamie

Poet Creek Or Bust
Engineering the TLAR way - "That Looks About Right"
TnTTT ORIGINAL 200A LANTERN CLUB = "The 200A Gang"
Green Lantern Corpsmen
User avatar
KCStudly
Donating Member
 
Posts: 9640
Images: 8169
Joined: Mon Feb 06, 2012 10:18 pm
Location: Southeastern CT, USA
Top

Re: The Poet Creek Express - Foamie Hybrid

Postby tony.latham » Sun Sep 07, 2014 12:20 pm

"I'm just a novice wood worker, hardly any experience at this stuff..."

KC: When you typed that, were you looking down and to the left, maybe squinting a bit? Feeling the need to cover your mouth with your hand? 8)

The sentence should read, "I was a novice woodworker when I started this project." I'm thinking your bloodline is from the lineage of the Jedi Warrior of Woodworkers.

Tony

p.s. Have you been tempted to throw a pad in that "little" project and take a test-drive nap in it?
User avatar
tony.latham
Gold Donating Member
 
Posts: 7073
Images: 17
Joined: Mon Jul 08, 2013 4:03 pm
Location: Middle of Idaho on the edge of nowhere
Top

Re: The Poet Creek Express - Foamie Hybrid

Postby KCStudly » Sun Sep 07, 2014 7:01 pm

tony.latham wrote:"I'm just a novice wood worker, hardly any experience at this stuff..." ...

The sentence should read, "I was a novice woodworker when I started this project." ...

p.s. Have you been tempted to throw a pad in that "little" project and take a test-drive nap in it?

Well, I did qualify that statement with, "least when I started, anyway."

I have always believed that given proper instruction and enough time I ... or anyone else for that matter... can learn to do just about anything. If you can show me how, I can do it too.

I did stack a couple of pieces of scrap foam up to use as a pillow and take a little siesta not too far back. It was very peaceful and emotionally rewarding. :)
KC
My Build: The Poet Creek Express Hybrid Foamie

Poet Creek Or Bust
Engineering the TLAR way - "That Looks About Right"
TnTTT ORIGINAL 200A LANTERN CLUB = "The 200A Gang"
Green Lantern Corpsmen
User avatar
KCStudly
Donating Member
 
Posts: 9640
Images: 8169
Joined: Mon Feb 06, 2012 10:18 pm
Location: Southeastern CT, USA
Top

Re: The Poet Creek Express - Foamie Hybrid

Postby KCStudly » Sun Sep 07, 2014 11:57 pm

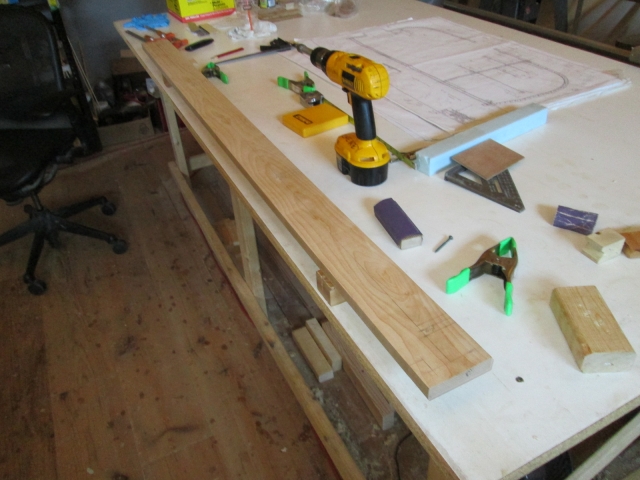
Today was all about detail work on the hatch spars, both upper and lower. I Started by laying out the hatch lower spar on a piece of 1x4 Maple that had been cut to approximate length previously.
Image

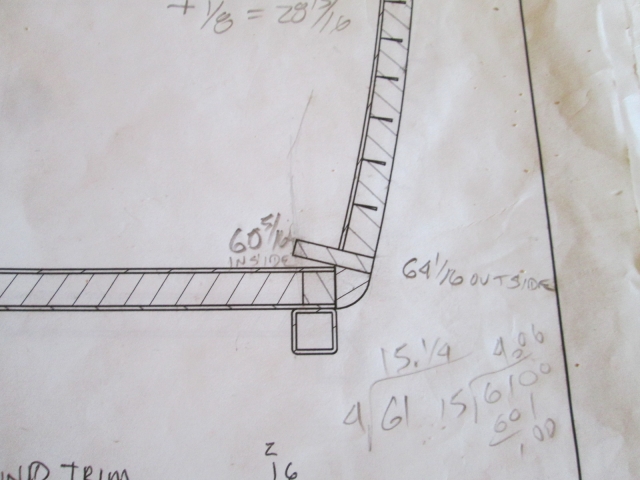
In this picture of the plan you can see this lower spar that will be screwed to the bottom of the hatch rib tails (tails penciled in).
Image

These shots from the computer model show it better. The hatch lower spar is shaped sort of like a wide flat muffin, with the lip of the muffin top wrapping around the ends of the walls.
Image
Image

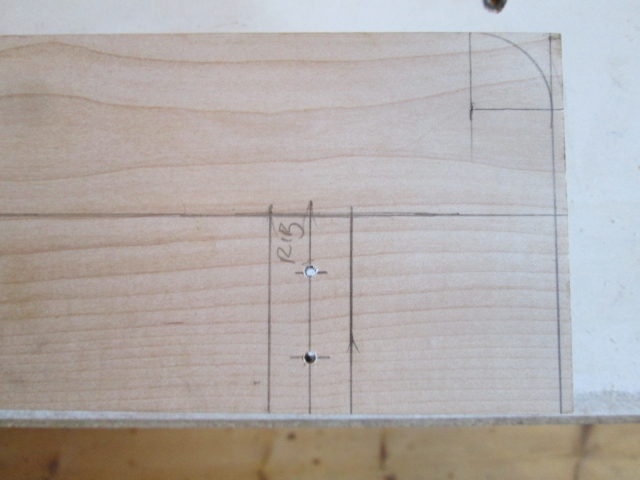
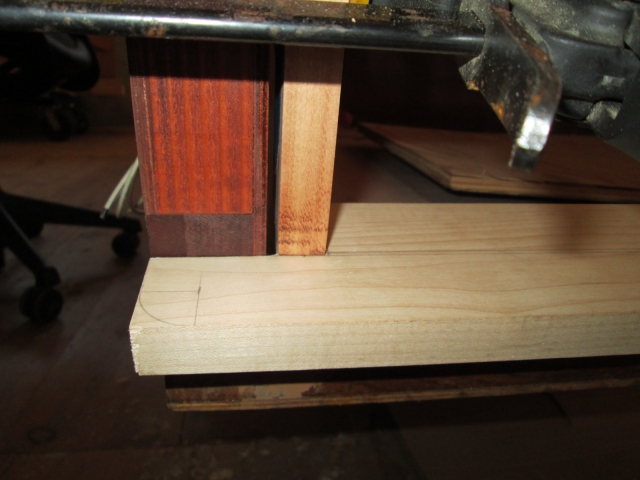
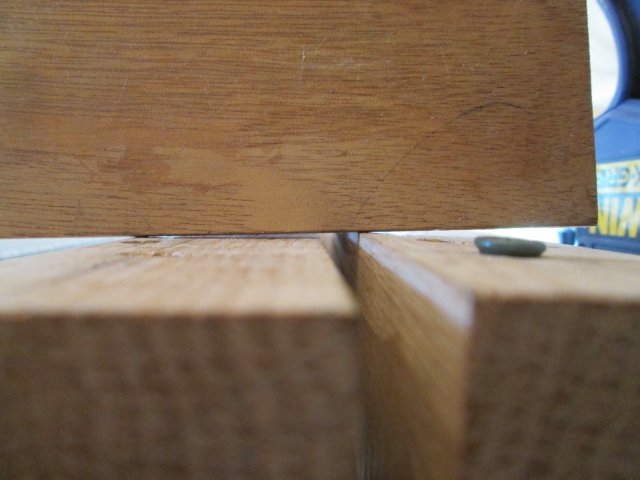
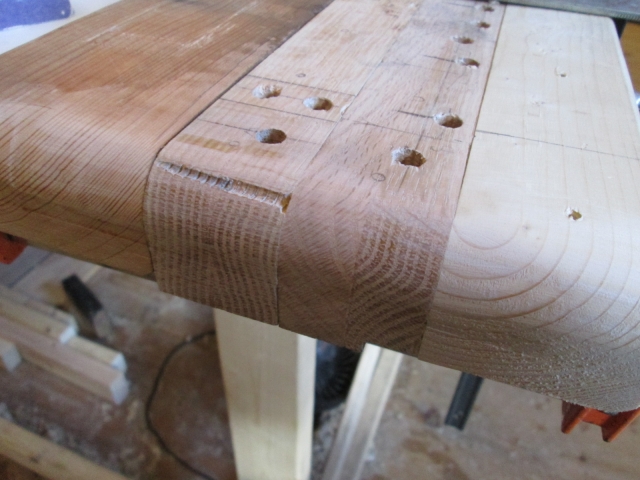
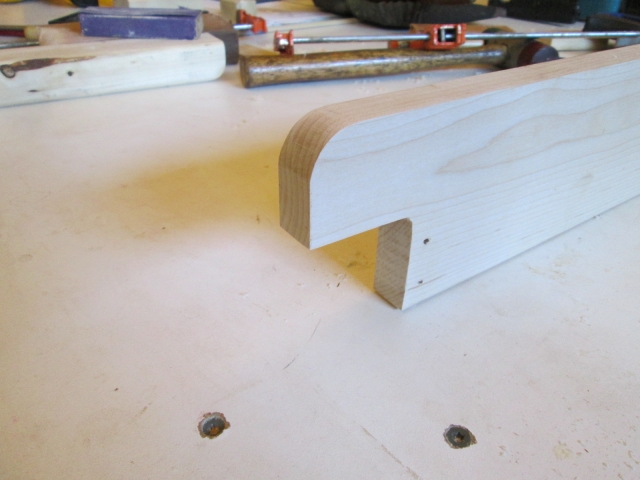
Here’s a shot looking down at the street side end of the lower hatch spar. The 3/4 inch radius is the same line that carries all along the wall to roof edge. The rectangular area with the two pilot holes is where the street side hatch rib will be attached, and the square area to the right of that will get notched out here shortly.
Image

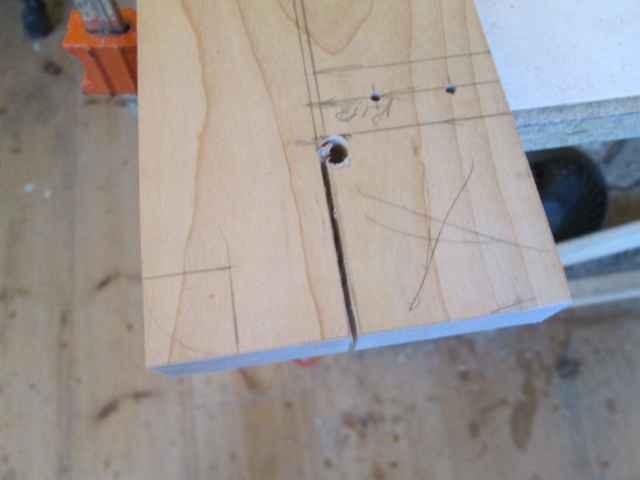
I drilled a small hole in the corner of each notch before cutting them out so that there would be an inside radius in the corner.
Image

Here I am doing a quick check just holding the lower spar up against the bottoms of the two side ribs and the backs of the walls; street side.
Image

Street side from the side.
Image
It looks like it is going to end up about a 1/4 inch higher than planned. I’ll have to check and make sure that there is enough meat in the lower sill blank to make this up, otherwise I may have to add something somewhere.

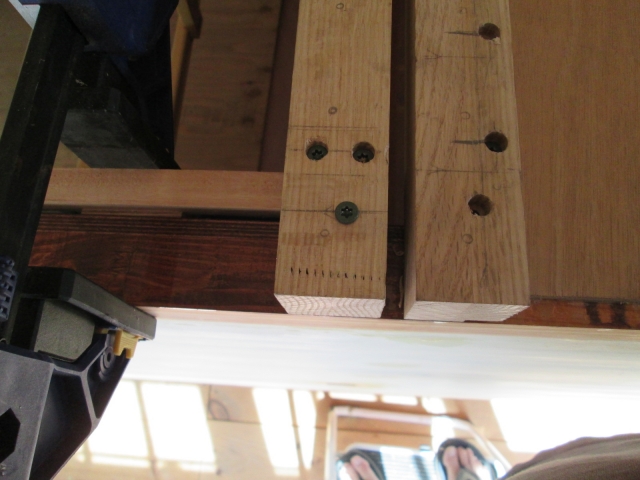
After thinking about the hatch build sequence for some time I have known that I was going to have a conflict. If I join the two inner skin blanks together on the bench to get a nice clean nearly invisible seam, then I would have no way to put the skin on with the frame in place in the galley because there would be no way to clamp it, and any temporary screws used to hold the ribs to the side walls would be inaccessible to remove once the skin was installed. So while noodling this over again playing twenty questions with Karl, he came up with the start of a great idea, and I figured out the rest. If I temporarily screw thru the top ends of the hatch hinge spar down into the tops of the walls, those screws would be accessible to remove after the skin goes on. At the bottom I can attach a couple of temporary cleats to the underside of the lower spar so that I can screw thru from the rear into the lower rear edges of the walls and get to those screws after the skin is on, as well. So thanks again to Karl for helping me work thru another sticky step in the build process!

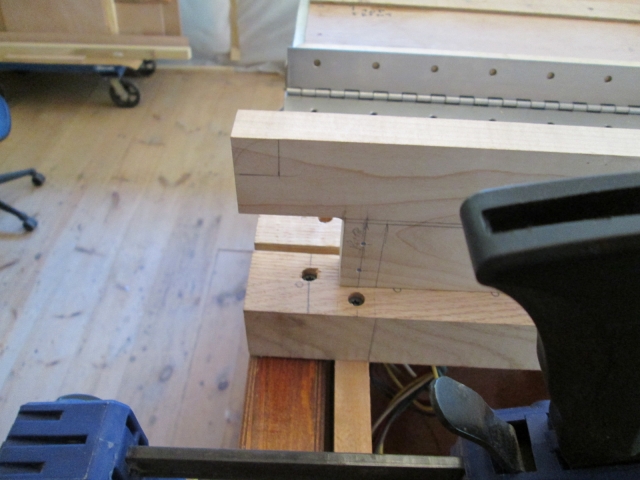
Here is a pic looking down at one of those extra temporary screws thru the curb side end of the hatch side spar (on the left) into the top of the wall.
Image

To allow a little room for the canvas that will fold under the part of the hatch that will overhang the walls, I used a little sliver of the oak (conveniently the discarded piece from the cabin side hinge spar rabbet) as a shim to hold the hatch side hinge spar up about 1/16 inch.
Image

Using a piece of scrap as a straight edge shows that I will need to plane the hatch side hinge spar down a bit so that the hinge will lay flat. I probably should have allowed 1/16 over on my hatch rib template, but will tweak everything a little and try to get this to work the way it is.
Image
I went back and countersank those temporary screws so that the plane will be able to pass over them.

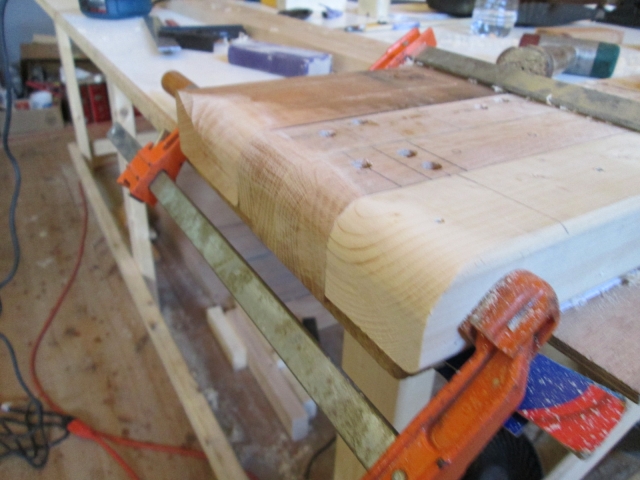
After laying out the locations for the two middle ribs on the upper and lower spars, I put the lower spar up on top of the upper spar just as a dumb-idiot-check to make sure they both lined up before drilling the holes in the upper spar. Here is the street side and one of the middle rib locations.
Image
Image

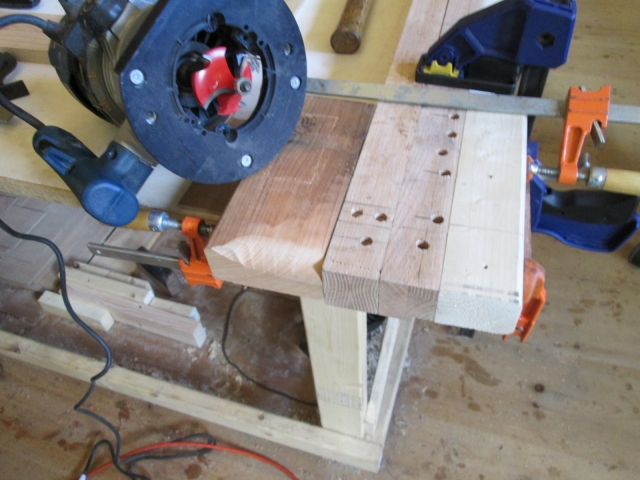
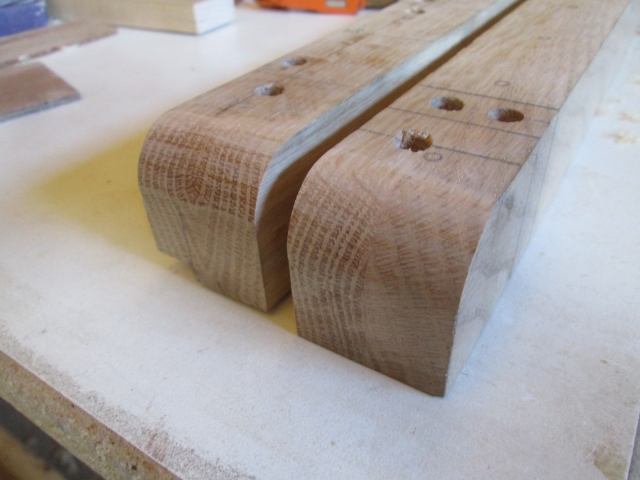
Next I removed the spars and worked on rounding over the edges. Here is the clamp set up for the router with blocks on either side to help support the router base and avoid chip out.
Image

I had hoped that the temporary screw hole (used to pin alignment when I glued up the spar blanks) would have been cut away by the radius, but no luck. I’ll have to use some filler on it. “Missed it by that much.”- Maxwell Smart
Image

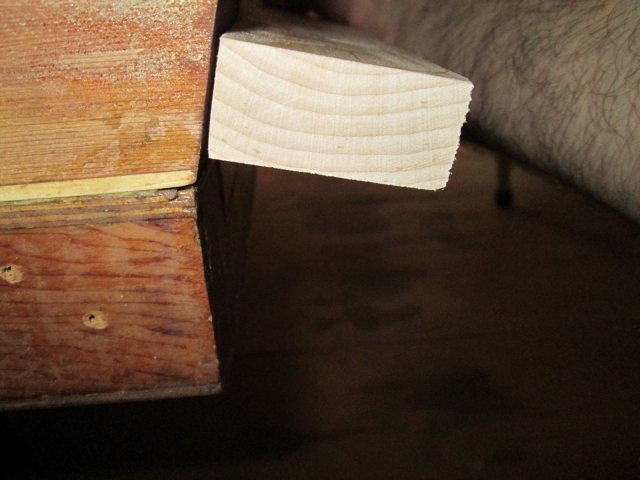
The other end came out better.
Image
Image

Set back up on the cabin for a look see.
Image

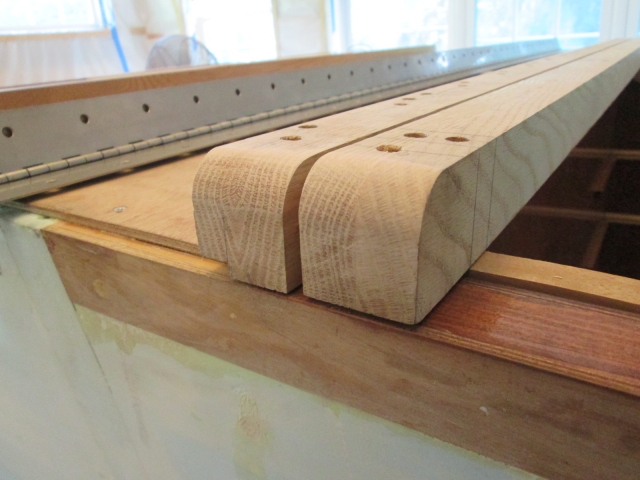
Same technique used for the lower spar.
Image

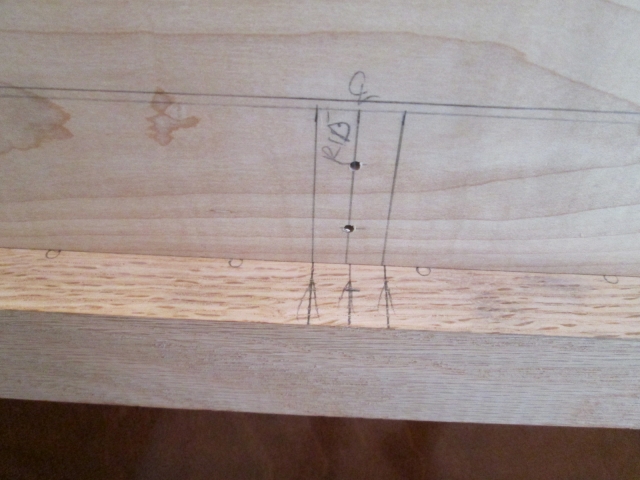
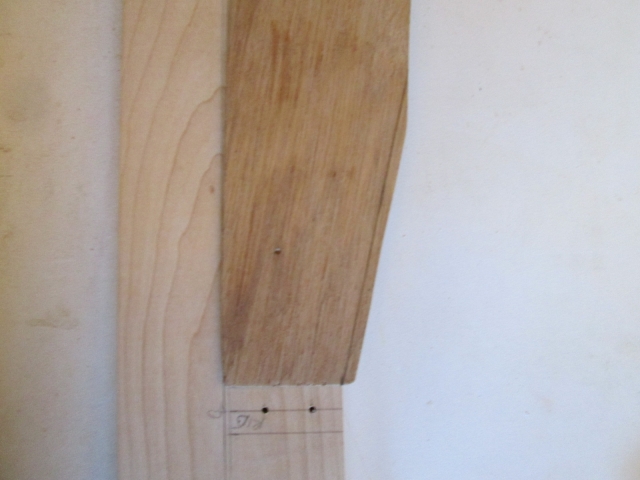
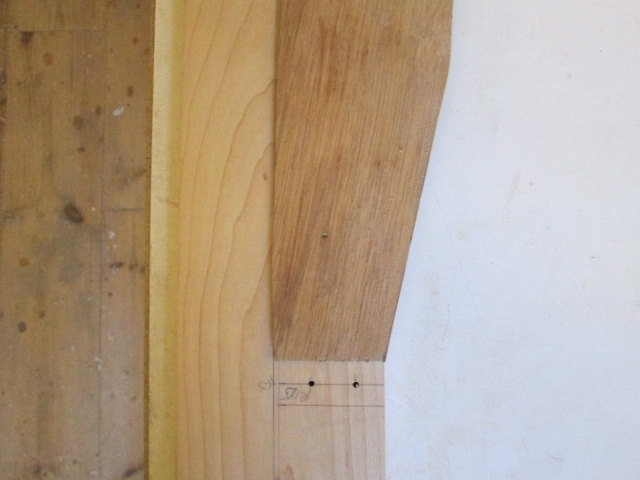
Here you can see one of the rib tail locations on the lower spar with the rib template laid over the top. Note how the tapered side of the template doesn’t meet the edge of the spar flush.
Image

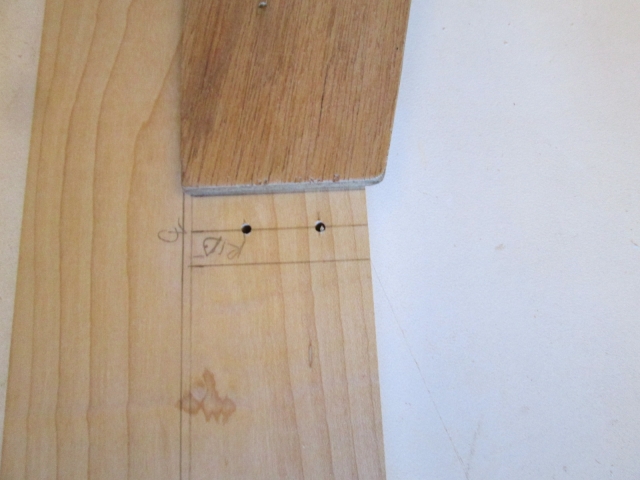
So I used a straight edge to draw a new line parallel to that edge that does meet flush; then cut the template back to the line with a razor knife and steel straight edge. I’ll use the template to correct all of the rib tails accordingly.
Image
Image

And that’s where I got to today.
KC
My Build: The Poet Creek Express Hybrid Foamie

Poet Creek Or Bust
Engineering the TLAR way - "That Looks About Right"
TnTTT ORIGINAL 200A LANTERN CLUB = "The 200A Gang"
Green Lantern Corpsmen
User avatar
KCStudly
Donating Member
 
Posts: 9640
Images: 8169
Joined: Mon Feb 06, 2012 10:18 pm
Location: Southeastern CT, USA
Top

Re: The Poet Creek Express - Foamie Hybrid

Postby Wolffarmer » Mon Sep 08, 2014 12:08 am

Looking good. Did you know 99 is from Idaho?

8) Randy
"these guys must be afraid of the dark"
User avatar
Wolffarmer
Donating Member
 
Posts: 4612
Images: 309
Joined: Wed May 02, 2007 1:32 pm
Location: Idaho Rupert
Top

Re: The Poet Creek Express - Foamie Hybrid

Postby KCStudly » Mon Sep 08, 2014 6:41 am

No, I did not know that, but I do now!
http://www.wouldyoubelieve.com/99.html
KC
My Build: The Poet Creek Express Hybrid Foamie

Poet Creek Or Bust
Engineering the TLAR way - "That Looks About Right"
TnTTT ORIGINAL 200A LANTERN CLUB = "The 200A Gang"
Green Lantern Corpsmen
User avatar
KCStudly
Donating Member
 
Posts: 9640
Images: 8169
Joined: Mon Feb 06, 2012 10:18 pm
Location: Southeastern CT, USA
Top

Re: The Poet Creek Express - Foamie Hybrid

Postby KCStudly » Mon Sep 08, 2014 10:17 pm

I was late getting out to Mecca tonight, but I did manage to get all of the hatch rib tails trimmed to match the lower spar.

Tomorrow at work I need to remember to get some more details from the model on the location of the upper actuator mounting holes (that go thru the middle two ribs) so I can drill those now. I want to make sure that they match from rib to rib, and get the holes very accurately located. Since they will be thru bolted on either side, the holes also need to be absolutely perpendicular to the faces of the ribs.

Noodling in my head on which edges can be rounded over vs. where not to. I think things like the galley light mount and paper towel holder will need to be worked out to the extent that I know I'm not "painting myself into a corner", or making extra work for myself. Fortunately the light bar can pivot, so placement should be somewhat flexible. It needs to be out far enough to aim at the counter, not the upper shelf, yet not so far back (when the hatch is up) that it is behind whoever is standing at the counter, lest it cast shadows.

I've also been thinking about whether I want to add an extra wire chase up thru the roof for any future needs, like for an entertainment center in the rear cabin cabinet. :thinking: Even if I just add the chase so that the wires could be pulled later.
KC
My Build: The Poet Creek Express Hybrid Foamie

Poet Creek Or Bust
Engineering the TLAR way - "That Looks About Right"
TnTTT ORIGINAL 200A LANTERN CLUB = "The 200A Gang"
Green Lantern Corpsmen
User avatar
KCStudly
Donating Member
 
Posts: 9640
Images: 8169
Joined: Mon Feb 06, 2012 10:18 pm
Location: Southeastern CT, USA
Top

Re: The Poet Creek Express - Foamie Hybrid

Postby Ned B » Tue Sep 09, 2014 9:05 am

KC since you're thinking about the chase, I'd go ahead & put it in. As you know it will never be easier (or even possible) to add than now
User avatar
Ned B
1000 Club
1000 Club
 
Posts: 1036
Joined: Sat Apr 16, 2011 10:25 am
Location: Syracuse NY (ish)
Top

Re: The Poet Creek Express - Foamie Hybrid

Postby tony.latham » Tue Sep 09, 2014 10:56 am

"paper towel holder will need to be worked out..."

Keep in mind that a "loose" household-type paper towel holder will allow the paper to unroll as you drive down the road. Perhaps you've addressed this in your mind.

Image
Image
Image

There's probably simpler ways of doing it. But I like turning stuff on the lathe anyway.

Tony
User avatar
tony.latham
Gold Donating Member
 
Posts: 7073
Images: 17
Joined: Mon Jul 08, 2013 4:03 pm
Location: Middle of Idaho on the edge of nowhere
Top

PreviousNext

Return to Foamies

Who is online

Users browsing this forum: No registered users and 9 guests