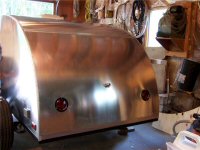
And so it begins...my removable foamie

Canvas covered foamies (Thrifty Alternatives...)

Moderator: eaglesdare

Re: And so it begins...my removable foamie

Postby mezmo » Mon Jun 04, 2012 1:51 am

Just a fast mention before you do your interior:
Polyester resin melts foam. I don't know if that
is what you were referring to by "poly" in reference
to your interior covering. I'd hate you to see the walls
melt away before your eyes! If it's a thin panel made
of hardened polyester using a foam compatible glue,
then you shouldn't have any problems.

Cheers,
Norm/mezmo
If you have a house - you have a hobby.
User avatar
mezmo
1000 Club
1000 Club
 
Posts: 1817
Images: 194
Joined: Fri Jan 01, 2010 4:11 am
Location: Columbia, SC

Re: And so it begins...my removable foamie

Postby SteveW » Mon Jun 04, 2012 3:04 pm

Was going to do a polyurethane...will this be okay on the foam?? Seems I remember reading it would work, but please correct me if this is going to eat my foam. I'm going shopping in a bit and want to get the right stuff!
Steve
The build is on.
User avatar
SteveW
Teardrop Master
 
Posts: 168
Joined: Thu Feb 02, 2012 7:11 pm
Location: Winter Garden, FL

Re: And so it begins...my removable foamie

Postby SteveW » Mon Jun 04, 2012 3:08 pm

Woohoo, Mr. UPS Driver just arrived with 4 packages for me...Christmas comes early!
Steve
The build is on.
User avatar
SteveW
Teardrop Master
 
Posts: 168
Joined: Thu Feb 02, 2012 7:11 pm
Location: Winter Garden, FL
Top

Re: And so it begins...my removable foamie

Postby bonnie » Mon Jun 04, 2012 6:55 pm

SteveW wrote:Woohoo, Mr. UPS Driver just arrived with 4 packages for me...Christmas comes early!


:thumbsup: :thumbsup: :thumbsup: Don't ya just love it?
Remember, the turtle won. :)
User avatar
bonnie
Donating Member
 
Posts: 1390
Images: 107
Joined: Sun Jul 24, 2011 4:14 pm
Location: Roxana, IL
Top

Re: And so it begins...my removable foamie

Postby atahoekid » Mon Jun 04, 2012 7:46 pm

Right now, I kinda feel like a kid waiting for Christmas to come. I think my packages of electrical stuff should arrive soon. I peek out the window when the mail delivery person comes (she's not a mailMAN) I'm jealous!! 8) :R 8)
Mel

"Believe in your abilities... Remember amateurs built the ark, professionals built the Titanic"

"Indecision may or may not be my problem" Jimmy Buffet

Image

The Road Foamie Build Thread: viewtopic.php?t=45698
User avatar
atahoekid
Platinum Donating Member
 
Posts: 1773
Images: 158
Joined: Sat Jul 24, 2010 2:49 am
Location: Incline Village, NV
Top

Re: And so it begins...my removable foamie

Postby millstone » Mon Jun 04, 2012 8:17 pm

The SIP panel is very cool.

Where did you get your reese hitch? Was it hard to install?

I'm curious. I was going to install one on my Clubman. Traded it instead.

Mark
User avatar
millstone
Silver Donating Member
 
Posts: 74
Images: 0
Joined: Tue Jul 05, 2011 3:53 pm
Location: Georgia
Top

Re: And so it begins...my removable foamie

Postby SteveW » Mon Jun 04, 2012 8:23 pm

Got the hitch from minidomore.com. It was pretty easy to install, although the instructions were for a hatchback rather than a convertible, so I had to remove a couple more trim pieces that weren't mentioned. I'm slow and methodical about that kinda stuff, but was still done in less than 3 hours, and that included washing out all the dust behind the bumper from our roadtrip out west seven summers ago!
Steve
The build is on.
User avatar
SteveW
Teardrop Master
 
Posts: 168
Joined: Thu Feb 02, 2012 7:11 pm
Location: Winter Garden, FL
Top

Re: And so it begins...my removable foamie

Postby eaglesdare » Tue Jun 05, 2012 7:08 am

i put poly directly on my "blue" foam. not a problem. but please check and test on your foam first.
Louella
May the foam be with you.
User avatar
eaglesdare
Donating Member
 
Posts: 3168
Images: 13
Joined: Tue Aug 26, 2008 7:06 pm
Top

Re: And so it begins...my removable foamie

Postby SteveW » Thu Jun 07, 2012 4:31 pm

Gaahhhh! Rain, rain, go away! Come again some other day after I finish my freakin build! Three nights of incessant rain. This is NOT doing anything to help with meeting my deadline (less than two weeks away!) :x
Steve
The build is on.
User avatar
SteveW
Teardrop Master
 
Posts: 168
Joined: Thu Feb 02, 2012 7:11 pm
Location: Winter Garden, FL
Top

Re: And so it begins...my removable foamie

Postby SteveW » Sun Jun 10, 2012 9:30 pm

SteveW wrote:Was going to do a polyurethane...will this be okay on the foam?? Seems I remember reading it would work, but please correct me if this is going to eat my foam. I'm going shopping in a bit and want to get the right stuff!

For preliminary results of using Minwax Fast Drying Polyurethane, to date no harmful effects to the (white beadboard) foam, but no real benefits either. Doesn't really like to stick to the foam the way I was hoping. Will try to pool it on a bit more and see what happens.
Steve
The build is on.
User avatar
SteveW
Teardrop Master
 
Posts: 168
Joined: Thu Feb 02, 2012 7:11 pm
Location: Winter Garden, FL
Top

Re: And so it begins...my removable foamie

Postby SteveW » Tue Jun 19, 2012 8:20 pm

Argh, used TB2 to put in my dowels into the foam instead of GG and was wondering why they were wiggly. Duh. :cry:

We have to hit the road on Sunday and this thing isn't even assembled yet. Sigh. Luckily the interior is basically done (or at least as much done as it's going to get before the trip) other than the ceiling. I'm not usually one to rush things, but I'm being forced to do so now. Tomorrow the dowels go back in and the walls, cubbies, and floor get glued together, followed by the first couple pieces of the ceiling. I have JUST enough days to get everything finished...but only if I don't have any more mishaps or setbacks (which of course doesn't seem to be in the cards so far). Making me really really nervous.

Progress that actually has been made...
All panels cut.
Kerfs cut in roof/hatch panels.
Door opening cut.
Door frame (for a couple Frank Bear doors...heavier than the rest of my teardrop I think, but no leaks to be had) constructed and glued in place.
Hard points glued in place.
Interior cubbies built and skinned with contractor paper/polyurethane (these took a lot longer than anticipated, as I wound up pulling off my first attempt)
Interior walls painted (for now...originally I started to skin with some leftover posterboard, but couldn't keep it from getting wavy, costing me even more time to pull it off and clean everything back up)
Dowel holes cut for walls and cubbies, then dry-fit together (and of course originally stuck in with TBII...luckily I didn't try to bond both sides together with it)

What's left to do...
Assembly.
Roof.
Hatch.
Seals.
Canvas.
Paint.
etc., etc.
The list seems endless.

On a good note, the actual trailer is finished and awaiting a trip to the DMV. I don't like the way the welding shop attached my aluminum fenders, but I gave them some creative license and they got creative. Otherwise it came out great. It weighed in today at 230 pounds. The camper should weigh no more than this...although the doors will add a good bit. I'm expecting to come in around 450-500 empty.

We made a trip to BestBuy to replace the old point-n-click that died recently, so I should hopefully get some new shots soon.
Steve
The build is on.
User avatar
SteveW
Teardrop Master
 
Posts: 168
Joined: Thu Feb 02, 2012 7:11 pm
Location: Winter Garden, FL
Top

Re: And so it begins...my removable foamie

Postby SteveW » Sun Jun 24, 2012 7:02 pm

Made some really good progress in the mad dash to get the teardrop ready for our trip up the east coast, but Debby had other plans. Not a dry day for the last 4 days, so no chance to get the canvas on. Ah well, we'll have to finish it when we get back. We've dumped all our camping days/stops in hopes that we'll do a part II later this summer and pick up all the spots we missed.
Steve
The build is on.
User avatar
SteveW
Teardrop Master
 
Posts: 168
Joined: Thu Feb 02, 2012 7:11 pm
Location: Winter Garden, FL
Top

Re: And so it begins...my removable foamie

Postby SteveW » Sun Jun 24, 2012 7:10 pm

Here's some photos of our progression. Sorry for the large size...
Image
Image
Image
Image
Image
Image
Image
Image
Image

On a side note, GG works really well bonding leg hair to leg skin. :shock: :frightened:
Steve
The build is on.
User avatar
SteveW
Teardrop Master
 
Posts: 168
Joined: Thu Feb 02, 2012 7:11 pm
Location: Winter Garden, FL
Top

Re: And so it begins...my removable foamie

Postby atahoekid » Sun Jun 24, 2012 9:40 pm

SteveW wrote:On a side note, GG works really well bonding leg hair to leg skin. :shock: :frightened:


Not sure that I wanted to know that but I guess it's useful info :roll: :roll: Your build looks like it's coming along fine. Sorry you're not getting done till you get back but perhaps then the pace is not so frantic and you can enjoy your progress. Looks great so far :beer: :beer:
Mel

"Believe in your abilities... Remember amateurs built the ark, professionals built the Titanic"

"Indecision may or may not be my problem" Jimmy Buffet

Image

The Road Foamie Build Thread: viewtopic.php?t=45698
User avatar
atahoekid
Platinum Donating Member
 
Posts: 1773
Images: 158
Joined: Sat Jul 24, 2010 2:49 am
Location: Incline Village, NV
Top

Re: And so it begins...my removable foamie

Postby SteveW » Mon Jun 25, 2012 8:49 am

atahoekid wrote:Sorry you're not getting done till you get back but perhaps then the pace is not so frantic and you can enjoy your progress.

That's the hope! :D
Steve
The build is on.
User avatar
SteveW
Teardrop Master
 
Posts: 168
Joined: Thu Feb 02, 2012 7:11 pm
Location: Winter Garden, FL
Top

PreviousNext

Return to Foamies

Who is online

Users browsing this forum: bdosborn and 6 guests