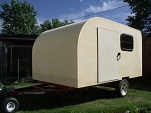
#1

Canvas covered foamies (Thrifty Alternatives...)

Moderator: eaglesdare

Re: #1

Postby ghcoe » Sat Dec 06, 2014 12:05 am

Any time. Just let me know. We are planning on heading back to City of Rocks at some point. Could be a good foamy trip.
George.

Gorrilla Glue, Great Stuff and Gripper. The three G's of foamie construction.

My build viewtopic.php?t=54099
Working with flashing for foamie construction viewtopic.php?f=55&t=60303
Making a hot wire http://tnttt.com/viewtopic.php?f=55&t=55323
User avatar
ghcoe
1000 Club
1000 Club
 
Posts: 1950
Joined: Fri Dec 11, 2009 11:20 pm
Location: SW Idaho

Re: #1

Postby Wolffarmer » Sat Dec 06, 2014 12:10 am

City of rocks, one my favorite places.

:D
"these guys must be afraid of the dark"
User avatar
Wolffarmer
Donating Member
 
Posts: 4612
Images: 309
Joined: Wed May 02, 2007 1:32 pm
Location: Idaho Rupert

Re: #1

Postby ghcoe » Sat Dec 06, 2014 7:01 pm

Some pictures of the windows and vent I scored. Windows came with screens and inside clamp ring. Weather has actually been pretty good here so I have made some progress. Details to follow.

DSCF3293 s.jpg
Window
DSCF3293 s.jpg (146.17 KiB) Viewed 1382 times


DSCF3298 s.jpg
Inside window ring
DSCF3298 s.jpg (161.84 KiB) Viewed 1382 times


DSCF3296 s.jpg
Vent
DSCF3296 s.jpg (171.6 KiB) Viewed 1382 times
George.

Gorrilla Glue, Great Stuff and Gripper. The three G's of foamie construction.

My build viewtopic.php?t=54099
Working with flashing for foamie construction viewtopic.php?f=55&t=60303
Making a hot wire http://tnttt.com/viewtopic.php?f=55&t=55323
User avatar
ghcoe
1000 Club
1000 Club
 
Posts: 1950
Joined: Fri Dec 11, 2009 11:20 pm
Location: SW Idaho
Top

Re: #1

Postby ghcoe » Sat Dec 06, 2014 8:24 pm

So since the weather is getting into the low 50's here during the day I have been able to do some Foamy work.

I went ahead and opened up the door clearance to 1/2 inch. This will give me a 1/4 inch clearance around the door to play with now instead of the 1/8 I was looking at before. Once flashing, canvas and paint are applied I hope it will be tight but no binding.
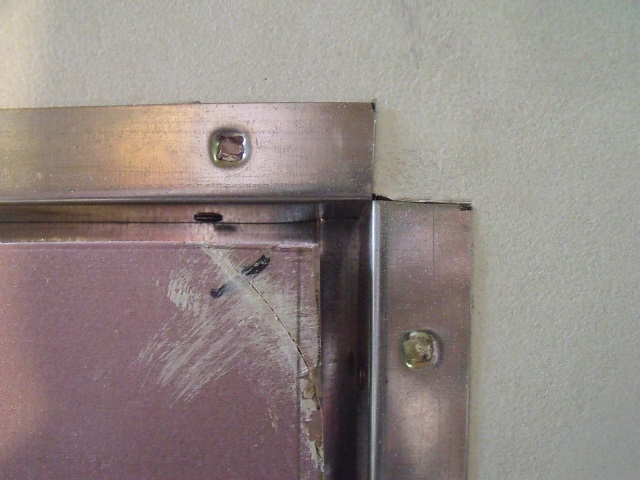
DSCF3297 s.jpg
Door fitment
DSCF3297 s.jpg (129.41 KiB) Viewed 1375 times


My plans originally called for the window to be in the doors, but I began to think that mounting them in the body was going to be better. The sleeping arrangements are different in this foamy than most TD designs by us sleeping with our heads near the bulkhead rather than the front wall. I figured that it would be more convenient to have the window near our heads especially if we are using the bulkhead as a backrest when hanging out in the trailer. After test fitting the window clamp ring on the door and then on the body I found that yes it was a better place. So to be a little different, which I like to be, I began the task of mounting the window.

So now that I have windows I know how big to make the cut out. I was not sure what size I was going to wind up with so I had to put this on hold till now. These window came with the interior clamp ring so I was able to use that as a template. It was easier for me to find reference points inside so I started there. It could be used the same way on the outside since the clamp ring is the same size as the window. Once I found where I wanted it I then traced along the outside edge of the ring where it goes through the wall.
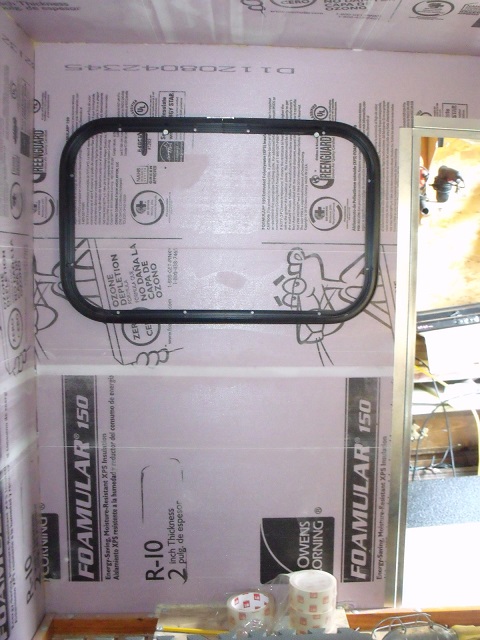
DSCF3299 s.jpg
Window clamp ring
DSCF3299 s.jpg (154.16 KiB) Viewed 1375 times


This gave me a nice line to follow with the jigsaw.
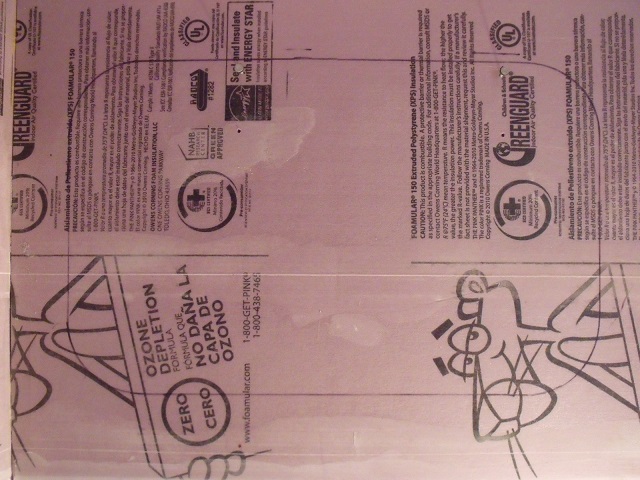
DSCF3300 s.jpg
Window outline
DSCF3300 s.jpg (146.63 KiB) Viewed 1375 times
Last edited by ghcoe on Sat Dec 06, 2014 8:59 pm, edited 1 time in total.
George.

Gorrilla Glue, Great Stuff and Gripper. The three G's of foamie construction.

My build viewtopic.php?t=54099
Working with flashing for foamie construction viewtopic.php?f=55&t=60303
Making a hot wire http://tnttt.com/viewtopic.php?f=55&t=55323
User avatar
ghcoe
1000 Club
1000 Club
 
Posts: 1950
Joined: Fri Dec 11, 2009 11:20 pm
Location: SW Idaho
Top

Re: #1

Postby ghcoe » Sat Dec 06, 2014 8:32 pm

So for me to get the jigsaw blade in the wall I had to drill a large hole. This was a bit hard for me to do since I was drilling into a perfectly good wall and not a door that I could just easily replace if I messed up.

DSCF3301 s.jpg
Drilling the wall
DSCF3301 s.jpg (158.64 KiB) Viewed 1376 times


DSCF3302 s.jpg
Hole
DSCF3302 s.jpg (105.9 KiB) Viewed 1376 times


The next hardest part was to actually start the cut....... :worship: Make sure that blade is on tight. :thumbsup:

DSCF3303 s.jpg
Getting jiggy with it!
DSCF3303 s.jpg (129.64 KiB) Viewed 1376 times
George.

Gorrilla Glue, Great Stuff and Gripper. The three G's of foamie construction.

My build viewtopic.php?t=54099
Working with flashing for foamie construction viewtopic.php?f=55&t=60303
Making a hot wire http://tnttt.com/viewtopic.php?f=55&t=55323
User avatar
ghcoe
1000 Club
1000 Club
 
Posts: 1950
Joined: Fri Dec 11, 2009 11:20 pm
Location: SW Idaho
Top

Re: #1

Postby ghcoe » Sat Dec 06, 2014 8:41 pm

Here is a shot on the other side of the wall halfway through the cut. Looking pretty good so far...... :frightened:

DSCF3304 s.jpg
Backside of cut
DSCF3304 s.jpg (89.85 KiB) Viewed 1376 times


A shot of the window once the foam fell out.

DSCF3305 s.jpg
Window!
DSCF3305 s.jpg (161.68 KiB) Viewed 1376 times


Another shot of the interior with the window cutout.

DSCF3306 s.jpg
Interior with window cutout
DSCF3306 s.jpg (148.42 KiB) Viewed 1376 times
George.

Gorrilla Glue, Great Stuff and Gripper. The three G's of foamie construction.

My build viewtopic.php?t=54099
Working with flashing for foamie construction viewtopic.php?f=55&t=60303
Making a hot wire http://tnttt.com/viewtopic.php?f=55&t=55323
User avatar
ghcoe
1000 Club
1000 Club
 
Posts: 1950
Joined: Fri Dec 11, 2009 11:20 pm
Location: SW Idaho
Top

Re: #1

Postby ghcoe » Sat Dec 06, 2014 8:48 pm

So I was pretty happy with how the process went. I cleaned up the cut and made sure I had enough clearance around the window for the canvas and paint.

DSCF3307 s.jpg
Outside shot of window cutout
DSCF3307 s.jpg (118.24 KiB) Viewed 1376 times


I could not stop there. I had to dry fit the window and door to see how it would look.

DSCF3310 s.jpg
Window and door back
DSCF3310 s.jpg (130.22 KiB) Viewed 1376 times


DSCF3314 s.jpg
Window and door front
DSCF3314 s.jpg (106.45 KiB) Viewed 1376 times
George.

Gorrilla Glue, Great Stuff and Gripper. The three G's of foamie construction.

My build viewtopic.php?t=54099
Working with flashing for foamie construction viewtopic.php?f=55&t=60303
Making a hot wire http://tnttt.com/viewtopic.php?f=55&t=55323
User avatar
ghcoe
1000 Club
1000 Club
 
Posts: 1950
Joined: Fri Dec 11, 2009 11:20 pm
Location: SW Idaho
Top

Re: #1

Postby ghcoe » Sat Dec 06, 2014 8:53 pm

And of course I can not leave out the inside shot. Maybe I am a bit bias, but I think it is looking pretty good.

DSCF3313 s.jpg
Inside shot
DSCF3313 s.jpg (135.9 KiB) Viewed 1376 times


I think by putting the window in the body it will reduce a lot of stress on the door too.

So the weather is looking good for tomorrow. With some luck maybe I can get some more stuff done. Maybe a roof vent. :thumbsup:
George.

Gorrilla Glue, Great Stuff and Gripper. The three G's of foamie construction.

My build viewtopic.php?t=54099
Working with flashing for foamie construction viewtopic.php?f=55&t=60303
Making a hot wire http://tnttt.com/viewtopic.php?f=55&t=55323
User avatar
ghcoe
1000 Club
1000 Club
 
Posts: 1950
Joined: Fri Dec 11, 2009 11:20 pm
Location: SW Idaho
Top

Re: #1

Postby pchast » Sat Dec 06, 2014 9:11 pm

:thumbsup:
pchast
Platinum Donating Member
 
Posts: 2036
Images: 97
Joined: Mon Jan 28, 2013 5:47 pm
Location: Athens, NY
Top

Re: #1

Postby KCStudly » Sat Dec 06, 2014 9:53 pm

A big milestone achieved! :thumbsup:
KC
My Build: The Poet Creek Express Hybrid Foamie

Poet Creek Or Bust
Engineering the TLAR way - "That Looks About Right"
TnTTT ORIGINAL 200A LANTERN CLUB = "The 200A Gang"
Green Lantern Corpsmen
User avatar
KCStudly
Donating Member
 
Posts: 9618
Images: 8169
Joined: Mon Feb 06, 2012 10:18 pm
Location: Southeastern CT, USA
Top

Re: #1

Postby GPW » Sun Dec 07, 2014 6:42 am

It’s looking VERY Good !!! :thumbsup: 8) ;)
There’s no place like Foam !
User avatar
GPW
Gold Donating Member
 
Posts: 14912
Images: 546
Joined: Thu Feb 09, 2006 7:58 pm
Location: New Orleans
Top

Re: #1

Postby lthomas987 » Sun Dec 07, 2014 2:28 pm

Looks great! Windows make it look so close to done!
Laura
Bike-Drop a Micro-Foamy Build Journal http://www.tnttt.com/viewtopic.php?f=50&t=59274
My first Superlegarra-ish Foamy build http://www.tnttt.com/viewtopic.php?f=55&t=59049
User avatar
lthomas987
Donating Member
 
Posts: 357
Images: 204
Joined: Sun Feb 02, 2014 2:41 pm
Location: Minneapolis, MN, USA
Top

Re: #1

Postby ghcoe » Sun Dec 07, 2014 7:12 pm

lthomas987 wrote:Looks great! Windows make it look so close to done!


My wife agrees. She sat in it tonight and now she is getting interested in using it.
George.

Gorrilla Glue, Great Stuff and Gripper. The three G's of foamie construction.

My build viewtopic.php?t=54099
Working with flashing for foamie construction viewtopic.php?f=55&t=60303
Making a hot wire http://tnttt.com/viewtopic.php?f=55&t=55323
User avatar
ghcoe
1000 Club
1000 Club
 
Posts: 1950
Joined: Fri Dec 11, 2009 11:20 pm
Location: SW Idaho
Top

Re: #1

Postby ghcoe » Sun Dec 07, 2014 7:19 pm

Well another good day. Was able to get out the shop around noon. Got the other window cutout done and test fitted the window.

DSCF3315 s.jpg
Other window cutout
DSCF3315 s.jpg (86.8 KiB) Viewed 1321 times


DSCF3317 s.jpg
Other window test fitted
DSCF3317 s.jpg (87.16 KiB) Viewed 1321 times


Then it was on to the roof vent.
George.

Gorrilla Glue, Great Stuff and Gripper. The three G's of foamie construction.

My build viewtopic.php?t=54099
Working with flashing for foamie construction viewtopic.php?f=55&t=60303
Making a hot wire http://tnttt.com/viewtopic.php?f=55&t=55323
User avatar
ghcoe
1000 Club
1000 Club
 
Posts: 1950
Joined: Fri Dec 11, 2009 11:20 pm
Location: SW Idaho
Top

Re: #1

Postby ghcoe » Sun Dec 07, 2014 7:23 pm

So first I needed to find the location for the vent. I finally decided to place it on center of the side windows. Next was to make the outline on the roof.

DSCF3318 s.jpg
Vent outline drawn
DSCF3318 s.jpg (86.16 KiB) Viewed 1321 times


Then to drill the hole for the jig saw blade.

DSCF3319 s.jpg
Drilling the roof
DSCF3319 s.jpg (70.98 KiB) Viewed 1321 times


Then the jig saw to cut it out. :thumbsup:

DSCF3321 s.jpg
Vent cut out
DSCF3321 s.jpg (90.39 KiB) Viewed 1321 times
George.

Gorrilla Glue, Great Stuff and Gripper. The three G's of foamie construction.

My build viewtopic.php?t=54099
Working with flashing for foamie construction viewtopic.php?f=55&t=60303
Making a hot wire http://tnttt.com/viewtopic.php?f=55&t=55323
User avatar
ghcoe
1000 Club
1000 Club
 
Posts: 1950
Joined: Fri Dec 11, 2009 11:20 pm
Location: SW Idaho
Top

PreviousNext

Return to Foamies

Who is online

Users browsing this forum: Bing [Bot] and 5 guests