Another foam standie...

Canvas covered foamies (Thrifty Alternatives...)

Moderator: eaglesdare

Re: Another foam standie...

Postby jdarkoregon » Sun Apr 01, 2012 11:49 pm

I now see how you got the name Wobbly, I hope the wind doesn't come up, it looks like it will just fall down
:worship: :NC :thinking:
Good luck

John
Innovation is essential
The world can be better
ImageImage
User avatar
jdarkoregon
Donating Member
 
Posts: 1237
Images: 47
Joined: Mon Aug 22, 2005 7:07 pm
Location: Oregon, Sublimity

Re: Another foam standie...

Postby atahoekid » Mon Apr 02, 2012 12:03 am

I like how you extended out the sides a bit without resorting to widening the floor. Good thinking! Yes it's always good to have the seal of approval from the Mrs. Makes life (and finances) easier.
Mel

"Believe in your abilities... Remember amateurs built the ark, professionals built the Titanic"

"Indecision may or may not be my problem" Jimmy Buffet

Image

The Road Foamie Build Thread: viewtopic.php?t=45698
User avatar
atahoekid
Platinum Donating Member
 
Posts: 1773
Images: 158
Joined: Sat Jul 24, 2010 2:49 am
Location: Incline Village, NV

Re: Another foam standie...

Postby eaglesdare » Mon Apr 02, 2012 5:38 am

that is a cool shape. its really starting to happen now! :thumbsup: :wine:
Louella
May the foam be with you.
User avatar
eaglesdare
Donating Member
 
Posts: 3168
Images: 13
Joined: Tue Aug 26, 2008 7:06 pm
Top

Re: Another foam standie...

Postby Wobbly Wheels » Mon Apr 02, 2012 8:37 am

Thanks for the replies (even the wrong one, lol).

I was going to go with a flat center section on the roof so I could put skylights in, but instead they are going to go into the angled sections just below it. Once I got them attached, it was a natural because they run from about 60" to 75" off the floor, so it's right in your line of sight while standing at the counter. I made up a vellum template for the ribs to get the curve aesthetically right and sat the cap in place till the glue dries. Tonight I'll pull the straps off, put the rest of the ribs in then glue it into place.

Next is the back wall - I'll do it solid for now and cut for the slideout after it's glassed. It too will have the top corner angled forward since that's just dead space anyway.
Then build up the door frame and the nose and I can start fairing and glassing !!

Still haven't boxed in the wheel wells, but I'm leaving that till I get the bigger wheels on.
User avatar
Wobbly Wheels
Donating Member
 
Posts: 1080
Joined: Tue Mar 15, 2011 9:51 am
Top

Re: Another foam standie...

Postby Wobbly Wheels » Fri Apr 06, 2012 5:01 pm

The Glacier is advancing !

I'm waiting on glue to dry right now on what should be a productive long weekend. The current task is to get the door framed in. That will give me the plane on which the nose cone terminates - on the port (driver's) side, it's easy because the cross section doesn't change, but on the curb (door) side) the extended side has to transition into the vertical plane of the door, then to the nose cone. I'll make up a series of triangular panels to make that transition: obviously the number of panels (and subsequent fitting involved) will determine how rounded that shape is.
At any rate, I've got the leading edge curve mocked up:
Image

I've got the back wall offered up (temporarily pinned with bamboo skewers again: thx Catherine !!) and cut the taper at the top, and I've started the nose taper on the port side:
Image
You know, it's going to be a shame to dismantle the panels again to glass them. Maybe ('schmaybe' ?) I SHOULD use canvas instead....

I've got a (paying) glassing job clogging the bench at the moment, but I'm still looking to get the door jamb up this weekend. One concession to using wood will be in the threshold - I've got a piece of 4/4 clear, straight grained fir that has found a new home. I'll drill into the bottom of the foam jamb and glue in dowels to take screws from underneath.
User avatar
Wobbly Wheels
Donating Member
 
Posts: 1080
Joined: Tue Mar 15, 2011 9:51 am
Top

Re: Another foam standie...

Postby Wobbly Wheels » Sat Apr 07, 2012 9:37 am

atahoekid wrote:I like how you extended out the sides a bit without resorting to widening the floor. Good thinking!


Thanks, but I've got to throw that one to jamscal's war wagon build. It seemed like the best way to get a little more width at countertop height on the deck I have. I was a little concerned about oscillation from the extra weight outboard of the wheels, but I'm building unltralight anyway...if it's a problem, I'll fab up some shock mounts to damp it.
viewtopic.php?f=39&t=32516
Image
User avatar
Wobbly Wheels
Donating Member
 
Posts: 1080
Joined: Tue Mar 15, 2011 9:51 am
Top

Re: Another foam standie...

Postby Wobbly Wheels » Sat Apr 07, 2012 9:42 am

jdarkoregon wrote:it looks like it will just fall down

Got some constructive criticism to make or are you just *spitting* in the wind ?
Looking at the time of your post, did you forget about the cardinal rule : "don't post anything when you've been drinking" ?
:roll:
User avatar
Wobbly Wheels
Donating Member
 
Posts: 1080
Joined: Tue Mar 15, 2011 9:51 am
Top

Re: Another foam standie...

Postby Wobbly Wheels » Sat Apr 07, 2012 9:51 am

eaglesdare wrote:that is a cool shape. its really starting to happen now!

Thx Louella. I'm amazed at how quick it's going together. It will slow down when I take the panels off to glass them - the sides come off from floor to ceiling, the back wall comes off as a unit, the roof as a unit, and hopefully I can do the nose all at once, though it will probably be far easier to do it as two halves like a clamshell. Once there's a layer of glass inside and out, I'll reassemble it, tape the seams and put the second layer of glass on the outside.

Today's jobs are to get the door frame done so I can start the nose, and to start gusseting the inside corners to make them rigid enough to remove from the frames they're screwed to.

This is the paying job - I'm glassing up a new insert for this engine panel from the doorskin mockup
Image
User avatar
Wobbly Wheels
Donating Member
 
Posts: 1080
Joined: Tue Mar 15, 2011 9:51 am
Top

Re: Another foam standie...

Postby GPW » Sat Apr 07, 2012 11:58 am

W2, I have the upmost Confidence in your build ... Just can’t wait to see it done ... 8)
There’s no place like Foam !
User avatar
GPW
Gold Donating Member
 
Posts: 14920
Images: 546
Joined: Thu Feb 09, 2006 7:58 pm
Location: New Orleans
Top

Re: Another foam standie...

Postby Wobbly Wheels » Sun Apr 15, 2012 2:11 pm

Thx Glen.

Making a little progress this weekend - got the gussets in place on the walls and made up a step where the door will sit.

I decided to use the door to transition the two planes from the nose to the extended plane of the sides out past the trailer's floor.
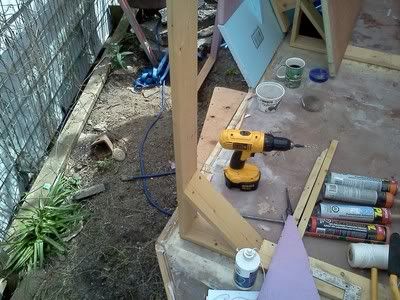
I was trying to figure out a way to do it without adding on another little triangular piece of floor, but after a while it was time to just cut some wood and git 'er done. I laminated the 'wedge' of floor from a lower piece of 5/8" ply, then 3/4" of pine under where the threshold will land (foam otherwise), then a piece of 3/8" on top. That will give me a floor that's level with the 3/4" threshold once the 1/4 ply underlayment goes down onto the traffic area of the floor. It's secured to the 3/8" underside and the perimeter framing with screws and glue, going back o the trailer framing. If needed, I'll make up a support that bridges the frame rail and carries the loading back to the center of the floor, since that step will see quite a bit of loading.
Today's project is to get the door screwed into place and attach the panels that will fair it into the side and the nose. Unfortunately, I left my angle grinder at the site (an hour away) so I can't clean up where I cut the perimeter frame today - I roughed it out with a jigsaw for now and I'll clean it up tomorrow night after I get home. I also left my glue gun there so I have to wait for glue to dry that's holding the foam to start building up the nose instead of tacking it temporarily with hot glue like I've been doing. Arrgghh !
Anyone got a spare short-term memory they're not using ? I seem to have misplaced mine...

The step cantilevered from the existing floor:
Image
And with the door in place to start fitting the panels around it:
Image


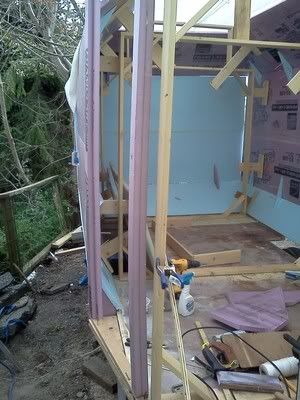
On foam and gussets...
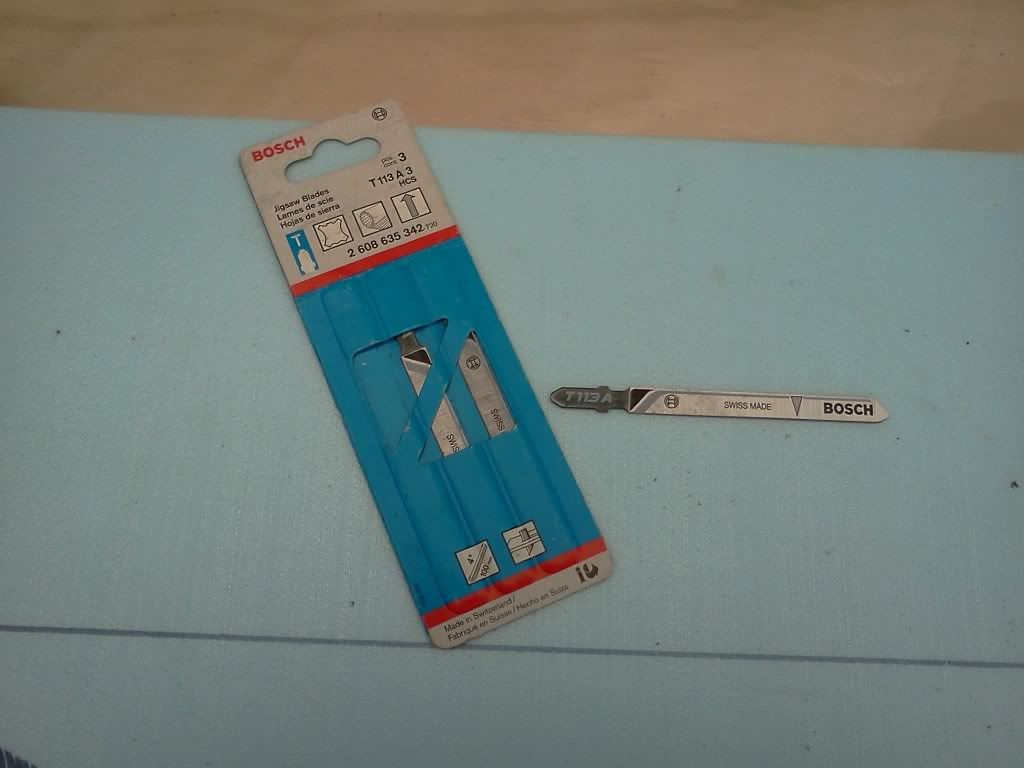
I'm using these to cut the foam with creating all that snow:
Image
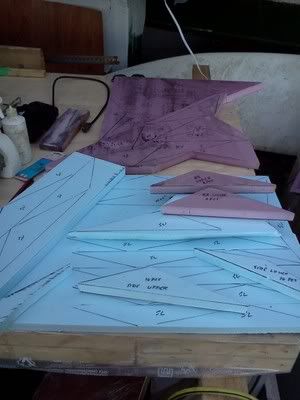
These are the gussets I had to cut out - it took about 10 or 15 mins with one of those knife blades in the jigsaw:
Image
Image

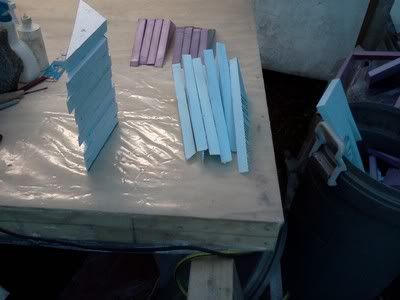
Dunno if I mentioned it earlier, but the table is a 4X8 sheet of 1/4" G1S on a frame of 2X4 and covered with vapour barrier to keep glue and resin from sticking. So far it's working pretty well - because of the vinyl, it comes totally clean with the swipe of a bench brush. That's going to be really important when I start cutting cloth because wood chips, etc in the cloth will create a high spot and a bubble that will need to be sanded out. I'll replace the plastic with a fresh piece just before I start glassing because I think I'll be getting a roll-end of cloth so I can build a holder for the roll rather than dealing with a folded bolt of cloth.

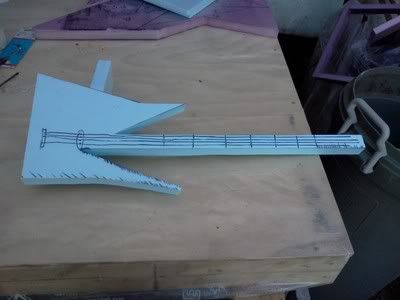
One of the offcuts reminded of a familiar shape that I couldn't quite place.....hmmm...a couple minutes with a sharpie brought it into focus. The 80's will never die !
Image

Enough goofing around: back to work...
Gussets glued into place.
Image
The glue run means I used enough ! :lol:
The gussets will hold the angle of the walls when I take them off the forms and lay them on the table to glass them. I'll cut keyholes over them in the cloth when I put the inside layer of glass on. I haven't decided for sure whether to leave them in and glass them, or to cut and sand them out once the glass is on. If I leave them on, I'll cut paneling to cover them from 1/8" luan and upholster them. It will give a good color break and a chase to run wiring through. The lower ones will be hidden inside cabinets and under the dinette table.

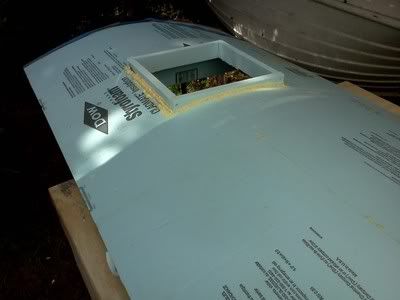
I also got the last two roof ribs installed in the domed center section. The curb is also in where I'm going to mount the vent. To give me the material to sand a radius into for glassing the curb, I sprayed in some canned foam. I'll go at it with a rounded sanded block and see how that works. The other option is to rip a bunch of chamfer strips on the table saw and glue them on where I need a radius on and inside corner. I think canned foam will be the better option, but if not my test area is up on top of the roof where I'll never see it...the visible corners will be done by which ever method proves the best.
Looks a li'l rough now but it'll clean up when I start sanding it:
Image

Time to get back at it: on to mounting the door and starting on the nose...
Last edited by Wobbly Wheels on Sun Apr 15, 2012 4:18 pm, edited 1 time in total.
User avatar
Wobbly Wheels
Donating Member
 
Posts: 1080
Joined: Tue Mar 15, 2011 9:51 am
Top

Re: Another foam standie...

Postby eaglesdare » Sun Apr 15, 2012 2:55 pm

wow, that is looking reall good! :wine: :thumbsup:
Louella
May the foam be with you.
User avatar
eaglesdare
Donating Member
 
Posts: 3168
Images: 13
Joined: Tue Aug 26, 2008 7:06 pm
Top

Re: Another foam standie...

Postby pat g » Sun Apr 15, 2012 3:58 pm

Nice work Brian! You definitely are a patient craftsman. Look forward to seeing the finished product.

Pat G :beer:
pat g
Teardrop Master
 
Posts: 155
Images: 122
Joined: Thu Feb 17, 2011 8:28 pm
Location: Medina, Oh
Top

Re: Another foam standie...

Postby Wobbly Wheels » Sun Apr 15, 2012 8:55 pm

Thx, you guys are too generous - all I see are the gaps in the foam joints, lol. I'm not too worried about it because I'm going to cut a V-groove into all of them and backfill it with canned foam to make sure I have 100% of the surface area bonded, but that will happen on the bench...hence the gussets.
It's pretty easy to stay motivated now that I know what it will look like and how much room it will have inside.
I know it's going to be light, but...I picked up the roof section and I frowned a little because it felt like it weighed about 20 lbs or so for the 41"X 8' curved panel.
Maybe this 'lightweight' thing is becoming a problem ?
Is there a group for that ?

I finally got the nose started - I'm waiting for the glue to dry now so that's it for today. I've set the height for the vertical part of the leading edge arbitrarily at 48" high. The sides will continue at that height till they hit the side walls, then the cone will go up from there. To get the leading edge to sweep back, I'll cut the triangular facets shorter as I get to the top, then I'll smooth it by sanding.
Like an engineer, I'll just build it to what looks right then later I'll back it up with some math and some babbling about laminar flow and production efficiency or some such.
:lol:
I'm going to go with a faceted cone rather than trying for round. I'll have to break the corners anyway so that the glass will roll over them, so I'll make those radii as generous as the foam's thickness will allow. I think that will work better than kerfing the panels and bending them because the joints will be straight lines rather than arcs. I can develop the arc visually (or most of it at least) by sanding the foam, even if I have to back fill with a strip down the inside of the seam

That's what I like about building this way: you don't really need a fixed design when you start, just a rough idea what you want. The foam is cheap enough and malleable enough that you can shape it and if you don't like it just cut it out, glue in a fresh piece and start again.
User avatar
Wobbly Wheels
Donating Member
 
Posts: 1080
Joined: Tue Mar 15, 2011 9:51 am
Top

Re: Another foam standie...

Postby atahoekid » Mon Apr 16, 2012 12:24 am

Coming along nicely!!! I like the way you're thinking this through. It's gonna be nice to see it all put together. Can't wait to see your pics of the fiberglass step. I'm planning on the same exterior skin and if I read right you're gonna glass the panels before assembly. Me too! :applause: :applause:
Mel

"Believe in your abilities... Remember amateurs built the ark, professionals built the Titanic"

"Indecision may or may not be my problem" Jimmy Buffet

Image

The Road Foamie Build Thread: viewtopic.php?t=45698
User avatar
atahoekid
Platinum Donating Member
 
Posts: 1773
Images: 158
Joined: Sat Jul 24, 2010 2:49 am
Location: Incline Village, NV
Top

Re: Another foam standie...

Postby Wobbly Wheels » Mon Apr 16, 2012 8:12 am

Thx Mel.

Yeah, once it's all shaped I'm going to take the panels off the form and glass them flat on the table with a layer of 6oz inside and out. Then I'll hang them back on the form, tape the joints and fair the seams. Then it's another layer of 6oz over the outside to fix everything together and to give it a thicker shell, final filling and fairing, and paint.

I've left the seams unglued where the panels join so I can separate both side walls, the back wall, the roof, the door jamb and the nose into panels small enough to work with. I have to carry them around the house and down a flight of stairs, so it's a good thing it's foam.
User avatar
Wobbly Wheels
Donating Member
 
Posts: 1080
Joined: Tue Mar 15, 2011 9:51 am
Top

PreviousNext

Return to Foamies

Who is online

Users browsing this forum: No registered users and 12 guests