Elmo's Rough Road Toy Hauler

Converting Cargo Trailers into TTTs

Re: Elmo's Rough Road Toy Hauler

Postby dustboy » Mon Mar 25, 2013 10:32 pm

Looking good, you have done it right all the way around. I want to see this slide-out galley in action, it's very similar to what I'm thinking of.
dustboy
Teardrop Master
 
Posts: 279
Images: 10
Joined: Fri Jan 11, 2013 5:27 pm

Re: Elmo's Rough Road Toy Hauler

Postby JHolden » Mon Mar 25, 2013 11:25 pm

Build is coming along very nicely!
JHolden
Teardrop Inspector
 
Posts: 17
Joined: Mon Feb 18, 2013 4:21 pm
Location: Indianapolis,IN

Re: Elmo's Rough Road Toy Hauler

Postby roadinspector » Mon Mar 25, 2013 11:42 pm

:applause: Very nice!!
Dadgum it! I cut that board 5 times and it's still too short!
2001 quad-cab Dodge Cummins 3/4 ton camper special, 16x7x7 CT work in progress toyhauler, 01 HD Ultra Classic, 98 HD Heritage Softail, 88 HD 1200 Sportster. viewtopic.php?f=42&t=51510
User avatar
roadinspector
500 Club
 
Posts: 599
Images: 127
Joined: Wed Mar 24, 2010 10:33 pm
Location: Texas
Top

Re: Elmo's Rough Road Toy Hauler

Postby elmo_4_vt » Sat Apr 13, 2013 9:34 pm

Finally got some time today to finish up the kitchen with the exception of the quick disconnect for the gas and water lines which will hopefully happen next weekend. 4 coats of spar urethane gave the kitchen a pretty thick and smooth finish. I think it will give me some good service life, But I'll still have to keep it mostly out of the rain because of the plywood. The canopy extends completely over the kitchen, but not sure if I'd chance it in the rain. I should have some time tomorrow to put the graphics on (just some color matched vinyl stripes), and start on the rear tire/propane holder. On with the pictures from today:

In the trailer. The latch on the front, bottom will keep it from moving in/out or up/down. There is also a cleat in the back that will keep that end from bouncing.

Image


Pull it out about half way.

Image


Pull out the legs and extend so they are about where they need to be:

Image


Pull out the rest of the way and fine tune the legs if needed. There is a brace wider than the opening that is screwed across the back of the kitchen unit that keeps it from falling out:

Image


Raise the other set of legs: (Sorry for the crappy picture, I think the motion of the dog screwed up the camera)

Image


Unfold, and this is when I'd be hooking up the propane and water connections:

Image

Image


Just a picture with all the doors open, showing the plates, bowls, cups, and cutlery (still need to get some nice knives).

Image


The bottom left drawer fits all of the pots and pans (3 liter and 5 liter pots, 10 and 14" frying pans) plus coffee mugs and extra cups. Not sure what I'll put in the upper compartment. May larger dish washing tubs? The second has spices, foil, saran wrap, zip lock bags, and trash bags.

Image


This shows the kitchen all the way out. You can see why I couldn't make these doors hinge open:

Image

Image

Image


Can't wait to use it in two weeks for the first camping trip of spring. It was so nice today in the Northeast I got my first sunburn on my neck and nose. Weird since it was only 60 deg.

Don

-
Truck: '96 Ford Bronco, Modified for off-road stuff

Trailer in progress: Not a tear drop exactly, sort of a mut of a couple different designs.
elmo_4_vt
Teardrop Advisor
 
Posts: 67
Joined: Tue Aug 30, 2005 3:04 pm
Location: Wilmington DE
Top

Re: Elmo's Rough Road Toy Hauler

Postby roadinspector » Sat Apr 13, 2013 10:46 pm

Very impressive kitchen setup!! Lots of work & thinking went into that. ENJOY!! :applause:
Earnest
Dadgum it! I cut that board 5 times and it's still too short!
2001 quad-cab Dodge Cummins 3/4 ton camper special, 16x7x7 CT work in progress toyhauler, 01 HD Ultra Classic, 98 HD Heritage Softail, 88 HD 1200 Sportster. viewtopic.php?f=42&t=51510
User avatar
roadinspector
500 Club
 
Posts: 599
Images: 127
Joined: Wed Mar 24, 2010 10:33 pm
Location: Texas
Top

Re: Elmo's Rough Road Toy Hauler

Postby dustboy » Sun Apr 14, 2013 9:31 am

I LOVE it! Great design, and all that counterspace is so luxurious!! You could cook a banquet for 10 on that galley.

Isn't it nice to have a place to keep everything?
dustboy
Teardrop Master
 
Posts: 279
Images: 10
Joined: Fri Jan 11, 2013 5:27 pm
Top

Re: Elmo's Rough Road Toy Hauler

Postby bc toys » Sun Apr 14, 2013 12:31 pm

would have loved to have seen this when i was doing my trailer nice job really a great ideal
bc toys
2000 Club
2000 Club
 
Posts: 2217
Images: 42
Joined: Sun Jun 28, 2009 2:45 pm
Location: LAS VEGAS NV
Top

Re: Elmo's Rough Road Toy Hauler

Postby H2Nut » Sun Apr 14, 2013 12:55 pm

Love the outdoor kitchen layout and design!! Excellent work! :thumbsup:
H2Nut
Teardrop Inspector
 
Posts: 21
Images: 22
Joined: Wed Aug 29, 2012 9:32 pm
Top

Re: Elmo's Rough Road Toy Hauler

Postby elmo_4_vt » Sun Apr 14, 2013 7:32 pm

Thanks for the compliments all... I can't wait to use it. Got caught up doing family stuff today, so didn't get the propane hooked up and only got about half way on my tire/propane carrier. Just not enough time. I'll have to focus on that this week, even if it's temporary so we can use it the last weekend in April. I did make an auxiliary table that can fit in the 2" receiver of the trailer or tow vehicle. The thinking was to use it as a work space for a small propane grill for cooking burgers/etc. while camping or just tailgating. Came out pretty good, but nothing worth taking pictures of since I just through it together with spare steel and wood as I was cleaning up the garage.


Don

-
Truck: '96 Ford Bronco, Modified for off-road stuff

Trailer in progress: Not a tear drop exactly, sort of a mut of a couple different designs.
elmo_4_vt
Teardrop Advisor
 
Posts: 67
Joined: Tue Aug 30, 2005 3:04 pm
Location: Wilmington DE
Top

Re: Elmo's Rough Road Toy Hauler

Postby revorunner » Sun Apr 14, 2013 9:40 pm

Very nice. :thumbsup:
User avatar
revorunner
Teardrop Advisor
 
Posts: 55
Joined: Tue May 22, 2012 9:03 pm
Location: BC Canada
Top

Re: Elmo's Rough Road Toy Hauler

Postby elmo_4_vt » Sun Apr 21, 2013 7:21 pm

Took some pictures earlier while I was waiting for paint to dry on today's project.

Yesterday spent a couple hours running around to Lowes and a somewhat local (30 minutes) camping store to get all the different hardware I needed to get the new stove working. What a pain. Some fittings are flare, and some are pipe. I could have gotten everything the way I wanted online, but didn't think far enough ahead. Took me two trips to each because I was in a rush and didn't plan everything out before hand. I'm going to have to live with a temporary setup for next weekends camping trip because I wasn't able to run the hard line under the trailer until I know where the water tank and heater are going to end up. Still, it works well, I'll just have to move the propane tank from the back of the trailer to the kitchen area. When I'm done, there will be quick disconnects at the front for the stove and grill. As for the fittings, I used a nice high quality, all brass and stainless type from Amazon. These are mush higher quality than the ones that would normally come with a store bought camper for an outdoor grill. I know this since I thought they'd be the same, and bought a stock extension hose to try and save some time. They are not even close in terms of quality. Anyway, on with pictures:

This is the hose that connects the kitchen with the propane tank (or in the hard line under the camper in the future):

Image


Dual regulator and the other side of the quick disconnect:

Image


Connected:

Image


Just showing everything set up, and the new I built table and portable grill:

Image


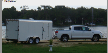
Today's project was the tire/propane carrier. I really didn't want to put the propane on the back, but because of the tongue weight being over 600lbs, I needed to redistribute weight a little. I figured the easiest way to do this was to put a spare on the back, and since I was putting the tire back there, I figured it would balance things out to just put the propane back there too. Maybe it will keep people from tailgating me? :twisted: The ramp is rated for 2000lbs, so hopefully it won't have any issues. It's made from 1.5" tube, 3/16" wall thickness, so it should be plenty beefy to hold these two things. I haven't tried opening or closing the gate yet with extra weight, but it has a torsion spring helper and as it stands now, it only takes a finger to close and you actually have to hold it back so it doesn't slam shut, so this should still be easily manageable. My only real concern are the hinges at the bottom. I'll have to keep an eye on them to make sure they don't deform, and add some additional ones if they start to deform from the weight bouncing down the road.

Where it will go on the trailer, I'm just going to through bolt it to the inside with 6, 3/8" grade 8 Bolts. There is 14 guage alum, 1.5"x3/16" Steel tube, then 3/4" Plywood:

Image


And the holder. Can't see much detail because of the shadows, but it's just 2"x1/4" angle top and bottom, 1.25"x3/16" tube verticals, and 2"x1/4" tube for the tire holder. The propane mount is for a forklift and fits a 20lb tank very well. The angle on the bottom just helps support the weight of the tank, and will have two notches cut in to accept the bottom ring of the tank.

Image


That's all for today. I was going to apply some graphics, but after reading the directions (gasp), it says you have to let them lay flat for 24 hrs before hand. They been rolled up in the garage for a couple weeks and I don't want to take any chances since they're a little pricey. Hopefully I'll have time to put them on this week, but it's not looking good. Either way we're ready for camping next weekend. Can't wait. Have over a cord of dried pine from a neighbors tree that we're going to tow up behind my friends truck. Hopefully it will burn well enough, and I won't have to waste any of my good fire wood.

Don

-
Truck: '96 Ford Bronco, Modified for off-road stuff

Trailer in progress: Not a tear drop exactly, sort of a mut of a couple different designs.
elmo_4_vt
Teardrop Advisor
 
Posts: 67
Joined: Tue Aug 30, 2005 3:04 pm
Location: Wilmington DE
Top

Re: Elmo's Rough Road Toy Hauler

Postby elmo_4_vt » Sun Apr 21, 2013 7:23 pm

The "Toad's" butt.

Everything was dry enough to install. And after mounting the tire once, pulling it off to caulk the edges, and putting it back on, I have to say it's not that bad. Not sure if I'm completely happy with the spacing/non-symmetrical aspect of it, but with the size of the tire and the license plate, I didn't have too many other options. I think it will work pretty well though. Everything seems really solid. After next weekend I can hook up the propane line out of black pipe and sort the rest of the propane and water system.

Image


This is a picture of it open, but it looks a little closer than it is... I have about 1.5" of clearance between the tire and the end of the hitch. The gate takes more to lift now, but it's still not that bad. Probably only about 30-40lbs of force at the toughest spot, which is about 15-45 degrees above horizontal. Still lifts up easy from all the way down, and once you pass the 45 degree mark, it finishes by itself, though just barely.

Image


Don

-
Truck: '96 Ford Bronco, Modified for off-road stuff

Trailer in progress: Not a tear drop exactly, sort of a mut of a couple different designs.
elmo_4_vt
Teardrop Advisor
 
Posts: 67
Joined: Tue Aug 30, 2005 3:04 pm
Location: Wilmington DE
Top

Re: Elmo's Rough Road Toy Hauler

Postby tommyt » Fri Apr 26, 2013 4:14 pm

What happened to all the pictures??? :shock: :cry:
tommyt
Teardrop Inspector
 
Posts: 5
Joined: Thu Jan 05, 2012 3:54 pm
Top

Re: Elmo's Rough Road Toy Hauler

Postby OverTheTopCargoTrailer » Fri Apr 26, 2013 5:40 pm

Maybe he forgot to pay photobucket :x :x :x :cry: :cry: :cry:
User avatar
OverTheTopCargoTrailer
1000 Club
1000 Club
 
Posts: 1628
Images: 0
Joined: Sun Jun 26, 2011 8:53 pm
Top

Previous

Return to Cargo Trailer Conversions

Who is online

Users browsing this forum: Bing [Bot] and 3 guests