The Poet Creek Express - Foamie Hybrid

Canvas covered foamies (Thrifty Alternatives...)

Moderator: eaglesdare

Re: The Poet Creek Express - Foamie Hybrid

Postby KCStudly » Mon Apr 08, 2013 12:07 am

On the way home Saturday I stopped at Ho-De-Po to look at surface mount wire raceway. My plan is to run the wiring for the cabin lights in channels routed into the foam covered by the inner wall skins. Then, punch a small hole at each location through the 2x2 cedar sill at the base of the wall and into a surface mount wire track that runs along the base of each side wall and the front bulkhead. From there I can get to either the rear cabin cabinet, under the galley counter, or forward to the tongue box without worrying too much about hacking trough the main structural elements of the cabin, and still maintain easy access for service and/or modifications.

I looked at the traditional Wiremold metal stuff. It was significantly cheaper by the foot, and came in longer lengths, but is a two piece design (backer cleat and separate cap), and was heavier.

What I decided on is the PVC version that is a little wider, but much flatter, light weight and single piece with a nifty snap to close hinged type of extrusion. They have a self-adhesive peel off backing, but I will probably drill some holes and mount it with screws so that there is no question of the adhesive failing in high heat situations.

Here is what I picked up.
Image
Image
Image
Image

Sunday, after taking care of some family business, I pulled the clamps off of that street side galley wall edge glue up and set to work trimming and sanding the excess glue down.

Here it is with the clamps removed but before running the steak knife around.
Image
Image

A quick look underneath at the outside face.
Image

Not sure if I hit this with one of the clamps, if it popped off when peeling the freezer paper off, or if I caught an edge when flipping the wall over, but there was this little sliver of the ply scab piece that broke off. No big deal; I’ll just glue that back on in a few minutes once I get done moving the wall around.
Image

Cleaned up nice.
Image
Image

Trimmed the rough profile cut.
Image
Image
Image

Then I glued and clamped the little ply chip back into place.
Image

Set up and cut the porch light blocking on the outside face of the wall.
Image

I guess I didn’t take any more pics until I had it all glued in and weighted down.
Image

Here’s that chip all glued back up. I’ll touch it with the little sanding block next time.
Image

Backing up a bit, Saturday we went up to Mom’s to celebrate a belated Easter dinner.
There was an antipasto appetizer tray consisting of string cheese, hard salami, mixed olives with feta cheese, mozzarella balls, artichoke hearts, and apple slices with a pistachio/almond/honey/orange zest butter spread.
Image

We had eaten quite a bit of it before anyone thought to take a pic.
Image

Mom sets a nice table.
Image

Mom at the helm.
Image

Pulling the rotisserie spit out of the roast leg of lamb and carving it up.
Image

Dinner is served.
Image
Image
Image

Tender lamb with garlic and mint sauce; quinoa with black rice, sautéed onions, garlic, cumin, coarsely sliced chives, avocado slices and fresh lemon wedges; and steamed asparagus.
Image

For dessert Aunt Sandra made an angel food cake with fresh strawberries and a creamy topping made with yogurt and sour cream that had more strawberries mixed in (sorry, no pic).
Last edited by KCStudly on Tue Mar 15, 2022 11:48 am, edited 2 times in total.
KC
My Build: The Poet Creek Express Hybrid Foamie

Poet Creek Or Bust
Engineering the TLAR way - "That Looks About Right"
TnTTT ORIGINAL 200A LANTERN CLUB = "The 200A Gang"
Green Lantern Corpsmen
User avatar
KCStudly
Donating Member
 
Posts: 9640
Images: 8169
Joined: Mon Feb 06, 2012 10:18 pm
Location: Southeastern CT, USA

Re: The Poet Creek Express - Foamie Hybrid

Postby Wolffarmer » Mon Apr 08, 2013 12:14 am

Yummmm Yum

Randy
"these guys must be afraid of the dark"
User avatar
Wolffarmer
Donating Member
 
Posts: 4612
Images: 309
Joined: Wed May 02, 2007 1:32 pm
Location: Idaho Rupert

Re: The Poet Creek Express - Foamie Hybrid

Postby GPW » Mon Apr 08, 2013 7:27 am

Starting to look like a trailer now .... getting exciting !!! :P :woohoo:
There’s no place like Foam !
User avatar
GPW
Gold Donating Member
 
Posts: 14920
Images: 546
Joined: Thu Feb 09, 2006 7:58 pm
Location: New Orleans
Top

Re: The Poet Creek Express - Foamie Hybrid

Postby KCStudly » Mon Apr 08, 2013 3:29 pm

We aim to please, Randy!

Yeah, Gp, I actually find myself slowing down as if I am afraid that I will forget some part of the sequence and go too far too fast. You know, get caught up in the moment and slap the wall skins on before the wiring is run?

I had to stop and get the wall template back out to double check the rough cut. I had already laid the cut line out before and didn't double check it against the template before jumping in and making the cut. Just looking along the wall edge it looked like part of the arc was reversed. OH NO, had I traced the bad edge of the pattern and made the cut too hastily? No. It was just some wandering in the rough cut that was fully outside of the good line from the template. :phew:

Dog day at work today. They actually had to turn the roof top chiller on a day earlier than planned. Spent most of the day replacing the seals in a large positive displacement pump (Waukesha U130), not usually a difficult job, but complicated by the installation location. During my little "cool down period" when I sit at my desk after the bell I am pretty sure I nodded off to sleep for a second or two. I think I'm just going to run by the marine supply and grab my fuse panel before heading for the couch to continue my nap.
KC
My Build: The Poet Creek Express Hybrid Foamie

Poet Creek Or Bust
Engineering the TLAR way - "That Looks About Right"
TnTTT ORIGINAL 200A LANTERN CLUB = "The 200A Gang"
Green Lantern Corpsmen
User avatar
KCStudly
Donating Member
 
Posts: 9640
Images: 8169
Joined: Mon Feb 06, 2012 10:18 pm
Location: Southeastern CT, USA
Top

Re: The Poet Creek Express - Foamie Hybrid

Postby RandyG » Mon Apr 08, 2013 6:08 pm

Ooooo I can't wait to see all the pieces put together :twisted: the time is drawing nearer.
Randy
Aircraft fabricator, novice carpenter, electrical apprentice, audio engineer dropout.
Build thread - http://www.tnttt.com/viewtopic.php?f=50&t=54126
User avatar
RandyG
500 Club
 
Posts: 695
Images: 115
Joined: Thu May 10, 2012 6:52 pm
Top

Re: The Poet Creek Express - Foamie Hybrid

Postby Junkboy999 » Mon Apr 08, 2013 9:13 pm

Why do I always have to run out for takeout every time I read this thread.

One wall up. Yaaa. Keep it up.
User avatar
Junkboy999
1000 Club
1000 Club
 
Posts: 1259
Images: 52
Joined: Fri Jul 06, 2012 9:18 pm
Location: Wichita, KS
Top

Re: The Poet Creek Express - Foamie Hybrid

Postby KCStudly » Mon Apr 08, 2013 10:59 pm

Yeah, cutting the profiles (even if it is just close for now) and standing each wall up is definitely a milestone (even if it was just for a quick look see).

I still need to route out for wiring. I want to get the switch plates made and figure out what I need for wall pockets there (I'm thinking just a couple of pieces of 1x2 separated by the width of the switch plate so that the wire channel can come up and pass through easily).

Then I need to apply the inner skins. The hatch strut blocks can be pushed out until I start building the hatch (still haven't decided for sure how I will skin the galley).

I also have to work out and decide how I am going to get wires from the porch light switches to the foot lights under the frame. Also wondering about what to do where the Wiremold chase will pass by the door surrounds (I may have to apply a toe mold trim of the same 5mm ply so that the wire chase attaches flush all along the base of the wall).

Still trying to decide how to maximize the application of finishes in the flat without over complicating or compromising gluing joints at assembly. For example, if I finish the floor before adding the walls I will need to mask the side edges of the floor to preserve the glue surface, but I still think that is easier than doing the finish from inside the box. The walls get even trickier because of all of the cabinet attachment points that would need to be plotted and masked with the risk of getting glue on the finish, or having unstained areas end up showing.

Just a few more things to figure out and lots of details to attend to. Once the inner skins go on there is really no undoing that step.

Not sure that my methods are saving time, or are more efficient, but that is the plan. Like a factory built modular home where QC and work environmental conditions are optimized compared to a stick built home where the shell goes up quick, but everything takes longer and is harder to finish "in the field", so to speak.
KC
My Build: The Poet Creek Express Hybrid Foamie

Poet Creek Or Bust
Engineering the TLAR way - "That Looks About Right"
TnTTT ORIGINAL 200A LANTERN CLUB = "The 200A Gang"
Green Lantern Corpsmen
User avatar
KCStudly
Donating Member
 
Posts: 9640
Images: 8169
Joined: Mon Feb 06, 2012 10:18 pm
Location: Southeastern CT, USA
Top

Re: The Poet Creek Express - Foamie Hybrid

Postby KCStudly » Wed Apr 10, 2013 11:48 pm

Another physical day at work today, but I forced myself to make the pilgrimage and at least make forward progress.

First, here is the fuse panel that I picked up on Monday.
Image
Image

It is a Blue Sea Systems 5026.

Since I will only have minimal 120v power (just a cord pass thru and power strip, maybe with a smart charger added later) it didn’t make sense to me to go with a larger more expensive power station/inverter do-hickey whatzit for what will be mostly a 12v system. I just don’t see us hanging out in camp parks, so 120v accessories are being kept to a minimum… actually none so far.

Stopped at Wall-o-witses tonight and got the Ozark shower/utility tent that Becky pointed out here.

Also, I got a couple of deluxe high back bag chairs. I couldn’t find an online listing for them, but I’ll get some pics up eventually. The things that I liked about the chairs were that the seat was not so low that I had to struggle to get out of it; the back was at a comfortable angle (not straight backed); it didn’t pinch in on the sides or feel like it was trying to fold up on me; it has padded solid arm rests that are at a useful height; and they are rated for 300 lbs., so hopefully they will last a little longer than others I have tried that always seem to break, bend, or snap after a few uses on soft ground. They have a detachable head cushion that hit me in the back of the shoulder blades, but was comfortable for me with it flipped to the rear, and maybe can be used to adjust lumbar, if needed. They are bigger than most bag chairs so they won’t fit in the tongue box I have planned, and they have a bent frame design so when stowed the bags have a bit of a dog legged shape which may be slightly less efficient from a storage perspective. Anyway, that’s enough about chair selection.

Okay, on to the build. I pulled weights and freezer paper off of the street side porch light blocking.
Image
Pic was taken from the top so is upside down, more or less.

Shaved the high foam and kissed it a little with the sanding block. This side is going to need a little spackle filler right behind the door jamb as there is a crease like low spot in the foam there. (It’s not really visible in the pic.)

Rather than just freehand the routing of the wire channels in the walls, I threw a quicky guide together. The curved piece was a drop from the window recess cutout, and the straight bit had been trimmed off of the wall edge scab piece. I countersunk a few holes so that I could hand screw drywall screws into the foam to temporarily locate them.
Image

A down and dirty stop block clamped on kept me from running thru the sill at the end of the cut. The PVC Wiremold will pass over this slot with a hole in the back of it where I can snake the wires thru into the wire trough.
Image

This next pic was taken from the top, so is upside down. The wire recess channel starts at the center of the dome light block turns out past the coat hook block passing over the porch light location on the far side (right about where the curve straightens out). I will drill a hole through from the porch light so those wires can run through this same channel.
Image

The channel runs parallel to the door jamb about 7-1/4 to 7-3/8 inch back and 1/2 wide x 1/2 deep… which I noted on the plans and am including here to document where not to drill or put any screws… ever.

I may extend the channel up to the roof line and route the vent fan wires thru this path, as well. The gradual arc and relatively short runs between access points make the possibility of pulling new or replacement wires much more feasible in the future.

Now shown the correct way around, this is how I plan to back up the switch plate. Two short lengths of 1x1 maple (3/4 x 3/4 actual) let into the foam straddling the wire channel. I can recess out a pocket for the wires and switch backs, but the blocks won’t get in the way of the wires passing up through the channel.
Image
Image

The switches are deep enough (with the tabs on the back) that I will probably need to raise them up from the surface of the wall with some decorative switch plates. I had hoped to make the switch plates out of stainless steel, but the cutout detail for the keeper tabs and anti-rotation key are fairly intricate, requiring great precision; machining them would be very time consuming; water jet cutting would be not cheap; and I need to raise them up to account for the depth of the switches anyway, so I will likely just make them out of stained hardwood and just hot glue the switches into round holes (k.i.s.s.). The switch and wall plate assembly will be screwed over the recess into these little wood “pontoons”.

The street side (my side) will get three (3) switches; street side dome, street side porch, and the red night lights. The curbside wall (Yvette’s side) will only get two (2) switches; curbside dome and curbside porch light.

And that was where I got to.

Thanks for watching!
Last edited by KCStudly on Thu Apr 11, 2013 12:12 am, edited 1 time in total.
KC
My Build: The Poet Creek Express Hybrid Foamie

Poet Creek Or Bust
Engineering the TLAR way - "That Looks About Right"
TnTTT ORIGINAL 200A LANTERN CLUB = "The 200A Gang"
Green Lantern Corpsmen
User avatar
KCStudly
Donating Member
 
Posts: 9640
Images: 8169
Joined: Mon Feb 06, 2012 10:18 pm
Location: Southeastern CT, USA
Top

Re: The Poet Creek Express - Foamie Hybrid

Postby Wolffarmer » Wed Apr 10, 2013 11:56 pm

Looks like you are going top hog on the electrical compared to my #1 TD. I have a 10 amp fuse at the battery. At least I did put a fuse in. My next one will have a 110 pass thru like yours and probably just a power strip also. But my pass thru will be from a truck. I have my eye on a Kenworth one from a truck of the guy I am working with. It is not hooked to anything as the engine block heater now has a short cord directly on it. I just need to plug up the hole when I swipe the pass thru. I want one that has the name of a truck on it. Most anything that is now Ford, GM.

Randy
"these guys must be afraid of the dark"
User avatar
Wolffarmer
Donating Member
 
Posts: 4612
Images: 309
Joined: Wed May 02, 2007 1:32 pm
Location: Idaho Rupert
Top

Re: The Poet Creek Express - Foamie Hybrid

Postby KCStudly » Thu Apr 11, 2013 10:08 pm

Yeah Randy, even the simplest plans seam to become complicated.

Today wasn’t so bad at work but I had to read a boring document and it nearly put me to sleep. The only funny (ironic?) thing was the reference to a Standard Operating Procedure, “SOP 602 Procedure for Writing Standard Operating Procedures”. The ironic thing is that it was not SOP 001. So by the end of the day, after the bell I was literally falling asleep.

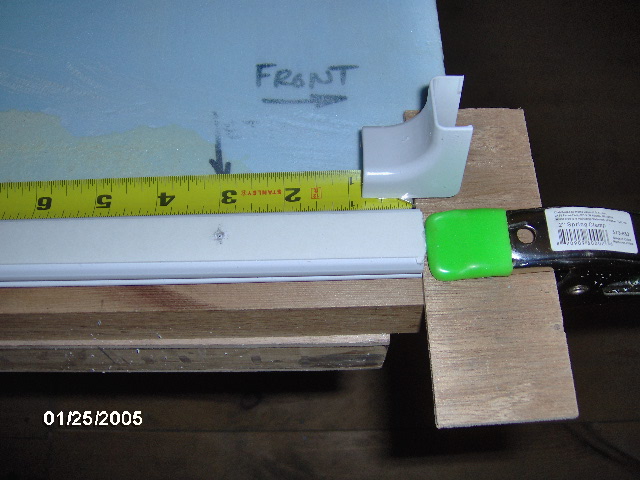
Okay, this pic gets kind of complicated. The lighter color curved piece in the center (with the notes written on it telling me that I used it as a wire channel template and how far away from the door jamb that was) is the same scrap router template as before, just repositioned to pass through the center of the pillow light/reading light location with the wire channel running aft a bit before turning down into the sill. The curvy bit clamped on the right was just a convenient way of making a stop for the router that could extend down past the end of the guide template. The piece above and the curvy bit to the left are just scraps laid there to shim the “free” side of the router shoe so that I didn’t have to try too hard to keep it level (they are just lying there, not even taped or screwed).
Image

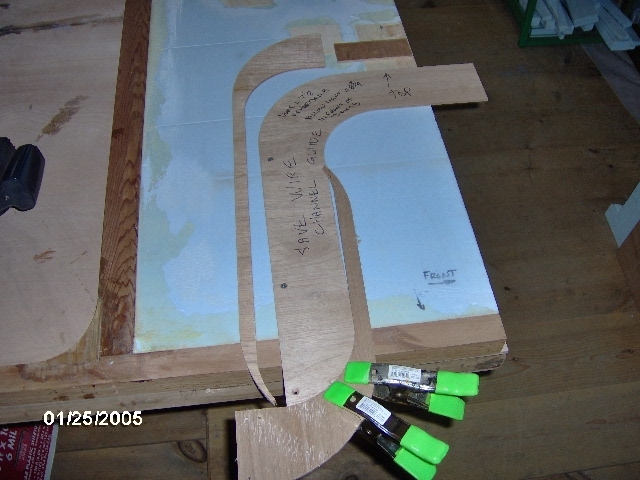
The resulting wire way channel will allow me to make a mounting block for the pillow light and switch that screws to the recess block, supports the side of the key catcher shelf, raises the switch adequately, and provides an opportunity to angle the light fixture in 3 dimensions to aid in aiming it.
Image
Image
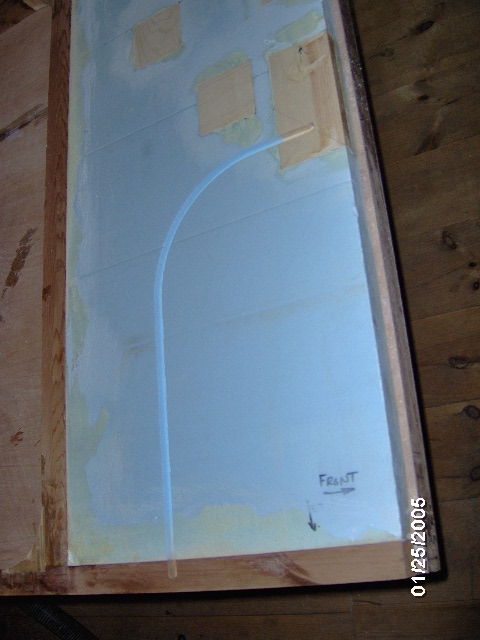
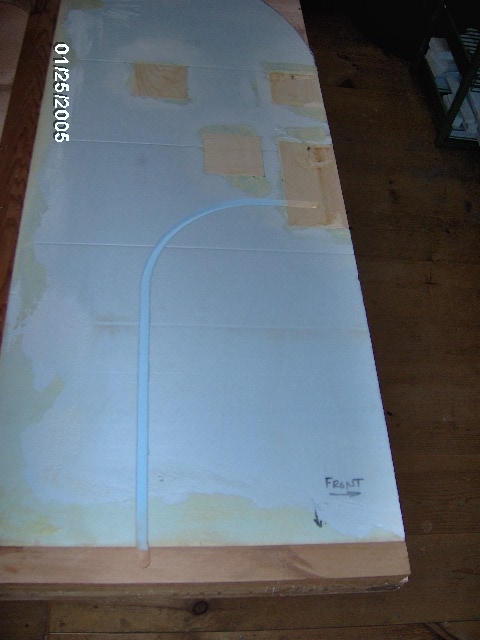
Also, the arc makes pulling wires easier and places the stress point created by the cut in the sill away from the front corner and away from the door jamb. Once the skin is on it won’t be much of a stress point, but it is still a consideration in my mental (insert joke here) process.

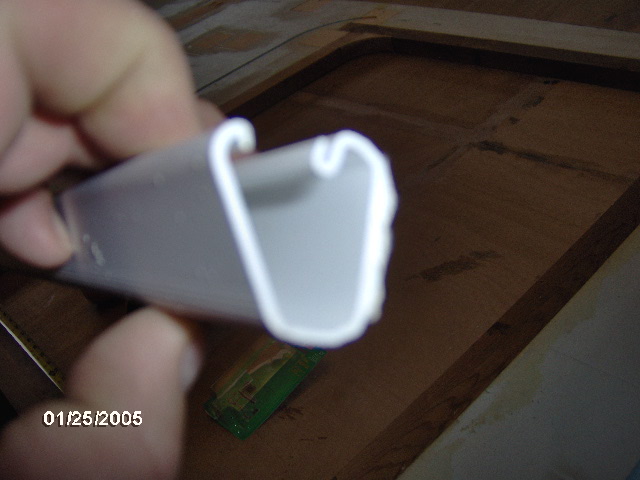
Here is a closer, albeit blurry look at the Wiremold PVC track. There is a seam where the catch lip seats which I might orient down for decorative purposes, but since the whole thing will be hidden by the mattress I will put the opening side up for easier access and gravity assist in laying wires inside.
Image

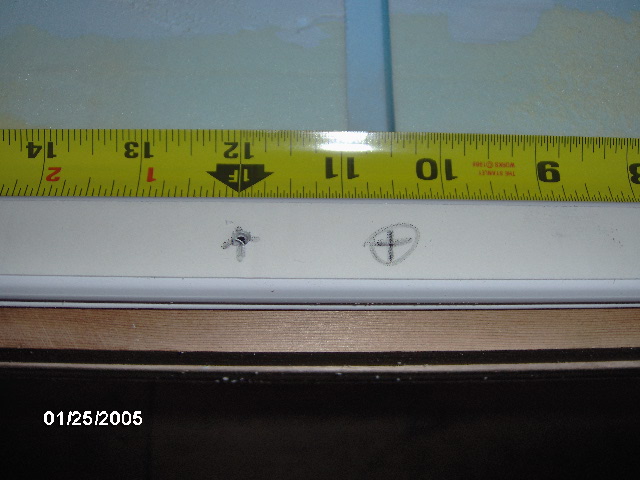
Here I have set up a small block clamped on at 3/4 inch from the front of the wall to help mock up the Wiremold in the correct position for a smooth transition at the corner trim piece, shown. Also note that I have oriented the mold with the open edge up, then flipped it over on its face to lay out the holes on the back/tape side. I will use truss head screws (similar to pan head, but shorter and wider) from the inside of the track to “compliment” the factory installed adhesive tape.
Image

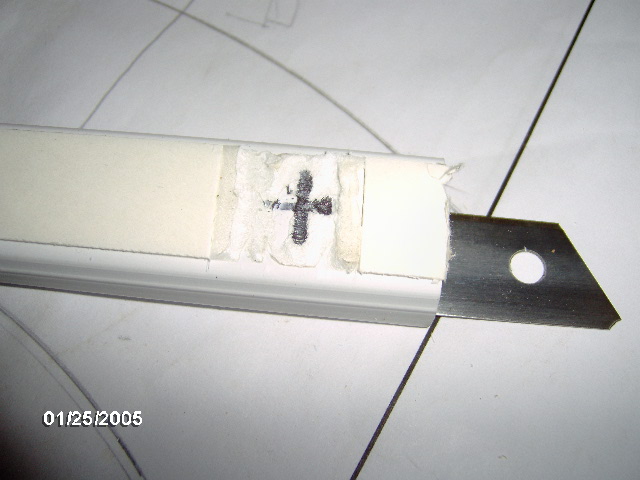
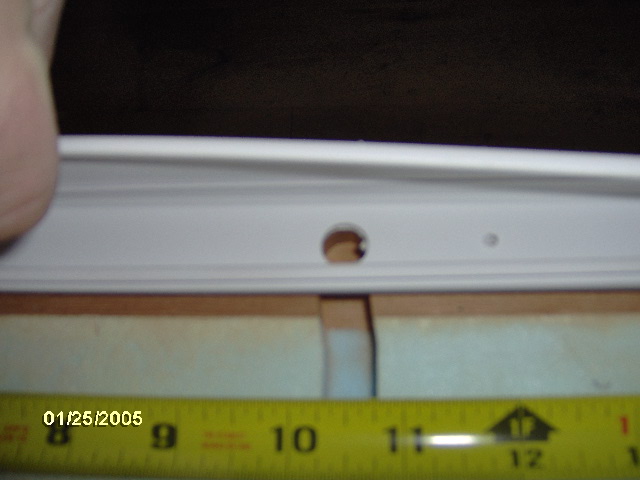
I settled on mounting screws located 3 inches from either end, and at each 9 inches on center in between. Here I am confirming that the marks for the wire pull holes (circled +) align with the routed channels.
Image

To make sure that I only drilled through the back side of the Wiremold I at first stuck a scrap of fir into the molding to stop the drill. After a couple of holes and poking through the wood with the drill (but thankfully not the molding), I switched to a replacement blade for my razor knife, shown here partially installed for the photo op.
Image
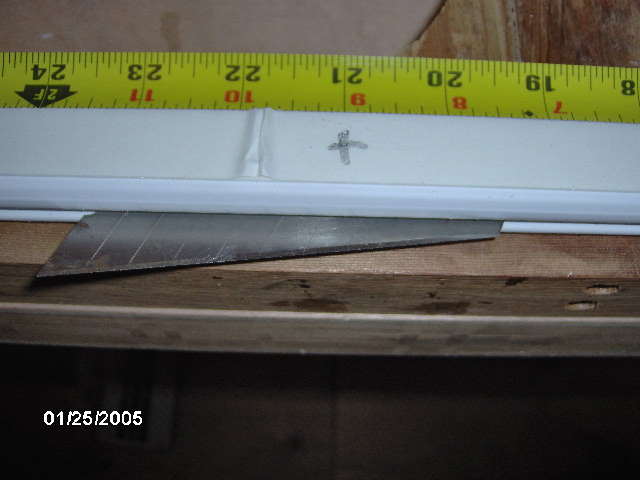
Worked great! Fit the channel perfectly and stopped the drill easily.

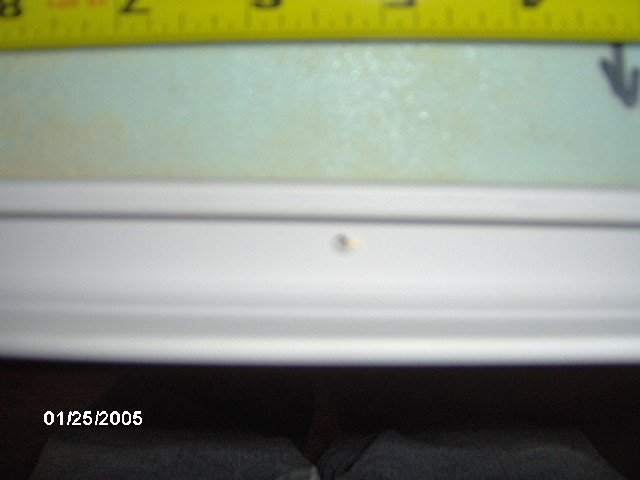
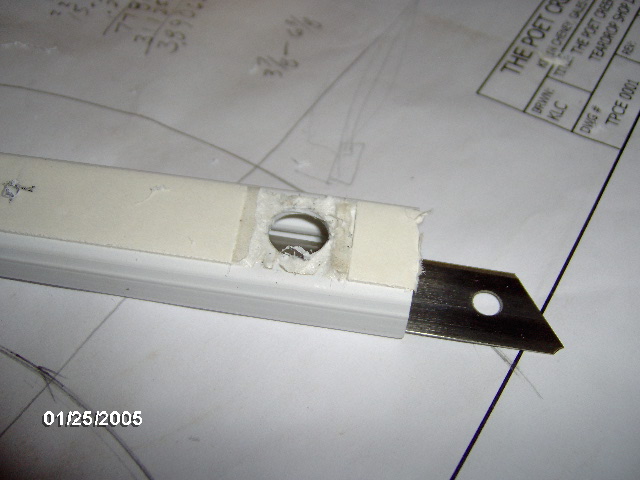
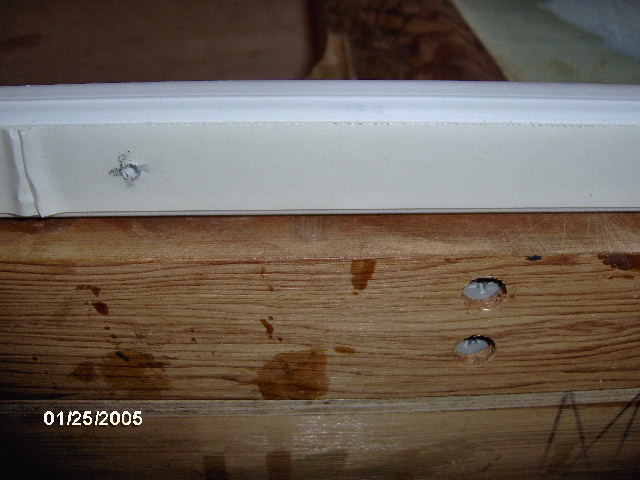
Crappy pic of the resulting screw hole only in one side of the PVC mold.
Image

This is the end of the piece marked for the hole at the street side wall switch wire channel. I decided to cut away the double backed tape before drilling the hole (I needn’t have).
Image
Also note the razor knife blade in true position to prevent drilling through the presentation side.

Karl was visiting, with Simon in tow, and suggested this 7/16 inch slugger bit for cutting a clean hole for the wires to pass through; less chance of biting in and/or shattering the PVC than a double fluted drill bit.
Image

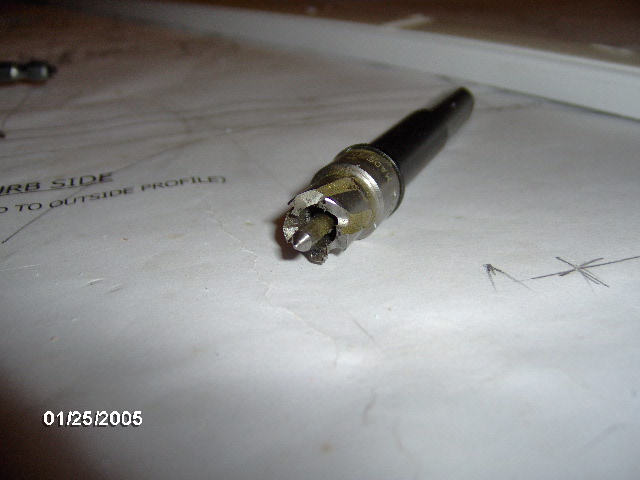
Worked like a charm. Right tool for the job.
Image
Image

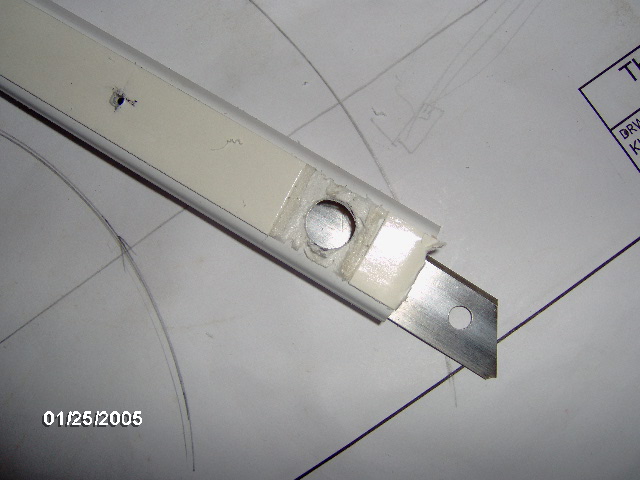
And this shot looking down from the top of the wall showing the dry fit check to make sure that the drill hole aligns to the routed wire channel in the wall.
Image
Haven’t deburred yet.

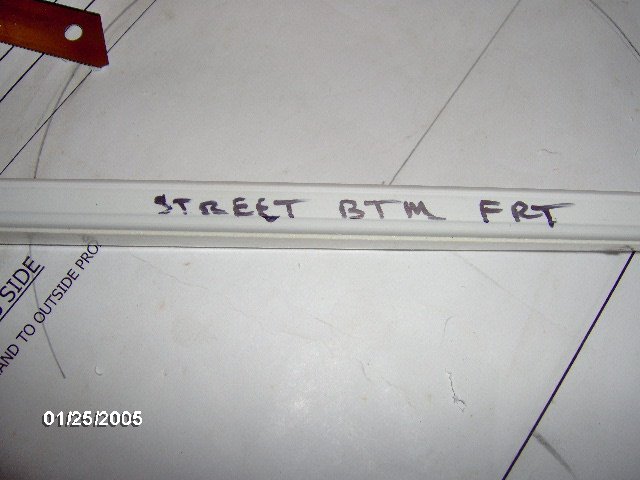
Made sure to label the part in a spot that will not show after installation (along the bottom edge).
Image

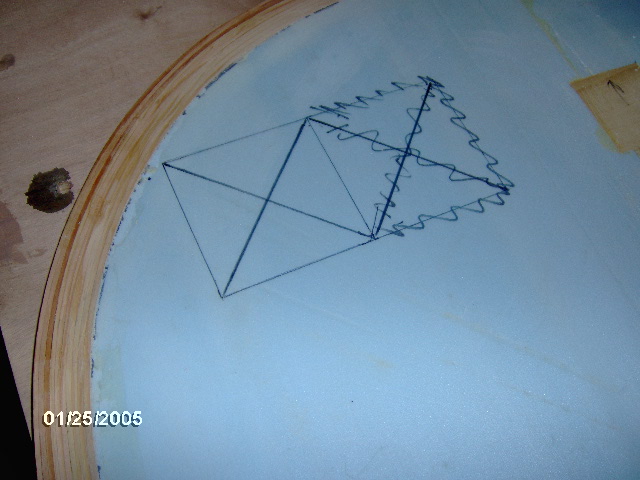
Then I laid out the recess for the “Plan B” hatch strut blocking. The scribbled out lines are where I put the layout ahead of the reference dimension instead of behind, like on the plan.
Image

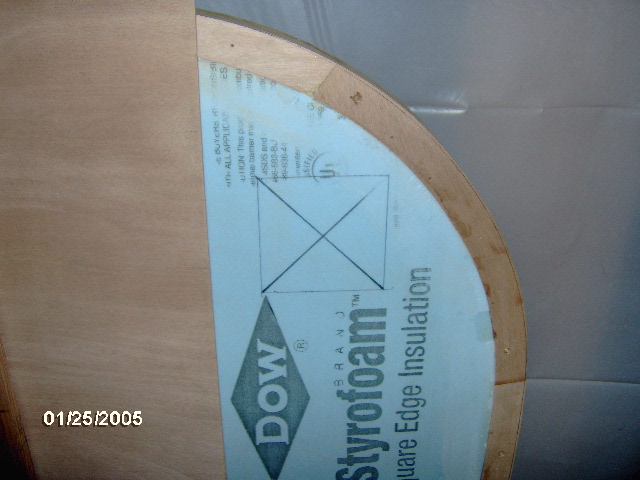
But a quick “dumb idiot check” of the curb side wall revealed the error and I was able to fix it before any harm was done. This is the curb side wall in the pile leaning against the wall.
Image

While wrapping up for the night I noticed the deck screws that I had used up through the bottom of the wall sill where I had missed the biscuit slots while gluing up the door jambs. Oops, better double check and make sure that none of the Wiremold mounting screws will interfere with these screws. All clear.
Image
Image

And that’s as far as I got. Progress is progress; many small bites doth eat the elephant.
Last edited by KCStudly on Tue Mar 15, 2022 2:56 pm, edited 2 times in total.
KC
My Build: The Poet Creek Express Hybrid Foamie

Poet Creek Or Bust
Engineering the TLAR way - "That Looks About Right"
TnTTT ORIGINAL 200A LANTERN CLUB = "The 200A Gang"
Green Lantern Corpsmen
User avatar
KCStudly
Donating Member
 
Posts: 9640
Images: 8169
Joined: Mon Feb 06, 2012 10:18 pm
Location: Southeastern CT, USA
Top

Re: The Poet Creek Express - Foamie Hybrid

Postby Wolffarmer » Thu Apr 11, 2013 10:11 pm

With all the jigs you have you can crank these out like Kaiser did Liberty Ships.

Randy
"these guys must be afraid of the dark"
User avatar
Wolffarmer
Donating Member
 
Posts: 4612
Images: 309
Joined: Wed May 02, 2007 1:32 pm
Location: Idaho Rupert
Top

Re: The Poet Creek Express - Foamie Hybrid

Postby KCStudly » Thu Apr 11, 2013 10:19 pm

Like I said, these jigs are just scraps on hand that I put to good use with minimal effort; one step better than crude freehand. The curves were already cut from previous operations.

Thanks for watching Randy, and, hey, you were pretty quick on the trigger with the reply. I appreciate you participating in my build.
KC
My Build: The Poet Creek Express Hybrid Foamie

Poet Creek Or Bust
Engineering the TLAR way - "That Looks About Right"
TnTTT ORIGINAL 200A LANTERN CLUB = "The 200A Gang"
Green Lantern Corpsmen
User avatar
KCStudly
Donating Member
 
Posts: 9640
Images: 8169
Joined: Mon Feb 06, 2012 10:18 pm
Location: Southeastern CT, USA
Top

Re: The Poet Creek Express - Foamie Hybrid

Postby Wolffarmer » Thu Apr 11, 2013 11:33 pm

Knock these out like "Liberty Trailers". :D

Randy
"these guys must be afraid of the dark"
User avatar
Wolffarmer
Donating Member
 
Posts: 4612
Images: 309
Joined: Wed May 02, 2007 1:32 pm
Location: Idaho Rupert
Top

Re: The Poet Creek Express - Foamie Hybrid

Postby bonnie » Fri Apr 12, 2013 6:43 am

KC, I am thinking along the same lines as you are about the wiring. Though, I am hoping to use wire loom, I have on hand. I'll be running most of the wiring along the floor edge, so I can't recess it, but it will be hidden by the bed/benches. As I was working on the headboard, I realized I didn't allow for the trailer light pass through. Opps. Love watching your progress. Great work. :thumbsup:
Remember, the turtle won. :)
User avatar
bonnie
Donating Member
 
Posts: 1390
Images: 107
Joined: Sun Jul 24, 2011 4:14 pm
Location: Roxana, IL
Top

Re: The Poet Creek Express - Foamie Hybrid

Postby GPW » Fri Apr 12, 2013 7:41 am

Well now ... my electrical system is a 50’ extension cord with GFI ... that’s the AC , DC is LED flashlights/lanterns (solar) hung from cup hooks ... :oops: KC, your wiring is so Well engineered !!! :thumbsup: 8) :applause:

KC... just hypothetically speaking ... If someone came to you and asked you to reproduce a trailer like yours for them .. what do you think the price tag would be ??? Just Curious ... it is , for lack of a better word , “Perfect !!! "
There’s no place like Foam !
User avatar
GPW
Gold Donating Member
 
Posts: 14920
Images: 546
Joined: Thu Feb 09, 2006 7:58 pm
Location: New Orleans
Top

PreviousNext

Return to Foamies

Who is online

Users browsing this forum: No registered users and 1 guest