Weekend started with me taking Friday off to take Bubbles around to three different places to find out if they could help us with the roof sealing issue.

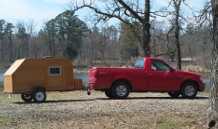
This was something of a "milestone" because it was the first time Bubbles had been hooked up since I put the new axle and lower spring arrangement last month.
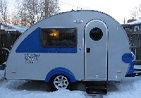
I have to say, she pulls nice! Such a difference having lost a hundred pounds or so, not to mention being so low. I've been used to running a "drop" hitch upside down to raise the hitch point, but this time I actually got to run it as a drop.
Taking the trailer to some professional refinishers, OTOH, didn't turn out so well. Suffice to say, the cost to have it done "professionally" is well beyond what we are comfortable spending (for the cost of having the roof covered in aluminum, we could probably just buy an off-the-shelf TD.)
So it was back to the original plan, refinish her ourselves as best we can and just live with it.
While I was out running around the FedEx truck showed up with our next big delivery: Fenders from the Teardrop Fix-It Shop in Montana. Here they are compared to Bubbles' "original" orange fenders:


They're narrow, but long. How long? Well, they'll fit in the area between the back of the door and the rear of the trailer, but only JUST!
Our wheels and hubcaps arrived last week, now we're just waiting for our retro-style whitewall tires to complete the look!
Then I used L brackets to attach the shelves to the back of the galley. We also came up with a way to keep the baskets in place when we drive, using an adjustable bungee cord and a couple of nice looking chrome handles.


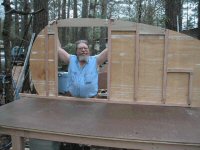
After that, it was back to the grind. Literally, as in, grinding off the old polyurethane and stain so we can put a new coat on, hopefully this weekend. It's a long, tedious process even with a power orbital sander. But it's getting done!

Saturday afternoon I took a break and got a 4 1/2" hole saw.

I'd never used a hole saw before, and this is the first time we'd ever really done any permanent modification on Bubbles' exterior. My stepson Daniel has done a lot of home improvement work on his house so he gave me some pointers, and Voila - a nice round hole in the roof...

The perfect place for our solar powered vent/light:

Slipped right into the hole I put in the center of the roof, at the highest point

Controls are all on the inside, easily accessible. Has a solar or battery powered fan and light. Fan is also reversible - will be an intake or exhaust fan, depending on what we want.

Not even very intrusive. It's nice that we have a high ceiling, too!

Following that it was sanding, sanding and more sanding. Still have some to do, but we are getting there. Fingers crossed, we hope to stain and poly this weekend. After the stain and poly are dry, the vent will be permanently mounted and sealed with silicone caulking.
Bubbles is in the shop now for some frame work - stay tuned, we should have her back by Thursday, if the weather clears up by then (with no finish on her and a hole in the roof, we can't risk moving her if there's a chance of rain!


 I'm no fool!


 )
)