Thursday.
Nothing conclusively wrong with the Jeep. After Yvette dropped me off at work, my coworker, lantern picker and friend, Larry offered that his TJ (’04 Rubicon) had the same problem which he traced to an intermittent short at a spade connection on the starter solenoid. (He is a patient and methodical troubleshooter, experienced professional in general carpentry, construction and renovation …and a damn good mechanic… very level headed with an education in psychology… go figure). I jumped on the phone and let the repair shop know to be on the lookout for this… Jeep TJ’s all seem to have the same problems… and they did find that this terminal connection was corroded. But the Jeep started fine this morning before that. They cleaned the connection and, get this, the guy said they spent so little time on it that he would not charge me. Then he said, “Well, you tell me.” Before this the only business that we had done with him was to have both vehicles emission tested there. He had gone to Yvette’s location (ok, it was maybe 1/4 mile up the road), did some rudimentary troubleshooting that I had already talked Yvette thru on the phone, attempted to bump start (since it had plenty of battery power, just no starter). His mechanic spent at least a few minutes putting the thing on a lift, or at least crawling under it. So maybe it falls under his free estimate policy, but I flipped him $20 and we were both happy. Can you really get that kind of service anymore?
I continue to be encouraged by the earnest nature of the people that I have been encountering these days. (Pay it forward. You know who you are.)
Maybe the problem recurs, maybe it doesn’t. The man offered a service and he deserved something for his time. He didn’t snow me, and he didn’t sell me something I didn’t need just so that he could turn a profit. He may not have solved my problem, but he didn’t take advantage of me either. I respect that.
Anyway, after picking up the Jeep I trekked out to Mecca and started by doing some pickup spackling on the street side wall. It seems like I keep finding divots in the ever changing light; need to put a work light on the subject.
Geep, we love the Jeep, and especially like tooling around on our vacations in the open air. Mechanical things have that issue that they are never 100/ct reliable, but they, by their nature do become worn out and used up over time. I’ve driven beaters my whole life (up until inheriting the Ford… and the wife’s Dodge before that… that she flipped on its side! ...totaled). I need at least a sense of reliability before I “invest” a whole vacation, and the outcome of this massive effort on a chunk that has been showing more frequent trouble.
Bonnie, it wasn’t a charging issue. There was plenty of juice in the battery. It just was not getting to the starter. Chasing these electrical gremlins can be quite time consuming. I’m just glad that the shop didn’t “throw parts at it” guessing at a solution.
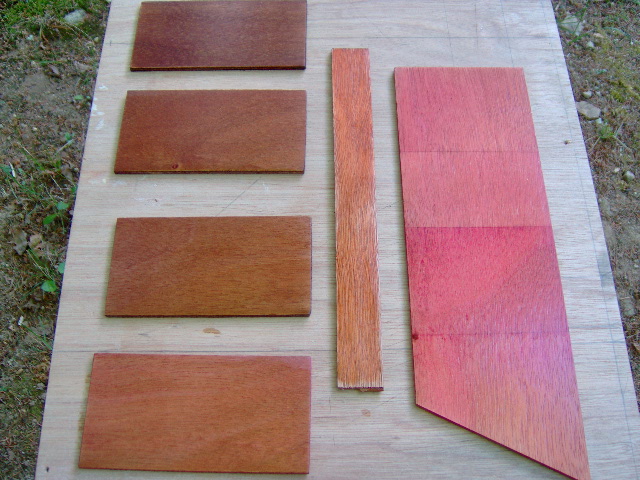
Sharon, I’m looking for a nice even medium brown color with an undertone of red, or even purple, but I want it to be an earth tone for sure, and a good contrast to the natural light color of the maple. The grain in the Okoume is fairly subdued and it takes color fairly evenly. I don’t really want the grain to “pop” (like oak), but I don’t mind a bit of character, either. What I really want is for the application of the finish to be simple, consistent over large areas, and, I am learning, agreeable under varying light conditions.
I’m going to have enough of a challenge dealing with the poly and getting a nice finish there that I don’t want to have trouble or second guesses on the color.
I ramble.

Like I said, the test pieces looked completely different under different lighting and the one we all thought would be “the one” now looked like pale salmon, as if the brown had all but faded out of it.
(Oops, I fell asleep last night while composing this and have now picked up where I left off.)
Friday now. Got some bubble wrap today, the kind with the small bubbles, to eventually be used vacuum bagging the inner wall skins.
Sanded street side spackle again. Scuffed the first coat of poly on all of the color samples with 320 grit and put another coat on.
Aligned the street side wall to the underside of the street side of the floor, laid out the screw holes for same, and drilled the countersunk holes (partially). The deck screws that I thought I was going to use ended up being a little short, so I need to make sure which screws I am going to need before finalizing the countersink and thru hole diameter.
Then I did a little more pick up work on the spackle. I just don’t know what the canvas will hide and what will project thru, so as they say, “the final coat is only as good as the prep work”. I hate body work, but the spackle is very light and sands very easy.
Big Mike has been very generous and has allowed me to exceed the normal photo gallery quota, so if you are able, I encourage you to become a donating member and support the forum by making a donation (see the donation tab in the header above).
I will show some respect by trying to keep the OT pic’s to a minimum. I want to continue with the story, so a few things might sneak in…
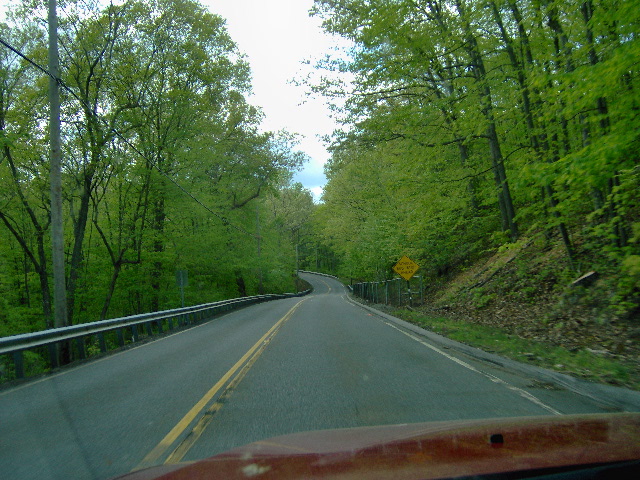
For example, last week after a stretch of warm weather we had a bunch of rain and the trees all popped out of hibernation as if at once. This is the road to Mecca in about the same spot that I showed the winter snow storm pic last.
I’m sure that the light is playing tricks on me, but I also am pretty sure that the color changed on the samples. The 4:1 red over brown that looked so good now looks pale and a bit too pink.
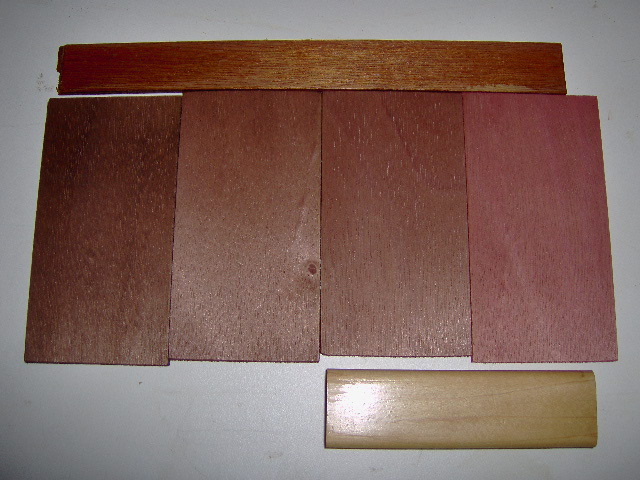
I went ahead and put poly on all. No flash, outside natural light at twilight.
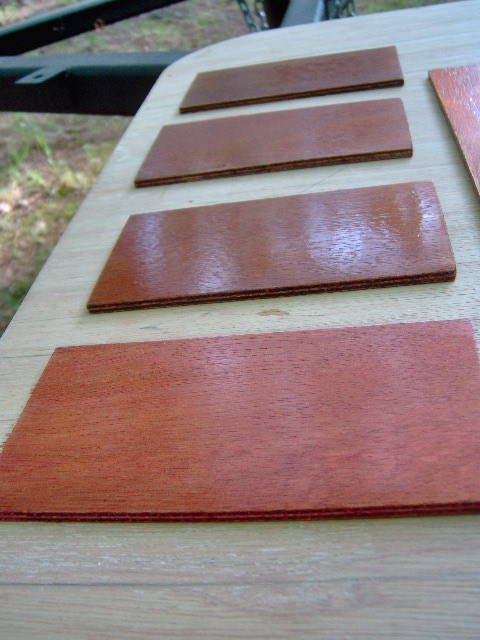
Same thing, different angle.
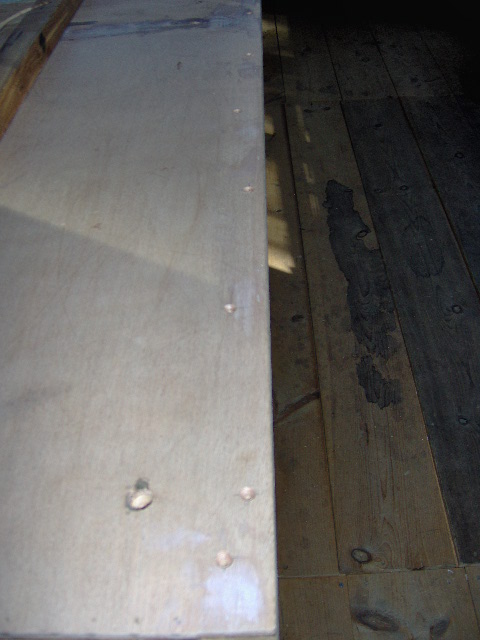
Moving on, street underside of floor. I laid out the pattern for the screws that will hold the wall to the floor. I put a couple of screws a little closure together at each end, and staggered them on 6 inch centers all the way down. The wall sills are 1-1/2 thick, so I put the holes at 1/2 and 1 inch in from the outside, every other. My thinking is that this will form a more solid joint, rather than a hinge line.
I have been searching the interwebs for weather tight car door or hatch dome light switches to use for the hatch actuator safety interlock. The mid 80’s Mustang hatch switches have a rubber boot and are a good cylindrical shape that would be easy to mount in the wall sills under the draw latches.
http://www.autozone.com/autozone/parts/_/N-9cjrj?itemIdentifier=103845_0_0_The problem is that the pigtail/matching connector plug is discontinued. The salvage yards around here are limited in size due to property values, so they tend to crush rather than hold on to older cars, so when I called around, no one has these old (?) Mustangs.
Did some searches on car alarm switches, too, but still nothing firm.
There’s a ton of these out there, it’s just that I am looking for a few specific features. Normally closed momentary (so that when the draw latches are open and the switches are not depressed, the circuit is made and the hatch actuator can operate off of the weather proof DPDT rocker switch), weather proof, simple shape (for easy thru wall mounting), the electrical connection straight thru the back, and electrical connection type that I can connect to relatively easily (spade, bullet, available connector, or even solder).
Thank you all for your support and interest in my build.


