Please Help - Gas Strut Mounting to the Wall

Anything to do with mechanical, construction etc

Please Help - Gas Strut Mounting to the Wall

Postby mrslamb » Wed Aug 21, 2013 11:52 am

Hello All,

I have two 100 lb gas struts on my hatch. They were working great until the screws started working their way out of the wall (Trailer has been used 4 times). I did not know where the gas struts would end up very well, and do not have enough "meat" behind the 1/4 in skin to screw into.

My walls are insulated, so I have my interior skin (1/4 in), 3/4 in Insulation, 1/2 plywood, and then aluminum outter skin. My question is, has anyone else ran into this issue? If so, how did you deal with it?

What suggestions does everyone have for mounting the gas strut bracket when there is not enough to screw to behind it?

I have more details and pictures in the PDF below.

Gas_Strut_Bracket_Problem[1].pdf
Further details
(183.06 KiB) Downloaded 53 times


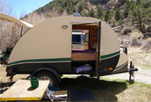
Thank you for all of your help! Please let me know if you have any other questions. I'll also try to upload some pictures of the entire camper soon!

Thanks,
David
mrslamb
Teardrop Inspector
 
Posts: 20
Images: 1
Joined: Wed Feb 06, 2013 4:41 pm

Re: Please Help - Gas Strut Mounting to the Wall

Postby desertmoose » Wed Aug 21, 2013 12:09 pm

Not that elegant, but I bolted an angle iron bracket to the wall and attached the strut mount to it.
Gives a large bearing area on the wall, and the carriage bolt through the wall can't pull out.

The carriage bolt heads are visible on the outside with this approach though.

Image

Sam
User avatar
desertmoose
The 300 Club
 
Posts: 421
Images: 98
Joined: Fri Aug 27, 2010 12:20 pm

Re: Please Help - Gas Strut Mounting to the Wall

Postby absolutsnwbrdr » Wed Aug 21, 2013 12:57 pm

I had a similar issue. Kind of. But my solution to a problem I had may work for you too.

My walls are solid 3/4", but I had to make 3/4" spacers because of the way my hatch seal is designed.

Image

My round wood spacers end up doing two things:

1) they move the bracket mounting point away from the wall so that the struts don't rub on my curved blue hatch seal board (this doesn't really apply to your situation)

2) they are glued & screwed onto the wall, which distributes the forces to a greater wall surface area, as opposed to having just the mounting bracket on the wall.

Maybe you can take another piece of 1/4" plywood (or even 3/8"), cut a circle using a 3" or 4" hole saw. Then glue & screw the circle in place, and then mount your bracket. The larger your circle, the more wall area you can distribute the forces to. It wouldn't even need to be a circle. Cut a new board that will fit your geometry, and glue & screw it.
Zach
Coming Soon...
Image Image
User avatar
absolutsnwbrdr
Donating Member
 
Posts: 2657
Images: 412
Joined: Mon Jan 25, 2010 6:10 pm
Location: Hanover, PA
Top

Re: Please Help - Gas Strut Mounting to the Wall

Postby mrslamb » Wed Aug 21, 2013 5:48 pm

Thanks everyone for the replies! I will evaluate the ideas for our camper. If anyone else has other ideas, let me know!

Thanks,
David
mrslamb
Teardrop Inspector
 
Posts: 20
Images: 1
Joined: Wed Feb 06, 2013 4:41 pm
Top

Re: Please Help - Gas Strut Mounting to the Wall

Postby Kody » Fri Aug 23, 2013 6:55 am

One other way you could mount the strut is by cutting a round hole thru the 1/4 ply and the insulation about maybe 4" dia. cut a 4" dia. circle of ply laminated from two 1/2" pieces to make a block 1" thick. You could also make this from a solid piece of wood. Glue this 1" block onto the side of the 1/2" ply wall. The 1" block should be trimmed /sanded so it fits flush with the face of the 1/4" inside "wall". Now make a circle of wood about 5" dia, and glue it onto wall and the 1" spacer block. You now have a mount that is part of the entire wall section. A strut can now be fastened where you want to mount it and the load/s are supported by the entire structure. The sizes of the hole and diameters of the circular pieces are not carved in stone. Make these parts to carry the load but the plate on the wall can be a fancy shape with a nicely routed profile on the edge. This would be an extremely strong method to make a mount.
Hope you can understand what I'm trying to describe. If you get stuck, I can post a CAD drawing of the section for you. A block made to 3" dia, might be the best actual size and a 4" dia. or square or oblong, or, or, plate that suits you can then be fitted.

Kody
Never be afraid to ask questions here, Prov. 11:14
User avatar
Kody
The 300 Club
 
Posts: 341
Images: 22
Joined: Fri Aug 24, 2012 5:14 am
Top


Return to Teardrop Construction Tips & Techniques

Who is online

Users browsing this forum: No registered users and 2 guests