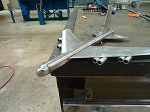
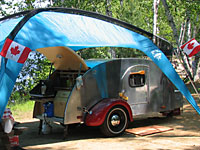
I am about half way through my build and putting these 1x2 spars across looks awfully flimsy and has me concerned!
I used 1x2 mostly and at the front top corner and where the hatch attaches I am using 2x2.
After everything I've done so far this feels the most unsure I've felt about building. I started to just use 2x2's all the way around. Anyways any comments tips or suggestions?
Oh the Ty Dean plans that I am call for little 1" blocks on the sides of the spars but it seems so useless.
Well I was going to post a picture but the tapatalk app isn't letting me.
ImageUploadedByTapatalk1378343664.351600.jpg (63.08 KiB) Viewed 1698 times
ImageUploadedByTapatalk1378343684.361692.jpg (61.32 KiB) Viewed 1698 times
Once you put the skin on, it will stiffen up alot. And those blocks between the spars do help by adding the surface area of the joints. I plan on running those blocks all the way from spar to spar on my build.
you can always increase the number of spars. My camper is 64 inches wide and I used 1.25 inch spars spaced about 10 inches apart. The roof is plenty stiff and I don't even have the interior skin on yet.
Is that a four or five foot span? For a four foot, I think it's fine. Maybe double up if its five. When you go to staple, have some shine a bright light on the outside and you should be able to see the spars through your ceiling. I used 2x2 oak for my hatch attachment spar.
You can clamp another doubler on each spar right now and glue with tite boned 2. I stapled my ceiling (1/8" birch) to the ribs outside on a sunny day and the ribs were easy to see in the dark interior. Otherwise cut a 12" guide stick to help you measure inside from one stapled spar to the next unstapled one. Doubled spars are going to be much easier to hit.
When I get home tonight, im going to double up ALL of my spars!
in addition, i have to yank out a spar on the roof because I forgot to make it 14" for the fan vent! I hope to get all of this done tonight HOPEFULLY...I have limited time to work on it before work-work and children duties (bath homework etc). But thanks again guys (and gals) this helps a bunch!
I left a message for Adohen supply co to talk to them about ordering a vent fan...Then I guess Im going to order the PD 4045 - I assume that is going to be my circuit breaker and inverter and everything I need...Right?
Are those true 1x2's (3/4 x 1-1/2 actual)? They look thinner, like furring strips. I would be concerned about the large knots creating weakness.
To aid in accurate stapling, before putting the skin on, mark the location of the centers of all of your spars on the outside of the walls, both sides. Then when you go to put the skin on you can string a chalk line from side to side giving you an accurate guide. Just a thought.
One more thought. If you double the spars you probably don't want to staple directly down the middle right into the glue seam; try alternating on either side of the chalk line.
No they are not true 1x2's. more like the 3/4x1.5!!!! I didn't think you could get true1x2's and when I did they were soft pine and I had trouble with them splitting. So I guess I'm going to make these spars work now. I've doubled a few of them to help make sure I get some staples or nails in them.
I'm kind of disappointed in my staple gun. Messing with some Luan around the door, quite a bit of the staple was still sticking out and I had to hammer them on in which didn't look too pretty! Are there better ways to secure the Luan to the spars?
It's the spring loaded hand type!! I bet I can rent one of the pneumatic staple guns from our local hardware store. They rent tools. I just didn't know what options I have available and which were best. Thanks!
Powered tools could make installing your plywood much easier. Here are some to consider from low cost to moderate cost ones. Most are pin nailers which shoot tiny 23 gauge pins. Pins will hold parts together till glue sets. Some people call a pin nailer a "third hand" because you can use it instead of clamps for many projects. It's a time saver. Pieces pinned and glued together need far fewer clamps or extended clamping and glue set up time. The pins almost "disappear" once you paint or varnish.
Harbor Freight pin nails get mixed reviews. Grex is a good brand of pin nails. Amazon.com sells them.
Harbor Freight has an electric 3-In-1 Pin Nailer, Stapler, Brad Nailerhttp://www.harborfreight.com/3-in-1-stapler-brad-pin-nailer-93749.html that might work to attach your 1/8" plywood better than your stapler. It's currently on sale for $18.99. Could be less with a discount coupon. Read the reviews to get feedback on it. It might not cost (much) more than renting a tool and it'd be yours to keep.
I used an air powered narrow crown stapler and really liked it for attaching plywood to my frame in areas that would later be covered. I put in more staples than needed because it was fast, cost little, and let's be honest it was so much fun to do. An air powered pin nailer is on my wish list.
LumberJocks.com has very helpful tool reviews. http://lumberjocks.com/reviews It's a fun helpful website filled with good information. Several people there have built teardrop trailers.