Interior trim

Anything to do with mechanical, construction etc

Interior trim

Postby drgrumpus » Wed Nov 20, 2013 7:33 am

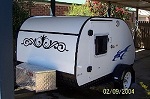
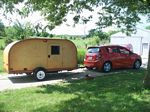
I've got my headliner in and have 1/8 to 3/16 gap between it and walls. I've been searching for some sort of flexible beading to dress these corners. So far 1/4 inch quarter round is all I can find. Would have to steam and bend it around 20 inch radius.

Any alternatives????

Mike
Five cords of wood in, snow tires on, 5 X 8 NT frame on order. Gonna build a TD this winter.
User avatar
drgrumpus
Teardrop Builder
 
Posts: 34
Joined: Wed Sep 18, 2013 5:45 pm
Location: SW New Hampshire

Re: Interior trim

Postby rowerwet » Wed Nov 20, 2013 7:42 am

home depot sells a rubber type molding that looks lke wood, it may be a special order
User avatar
rowerwet
Gold Donating Member
 
Posts: 2075
Images: 521
Joined: Mon Apr 20, 2009 12:52 am
Location: Merrimack River Valley

Re: Interior trim

Postby KCStudly » Wed Nov 20, 2013 8:44 am

Some people have used hemp rope for a rustic twist (but I'm personally not a big fan of the look).

If the 1/4 round is too marginal in size to cover your gaps, consider making your own using a 3/8 round over bit and router. You could try cutting kerfs in the back of the 1/4 rnd and see if that helps you form it to the curve(?).
KC
My Build: The Poet Creek Express Hybrid Foamie

Poet Creek Or Bust
Engineering the TLAR way - "That Looks About Right"
TnTTT ORIGINAL 200A LANTERN CLUB = "The 200A Gang"
Green Lantern Corpsmen
User avatar
KCStudly
Donating Member
 
Posts: 9640
Images: 8169
Joined: Mon Feb 06, 2012 10:18 pm
Location: Southeastern CT, USA
Top

Re: Interior trim

Postby corncountry » Wed Nov 20, 2013 9:07 am

I used a plastic molding, called shoe molding. It measures 3/8 by 5/8. It bent nicely around my 20 in. radius.Got it from the big box stores.

Jim
User avatar
corncountry
Donating Member
 
Posts: 142
Images: 58
Joined: Sun Aug 09, 2009 5:43 pm
Location: S.E. Iowa
Top

Re: Interior trim

Postby bobhenry » Wed Nov 20, 2013 9:56 am

I hid mine with rope lights!

Image

Trim with some ambient lighting :thumbsup:
Growing older but not up !
User avatar
bobhenry
Ten Grand Club
Ten Grand Club
 
Posts: 10368
Images: 2623
Joined: Fri Feb 09, 2007 7:49 am
Location: INDIANA, LINDEN
Top

Re: Interior trim

Postby Roo Dog » Wed Nov 20, 2013 6:16 pm

Mike,
We obtained a roll of small flat section rubber molding from the local hardware store, adhesive on one side as bought. Reduced the overall width with scissors.
Went on like a treat over the interior trim. Easy to replace if needs be. Been there over two years now.
RD :)
Lets do a three sixty and get out of here !
User avatar
Roo Dog
Silver Donating Member
 
Posts: 461
Images: 0
Joined: Fri Mar 22, 2013 3:12 pm
Location: Esperance Western Australia
Top

Re: Interior trim

Postby tony.latham » Wed Nov 20, 2013 7:08 pm

If you decide to go with steam bending, a piece like that would be easy to steam in a piece of plastic pipe. I've done it. The trick is to move fast and have your bending jig all set up and ready for it to go in and cool. I can envision using dowels set in a piece of plywood for this task. There is some rule of thumb about time in the steam based on thickness. I don't recall but I'm sure it's on the 'net somewhere.

I had the same problem inside my hatch but didn't have the tight radius to contend with –so no steam needed. Glue and crown staples had me fixed up in no time.

I spent many a night lying in bed trying to find tomorrow's solution!

TL
User avatar
tony.latham
Gold Donating Member
 
Posts: 7074
Images: 17
Joined: Mon Jul 08, 2013 4:03 pm
Location: Middle of Idaho on the edge of nowhere
Top

Re: Interior trim

Postby oakinteriors1 » Wed Nov 20, 2013 7:53 pm

Just make it.....
Cedar trim....do it and the cabinets first then lay the inside skin on top then add the spars etc...
tn_100_4042.JPG
tn_100_4042.JPG (47.79 KiB) Viewed 738 times
User avatar
oakinteriors1
Silver Donating Member
 
Posts: 297
Images: 1
Joined: Tue Sep 03, 2013 4:47 pm
Location: Bates City Mo.
Top

Re: Interior trim

Postby Campin' Texan » Wed Nov 20, 2013 10:16 pm

I used this real wood veneer. It stained to match my birch perfectly. It comes in a couple different types of wood. The iron on adhesive has held up great. I had a small gap between sheets of plywood on my ceiling. This worked great to cover the gap and cover nails. Here's some before and after pics.

before
Image

after
Image
User avatar
Campin' Texan
Teardrop Advisor
 
Posts: 64
Images: 0
Joined: Tue Apr 10, 2012 6:06 pm
Top

Re: Interior trim

Postby rowerwet » Thu Nov 28, 2013 7:43 pm

User avatar
rowerwet
Gold Donating Member
 
Posts: 2075
Images: 521
Joined: Mon Apr 20, 2009 12:52 am
Location: Merrimack River Valley
Top

Re: Interior trim

Postby rick e » Sat Dec 07, 2013 9:27 pm

oakinteriors1 wrote:Just make it.....
Cedar trim....do it and the cabinets first then lay the inside skin on top then add the spars etc...
tn_100_4042.JPG


Nice, this would be my preferred trim. The plastic stuff is useful though, I haven't seen the rubber.
User avatar
rick e
Teardrop Advisor
 
Posts: 50
Images: 18
Joined: Mon Nov 11, 2013 6:44 pm
Location: Orange City, Florida
Top


Return to Teardrop Construction Tips & Techniques

Who is online

Users browsing this forum: No registered users and 1 guest