Your build is still catching my eyeballs. First it was the CNC router, then it was the white Tacoma (a bit of a joke there), and now the vacuum bagging. I've got a vacuum pump on my wood lathe for running a vacuum chuck –how'd you do the air connection into your homemade vacuum bag???? Maybe I'll git to Googlin'.
And yeah, 30ºF? I haven't seen it above freezing for over a month. I think it was +14º this morning.
Tony
Teardrops n Tiny Travel Trailersor t n ttt for short (tnttt.com) |
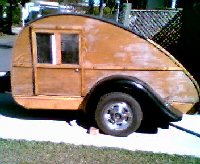
CNC Build: The Bed and Breakfast at 4 years and 40,000 miles
Re: CNC Build
![]() by tony.latham » Tue Dec 17, 2013 1:05 am
by tony.latham » Tue Dec 17, 2013 1:05 am

-

tony.latham - Gold Donating Member
- Posts: 7073
- Images: 17
- Joined: Mon Jul 08, 2013 4:03 pm
- Location: Middle of Idaho on the edge of nowhere
Re: CNC Build
![]() by capnTelescope » Tue Dec 17, 2013 1:08 am
by capnTelescope » Tue Dec 17, 2013 1:08 am
Terry,
I considered calling my next-door neighbor in. He owes me. Now that I've done it once, I've got the method down pretty good. I'll give him the hard work & take the light end.
If you're doing vacuum hold-down and vacuforming, you're more than halfway to bagging. I wanna do both of those. I got started when I wanted to re-veneer a piece of furniture, and mechanical clamping was a total fail. Try it, you'll like it.
-

capnTelescope - Lifetime member
- Posts: 1222
- Images: 368
- Joined: Sun Jun 27, 2004 3:44 pm
- Location: Round Rock, TX


 (/edit)


