Here's another TrailTop assembly animation. Since I don't have 3-d drawing software, I'm doing these animations in my 2-d drawing program, so they may be a little rough in spots, but I think they're good enough to illustrate the main points. Also this particular animation file is pretty large, so it may take a while to download if you don't see it right away.
This time I drew a "breadbox" shaped camper rather than a teardrop, and it's got a rear barn door. The driver's side wall is going up first; it's got a 1/4" plywood outer skin, a layer of foam insulation, and the inside of the wall is covered with 1/8" plywood. Also notice in frame 8 a sill piece is secured to the bottom of the wall; this is used to bolt the wall to the Jeep tub, in the same way that a jeep hardtop bolts to the Jeep. Similar sills would go on the front and rear walls as well. The rear door is 3' wide, which is the size of the Jeep tailgate opening.
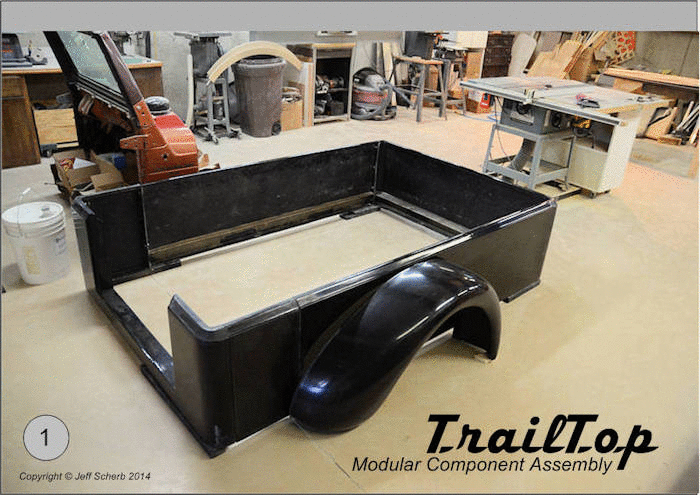
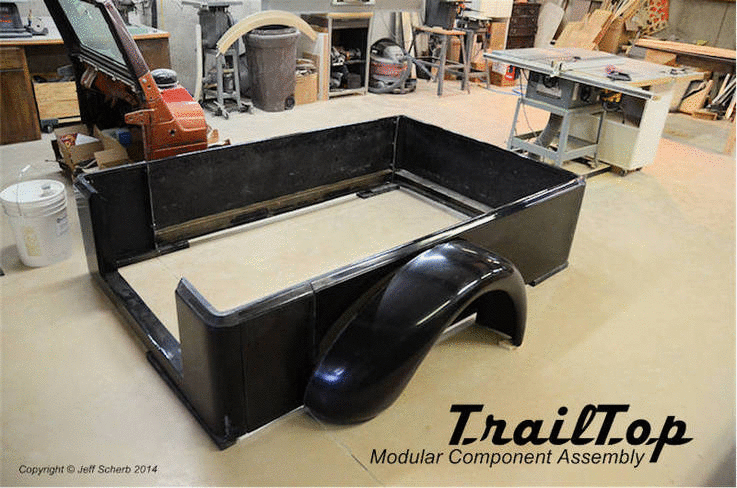
As with the last animation I posted, even though the animation shows all of the parts being assembled in place, what probably would be the best assembly plan would be to fully assemble each side panel, install them on the tub (or on the trailer frame if a tub wasn't being used), and then assemble the roof and ends to the installed sides.
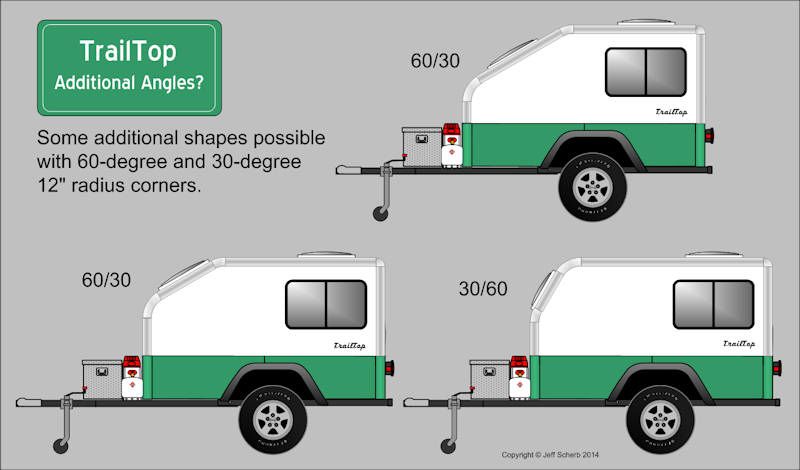
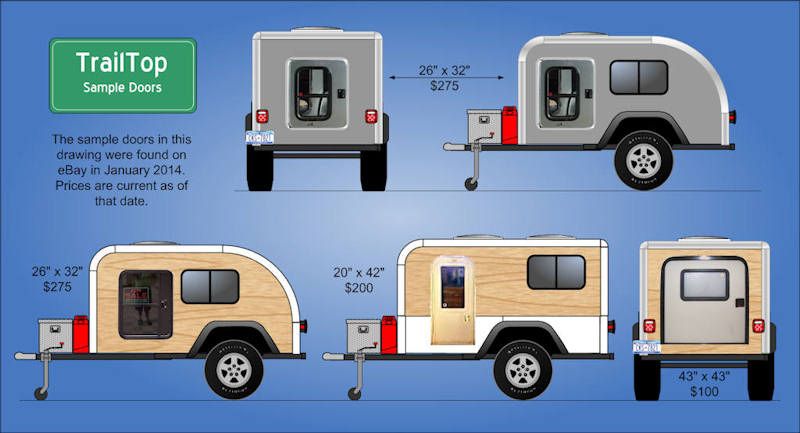
This one uses straight rail pieces, 12" radius curves in the front and a fiberglass 12" radius curved roof section, and 3.5" radius 90-degree corners in the back.

 I am not a CAD designer or I might try expanding it myself.


 .
.
 ...!
...! ...!
...!
 [/quote]
 ...
...