Worked on the electrical stuff this weekend mostly. I need to get this done so I can move on to covering the roof with with final layer of insulation then plywood.

First thing to do is to install inlet back in its place with 10 gauge wires connecting to PD4045. I used dryer hook up wires for this.
Here is the back side of inlet with wires attached.

Here is inlet with adapter attached so I can connect to the house outlet for the testing.

This is PD4045 in the middle of galley. It is pulled out for the testing. I had to research to get the wiring confirmed, so I will try to write how I did in here.

First of all, it is sitting on its side in the photo. The bottom is the 12V side and top in this photo is 120V side. When it is finished, 12V is on left and 120V is on right. First thing is to get 30A breaker installed. It is the one located on left side in 120V compartment. Ground and neutral to be hooked up to the bus bar on PD4045 and hot is connected to the breaker. To have 12V side working, the converter needs to be hooked up. Install 15A breaker for that. I used tandem 15A breaker. It is located on the right side. There is bus bar to connect to converter in PD4045. In addition to this, I will add another 15A tandem for other 120V circuit and 20A for AC.
After 120V wiring is done, 12V positive feeds are attached to the terminal block (the one seen in the top compartment in the photo) and negative connected to another terminal block. (the one sitting in front of PD4045) 10 gauge wire connecting negative terminal block to PD4045. For the testing, I am using #3 circuit in 12V which I installed 15V fuse in its place.
Bunch of wires coming out from top right corner of top compartment are the different wires for 12V circuits.
Two biggest test for me are the porch lights and dome lights because those involved remote switches.

But this is where good planning pays off. Testing confirmed that I had the wiring correctly.
Here you can see a dome light and red side marker I used for the test simulating two dome lights.

Both lights can be turned on and off from either switch located at the door.
Here are the reading lights. Off curse these can be turned on and off individually.

I initially thought I would have to make some kind of frame to make it come out a little since these have big ball joints on the back side and my roof spars were not deep enough. I actually started to make some frame, then realized I did not need to make any frame. Here is the shot showing the back side.

I also swapped the bulb to LED.

Last item on 12V testing to make USB charger for phones and iPad.
I am going to use cigarette charger used in cars.

This is supposedly rated to charge Apple and Android products at the same time.
I need the guts of this thing. After opening it up, tweaked a little, this is what came out. Tested both Android smart phone and iPad and both seems to work.

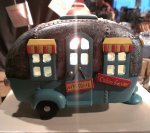
Since it was such a nice weekend, I decided to pull the trailer out of the garage to set it up behind of TV.
I received family approval!


Then I opened up and celebrated my progress!