All right! R&D is R'ed and D'ed and it''s time to get on with the build. Yesterday, I went to Fine Lumber and Hardwoods and got the 1/8 ply for ceiling and roof. Today I dusted off the table saw and got busy making the 4 cross-ribs for the hatch. Each of the ribs gets a dado in the center and a rabbet on each end to fit up with the notches CNC machined in the 3 spars.
After cutting the ribs to length, the next step was to cut a dado in the center. Here's pop quiz #1 for this post: Try to figure this out in your head. No cheating by using pencil and paper. Each rib is 56 inches long, and the center dado is 3/4", nominal. The ruler on the saw fence measures from the right side of the normal thin kerf saw blade. What reading on the saw ruler will locate the fence to the right of the dado blade, and center the dado close enough for the girls we go out with(CEFTGWGOW)? I tried about 4 times

and finally just used the tape measure, but you don't get any credit for that answer.
After that ordeal, I quickly dispatched the dado cuts:
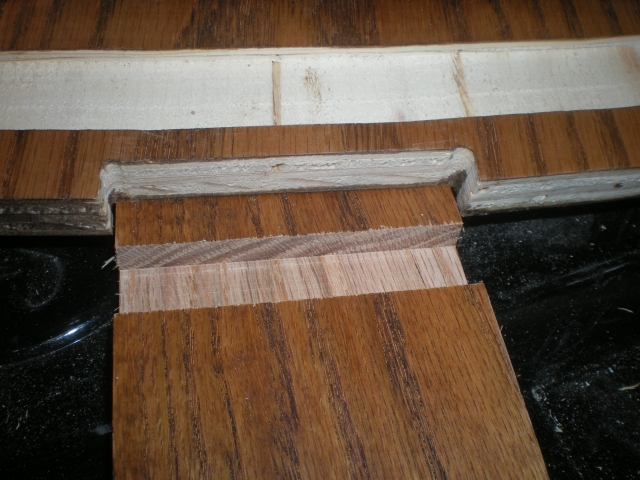

Tested for fit:
The cross rib fits snug in the spar notch, the spar fits snug in the rib dado and the top of the rib is flush with the top of the spar.

Onward to the rabbets! If things are going to fit up nicely, you have to use the right datum for your measurements. In this case, we want the edge of the rabbets to be consistently the same distance from the nearest edge of the dado. Remember, the dado is centered CEFTGWGOW. Using clamps and wood scraps, I rigged up a stop that fit in the dado so I could cut the rabbets at the same distance from the dado:

It was pretty shaky, but worked out well. Here I fit a piece of ply in the dado to line up the 4 ribs.:
CEFTG!
Actually, it turned out even better than I expected.
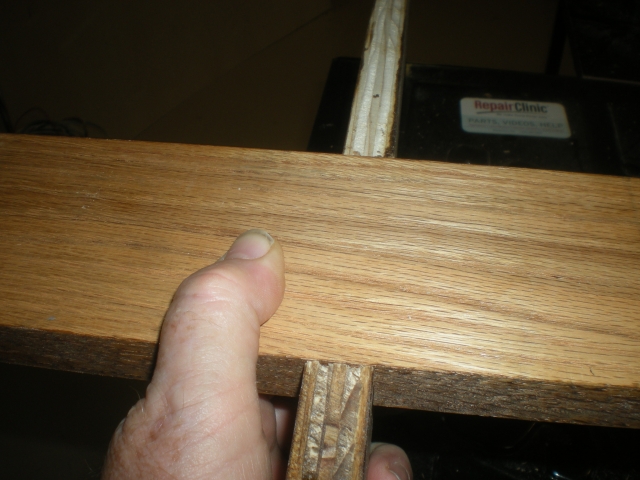
One more detail to take care of on the rib at the bottom edge of the hatch:
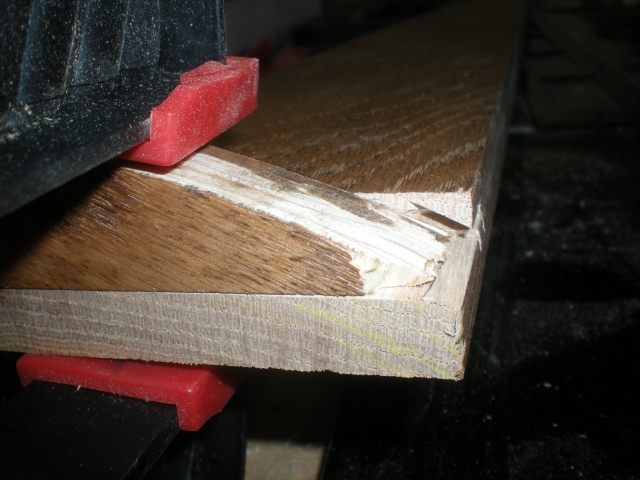
This picture isn't one of photography's finest moments. What it's trying to show is that the bottom of the hatch spars come to a point, and there's excess material sticking out where there should be roofing. You can see a short saw kerf to the right of the spar end. That is what has to come off, plus a little.
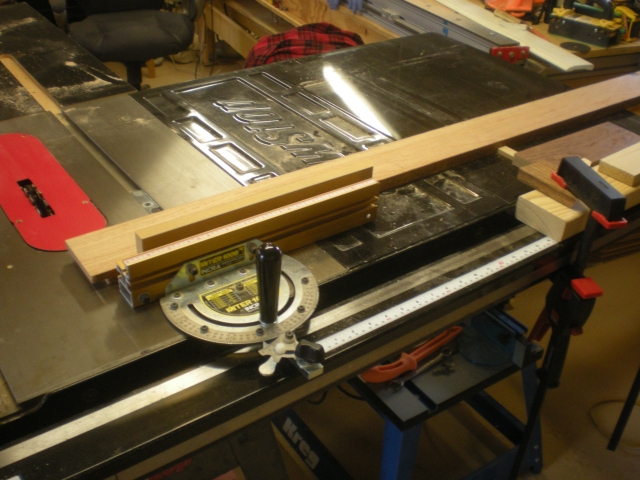
After the cut:
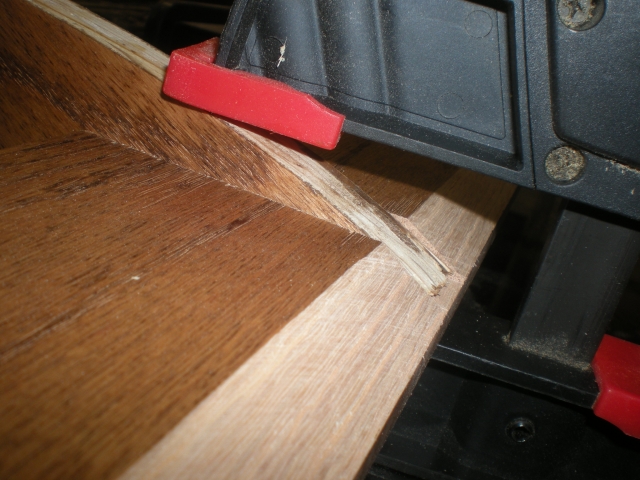
There is still a little material to remove, which I'll get later with a hand plane.
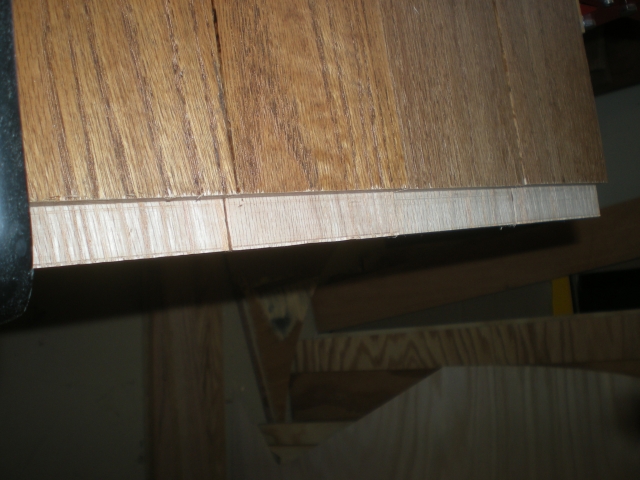
With all that done, I did a dry assemble:

It all fitted up square and parallel without any drama.
Then it was back to the drawing board. I want to glue and pocket screw this whole thing together, but there's a little problem.

Using the standard Kreg settings will result in the screw meeting the spar right at the corner of the notch cutout, which practically guarantees a poor result. Picture worth $1.98:
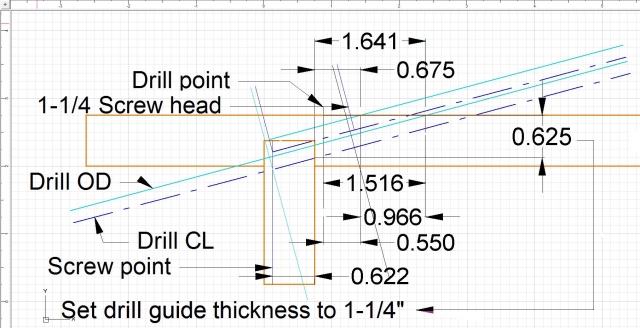
The upper drill centerline illustrates the standard settings. I want the screw to emerge farther down the dado wall, shown by the lower CL. I made the drawing to solve the problem, but I thought it might be worth sharing.
Made a test run with the dado setup piece:
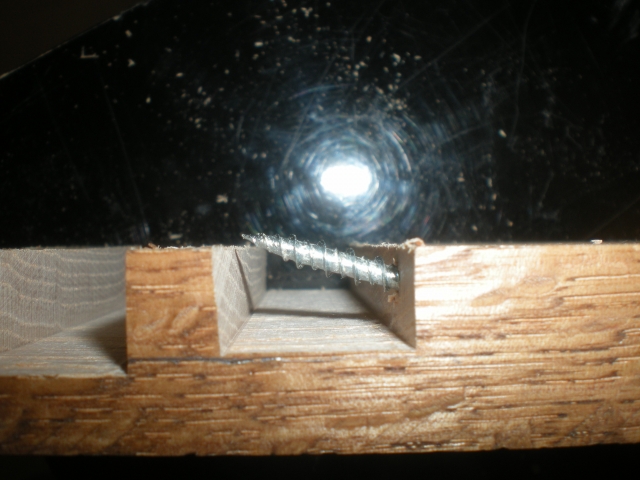
With First Article Inspection passed, I was off to drill pocket screw holes.
Pop Quiz #2: Q: What's wrong with this picture?
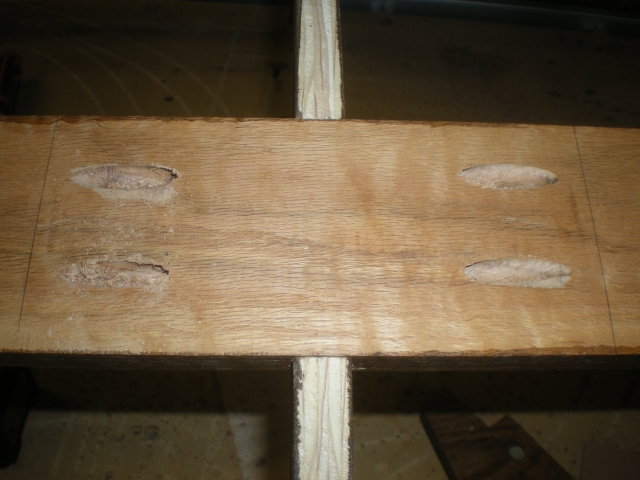
A: The opposing pockets could interfere with each other. This side doesn't show, so I went back and drilled a pocket between the holes on one side. That was the original plan, it just got lost in all the excitement of drilling pocket holes.

Answer to Pop Quiz #1: 28-3/16"

Thanks for stopping by!

 Another recommendation is to pick up a copy of "How To Weld" by Todd Bridigum. I found my copy at Barnes & Noble, but you could probably find it cheaper online. I think he does one of the better jobs breaking down the techniques with clear pictures and drawings.
 I didn't want to get other peoples cooties. I don't think they have the magnifying lenses. Maybe it's a standard size?

 , and a package from Amazon, I was able to boldly


 Oh well, If the need arises, I can use the edge as a saw.


 I knew to do that, too. The walls got held down with screws in a few places where clamps wouldn't reach.

 ) That would have taken out a big enough chunk of skin to make you think about it for a few days.

