Teardrops n Tiny Travel Trailersor t n ttt for short (tnttt.com) |
The Mid-Life Crisis Build
49 posts
• Page 2 of 4 • 1, 2, 3, 4
Re: The Mid-Life Crisis Build
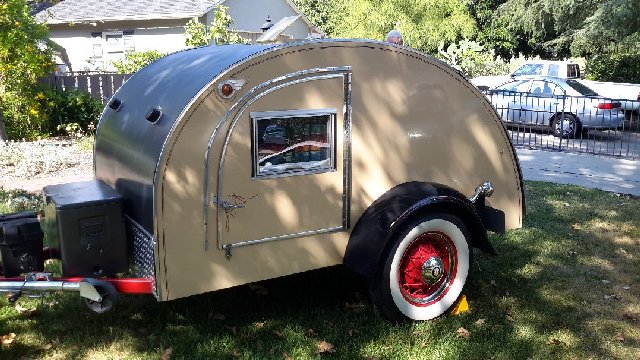
![]() by grantstew8 » Sun Jan 19, 2014 3:45 am
by grantstew8 » Sun Jan 19, 2014 3:45 am
The build is looking good!
"To begin, begin" William Wordsworth
http://pinterest.com/muircockhall/teardrop-trailer/
Build Log http://www.tnttt.com/viewtopic.php?f=50&t=56093&start=15
Blog http://honeymoonteardrop.tumblr.com/
Youtube videos of the build http://www.youtube.com/playlist?list=PLm2lVBlIv2fzASj6PbdVsFWScO0lqp0dX
http://pinterest.com/muircockhall/teardrop-trailer/
Build Log http://www.tnttt.com/viewtopic.php?f=50&t=56093&start=15
Blog http://honeymoonteardrop.tumblr.com/
Youtube videos of the build http://www.youtube.com/playlist?list=PLm2lVBlIv2fzASj6PbdVsFWScO0lqp0dX
-

grantstew8 - The 300 Club
- Posts: 448
- Images: 77
- Joined: Tue May 28, 2013 5:26 pm
- Location: Dunfermline, Scotland
Re: The Mid-Life Crisis Build
![]() by climbnkd » Mon Jan 20, 2014 11:48 pm
by climbnkd » Mon Jan 20, 2014 11:48 pm
I managed to get a little done on the trailer today. As usual, not as much as I hoped.

I finished the bracing for the cabin bunk.

One big accomplishment done today. Got the entire trailer skinned, inside and out. I also started to fill in all the screw holes and imperfections on the outer skin so I can get it sealed.

Here's a shot of the rear hatch. I still need to trim the bottom but otherwise it is done.

Nothing too spectacular here, just a shot of the roof.
I bought a flush cut router bit today and I got to say WOW! It was literally awesome to trim all the edges and have it come out so good. Is it weird that I'm excited about nice clean edges on my trailer? I don't think so. If I wasn't enthusiastic about building a TD then why even bother.
Although I was hoping to be further along in the build, I can't really complain about the progress I have made in less than one month. I went from a couple of boxes from Harbor Freight to a tangible, almost done TD. I really need to get it sealed next so that it can go outside. My wife's ready to have the garage back and not have to scrape the car windows in the morning. Can't blame her for that.
Not really sure when I'll be able to make significant progress again. Next weekend is already shot so maybe in two weeks. I'll keep you posted.
I finished the bracing for the cabin bunk.
One big accomplishment done today. Got the entire trailer skinned, inside and out. I also started to fill in all the screw holes and imperfections on the outer skin so I can get it sealed.
Here's a shot of the rear hatch. I still need to trim the bottom but otherwise it is done.
Nothing too spectacular here, just a shot of the roof.
I bought a flush cut router bit today and I got to say WOW! It was literally awesome to trim all the edges and have it come out so good. Is it weird that I'm excited about nice clean edges on my trailer?
I don't think so. If I wasn't enthusiastic about building a TD then why even bother.Although I was hoping to be further along in the build, I can't really complain about the progress I have made in less than one month. I went from a couple of boxes from Harbor Freight to a tangible, almost done TD.
I really need to get it sealed next so that it can go outside. My wife's ready to have the garage back and not have to scrape the car windows in the morning. Can't blame her for that.Not really sure when I'll be able to make significant progress again. Next weekend is already shot so maybe in two weeks. I'll keep you posted.
**John**
-

climbnkd - Teardrop Builder
- Posts: 32
- Images: 73
- Joined: Mon Dec 30, 2013 6:11 pm
- Location: Utah, USA
 Here you can see how I solved the problem by cutting the opening a little bigger.