I've been working toward the trailer inspection, which means I need this to have working trailer light and be able to travel on highway. I will probably don't have time to for aluminum skin installed, but I do want to apply the epoxy so that if rains, I am somewhat protected.
Things I will be concentrating are Hatch, doors, tongue box hatch and trailer lights.
First the easy stuff. Trailer side markers. I already had the main wiring done sometime ago, so only thing to do were to locate and mount. Front amber light and rear red light. Total of 4 lights.


Next is the door.
There will be a door stop attached to the inside to hold the door when it is closed. And that's where I will be attaching door seal. To make them, I first needed to make a rough frame with 1x lumber.

Then, using the layout I created, rough cut to the shape. Fat area at top right corner is where the switches will be mounted for the dome and porch lights.

I made a MDF template to route them to the same shape. After that, sanding, sanding and I am still sanding...

It will looks light something like this when mounted.

I should have made the lip a little wider. There won't be much of overlap with door to seal...

This is where the switches will be mounted. I need to make the hole deeper to mount the switch I ordered. The switches will be mounted on a aluminum plate, and that will be mounted over the hole.

Now that I got the door opening in a decent shape, I started to work on the actual door.
Using the cutout from the wall, spaced out evenly in the opening and attached the hinge to hold it in place. Cut out a hole for the window as well.

This window is a crank-out type, I wanted it for the ventilation. I will be mounting it as low as possible. I still be able to look out sitting from inside, too.

One thing I noticed is that I don't think I left enough space between top hing and the corner of window for window drip cap. I will have to check that when I get it.
I also mocked up the door latch.
This latch is design for door/wall thickness of 1-1/4" to 1-1/2". My wall is 2 layers of 1/4" with 3/4" plywood core, but each thickness is not exactly that dimension.These 3 layers of plywood are less than 1-1/4" and needed to add another 1/4".

I had to remove the deadbolt mechanism to slide it in.

I need to make another mock up with extra 1/8" instead of 1/4". I don't want the thickness of wall and door to be different too much.

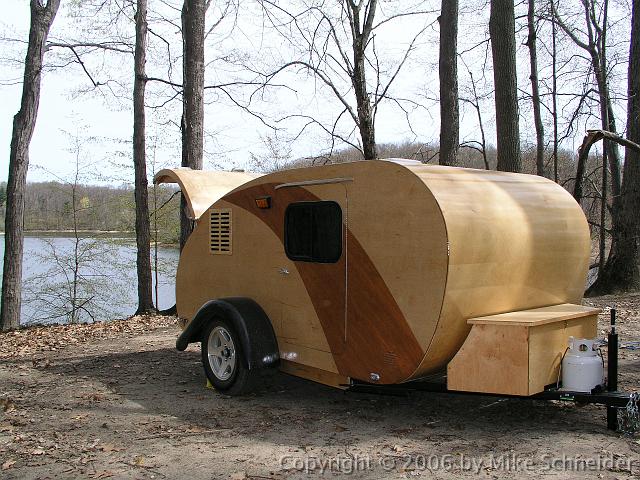
Last progress is on the hatch.
I skin the hatch with 1/8" baltic birch and mounted tail lights. License holder is taped on there for now.

I had to make the galley wall off set for the hinge and seal, and I have been dreading this. But I could not wait any longer. I just had to do it.

I first made a template from 1/4" plywood so I can use on both side. I traced the offset distance from the inside of the hatch.
This is template mounted on the wall ready to be routed.

And this is after. I think the gap is about the same all the way.

I repeated the same process on the other side.
I hope to have the trailer inspected by middle of June.

, got the self applied bruise to the behind
.