4-Day Weekender - Toddler bed!

...ask your questions in the appropriate forums BUT document your build here...preferably in a single thread...dates for updates, are appreciated....

Re: 4-Day Weekender - Forward cabinets

Postby Kharn » Fri May 09, 2014 5:06 pm

We accomplished our goal, the air conditioner is in. :D
20140509 AC deployed small.jpg
20140509 AC deployed small.jpg (115.73 KiB) Viewed 2304 times

It slides back into the tear nicely, a flush door with T-molding and a short hurricane hinge will complete the package.
20140509 AC stowed small.jpg
20140509 AC stowed small.jpg (123.29 KiB) Viewed 2304 times

Someone might've dropped an object that mashed some of the AC fins. :oops:

And then we finished the front shelves.
The bottom openings get bottom-hinged doors, middle openings on each side are left open and the top openings get sliding doors.
20140509 front shelves small.jpg
20140509 front shelves small.jpg (183.56 KiB) Viewed 2304 times
User avatar
Kharn
500 Club
 
Posts: 655
Images: 1
Joined: Sun Jul 17, 2011 1:54 pm

Re: 4-Day Weekender - AC installed

Postby KCStudly » Fri May 09, 2014 7:40 pm

Take a tiny flat blade screw driver (or better yet an HVAC fin comb) and very carefully re-set those fins. You'd be surprised how easy it is to make them look half way decent again (and functioning). Just take your time. :thumbsup:
KC
My Build: The Poet Creek Express Hybrid Foamie

Poet Creek Or Bust
Engineering the TLAR way - "That Looks About Right"
TnTTT ORIGINAL 200A LANTERN CLUB = "The 200A Gang"
Green Lantern Corpsmen
User avatar
KCStudly
Donating Member
 
Posts: 9640
Images: 8169
Joined: Mon Feb 06, 2012 10:18 pm
Location: Southeastern CT, USA

Re: 4-Day Weekender - AC installed

Postby capnTelescope » Fri May 09, 2014 10:33 pm

"Let he who is without (bent) fins cast the first stone." :roll:

KC's got the cure.
I'll burn that bridge when I come to it.

Brad
ImageImageImage

Building the Bed & Breakfast
User avatar
capnTelescope
Lifetime member
 
Posts: 1222
Images: 368
Joined: Sun Jun 27, 2004 3:44 pm
Location: Round Rock, TX
Top

Re: 4-Day Weekender - AC installed

Postby Kharn » Sun May 11, 2014 7:27 pm

Today I cut the forward cabinets for electrical raceways, I really should have done those earlier when I could have used the table saw, but the Multimax did the job without much fuss. I also cut the doors for the lower headboard cabinets, I haven't decided if I'll do just a finger hole or a hand slot in them, and I need to put a small brace behind each door on the underside of the shelf so that if we lean back on them it won't put all the stress on the hinges.

I also installed part of the foot of the bed cabinet. It has a really high lip because I want to be able to add a sling bed in front of it if our future calls for it. There's a second piece that goes up at the roofline to hold the tops of the sliding doors but I couldn't align and screw it solo so it will have to wait for another day.
20140511 foot cabinet small.jpg
20140511 foot cabinet small.jpg (89.46 KiB) Viewed 2218 times
User avatar
Kharn
500 Club
 
Posts: 655
Images: 1
Joined: Sun Jul 17, 2011 1:54 pm
Top

Re: 4-Day Weekender - AC installed

Postby Kharn » Mon May 12, 2014 8:25 am

Oh, I forgot to mention that my neighbors' daughter saw the Weekender in the driveway and stopped by to ask a ton of questions. Apparently she and her husband want to ditch their current RV and get something smaller as their kids are grown so she'd been checking out teardrops on Pinterest the night before. I referred her both here and to Tearjerkers, so we'll see if she joins us.

A few random thoughts:
1. For door curtains, which side are they normally stored on when in the open position? On the hinge side or the latch side of the door?
2. Are door skirts (like on Camp-Inn's trailers) worth the effort?
3. How does everyone figure out their lighting needs vs fixtures? I've found one website detailing light levels (here) so I'm leaning towards four 150 lumen recessed lights for general cabin illumination but I'm not sure if I want two more for reading lights or if I should go with smaller lights. Four lights at 150 lumen in a 60.5x80" cabin (3.1 square meters) would give 193 lumen/m2, midway between "home" and "light office work." A 40w incandescent bulb is 450 lumens, so I'll have to put one in a lamp and see how that lights up the cabin.
4. I'm thinking about using low voltage rings and 2-gang blank coverplates as the mounting points for each recessed light so if I need to replace one, I can just get a new coverplate and cut it accordingly, rather than having unsightly patches in the wood paneling or having to deal with sawdust, etc, in a completed camper, plus having a much bigger hole for wiring access.
5. I'm debating if I want to put a little 3 or 6 LED light in each cabinet, I might do all the forward cabinets (the six doored cabinets) on one pair of 3-way switches and then the foot cabinets on a single center-mounted switch between the cabinet doors, rather than having each light individually switched.
User avatar
Kharn
500 Club
 
Posts: 655
Images: 1
Joined: Sun Jul 17, 2011 1:54 pm
Top

Re: 4-Day Weekender - AC installed

Postby absolutsnwbrdr » Mon May 12, 2014 8:52 am

I know you're an engineer, but you're over-complicating your lighting analysis while leaving out a major factor - distance. Lighting intensity from a recessed light in a large living room @ 8' above a floor is quite a bit different than the same light fixture in a small space that's only 4' from floor to ceiling. While engineering toolbox might give you a basis for comparing the lighting intensity for two different lights, a lot more goes into lighting calculations than whats on that site.
Zach
Coming Soon...
Image Image
User avatar
absolutsnwbrdr
Donating Member
 
Posts: 2657
Images: 412
Joined: Mon Jan 25, 2010 6:10 pm
Location: Hanover, PA
Top

Re: 4-Day Weekender - AC installed

Postby Kharn » Mon May 12, 2014 8:56 am

I did wonder why they didn't have any calculation for the distance from the light to the measurement location. An under cabinet light is only 18" from the typical kitchen countertop, while a grand foyer light might be 30+ feet from the floor, so their math wouldn't work well in either situation.
User avatar
Kharn
500 Club
 
Posts: 655
Images: 1
Joined: Sun Jul 17, 2011 1:54 pm
Top

Re: 4-Day Weekender - AC installed

Postby absolutsnwbrdr » Mon May 12, 2014 9:04 am

Just wing it like the rest of us :lol: :lol:

btw... nice AC slideout :thumbsup:
Zach
Coming Soon...
Image Image
User avatar
absolutsnwbrdr
Donating Member
 
Posts: 2657
Images: 412
Joined: Mon Jan 25, 2010 6:10 pm
Location: Hanover, PA
Top

Re: 4-Day Weekender - AC installed

Postby Kharn » Mon May 12, 2014 9:09 am

Oh, one important thing to note about the AC: I didn't glue any of the flange to the wall. That way if I ever get a different unit, I'll be able to unscrew the current flange and remove it (bottom and top slide sideways, then the sides will fall down), I just might have to score some joints with a razor to break the paint.
User avatar
Kharn
500 Club
 
Posts: 655
Images: 1
Joined: Sun Jul 17, 2011 1:54 pm
Top

Re: 4-Day Weekender - AC installed

Postby KCStudly » Mon May 12, 2014 9:57 am

The problem with engineering a lighting system is that most manufacturers don't test and publish the particulars of how their fixtures perform. Sure they might list the equivalent wattage, lumens or candle power, but it doesn't mean anything when taken out of context. The reflector, lens and distance all play a roll, and there are basically 3 different styles of fixture: area, task/spot, and indirect lighting. (I'll note that Zach does a very good job of blending these three!)

Lightolier is one company that has a great deal of technical info available for their fixtures from their standardized testing laboratory. They also have a lot of design info accessible on their site. Not at all trailer specific, but good info if you care to dig.
(I did a lot of subcontract work on their Pendalyte line back when I was 'in da biz'ness', but have no current affiliation.)

It's kind of like furniture. You can walk into the discount bargain basement showroom and walk out with a couch that may or may not be comfortable, match your decor, and/or be durable; or you can go to the high zoot showroom, talk to their interior decorator and have a top quality custom turn key room designed that would look good in any magazine, right down to the flowers in the vases. Pays your money and takes your choice.

... so, yes, take an educated stab and use the TLAR method!!! :thumbsup:
KC
My Build: The Poet Creek Express Hybrid Foamie

Poet Creek Or Bust
Engineering the TLAR way - "That Looks About Right"
TnTTT ORIGINAL 200A LANTERN CLUB = "The 200A Gang"
Green Lantern Corpsmen
User avatar
KCStudly
Donating Member
 
Posts: 9640
Images: 8169
Joined: Mon Feb 06, 2012 10:18 pm
Location: Southeastern CT, USA
Top

Re: 4-Day Weekender - AC installed

Postby Kharn » Mon May 12, 2014 8:50 pm

Nothing big tonight, only had about 90 minutes to work so I drilled the finger holes and sanded the headboard lower doors. The MDO is so smooth I only have to sand edges and apply a very minor amount of filling, the faces are paint-ready from the mill.
User avatar
Kharn
500 Club
 
Posts: 655
Images: 1
Joined: Sun Jul 17, 2011 1:54 pm
Top

Re: 4-Day Weekender - AC installed

Postby Kharn » Sun May 18, 2014 6:38 pm

So I've made a little progress over the last few days.

The headboard lower doors are 100% ready for paint, along with a few other pieces. I'm considering clearing out a portion of my basement so I can paint there rather than wait for a 100% clear day to leave the trailer in the driveway while I paint in the garage. I put two coats of primer on the floor and in the storage box (I really should have painted that interior before I attached it to the floor, that was a pain to paint), I'll hold off on the paint until I've finished the walls.

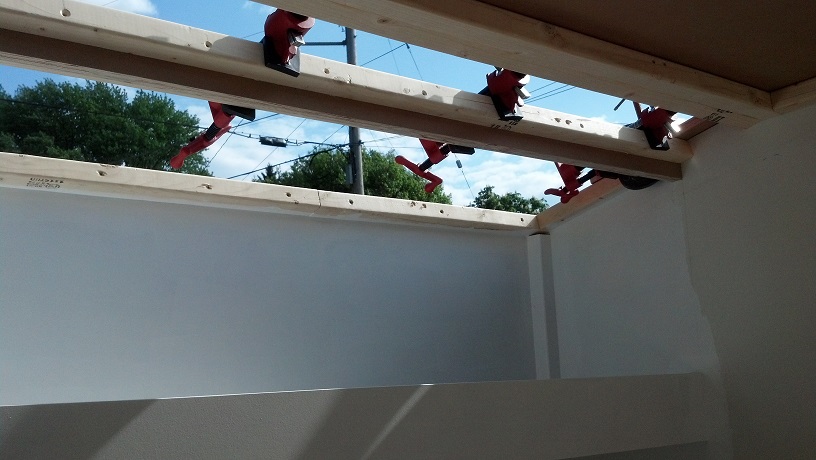
I was able to fit the pieces that will hold the upper sliding door tracks both at the foot of the bed and the headboard, along with their accompanying 2x4s that will hold up the ceiling panels (I'm planning for beadboard, but may go with luan) that will conceal the wiring and insulation.
20140518 rear brace small.jpg
20140518 rear brace small.jpg (112.01 KiB) Viewed 2072 times


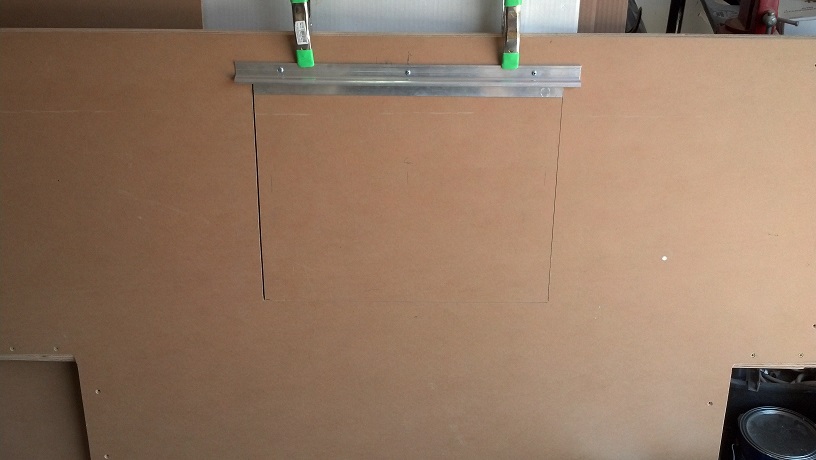
I also fit the hinge for the AC door. I realized after I cut the door part of the hinge that I should have left that side a little long as well, now I'll have to make the T-molding a little long to compensate.
20140518 AC door small.jpg
20140518 AC door small.jpg (83.5 KiB) Viewed 2072 times

I'll need to get a box of screw-nails, I saw those were the recommended method for attaching the T-molding, then I can figure out how much of a gap I need at each side and can adjust the door accordingly. Cutting the T-molding with the chop saw worked pretty well for straight cuts, I'll need to use a block or something to hold it off from the fence when I miter the corners.

My wife and I agreed on a color scheme, we're doing a light blue interior with tan accents (cabinet doors, maybe the ceiling paneling) and a tan exterior with a green design that we haven't decided upon yet. The galley color scheme isn't finalized yet, she wants bright red (as I won't let her paint our home kitchen that color :lol: ) but I say it will clash with our red camp oven that the galley is pretty much designed around due to its size.
User avatar
Kharn
500 Club
 
Posts: 655
Images: 1
Joined: Sun Jul 17, 2011 1:54 pm
Top

Re: 4-Day Weekender - AC installed

Postby Kharn » Thu May 22, 2014 7:22 am

Rain, rain go away. :x
I had to stick with filling and sanding last night because I couldn't put the tear out in the rain.
But, I have a four day weekend and the only bad weather is supposed to be Saturday afternoon, so I should be able to get a ton done. I also cleaned out a section of my basement so I can paint all the removable parts without interfering with other activities.

I ordered some T-track rail, t-bolts and such for the canvas bunk, I'd hoped to paint its mounting plate in place but since the tracking information says the package is not likely to arrive until next week, I'll just mark and tape off the area it will attach to and primer/paint around it, touching up the area later as needed. I'd rather cut the plate's recess for the track using a dado on the table saw vs trying to route it in place later.
User avatar
Kharn
500 Club
 
Posts: 655
Images: 1
Joined: Sun Jul 17, 2011 1:54 pm
Top

Re: 4-Day Weekender - AC installed

Postby Kharn » Sat May 24, 2014 8:35 am

I made a bit of progress yesterday.
First I put the front and back faces on the oven's drawer.
20140523 oven drawer small.jpg
20140523 oven drawer small.jpg (101.66 KiB) Viewed 1968 times

Then I added the jambs for the lower hatch to seal against.
20140523 curb jamb small.jpg
20140523 curb jamb small.jpg (139.21 KiB) Viewed 1968 times

The road-side jamb had to be notched for the panel you can see here, that will offset the slide for the oven drawer by 1/4" so it can slide without scraping on the wall or seal.
20140524 road jamb small.jpg
20140524 road jamb small.jpg (96.21 KiB) Viewed 1968 times


After that, I put the second coat of primer on the interior walls and the various removable pieces.
User avatar
Kharn
500 Club
 
Posts: 655
Images: 1
Joined: Sun Jul 17, 2011 1:54 pm
Top

Re: 4-Day Weekender - AC installed

Postby Kharn » Sun Jun 01, 2014 6:54 pm

It was a bit of a slow week for trailer progress, but today we managed to glue, countersink and screw down all of the exterior panels.
20140601 Front small.jpg
20140601 Front small.jpg (161.42 KiB) Viewed 1896 times

Then we cut the tongue box for the lid style I wanted.
20140601 cutting tongue box small.jpg
20140601 cutting tongue box small.jpg (95.88 KiB) Viewed 1896 times

To get this finished product:
20140601 tongue box small.jpg
20140601 tongue box small.jpg (109.45 KiB) Viewed 1896 times
User avatar
Kharn
500 Club
 
Posts: 655
Images: 1
Joined: Sun Jul 17, 2011 1:54 pm
Top

PreviousNext

Return to Build Journals

Who is online

Users browsing this forum: No registered users and 3 guests