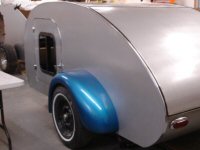
In our last episode, I was faced with the need to overcome the problem of the drawer slide getting in the way of the oven door. The upright + sideways solution appears to hold much promise, and I have been working in that direction. I drew up a plan, cut out some parts, and ... Surprise! I ran into the same problem that has been dogging me since day one.

Somewhere in the process, I misinterpreted my drawings, and made some really good looking scrap. Fortunately, I'm working with HD SandePly. So the material is popularly priced, and Ecuador is the place getting deforested. Not that I have anything against Ecuador. It's the American way. Send all the dirty jobs, or the ones having to do with cutting down trees, "over there." They'll do a clean, safe job, and manage their forests better than We ever would. Yeah, right. Out of sight, out of mind. How many of us here are ever going to go to Ecuador to see how clean their air is, or how well (or poorly) they manage their forests? Not me. Nope. No desire. Probably not you either, Dear Reader. In the meantime, they have the jobs, we have the trees to hug. Harrumph.

(/rant)
But I digress.

How'd I get off on that tangent anyway? That was totally unplanned. It just flowed. I apologize. No I don't. I'm glad I got it off my chest.

Meanwhile, back at the build...
One of the reasons the first batch of parts turned out wrong was that I did all the table saw work first, then did the CNC work. So I messed up on the CNC.

I think if I had turned the parts over on the CNC, they might have come out all right. Or not. This time, I'll be able to mess up on the table saw.


Here's what the new batch looks like:

Forward end, back, aft end, front of stove(in back).
I still have two aluminum shelves to cut. The bottom one for the oven gets some cutouts for ventilation, just like the sides. I'm really glad my machine can cut aluminum, but it is so MESSY. I get aluminum chips
everywhere. They even find their way into the house. And they won't leave. It doesn't seem to matter how many times I vacuum, there's still some hiding somewhere in the shop.
Getting the poly applied has been a constant time consumer for me. Since I got the ol' HVLP out of the attic to paint the trailer, I thought I'd try it out with the poly. There was some
recent discussion in Lauren's Father-Daughter Build thread about that gave me the courage to try thinning the poly and spraying it. First thing was to clean the gun of all that black trailer paint. Paint thinner was no use, so I tried some stripper. On plastic parts.

Worked like a champ. While I was blowing out one of the passages in the gun with compressed air, a big paint booger got loose, and hit me in the belly. It stung. I'm glad I wasn't looking in there to see what's going on. After all this, the spray gun worked like new. Victory!
First victim was the oven-stove pullout which you saw above. This went well, and it's so much faster than brushing. I still had another coat to put on my cabinet faceframes, so they were next. The poly sprayed on the prior coat very nicely, and I declared the face frames finished.
I had to see how it's going to look, so the galley was first.

That was good. I'll probably need to relieve the frames for clearance of the gozunder sliders.
Since that was pretty satisfying, I did the cabin cabinets next:

Close, no cigar.
I cut out notches at the top of the frame for the wiring in the walls to go through. I just didn't make them quite big enough:


Easy table saw fix. With this minor exception, everything has been fitting together nicely (knock on wood).
About this time, Bunny Rab came by to inspect progress and pose for the 'razzi.

That would make this the first nature photo taken from the Tear.
Thanks for stopping by!

 They're here in Austin. Coulda gotten an Igloo big enough for the whole underneath for the same bucks. The Igloos this size don't have a drain!
  I just hate it when the coffee cake gets all soggy in the ice melt.


