Details on "sandwich" construction method

Anything to do with mechanical, construction etc

Postby BoilermakerFan » Fri Oct 15, 2004 11:42 pm

wired74z

I definitely agree with Larry that 1/4" ply on both sides would be adequate, especially with fully framed and insulated construction. See AsianFlava's Texas Teardrop as well.

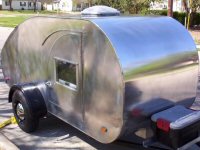
I'm planning 1/8" ply on both sides of a minimally framed 3/4" rigid insulation sandwich. The bottom and galley wall will be made the same way, top will be 1 1/2" thick. I may slip a single thickness of 4.7oz CF cloth on each side of the foam for additional stiffnes and to bring the thickness to a true 1" since the plywood is always a little under. This will allow Camp-Inn's door trim to fit better for a tighter installation.
User avatar
BoilermakerFan
Teardrop Master
 
Posts: 157
Joined: Sat Sep 25, 2004 12:23 pm
Location: Evansville, IN USA

Postby asianflava » Sat Oct 16, 2004 12:55 am

Quoted from the site:

But why it’s so strong is harder to explain.
Basically, it comes down to this — once the skin is glued to the frame, you’ve got a rigid structure that resists movement in every direction. For the panel to bend or twist, the skin and the frame would have to “let go” of each other. As long as the glue joints are sound, that won’t happen.

That's why when you vacuum bag, it makes for a stronger wall. You could compare it to a joint that was clamped while it was set and one that wasn't. They are both strong but the clamped one is devoid of any air pockets and excess glue making it stronger. The vacuum will clamp the pieces together as well as pull out some of the air from between the panels.

When panels are laminated together it is stiffer because bending forces are transformed to shear forces between the panels. If you took a telephone book and bent it, the pages will taper down towards the bottom. If those pages were glued then it wouldn't allow for the shear between the pages. A sandwich structure also converts the bending to tension and compression. For example, a solid aluminum rod is easier to bend than an aluminum tube of the same diameter.

I hope I'm right, I kinda came up with these from observation. If anyone has any comments to the contrary please let me know.
User avatar
asianflava
8000 Club
8000 Club
 
Posts: 8412
Images: 45
Joined: Mon Aug 02, 2004 5:11 am
Location: CO, Longmont

Postby angib » Sat Oct 16, 2004 4:47 am

asianflava wrote:That's why when you vacuum bag, it makes for a stronger wall.

I'll dive in and, partially, disagree with this idea.

The strength of a lot of old glues was sensitive to the glue-line thickness (I even did a college project on this subject!) - the thinner the glue-line, the stronger the joint. Wood and carpenter's glue is a good example - clamping the joint will increase its strength.

However there are some modern glues (OK... adhesives) that do not respond this way and there are some where a very thin glue-line will reduce the joint strength - I think most of these are two-part glues where a thin glue-line will be cooled too much by the surrounding material and so will not be able to generate enough heat to thermoset.

A second 'however' is that achieving the full strength of the glue is only a benefit when the materials either side are as strong as the glue - again with a lot of modern glues this is not always true. If the core of your sandwich panel is foam, it would need to be proper structural foam (read; very, very expensive) of high density before any decent core bond became the weak point.

Conclusion: you need only enough pressure (ie, vacuum) to achieve the necessary strength in the glued joint and in some cases excess pressure may be detrimental.

Oh, and if you're sticking together the pages of a phone book, the trick is to stick half the book and then put the book down with that half on the bottom - the weight of the other half will be enough as clamping pressure. Later, glue the other half and turn the book over. Simple, innit?

Andrew

PS Based on the above, I welcome suggestions as to whether I should seek a later-in-life career as a geek or as a nerd - I was hoping to be a curmudgeon, but I think I do not have the tenactiy for that occupation. :wink:
User avatar
angib
5000 Club
5000 Club
 
Posts: 5783
Images: 231
Joined: Fri Apr 30, 2004 2:04 pm
Location: (Olde) England
Top

Postby mexican tear » Sat Oct 16, 2004 8:17 am

I have been reading about vacume bagging for months and still have no idea how to do it.

My next TD I want to be a lot lighter and would like to do the sandwich construction and vacume bagging, however ...

Can someone point me in the correct direction for some instructions.

thanks
kai
"Essie" and the Mexican Tear
Image
User avatar
mexican tear
Donating Member
 
Posts: 506
Images: 14
Joined: Mon May 24, 2004 12:31 pm
Location: Hardy, Arkansas USA
Top

Postby Steve Frederick » Sat Oct 16, 2004 10:29 am

angib wrote:
asianflava wrote:That's why when you vacuum bag, it makes for a stronger wall.

I'll dive in and, partially, disagree with this idea.

The strength of a lot of old glues was sensitive to the glue-line thickness (I even did a college project on this subject!) - the thinner the glue-line, the stronger the joint. Wood and carpenter's glue is a good example - clamping the joint will increase its strength.

However there are some modern glues (OK... adhesives) that do not respond this way and there are some where a very thin glue-line will reduce the joint strength - I think most of these are two-part glues where a thin glue-line will be cooled too much by the surrounding material and so will not be able to generate enough heat to thermoset.

A second 'however' is that achieving the full strength of the glue is only a benefit when the materials either side are as strong as the glue - again with a lot of modern glues this is not always true. If the core of your sandwich panel is foam, it would need to be proper structural foam (read; very, very expensive) of high density before any decent core bond became the weak point.

Conclusion: you need only enough pressure (ie, vacuum) to achieve the necessary strength in the glued joint and in some cases excess pressure may be detrimental.

Oh, and if you're sticking together the pages of a phone book, the trick is to stick half the book and then put the book down with that half on the bottom - the weight of the other half will be enough as clamping pressure. Later, glue the other half and turn the book over. Simple, innit?

Andrew

PS Based on the above, I welcome suggestions as to whether I should seek a later-in-life career as a geek or as a nerd - I was hoping to be a curmudgeon, but I think I do not have the tenactiy for that occupation. :wink:

I'm with you, Andrew! (I'm more of a GEEK)
Epoxies and other hi-tech adhesives rely on a chemical bond, and require a certain amount of material to achieve this bond. If you clamp or vacuum the material out of a joint, the strength is decreased.
I believe, based on my own experience, that clamping uniformly with weight or other means, results it a high quality assembly.
I think that bagging is more for the assembly of projects that require odd clamping, or thin, strong layups. like racing shells or kayaks. The priority is lightness, and saturation of epoxy into a multi-layer layup. The adhesive is a major strength element, impregnated into the fabrics used.
For me, I'll stick with bags of sand, kitty litter etc. :wink:
Blessings, Steve
Adirondacks, Upstate New York
Building Journals
The Shop Manual's 8-years old!! Thank's everyone!
New! 'Rondack Lodge Plans!Order Here!
Image
User avatar
Steve Frederick
Custom Teardrop Builder
 
Posts: 1984
Images: 29
Joined: Thu Apr 15, 2004 5:02 pm
Location: Upstate New York, Adirondacks (Great Sacandaga Lake)
Top

Postby BoilermakerFan » Sat Oct 16, 2004 11:04 am

I have a little more to add to the vacuum bagging debate.

I called and spoke to the owner of Carbcom and explained my TD construction project and the goal of achieving a very light, strong shell over rigid insulation. He recommended plain weave 4.7oz CF fabric and suggested I "assemble" the shell then layup the CF to make a monoque (sp?) body.

I asked about vacuum bagging since I have about 70% of the equipment/materials already. He said that for a sandwich composite of this type, vacuum bagging only adds uneccessary complications. It wouldn't be any stronger, could possibly be weaker, and would "waste" epoxy that could be "recovered" with a yellow bondo squegee. The difference in weight would only be about 4oz. per square yard.

Bad news is the CF is stiff but very fragile. A rock hitting it at highway speeds would penetrate the skin and knock a hole in it. A layer of Kevlar over the CF would lend impact resistance, but the CF would probably still crack. May do Kevlar on the outside (with Kevlar felt chip guards on the leading edges) and the CF on the inside with the Kevlar wwrapped over the edges into the interior to bond the two sides together. I would still skin the outside in aluminum and use hardwood veneers on the inside. The entire shell would weigh about 80-90 pounds without hardware.

All said and done, I'm back with Steve and Andrew, avoid the hassle of vacuum bagging and use sand, P-fill, etc. to "clamp" the sandwich together with an epoxy adhesive.
User avatar
BoilermakerFan
Teardrop Master
 
Posts: 157
Joined: Sat Sep 25, 2004 12:23 pm
Location: Evansville, IN USA
Top

Postby angib » Sat Oct 16, 2004 12:42 pm

kai wrote:Can someone point me in the correct direction for some instructions.

This seems reasonable:

http://composite.about.com/library/weekly/aa000109.htm

It is describing the use of vacuum bags in laminating composites but the basic techniques are common.

Andrew
User avatar
angib
5000 Club
5000 Club
 
Posts: 5783
Images: 231
Joined: Fri Apr 30, 2004 2:04 pm
Location: (Olde) England
Top

Postby R Keller » Tue Oct 19, 2004 1:48 pm

Hi all,

Thought I'd chime in here since I did a lightweight sandwich construction on my trailer back before I could find much information on it on the teardrop boards. Tom Matheson did provide me with lots of good information in some private e-mails.

First some basics: I used 5/32" (4mm) Finland Birch plywood sandwiching 3/4" Styrofoam (for the floor, sidewalls, bulkhead, galley counter, etc.) and 1.5" Styrofoam (for the roof, front wall, and galley hatch). I used 3/4" x 1.5" poplar for the framing laid flat, or on-end, respectively.

What I can tell you is that the construction technique I used is way stronger than possibly required by this trailer (for example, I can jump up and down in the middle of my 5-foot wide roof with no worries ). The panels were very strong by themselves and when attached together, you get a large, incredibly strong torsion box. However, the technique is also very labor intensive and costly (if using epoxy to do glue-up). And that was without vacuum-bagging (which I seriously considered and then decided against for reasons that I'll discuss below).

My opinion is that as long as you are gluing the whole surface of the foam, 1/8" plywood on each side is plenty strong for a sandwich panel, even for the floor. Larry Messaros' experience using a framed panel with 1/8" plywood on the inside and no outside panel suggests that even that technique is plently strong, at least for side walls. Plus, most commercial trailers were made this way in the past.

Also a word about plywood: A lot of luan plywood is really low quality stuff. Full of voids and knots in the interior core. And paper-thin (and brittle and easily cracked) exterior skins Also, the reason that it is so cheap is that it is coming from impoverished countries with few environmetal safeguards that are decimating their rainforests to produce it (luan is not made out of mahogany. It is made from 15-20 hardwood rainforest tree species that are being unsustainably logged). So, there are a few reasons to avoid using it if possible.

Using my method, my panels ending up weighing about as much as 1/2" to 5/8" plywood (sometimes more, sometimes less, depending on how much framing I used). The side panels, for example have a lot of poplar framing, but still weigh only 1.8 lbs./sq. ft., which is a bit more than 1/2" (nominal, actually 15/32") plywood at 1.5 lbs./sq.ft., equivalent to 5/8" (nominal, actually 19/32") plywood at 1.8 lbs./sq. ft., and less than 3/4" (nominal, actually 23/32") plywood) at 2.2 lbs./sq. ft. However, the side panels have about 3.3 times the stiffness of 3/4" plywood, and almost 12 times the stiffness of 1/2" plywood.

The basic process I used for gluing the sandwich panels typically was this (first I built a large flat, strong table to glue down everything - any curve you impart to the panel is going to be hard to correct):

1. glue framing to "outside" skin using Titebond II glue- clamp using clamps (of all things) and by screwing through the framing into the table. Framing was also pocket-screwed together, though this probably wasn't necessary.

2. cut Styrofoam fit into the spaces in the frame with an X-acto knife. I tried a lot of techniques and a sharp (change blades often) X-acto, did the best, most precise job. Hint: press an oversize piece of foam hard onto the framing and you will get indentations that will show you where to cut the foam.

Image[this is my floor before the inside sking was put on; notice hole for footwell]

3. lightly sand both sides of the Styrofoam (I used both a ROS and a long-board with 120 grit) to give some "tooth" for the adhesive to grab onto. Also the 3/4" foam was slightly thicker than this, so this gave it the right thickness.

4. apply a thin wet-out coat of "neat" (unfilled) epoxy mixture to the inside of the outer skin, the frame members and both sides of the styrofoam pieces. I used System Three epoxy. I applied it with a foam roller (large areas) and a small brush.

5. apply a thickened epoxy mixture to the inside of the outer skin and the frame members. I used System Three epoxy mixed with plastic minifibers. I applied the mixture with a 1/32"notched trowel that provides about a 16 mil thickness or so.

6. squeeze Styrofoam pieces into frame spaces

7. apply a thickened epoxy mixture to the styrofoam and frame using the notched trowel

8. Place "inside" skin on top and line up. I then clamped the entire sandwich together using a combination of clamping the panel to the table on the edges, using clamps across the table, screwing into the table where the screwholes would be hidden later, and weights (containers filled with water).

9. Let epoxy cure overnight

That's it! Easy, right?! :wink:

I have some thoughts about vaccum bagging:

Vacuum bagging would have been a little more tricky and would have added some more complication to an already complicated process. It's hard enough to be able to do everything you need to on a large panel before the epoxy starts kicking off.

Vacuum bagging allows you to use a thinner glue line and thus theroretically use less epoxy and save money (and a little weight). However, you still need a way to spread the epoxy evenly at the thickness that you want. In the System Three literature, I found that 20 mils was the minimum recommended glues line thickness using clamping, and 8 mils if using vacuum bagging. Since it would be hard to spread the thickened epoxy at an 8 mil thickness, there would be a lot of waste as the excess epoxy squeezed out of the panels, and practically speaking, you might not use much less epoxy that way. Plus, you do have to worry about too much epoxy squeezing out and "starving the joint" if vacuum bagging is used.

When it came down to it, I used some makeshift clamping methods in lieu of vacuum bagging. Since the glueline was so thick, I was not worried about gaps. Using my wet-out and 1/32" notched trowel method, I got about 60 sq. ft. of coverage per gallon of neat epoxy (about 20 mil thickness - 5 for wet-out coat and 16 for thickened mixture), But remember, that's spread out on both sides of the sandwich panel, so the epoxy use really adds up!

If I wanted to go really lightweight and insulated, and I didn't care about having smooth sides: I'd do something similar to "standard" trailer construction techniques (also see Larry Messaros', Glen-L plans), etc. I'd cut a profile out of 3/4 plywood and then cut out holes for insulation, leaving only a little framing left. Then I'd glue the interior 1/8" plywood panel to it. Then cut Styrofoam insulation to fit. And cover exterior in overlapping, stapled, aluminum panels like Grant Whipp does on his Lil' Bears.

Hope this helps some of you in your construction efforts.

Rik
R Keller
Teardrop Master
 
Posts: 187
Images: 1
Joined: Thu Apr 15, 2004 4:01 pm
Location: Sacramento, CA
Top

Postby R Keller » Tue Oct 19, 2004 1:59 pm

asianflava wrote:For example, a solid aluminum rod is easier to bend than an aluminum tube of the same diameter.


You're right about everything except that last statement! The tube would still bend easier. But it is true that the exterior material adds way more to the bending stiffness than the material toward the inside. And the tube is much lighter than the rod.

That is why I-beams have most of their material on the flanges, separated only by a thin web, whose primary job is to keep the flanges apart.

Rik
R Keller
Teardrop Master
 
Posts: 187
Images: 1
Joined: Thu Apr 15, 2004 4:01 pm
Location: Sacramento, CA
Top

Postby R Keller » Wed Oct 20, 2004 6:59 pm

Wow! Killed that thread, didn't I?

C'mon folks, that was a lot of typing! The least someone could do is tell me I don't know what I'm talking about. :wink:

Rik
R Keller
Teardrop Master
 
Posts: 187
Images: 1
Joined: Thu Apr 15, 2004 4:01 pm
Location: Sacramento, CA
Top

Postby mikeschn » Wed Oct 20, 2004 7:18 pm

Okay Rik... you don't know what you are talking about. With the huge panels, you don't want to vaccuum bag... you want to use a makeshift clamping arrangement, and build a mock vaccuum bagged panel.

Oh, that's what you did!!! Opps... J.K. Just following your orders!!! LOL

Mike...

P.S. I'll be using a table saw to cut my foamular to fit!!! 8)
The quality is remembered long after the price is forgotten, so build your teardrop with the best materials...
User avatar
mikeschn
Site Admin
 
Posts: 19202
Images: 475
Joined: Tue Apr 13, 2004 11:01 am
Location: MI
Top

Postby R Keller » Wed Oct 20, 2004 7:49 pm

mikeschn wrote:P.S. I'll be using a table saw to cut my foamular to fit!!! 8)


Oh sure. A table saw. Now that doesn't really give the foam a fighting chance, does it? How unsporting! :wink:

Rik
R Keller
Teardrop Master
 
Posts: 187
Images: 1
Joined: Thu Apr 15, 2004 4:01 pm
Location: Sacramento, CA
Top

Postby mikeschn » Wed Oct 20, 2004 7:58 pm

R Keller wrote: How unsporting! :wink:
Rik


Unsporting? :rofl: There are enough challenges packaging 10# of stuff into a 5# teardrop... I don't need to make it any harder to build than it already is...

BTW, after I used a tablesaw on mine, Ross Wade used a table saw on his too... best thing since sliced bread!!! :lol:

Mike...
The quality is remembered long after the price is forgotten, so build your teardrop with the best materials...
User avatar
mikeschn
Site Admin
 
Posts: 19202
Images: 475
Joined: Tue Apr 13, 2004 11:01 am
Location: MI
Top

Postby muir » Wed Oct 20, 2004 9:43 pm

Actually, I was going to post a reply to your treatise on "composite" frame construction a while ago, but I first went to your website, and a number of my questions were answered there. There was a lot of useful info in your post, so the time you took to write it up is appreciated.

I took a look at the MacBeath website, and they say all of their plywood comes in 2'x4' pieces. Can you get bigger when you purchase at their Berkeley store? Have you found any good plywood suppliers more local to Sacramento?

Also, I'm guessing that you glue the foam to the outside wall and sandwich it with the interior wall in one step to save having to "clamp" the foam once, then pull all the weights, etc. off, and then do the interior wall. Could you do just the foam first, and then in a second step glue up the interior? It seems like this would make for a less hurried build-up, especially if you had a large wall panel. (At the expense of two rounds of clamping, curing, etc.)

Thanks.

-Scott
muir
Teardrop Inspector
 
Posts: 13
Joined: Thu Sep 16, 2004 12:49 pm
Location: Nevada City, CA
Top

Postby Larry Messaros » Wed Oct 20, 2004 11:24 pm

Ok Rik, I'll bite! :lol:

R Keller wrote:
If I wanted to go really lightweight and insulated, and I didn't care about having smooth sides: I'd do something similar to "standard" trailer construction techniques (also see Larry Messaros', Glen-L plans), etc. I'd cut a profile out of 3/4 plywood and then cut out holes for insulation, leaving only a little framing left. Then I'd glue the interior 1/8" plywood panel to it. Then cut Styrofoam insulation to fit. And cover exterior in overlapping, stapled, aluminum panels like Grant Whipp does on his Lil' Bears.

Hope this helps some of you in your construction efforts.

Rik


I would cringe at cutting up a piece of 3/4 " plywood to use as a frame. Then what do you use the inside pieces for? 1x2 kiln dried spruce (or like what I did, 1x4 ripped into 2 pieces) for the frame suits me just fine. No pocket screws, just a couple of staples (9/16" long x 1/2" deep) on each side to hold it together until the plywood goes on. Glue only on the wood surfaces. Small aluminum nails with rounded heads to "clamp" the plywood Insulation only friction fit. For the tear I will be building, I plan on putting some sort of smooth surface (plywood, hardboard....) so I can put on a smooth aluminum sheet. It will go on after it's all together and the electrical is done.

After "testing" the camper for quite a few years with trips from Los Angeles to Chicago to Quebec City. From smooth paved freeways to rocky gravel side roads to the twisty Hwy 101 down the west coast and even through the Canadian Prairies where there always seems to be a head wind. :lol: From the heat of Death Valley to the cool winter climate here in BC, we have slept 3 people in a pinch and it's always been loaded down with all of our regular equipment for some of our long trips, our camper stood up extremely well.

Our floor was not insulated, nor was the side overhangs. They were just 3/8" spruce sheathing (not even good 1 side!) This is the sheathing that was used for side wall construction for a house. If it can stand the shear forces in a house, then my thinking it would be good for the camper. It wasn't pretty, but most of it was covered up. I tried to stay with mostly spruce, and again, it was from some ideas that I had that spruce was strong and light weight. (keep in mind that I was also using materials that were locally available at the time)

For the overhead bunk, which was just a little overhang on the front I built a fold down bed as the torsion box and it was incredible that someone would be able to sleep on it when it was spanning 6 feet (although the width of the fold down portion was about 22")

You might think I am a little obsessed with weight, but when I was building my camper a friend was also building his but he decided to add a few "extras" on, like an insulated floor and side overhags (built like a torsion box, complete with 2 sheets of plywood) which almost doubled the weight for the bottom framing alone, A raised roof to be able to stand up in. This added quite a bit more weight because the roof had to be beefed up because of the big hole in the ceiling. He also worked at a car dealership where he was getting rear cab window takeouts from pickup trucks (for sliding windows) for nothing and incorporated one of these into his camper as well. (this window alone weighed almost as much as all my windows together!) Needless to say, his weighed quite a bit more than mine did. What I'm trying to say is keep track of everything you put into it as every little bit adds up. Now Rik, do you know the weight of all of the screws that you put into the side wall?? :D

And, no, I wouldn't use 1/8" plywood for the floors, but 1/4" would probably work well, hmmmmm...........

As for the flat surface, yes, make sure it is perfectly flat, and the exacto knife, yup, a sharp knife works great, cuts through skin real good too! :cry: as a matter of fact, it stitiched up so good I can't tell where the scar is any more :lol:
Larry Messaros
:snow
Cariboo Country: If you don't like the weather, wait 5 minutes!
User avatar
Larry Messaros
Platinum Donating Member
 
Posts: 392
Images: 8
Joined: Fri Apr 16, 2004 12:42 am
Location: 70 Mile House, BC
Top

PreviousNext

Return to Teardrop Construction Tips & Techniques

Who is online

Users browsing this forum: No registered users and 4 guests