'47 MobilGlide maiden voyage went great!

...ask your questions in the appropriate forums BUT document your build here...preferably in a single thread...dates for updates, are appreciated....

Re: '47 MobilGlide started a new frame 5/25

Postby doug hodder » Fri Jun 20, 2014 9:48 pm

It's been some slow going as I have done some camping and until the camping season is over, won't be hitting it all that hard. Steve E and I have a plan to modify the garage door entrance to get the clearance to pull it in the garage. That will make it much more "builder" friendly. I won't have to worry about securing tools and buttoning it all up after a days work.

This frame is incredibly rigid! (shown upside down). So far all the dimensions seem to be working out as I've measured it about 10 times. I need to do some careful measuring and then cut/weld on the outriggers outboard of the longsills (rails) on the frame to support the bottom perimeter frame on the body. I figure I'll get enough on to support the body, then weld on those that are more critical (like those in front and behind the wheel well openings) after the body is on the frame. I'm just kind of putzing on it right now.

Once I crawl under it and cut off all the mounting bolts with a torch, we will be able to see if we can physically lift the body with just people and no jacks or lifts. I know that the smaller Airstreams can be lifted by a couple of people. Had that discussion with a guy up at Fallen Leaf Lake last weekend about that.

While up there, a fellow camper "gifted" me a couple of stainless winged clearance lights. I still need to get the electrical portion, but that should be no problem. I also need to pick up a couple of amber ones as well. I've looked all over for the KD 523 housings that the original lights have. All my lenses are good, but the housing is cracked and in terrible shape on all of them. I figure, I can finance the new lights by selling the old lenses as they are original glass and perfect. I'm not really committed on it at this point, things may change, I do like the "winged" look however. I also spoke with John Greene who many of you may know. He gave me the numbers for the extrusions on the rubber for some of the windows and where to get them. He had them make the die to extrude the rubber on his Westcraft. That's a big help!

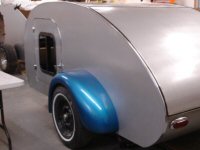
I'll drag out the Voyager this weekend and start getting it ready for the IRG. Sorry Globetrotter....you're on hold for while. Thanks for watching. Doug
Image

Image
doug hodder
*Snoop Dougie Doug
 
Posts: 12625
Images: 562
Joined: Tue Dec 14, 2004 11:20 pm

Re: '47 MobilGlide started a new frame 5/25

Postby doug hodder » Thu Jul 10, 2014 9:15 pm

Today the registration and title showed up for the trailer. I am "officially" titled as a '47 and have '47 PTI vintage plates on it as well. If you are in Ca., that is a big plus to have the plates on it. PTI plates are good for 5 years. I've also have a black Ca. trailer plate on the trailer now that I can sell on E-bay. That, along with the existing glass lenses that I can't find the housings for, will finance the new clearance lights and rear stops I want. Doug
doug hodder
*Snoop Dougie Doug
 
Posts: 12625
Images: 562
Joined: Tue Dec 14, 2004 11:20 pm

Re: '47 MobilGlide started a new frame 5/25

Postby doug hodder » Sun Jul 13, 2014 4:31 pm

Pretty much finished up the frame today and didn't manage to drop it when flipping it by myself. Still need to make a couple of outriggers on the rear for support, and I managed to get the original steel VIN tag off the old frame without screwing it up. It's sitting in some citric acid to remove the rust on it. I also managed to get the existing trailer up on some jack stands so I can begin cutting out the bolts holding it to the existing frame. I'm thinking I will be able to just remove the upper shell and plop it down on a the new frame. That's all provided the shell is solid enough to be moved, should be.

Next step is to shoot the frame black and get the deck spliced together on the new frame and pattern it to fit the shell. I'm going to have to figure out a way to cut the bolts holding it down. The torch may not be the answer as the wood floor is way dry and since the bolts are so close to the aluminum, I'm afraid of blowing a hole in the aluminum. My cut off tool can't quite fit in the area. I may make up a steel shield to back up against the aluminum and use the torch anyway.

Once jacked up, the existing torsion axle didn't move an inch. It's locked up in a total vertical position. I bagged the idea on the wide whites, since on a heavier trailer, the car rated tires seem to be a bit squishy. I took them off the Kamp King and put on some trailer tires. No wide whites, saved me a bunch of building funds.

Thanks for watching.

Image


Image
doug hodder
*Snoop Dougie Doug
 
Posts: 12625
Images: 562
Joined: Tue Dec 14, 2004 11:20 pm
Top

Re: '47 MobilGlide frame complete.

Postby halfdome, Danny » Sun Jul 13, 2014 5:08 pm

Doug, will a Sawzall with a long blade work on the bolts?
:D Danny
ImageImage
"Conditions are never just right. People who delay action until all factors are favorable do nothing". William Feather
Don't accept "It's Good Enough" build to the best of your abilities.
Image
Teardroppers Of Oregon & WashingtonImage
User avatar
halfdome, Danny
*Happy Camper
 
Posts: 5894
Images: 252
Joined: Sun Aug 14, 2005 11:02 pm
Location: Washington , Pew-al-up
Top

Re: '47 MobilGlide frame complete.

Postby doug hodder » Sun Jul 13, 2014 6:16 pm

I may try that Danny, but one poke will put it through the aluminum skin. They are only like less than 3/4" away from the exterior skin. There is a skirt all around the trailer and the frame is set up inside that. The bottom perimeter of the body rests on the wood floor and then a 4" skirt. I haven't removed any of the interior skin yet to see if it's on a steel perimeter or aluminum. The existing floor is so dry and cupped, with gaps of up to 1/2" that I just figure, I need to do a new one, rather than top it. Thanks for the idea. doug
doug hodder
*Snoop Dougie Doug
 
Posts: 12625
Images: 562
Joined: Tue Dec 14, 2004 11:20 pm
Top

Re: '47 MobilGlide frame complete.

Postby halfdome, Danny » Sun Jul 13, 2014 6:29 pm

Doug, if you have a planer (I think you do) you could size wood blocking between the aluminum skin and the bolts.
The backing might give you a more solid surface to cut on & save your trailer skin.
:D Danny
ImageImage
"Conditions are never just right. People who delay action until all factors are favorable do nothing". William Feather
Don't accept "It's Good Enough" build to the best of your abilities.
Image
Teardroppers Of Oregon & WashingtonImage
User avatar
halfdome, Danny
*Happy Camper
 
Posts: 5894
Images: 252
Joined: Sun Aug 14, 2005 11:02 pm
Location: Washington , Pew-al-up
Top

Re: '47 MobilGlide frame complete.

Postby Greg M » Mon Jul 14, 2014 8:48 pm

Could you try drilling the heads off from above, or would they just spin?
Give a person a fish and you feed them for a day; teach a person to use the Internet and they won't bother you for weeks.
User avatar
Greg M
*Geek Extraordinaire
 
Posts: 1167
Images: 85
Joined: Mon Sep 12, 2005 12:40 am
Location: Victoria, BC, Canada
Top

Re: '47 MobilGlide frame complete.

Postby pchast » Mon Jul 14, 2014 9:04 pm

How about a nut cracker or cold chisel?
:thinking:
pchast
Platinum Donating Member
 
Posts: 2065
Images: 97
Joined: Mon Jan 28, 2013 5:47 pm
Location: Athens, NY
Top

Re: '47 MobilGlide frame complete.

Postby KCStudly » Mon Jul 14, 2014 9:13 pm

Pneumatic chisel?
KC
My Build: The Poet Creek Express Hybrid Foamie

Poet Creek Or Bust
Engineering the TLAR way - "That Looks About Right"
TnTTT ORIGINAL 200A LANTERN CLUB = "The 200A Gang"
Green Lantern Corpsmen
User avatar
KCStudly
Donating Member
 
Posts: 9640
Images: 8169
Joined: Mon Feb 06, 2012 10:18 pm
Location: Southeastern CT, USA
Top

Re: '47 MobilGlide frame complete.

Postby doug hodder » Sun Jul 20, 2014 8:42 pm

Thanks for all the replies! I figured the only way to tell what I needed to do was to remove all the interior aluminum skin on the lower portion to see what I have to deal with. After removing it, I found that all the original insulation had sagged and was kinda stuck to the wall but left plenty of uninsulated places. I thought ahead and marked all the interior panels so that I would know where they belong. I took the leaf blower in and cleaned out the lower channel to reveal all the existing tie down bolts. There were maybe 25 and after removing the shroud, and side handle found that I could use the 4" grinder to take the tops off the bolts and then punch them with a drift punch.

This morning Steve E came by, (thanks Steve) we manage to jack the body about 1 1/2". I put some 2x4's across it at the bottom and screwed the body to them so that it wouldn't spread and drop. I then took the sawzall and cut out all the corners as they were causing the body to hang on them. I left the upper portions of the interior skin installed as the exterior roof is missing maybe 50 rivets and didn't want to cause things to "loosen up".

I now at least have the radius of the corners and some exact dimensions on the floor so that I can build the new floor and attach it on the frame. What I'm surprised about is....maybe I'm old, but this thing is heavier than I had expected. Maybe it's just knowing what it costs at the chiropractor, but this one is going to be jacked up, not just human lifted to plop on the new frame. Check out the "beefy" 3/4" sq. tube on the aft end for support! It made it 67 years....not much there huh?

Up next...get the floor spliced together and on the frame which needs paint. It measures 7' x 12'5". That will be one big piece of ply when I'm done with it. Thanks for watching. Doug

Image


Image
doug hodder
*Snoop Dougie Doug
 
Posts: 12625
Images: 562
Joined: Tue Dec 14, 2004 11:20 pm
Top

Re: '47 MobilGlide body cut loose 7/20

Postby doug hodder » Sun Jul 27, 2014 8:18 pm

Bought up 3 sheets of 4x8 import 5/8" birch yesterday. The import birch works great on a floor, not the price of the baltic birch and av available in 4x8 sheets, but has 8 layers of veneer so it's really stable and solid. I hate a squishy floor. I managed to get it all splined, epoxied, and topped with some glass cloth on the seams. Next step, cut it to fit the 7' x 12'4" deck with radius corners, flop it on the frame and install any wooden supports that will be necessary. Then, I'll install the rear outriggers that I am lacking. Thanks for watching. Doug

Image
doug hodder
*Snoop Dougie Doug
 
Posts: 12625
Images: 562
Joined: Tue Dec 14, 2004 11:20 pm
Top

Re: '47 MobilGlide body cut loose 7/20

Postby doug hodder » Sat Aug 30, 2014 7:28 pm

Got the frame in paint, deck completed/ sealed and bolted to the frame. Today I built sort of a 2x4 T padded with a blanket, and with the floor jack, lifted the body about 5 inches and slipped some 10' 2x4's doubled up under the body and screwed it to the boards. I also put in a couple of cross members so that the bottom the body wouldn't spread. I can use a jack on the ends of the 2x4's to support the body while I drag the old frame out and slip in a new one. The real hassle to work around is that the body panels extend about 4 inches below the bottom frame. I hope it all holds together till I get it swapped out. That won't happen for a while. I don't get how the boys at Airstream were able to lift a body with just 2 people. While I still have a lot of the interior skin installed I just don't see how this body could be moved that easily. My plan is to use jacks. Camping trips have gotten in the way of progress. Doug

Image

Image
doug hodder
*Snoop Dougie Doug
 
Posts: 12625
Images: 562
Joined: Tue Dec 14, 2004 11:20 pm
Top

Re: '47 MobilGlide body lifted, frame decked. 8/30

Postby doug hodder » Sun Oct 05, 2014 7:45 pm

A couple of weeks ago, I did the final lift on the body and pulled the old frame out from under it. Rolled the new one in and dropped it down. Without a frame under it, the body was very floppy given it's 67 years. One thing I found is that the body had sort of settled into a position on the old frame, or at least that seems to what has happened. After several hours of rasslin' around with it, my neighbor and I got it to drop down flush on the new deck. It took considerable language skills. What's nice is that once it was "stretched" to fit the new frame, the large gaps in the exterior roof panels all closed up.

This weekend I went about working on the roof. It had a large stretch, maybe 6 feet with popped rivets on one side spaced about 1.25" apart. I was smart enough to not have removed the interior skin as that's what was holding it all together until I got it all buttoned up. I'm using the urethane sealant made for this type of work, (from vintage trailer) and also bought up a load of closed end rivets. They're like a pop rivet, but with no through hole in them, so they are water tight. They are made for boats. The other side of the roof had about 75 steel rivets that had to be drilled as they weren't tight. I bought a pneumatic riveter so that part went quickly and no hand cramps.

Today I finished up the roof, with the exception of the vent, which they were out of, and I didn't want to leave that big of a hole open in the roof. I also stripped out the rest of the interior aluminum all the trashed insulation and the wiring. While it may have only looked like it needed to be cleaned up....it was a testimonial to not doing a "patch and paint" type of job. There was practically no insulation left in the roof and the rest of it had been water soaked and was a real mess + hidden damage that would be an issue down the road. The water intrusion had corroded some of the ribs on the ceiling, so I will need to tend to them. Just for a double check, and since no one will be able to see it from the ground, I am thinking I will "seal coat" the roof to the edge of the center panel and paint to match the body. There are over 200 rivets that I didn't do, they are tight, but I'm not going to drill and replace all of them. I just don't know if they are "water tight".

Body lifted with no frame.

Image

New frame under it, axle placement and tongue all fit great, just a hassle to drop it down completely.

Image


Setting rivets, urethane sealant cleans up with a little Xylene. I did short stretches of 2' for working time on it.

Image

Interior stripped out.

Image

Also restored the license plate. So lucky to have a '47 plate tagged to this trailer. Thanks Steve and Patty! It ain't perfect, but I didn't have to pay to have it done.

Image

I also scored a late 40's Port-O-Stove for it. Kinda has a breadloaf appearance to it. Traded a restored 413C stove for it.

Image

Thanks for watching. Doug
doug hodder
*Snoop Dougie Doug
 
Posts: 12625
Images: 562
Joined: Tue Dec 14, 2004 11:20 pm
Top

Re: '47 MobilGlide updated 10/5

Postby Woodbutcher » Sun Oct 05, 2014 8:05 pm

Beautiful job Doug. I like to follow along, keep up the good work. :applause:
User avatar
Woodbutcher
Platinum Donating Member
 
Posts: 4191
Images: 45
Joined: Fri Mar 10, 2006 10:01 pm
Location: Chicago Suburbs
Top

Re: '47 MobilGlide updated 10/5

Postby KCStudly » Sun Oct 05, 2014 10:35 pm

Stove's a nice match. How are you going to handle that big dent in the side panel? Hammer and dolly work, or replacement?

Glad to see you bringing one back, but I do not envy you at that task. I am sure it must be a lot more work than building from scratch.
KC
My Build: The Poet Creek Express Hybrid Foamie

Poet Creek Or Bust
Engineering the TLAR way - "That Looks About Right"
TnTTT ORIGINAL 200A LANTERN CLUB = "The 200A Gang"
Green Lantern Corpsmen
User avatar
KCStudly
Donating Member
 
Posts: 9640
Images: 8169
Joined: Mon Feb 06, 2012 10:18 pm
Location: Southeastern CT, USA
Top

PreviousNext

Return to Build Journals

Who is online

Users browsing this forum: jdeleon and 3 guests