Sorry I don't have any good ideas for your hatch fix. I guess somethings are just easier to fix when you are moving slower. Is the trim on permanently, or can it be taken off to make the repair easier?
On TPCE, I had an unexpected day off from the build yesterday. The Escape had a service recall for the steering torque sensor (electronic power steering). I decided to combine that with some other needed repairs, including the major 60k mile tranny oil change, front brake job, spark plugs (which is a major undertaking on the transverse V6), replacement of a leaking PTU shaft seal (PTU = Power Takeoff Unit… rear axle drive shaft yoke), cabin air filter change, and replacement of the HVAC fan speed resistor. It is so nice to have all four fan speeds back again!
Anyway, I was at the mercy of others to get to and fro; from work Wednesday to drop the car off the night before, home, to work again this morning, and back to pick up the car after work today. I'm very grateful to a coworker who lives close to me for ferrying me about; we take turns when our cars are in the shop.
But that’s not why you came! Let’s get caught up. Monday Karl helped me take the ceiling assembly back down off the cabin and onto the work bench. Before flipping it inside up, I glued and screw clamped the front vent shim onto the front vent spar (no pic). I had left this from before until it was easier to reach. Since that was well secured, we were able to flip the assembly inside up right away.
You’ll recall that when I had the ceiling dry fit to the cabin I went around inside and traced key points at intersections and mid spans of all the joints and cabinets to reference for masking. Here are a few examples.
The pencil lines are just inside the boundaries by about a scant 1/16 inch, perhaps 1/32. Not sure how well these pencil lines would be concealed by the stain (some of the lines were fairly bold), so I wanted to sand them down at least until they were very faint, but first I measured carefully at each station and used an ink pen to mark the measurements inside the lines where the markings will (hopefully) remain visible after the first round of masking and finishing is complete. This way I can mask next to the lines so the finish runs under the edges of the joints, then later the measurements will allow me to mask the finish off inside were the lines had been so that the tape does not get pinched in the joint.
I took some time to remove the little bit of excess glue from the inside corner of the flap on the front screw flange. This to be sure that the joint lays down nice and flat when it goes together at final assembly. Here you can see the cleaned up area on the left vs. the yet to be cleaned section on the right.
I made sure to sweep away all of the resulting hard beads of loose glue so that they wouldn’t get ground into the surface of the ceiling and cause mars.
Next I hand sanded the entire surface of the ceiling, paying particular attention to the visible seam and a few “rough” areas around the vent hole (I chose to flip this panel “good side” out because it had several small knots on that side, while the “back” side matched better.
The seam looks pretty good…
… except for a small area near the middle where the glue has soaked in to the face in a little low area.
I’m reluctant to try to sand this down for fear of burning thru the first ply.
Rather than just leave this lying flat for a couple of days (turned into 3), I propped the front end up with a couple of sticks to try to “maintain the train”.
Tonight I only got another 1-1/2 hrs in, but still felt good about progress.
I managed to get the panel flipped back upright by myself and took the screw clamp off of the front vent shim.
I planed and sanded this down until it was flush to the others, both by touch and when checked with a straight edge.
This next little detail took a half hour or so, but I think it will pay off in a nice professional look later when I fair the foam up to the vent frame prior to covering with the canvas. Maybe one of those things that you don’t necessarily notice by itself, but that will make a difference in how the overall build will be perceived (at least I hope).
I got the trim base for the roof vent fan out and positioned it hard into each corner, at the limits of the rough opening, so that I could trace the corner radii.
I then marked the diagonals and used the small compass to step off the edges, finding corner radii that were approximately concentric with the tracings. (No need for exact precision here; it is up on the roof after all.)
Then it was a simple matter to cut on the line with the utility knife, and chip the sharp part of the corner away; little cleanup with the 3/4 inch chisel.
And finally, I masked off the good side of the ceiling. Where the 0.92 wide tape was too wide, I used a straight edge and the utility knife to cut just thru the tape and peel the excess off. (This is actually shown out of sequence, but I forgot to take a pic of the masking until after I flipped it back to rest on the props for the night.)
While I’m working on this, a contractor is replacing the screened porch back at the house. I had hoped to stay out of this project altogether, but ‘oh well’, on Saturday I need to relocate the dryer duct and heating oil tank vent, which currently exit thru the rim joist and the old ledger board. Code requires a 4 inch step out of the building but the old deck was only about 2 inches down; so the new decking will be slightly lower and those services need to be relocated.


 ) sanding scratches around that area by the vent opening. Probably won’t be noticed by most people.

 ..., so the big boys will have to set up twice. During the weekend of the event they will be shooting at targets instead of for distance). I'm pretty sure this is because of the insurance hassle at the current field.
 Just sayin’ ... FWIW
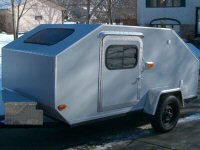
 a camper.