The center section of the roof's ribs are the most challenging because I had this "brilliant" idea to install a
sunroof sunroof there. I'm sure it will be worthwhile in the end but the detailed shape of it is proving to be a challenge. The primary holding mechanism is for the top frame and interior trim ring underneath to clamp on the sheet metal roof of a car or truck (or a teardrop in this case). The cross-section of the clamping frame is shown.
It can be clamped with either the frame and trim ring, or with a peeled back trim ring with a L-shaped ring that would get clamped instead. For now, I'm going to use the full trim ring to clamp it, leaving the option later to peel back the trim ring and use the L-ring inside because once I peel the trim ring I'll not be able to switch back to the other method.
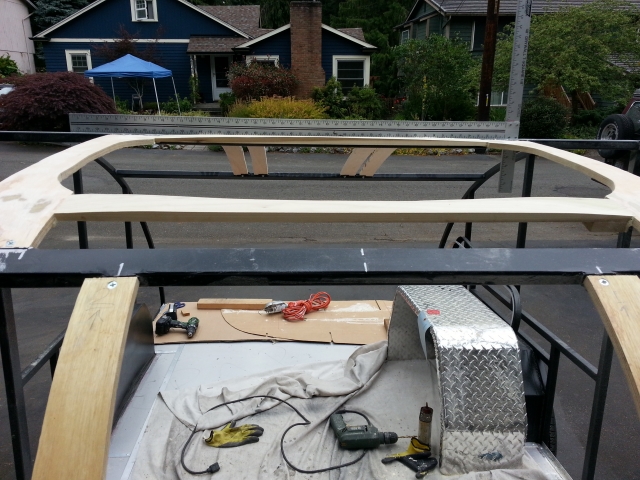
To do this, I'll have the wooden frame on the roof set back from the perimeter of the sunroof about an inch to allow full access to the skin on top. The frame on top has to roughly match the contour of the sunroof which is flat fore-aft, but has a crown of about 3/16" side-to-side. Unfortunately, this is just the opposite contour of my teardrop roof (flat side-to-side, and curved fore-aft).

It is upside-down in this picture before installation.

I made the frames for this section of the roof 5-1/2" wide and cut out the side contour of the sunroof, while the fore and aft edges are contoured poplar 1x3s. This is assembled with pocket joints and gorilla glue. After the initial installation, I checked the fit using scraps of doorskins cut to mimic the eventual sheetmetal skin then attacked it with a belt sander to shape the poplar.

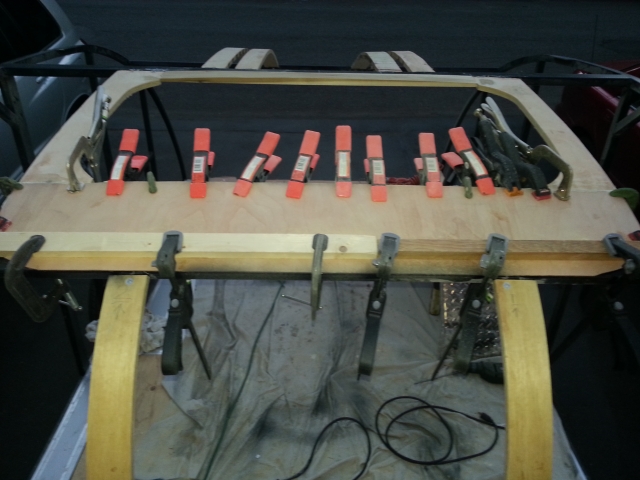
After getting as close as I could to matching the contour with the sander, there was a gap on the front edge (as expected) because the front is curving away from the top so I started to build it up with more thin plywood. Once I build up a few layers I'll sand it to fit the contour and try to keep the contour manageable for the eventual aluminum roof skin. The leading edge of the front plywood skin is attached to the steel cross-bar with VHB tape (getting familiar with it on my first use of it before using it on the skin eventually) and the rest with gorilla glue to fill any tiny gaps that may be lurking. The next layer(s) will probably be glued with Weldwood plastic resin as I did with the curved plywood ribs I made.
My plan for the roof skin is to have 4 relief joints where it comes into the sunroof frame so I'll be able to manipulate the skin slightly and avoid causing weird bulges elsewhere. The trailer frame is 72" wide, and I'll have one 24" band down each side (matching the roof rails in other areas) and a middle band overlapping between them (about 26" wide). This will also allow me to cover all or most of my trailer with the 4 4'x10' sheets of 0.050" 6061 that I got on craigslist from a metal shop that was closing.
I wanted to get all this work with the clamping and shaping the roof out of the way before I start to install the 1/8" birch plywood skin for the ceiling, inserting the pink extruded polystyrene and wiring.


 KC's progress ahead of mine helped me see how I can make it work. Thanks KC!

 It actually looks good when I clean up after myself, but i just haven't lately.


 Stay tuned for some attempts on my scrap pieces to see what successes or lessons I find before I commit by trying it on the actual doors.