Sleepin Around, New Zealand. The Build

...ask your questions in the appropriate forums BUT document your build here...preferably in a single thread...dates for updates, are appreciated....

Re: Sleepin Around, New Zealand. The Build

Postby Sheddie » Sun Aug 10, 2014 5:46 am

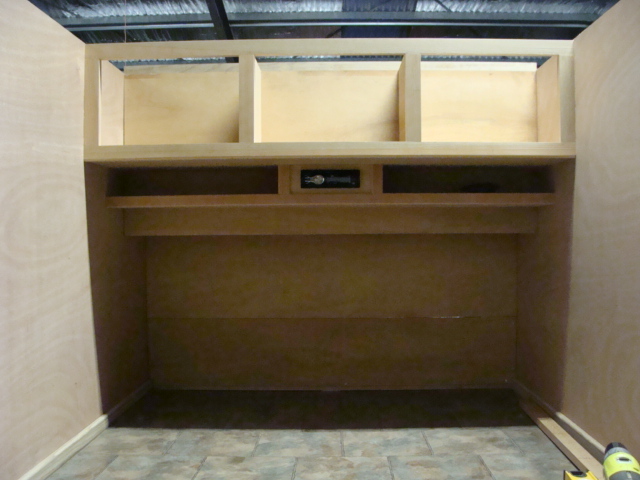
Day 23: 10 Aug 2012.
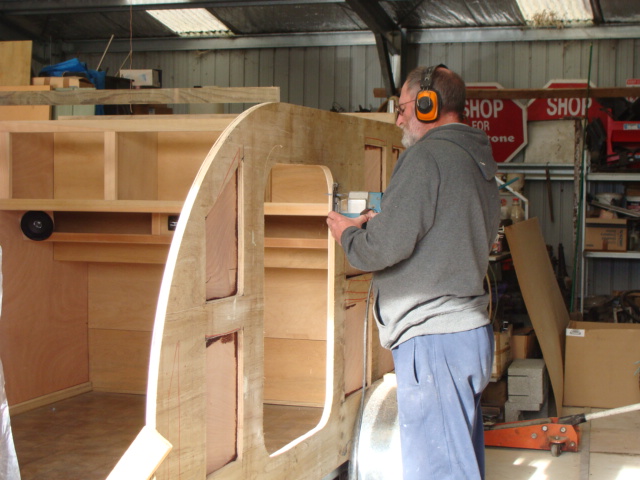
Shelf added under rear cabin cabinets, with stereo fitted in the middle of it.
Image
Last edited by Sheddie on Sat Oct 11, 2014 5:08 pm, edited 2 times in total.
User avatar
Sheddie
1000 Club
1000 Club
 
Posts: 1499
Images: 1129
Joined: Mon Jul 01, 2013 3:26 pm
Location: Whangarei, New Zealand

Re: Sleepin Around, New Zealand. The Build

Postby Sheddie » Tue Aug 12, 2014 4:42 am

Day 25: 12 Aug 2012.
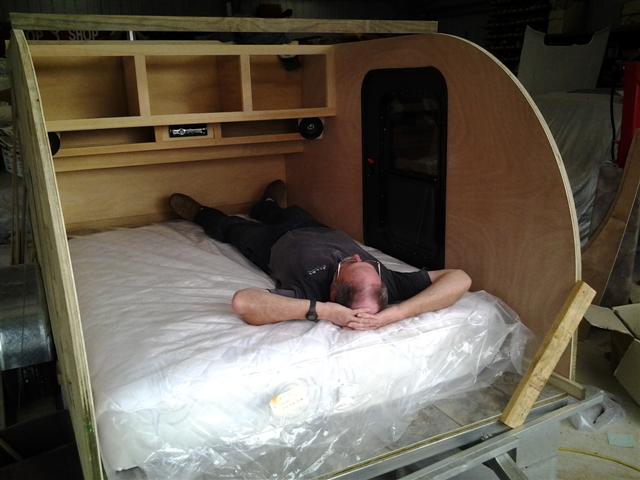
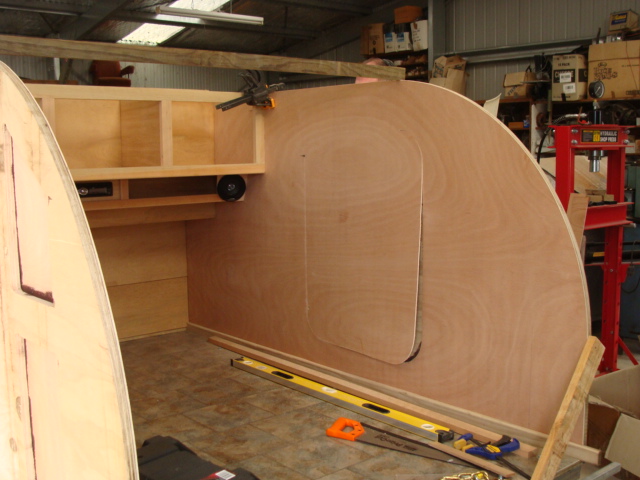
Yesterday we picked up the bed. An inner sprung mattress, the size is a "double long", double width and queen length (1.35m x 2.0m). We could have squeezed in a "Queen", but this gives us space to tuck bedding down the sides. And besides, we are not likely to fall out of bed.
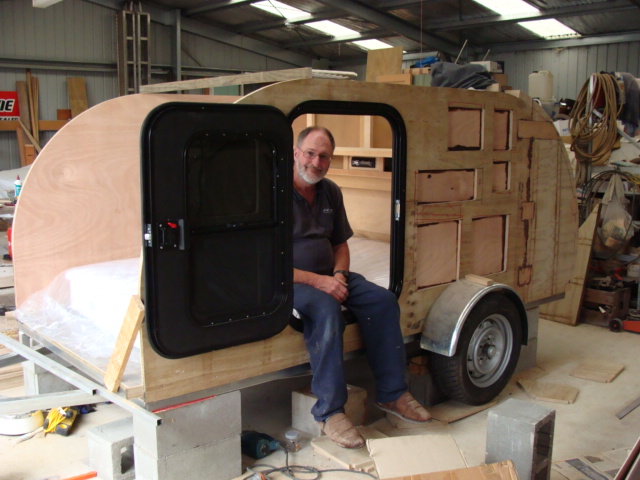
Now we could check the height to fit the doors.
Image
Cutting out door openings
Image
Little bit of final trimming
Image
Door fitted
Image
Nice bed. Can't wait to start using it. :goodnight:
Now that we have the door openings done we can start closing in the roof.
Last edited by Sheddie on Sat Oct 11, 2014 5:09 pm, edited 1 time in total.
User avatar
Sheddie
1000 Club
1000 Club
 
Posts: 1499
Images: 1129
Joined: Mon Jul 01, 2013 3:26 pm
Location: Whangarei, New Zealand

Re: Sleepin Around, New Zealand. The Build

Postby Sheddie » Thu Aug 14, 2014 5:47 am

Day 27: 14 Aug 2012.
Headboard cabinets done.
Can now start closing in the roof. It made it a lot easier working on the interior without the roof, as I could walk in and out the front and stand up, instead of crawling in the doors and crouching down to work. I'm not as young as I used to be.
Image
Image
Large area at the bottom has sliding doors, above bed height, and should be ideal for storing extra blankets, towels etc.
The three areas above that is planned for glove box type cupboards, for small items like socks and under wear.
We will also get the varnishing done on the interior before we close it in.
Last edited by Sheddie on Sat Oct 11, 2014 5:10 pm, edited 1 time in total.
User avatar
Sheddie
1000 Club
1000 Club
 
Posts: 1499
Images: 1129
Joined: Mon Jul 01, 2013 3:26 pm
Location: Whangarei, New Zealand
Top

Re: Sleepin Around, New Zealand. The Build

Postby KCStudly » Thu Aug 14, 2014 11:06 am

Looking really good! :thumbsup:
KC
My Build: The Poet Creek Express Hybrid Foamie

Poet Creek Or Bust
Engineering the TLAR way - "That Looks About Right"
TnTTT ORIGINAL 200A LANTERN CLUB = "The 200A Gang"
Green Lantern Corpsmen
User avatar
KCStudly
Donating Member
 
Posts: 9633
Images: 8169
Joined: Mon Feb 06, 2012 10:18 pm
Location: Southeastern CT, USA
Top

Re: Sleepin Around, New Zealand. The Build

Postby BuildingForFun » Thu Aug 14, 2014 12:34 pm

KCStudly wrote:Looking really good! :thumbsup:


In agreement, looking good and coming right along! keep up the good work.
BuildingForFun
Teardrop Master
 
Posts: 110
Joined: Fri Jul 25, 2014 3:09 am
Top

Re: Sleepin Around, New Zealand. The Build

Postby Sheddie » Thu Aug 14, 2014 8:20 pm

Thanks guys for the comments. Pushing hard for the October departure time. It is good to receive some acknowledgment that the posts are being read.
Frank
User avatar
Sheddie
1000 Club
1000 Club
 
Posts: 1499
Images: 1129
Joined: Mon Jul 01, 2013 3:26 pm
Location: Whangarei, New Zealand
Top

Re: Sleepin Around, New Zealand. The Build

Postby BuildingForFun » Fri Aug 15, 2014 8:11 am

Sheddie wrote:Thanks guys for the comments. Pushing hard for the October departure time. It is good to receive some acknowledgment that the posts are being read.
Frank

:thumbsup: No problem, and im in agreement, thanks for the posts on my build as well. Helps keep me motivated.
BuildingForFun
Teardrop Master
 
Posts: 110
Joined: Fri Jul 25, 2014 3:09 am
Top

Re: Sleepin Around, New Zealand. The Build

Postby Sheddie » Sun Aug 17, 2014 5:43 am

Day 30: 17 Aug 2012.
Interior has now been varnished, so it is time to start covering it in.
First is to cut and dry fit the roof beams. By fitting them on top of the ply, instead of checking them in, we gained another 50mm (2inch) headroom out of a 1220mm (4ft) sheet of ply. The exterior cladding is in 3m x 1.5m sheets (9'10" x 4'11") so we have plenty to work with there. Although in saying that, after I put the front beams on I ran the tape along the sides and found that it was about 20mm (3/4") too long. :oops: Easy fix, just lay the first few beams on their flat, problem solved. The space between the beams along the edge will get spacers fitted to fill the gaps, and this will really lock the beams in solid.
Image
Last edited by Sheddie on Sat Oct 11, 2014 5:11 pm, edited 1 time in total.
User avatar
Sheddie
1000 Club
1000 Club
 
Posts: 1499
Images: 1129
Joined: Mon Jul 01, 2013 3:26 pm
Location: Whangarei, New Zealand
Top

Re: Sleepin Around, New Zealand. The Build

Postby Sheddie » Mon Aug 18, 2014 5:38 am

Day 31: 18 Aug 2012. One month in to the build.
After dry fit of the beams, I can now check the curve to see what needs packing or trimming with the change to some beams being fitted on their flat.
Image

I have now cut the frames for the hatch.
Here they are clamped together for final trimming.
Image
Last edited by Sheddie on Sat Oct 11, 2014 5:12 pm, edited 1 time in total.
User avatar
Sheddie
1000 Club
1000 Club
 
Posts: 1499
Images: 1129
Joined: Mon Jul 01, 2013 3:26 pm
Location: Whangarei, New Zealand
Top

Sleepin Around, New Zealand. The Build

Postby atoddy » Mon Aug 18, 2014 3:39 pm

Nice build Sheddie!! Curiosity, did you have to pay any GST when you bought your doors in from the states. I'm looking at building a tear to go on my existing trailer so I don't have to pay another rego and warrant but finding doors and windows here in good old NZ rather expensive. Still working with ideas to secure it to the trailer when it's on and a way for it to free stand when it's off the trailer?? Any ideas??
Last edited by atoddy on Mon Aug 18, 2014 7:36 pm, edited 1 time in total.
atoddy
Teardrop Inspector
 
Posts: 13
Joined: Tue Jul 29, 2014 5:49 am
Top

Re: Sleepin Around, New Zealand. The Build

Postby Redneck Teepee » Mon Aug 18, 2014 6:49 pm

Nice looking job and teardrop Sheddie, keep us posted on the October launching. :thumbsup: :thumbsup: :thumbsup: :pictures: :pictures: :pictures:
I fear the day that technology will surpass our human interaction, the world will have a generation of idiot's.
User avatar
Redneck Teepee
Silver Donating Member
 
Posts: 853
Images: 21
Joined: Fri Dec 27, 2013 5:00 pm
Location: Central Ca.
Top

Re: Sleepin Around, New Zealand. The Build

Postby Sheddie » Tue Aug 19, 2014 4:34 am

Hi Atoddy and Redneck. Thanks for the replies, they are always appreciated.

atoddy wrote:Nice build Sheddie!! Curiosity, did you have to pay any GST when you bought your doors in from the states. I'm looking at building a tear to go on my existing trailer so I don't have to pay another rego and warrant but finding doors and windows here in good old NZ rather expensive. Still working with ideas to secure it to the trailer when it's on and a way for it to free stand when it's off the trailer?? Any ideas??


Atoddy, welcome! What part of the country are you? It is always good to see more Kiwis joining in. I have found about 25 registered, but not many of them have been active on the site for a while. Bantam in Auckland is doing a lift off (Removable Grumman woody teardrop from downunder). We called in to see him a few months ago to check out progress. I was also in contact with 41South some time ago, but seen no report for a while. He is in the Wellington area.
The doors were well worth bringing in, and if we were ever to build another one, we would do the same. We weren't charged GST, but I think that was just the luck of the draw at the time. They are getting a bit harder on that now, so I bet we would pay it next time. But even the couple of hundy involved would still be worth it.
As far as the removable idea. We did look at our general purpose trailer, with that idea, but soon flagged that. For us, getting the TD to fit the existing sideboards, guards, and also the deck height was going to complicate things too much. And as far as reg and WoF costs go, it doesn't amount to much. When you lift it off it becomes immobile, so it needs to be where it wont get in the way, then you decide, lets go away for the weekend, and your cousin has borrowed the trailer and it's full of rubbish. In saying all that, it may work perfect for you, but then I would hate you to think further down the track, I wish you had told me this.
As far as tying it down to the trailer, there are things like over centre latches.
All the best with your build, keep in touch.
Frank.
User avatar
Sheddie
1000 Club
1000 Club
 
Posts: 1499
Images: 1129
Joined: Mon Jul 01, 2013 3:26 pm
Location: Whangarei, New Zealand
Top

Re: Sleepin Around, New Zealand. The Build

Postby Sheddie » Tue Aug 19, 2014 5:15 am

Day 32: 19 August 2012.
This is the front section of the inner liner and roof beams glued in. Went in quite easily and the glue/sealer we are using here has good tack to it so required very little propping to hold the lining in place until it was set.
Image
Looking at it from inside gives a nice light spacious feel.
Image
This is the product we used for the inner liner. Although it calls it foam, it is a semi hard plastic sheet with a satin finish. It bends around the curve easily, and with a heat gun would take tight bends. It is 3mm thick and nice and light.
Photo0026 (480x640).jpg
Photo0026 (480x640).jpg (151.88 KiB) Viewed 3552 times
Last edited by Sheddie on Sat Oct 11, 2014 5:14 pm, edited 1 time in total.
User avatar
Sheddie
1000 Club
1000 Club
 
Posts: 1499
Images: 1129
Joined: Mon Jul 01, 2013 3:26 pm
Location: Whangarei, New Zealand
Top

Re: Sleepin Around, New Zealand. The Build

Postby Sheddie » Thu Aug 21, 2014 4:16 am

Day 34: 21 August 2012.
Hatch frame all assembled and in place.
Still trying to work out where everything is going to fit in the galley
Image
Last edited by Sheddie on Sat Oct 11, 2014 5:15 pm, edited 1 time in total.
User avatar
Sheddie
1000 Club
1000 Club
 
Posts: 1499
Images: 1129
Joined: Mon Jul 01, 2013 3:26 pm
Location: Whangarei, New Zealand
Top

Re: Sleepin Around, New Zealand. The Build

Postby noseoil » Thu Aug 21, 2014 7:27 am

Really enjoying this build & your approach. I'm curious about the headliner material, the 3mm Unifoam is a plastic sheet, but where did you find it? Is it used in signs or some other application in business? I looked online just now, but am drawing a blank on a supplier. Suggestions on where to buy "locally" would be appreciated. I can most likely find it up in Phoenix, or it may be available here in Tucson. I'm still thinking I will probably use an automotive headliner material, but this might be a better choice for a substrate than 1/8" plywood. Thanks, tim
Build log: viewtopic.php?f=50&t=60248
The time you spend planning is more important than the time you spend building.........

137905
User avatar
noseoil
1000 Club
1000 Club
 
Posts: 1821
Images: 669
Joined: Sun Apr 27, 2014 8:46 am
Location: Raton, New Mexico, living the good life!
Top

PreviousNext

Return to Build Journals

Who is online

Users browsing this forum: Bing [Bot] and 4 guests