First Teardrop build for a lifelong DIY Madman

...ask your questions in the appropriate forums BUT document your build here...preferably in a single thread...dates for updates, are appreciated....

First Teardrop build for a lifelong DIY Madman

Postby MitchReef » Thu Aug 21, 2014 2:53 pm

Hi everybody, my name is Mitch and I use the screen name everywhere, not related to reefer, but instead to ReefKeeping. I have a 120Gallon display, living coral reef aquarium but that is an entirely different subject....

Anyway, I have done about everything from wiring into the box out to building a room, restoring an old 1971 Corvette Convertible. I worked as a Machinist Mate in the US Navy for 8 1/2 years, passing Nuclear Power School and working in the Nuke world. Basically I never built a trailer but no time like the present!

Anyway, I originally started a build thread on another site and decided to move it over here, as this seems like a more dynamic forum.

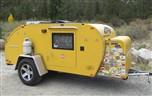
So, with that said, I am going to pull together highlights up to present but be aware you are seening a good few months as I have made painfully slow progress. So I started by purchasing a wood-rotted 96 Jayco big Popup. I checked the frame best I could before I got it. I tore it down to the frame and was able to salvage a big rooftop AC unit that I plan to run with a full size side room opened from the tear. I have a really nice 3 burner stovetop and full 2 tank propane system. I have an old but operable Carson 12V Converter and the breaker boxes and shore power complete setup. I have the kitchen sink and pump faucet but would prefer to put a pump on the line. The old one does have the option of shore water as well. I have four stabilizers that I need my neighbor to weld back on. The frame ended up being amazingly solid and free of rust. I cut off extensions that stuck out from the main frame lines on both sides. Ended up taking off 11" from each side, with regard to overall width. The frame is now 54" wide and decked to 9"10" in box length. It had a lot of surface brown stuff but I brushed it all off and applied two coats of Ospho, just to get started, then two coats of automotive primer followed with two coats of gloss black Rustoleum. Couple of my younger neighbor buds came over and helped me flip it so all surfaces could be covered. Anyway enough words for the first entry, here are couple pictures:
Image

Image

Image

I have a 16' slab of doubled, laminated together 2X10's that a neighbor wanted to get rid of, so I am custom cutting them to extend the frame out 3 1/2 inches on each side. I am cutting them to go from the bottom of the frame rails to the same elevation as the 1X2 sticks I am using between the frame and the actual floorboards an the crossmembers. More on that to follow.....
Last edited by MitchReef on Thu Aug 21, 2014 3:03 pm, edited 1 time in total.
First time Teardrop build, hoping for acceptable end quality!
Here's my Build Thread:
viewtopic.php?f=50&t=60812
User avatar
MitchReef
Teardrop Builder
 
Posts: 30
Images: 1
Joined: Mon Aug 18, 2014 4:00 am
Location: Oviedo FL, home of the Oviedo Chickens!

Re: First Teardrop build for a lifelong DIY Madman

Postby MitchReef » Thu Aug 21, 2014 3:00 pm

So....one of my neighbors is a large scale equipment engineer and mechanic. He asked me if I wanted the wheels Powder Coated and so he did them satin black with the dust caps the same black. I got all new lug bolts and new 5.30 X 12 tires (1090 cap.) and did the same metal prep and finish as the trailer but with Rustoleum gloss Red. I really like the way it looks together:
Image

Image

Here is a shot of the wheel and hub area:
Image
This may not be real exciting to anybody else, but I saw it as a real great starting point!
First time Teardrop build, hoping for acceptable end quality!
Here's my Build Thread:
viewtopic.php?f=50&t=60812
User avatar
MitchReef
Teardrop Builder
 
Posts: 30
Images: 1
Joined: Mon Aug 18, 2014 4:00 am
Location: Oviedo FL, home of the Oviedo Chickens!

Re: First Teardrop build for a lifelong DIY Madman

Postby MitchReef » Thu Aug 21, 2014 3:08 pm

I finally finished painting the frame from the bottom and top to get all areas and paying attention to boxed areas and such. I went and purchased all the wood needed for my floor panel. I am using 1/2" plywood with a 1X2 and 1X4 support framing, to make a proper area for the fiberglass insulation board. I picked up the plywood, the 1X material and the first bottle of Titebond II. I mentioned the big timber my neighbor gave me anyway I will use it to extend the trailer rails out to the desired width without having to weld extensions on. I have come to the conclusion that I wish my axle was a bit wider, but I figure on making the body with a small relief to partially house the wheel/tire, with a fender inset (or cut off to be just the outer half or so) to match, adequately enclosing the tire. I ought to be making the first sawdust tomorrow, as I have a router that is just begging to come out of storage! I will be doing lap joints on the floor plywood once I have the frame widened properly. Then attach the bottom framing and Voila! I will have a beginning floor panel! Photos to follow.....

(again, realize I am copying this so a bit of time reference will seem weird)
First time Teardrop build, hoping for acceptable end quality!
Here's my Build Thread:
viewtopic.php?f=50&t=60812
User avatar
MitchReef
Teardrop Builder
 
Posts: 30
Images: 1
Joined: Mon Aug 18, 2014 4:00 am
Location: Oviedo FL, home of the Oviedo Chickens!
Top

Re: First Teardrop build for a lifelong DIY Madman

Postby MitchReef » Thu Aug 21, 2014 3:11 pm

FIRST SAWDUST!!!!!!!!!

I rough cut the floor boards on Friday July 25 and started making the lap joints. I have two sections that are 48 X 61" and a back section that will be 25 X 61. They will all go together as one piece 10' X 5'1. I routed down and made the first lap joint, which fits two pieces together to be the aft 2' of floor. They have a 1 X 2 transverse crosspiece attached to the bottom to support the end of the lap, as I will be incorporating 1 X 2 cross framing between the metal rails and the floor panels, to make a space for insulation block. The big lap joints between the two main deck boards and between the middle deck board and the aft section should be completed tomorrow, as the rain was looming already today.
First time Teardrop build, hoping for acceptable end quality!
Here's my Build Thread:
viewtopic.php?f=50&t=60812
User avatar
MitchReef
Teardrop Builder
 
Posts: 30
Images: 1
Joined: Mon Aug 18, 2014 4:00 am
Location: Oviedo FL, home of the Oviedo Chickens!
Top

Re: First Teardrop build for a lifelong DIY Madman

Postby MitchReef » Thu Aug 21, 2014 3:13 pm

This is the plywood "rough cut" and laid out in place before any lap joint routing:
Image

Image

I started the lap joints with the two smaller pieces which will make up the Galley floor:
Image
I used Parchment Paper from the kitchen pantry to prevent the TBII from sticking everywhere and stacked lumber on top for "clamping"

Unfortunately the day was a "Honey Do" day so I didn't get a lot done before the rain but I intended to finish the decking construction the next day. Two long lap joints then attaching the 1 X 2 and 1 X 4 framing for the deck.
First time Teardrop build, hoping for acceptable end quality!
Here's my Build Thread:
viewtopic.php?f=50&t=60812
User avatar
MitchReef
Teardrop Builder
 
Posts: 30
Images: 1
Joined: Mon Aug 18, 2014 4:00 am
Location: Oviedo FL, home of the Oviedo Chickens!
Top

Re: First Teardrop build for a lifelong DIY Madman

Postby rdraider » Thu Aug 21, 2014 3:21 pm

Great looking start! Keep up the good work!
User avatar
rdraider
Teardrop Advisor
 
Posts: 71
Joined: Sun Jul 18, 2010 10:51 am
Location: Sheffield, Texas
Top

Re: First Teardrop build for a lifelong DIY Madman

Postby MitchReef » Thu Aug 21, 2014 3:21 pm

The next day, Sunday July 27 was the last day I did anything on the project and I guess I will just Copy and past a couple of posts from before to get everybody up to date:

"I made some real good progress today but didn't finish all my goals for the day. The weather is holding and it's my last day of vacation. I got all the lap joints cut and glued. I wood screwed a couple of 1 x 4s to the top of the floor panel to brace it until the floor framing is all done. I started cutting the timbers for the sides of the trailer frame. My neighbor gave me a huge 16 foot pair of screwed and glued 2 X 10s that I am cutting for the side support beams. This is where the day took a turn. One of my cut to fit parts had a gap that needed pulled together with a screw. I was leaning on my drill with Phillips bit spinning when the screw rocked over driving the Phillips straight through my wedding ring finger. It has nasty entry and exit holes but hopefully missed the bone.

Anyway, long story short, I am sitting here at the Urgent Care waiting for an X ray. Boy does a finger throb.

I will put pictures of the project up when I get home and settled."

And this was followed by the following at about 11:00 that night:

"So, just to get the injury out of the way, I did NOT hit the bone, but the screwdriver tip did, in fact leave both entrance and exit wounds in the pad of my finger. A true through and through. X-Ray showed "foreign material" inside the wound so the Urgent Care doctor said go see my Primary doctor for a recommendation for an Orthopedic Surgeon specializing in hands....so it looks like I may be in for a lot more hassles from this.

But, since everybody seems to love pictures, here is how it looks now:
Image

Now, on to more important things....

Like I said before, I got the rest of the lap joints cut for the floor, here is one of them, before assembly:
Image
and after assembly:
Image
Kitchen parchment paper was used to keep the glue from grabbing the weights!

I didn't get good pictures of the final floor panel, as I had to stuff it in the Garage before I went to Urgent Care, but this is the bottom of the panel:
Image
and this is the top of the panel with temporary 1 X 4 supports:
Image
A job worth doing is a job worth hemorrhaging for!!!

So far so good, I have an early morning appointment with my primary doctor on Wednesday to decide if she thinks I should see a hand surgeon..."

then on Tuesday:

"Yet another update....hurtling through the Bandwidth at near the speed of light and having no real pertinence to the world at large! I saw my doctor today and she ate my butt for going to an Urgent Care instead of the ER with a trauma. I said it isn't really a trauma, but just a finger. She pointed out that I did jam a blunt tipped piece of metal all the way through the muscles, tendons and nerves of my fingertip, and she would call that a trauma. I gave in and said I was just trying to be a responsible member of society and help with cost containment and she snarled at me. I gotta tell you I have been seeing the same primary for the last 15 years. Anyway, long story short, she did some calling for me and at 7 in the morning I see the top hand microsurgeon in Central Florida. I just hate that....the having to see one, not the one I am seeing.....

Anyway, I type this with 9 fingers...I will update tomorrow...."
Last edited by MitchReef on Mon Sep 01, 2014 9:55 am, edited 1 time in total.
First time Teardrop build, hoping for acceptable end quality!
Here's my Build Thread:
viewtopic.php?f=50&t=60812
User avatar
MitchReef
Teardrop Builder
 
Posts: 30
Images: 1
Joined: Mon Aug 18, 2014 4:00 am
Location: Oviedo FL, home of the Oviedo Chickens!
Top

Re: First Teardrop build for a lifelong DIY Madman

Postby MitchReef » Thu Aug 21, 2014 3:38 pm

Since then I saw the hand surgeon who said I didn't need anything done but to keep it dressed and take massive oral antibiotics for two weeks. I started the antibiotics that evening with dinner and noticed my neck was stiff and sore by bedtime. I figured I just turned it wrong and I went to bed. On Friday morning I woke with a full blown antibiotic reaction. I was dizzy as can be, actually having several near falls, my ears were running, profuse sweating, jitters, nausea, etc. Called and they stopped one of the antibiotics. Better but pretty wretched through the weekend and I figured it was just the other one getting out of my system. On Monday when I was still sweating and jittering I called the doctor again and this time was told to restart the med I stopped and stop the one that was continued. By Thursday, the day I went back to the surgeon it was pretty much back to normal. He still said no working with the hand and today he gave me the green light to continue. Saturday I will be finishing my wood timber side extensions and pre-fitting them with their lags and drilling the frame for them to attach. At that point I will assemble the rest of the flooring to the frame and use the router to size it to perfection. I will be adding 1 X 4 faced against the front and back beams of the frame to give me the true 10' overall box length. I will mark the bottoms of the floor panels for insulation and will add that to the bottom of the floor after pulling the fully assembled floor back off until I am ready for walls. By then I should have the floor finished and the bottom insulated and sealed. I am using the Asphalt roof sealer on all bottom or inside facing surfaces. My plan is to make the walls with 1/2 inch outer skin attached to the faces of the extension timbers, then the inner structure wall of skeletonized 3/4" ply which will sit on the floorboards/timbers to support the weight of the AC. I plan to then use 1/4" for the inner skins. There will be 3/4" foam board in the voids of the 3/4". I started messing with Sketch Up and have a basic side view done but I will not bother posting that here.

Hopefully I will document some progress this weekend.....
First time Teardrop build, hoping for acceptable end quality!
Here's my Build Thread:
viewtopic.php?f=50&t=60812
User avatar
MitchReef
Teardrop Builder
 
Posts: 30
Images: 1
Joined: Mon Aug 18, 2014 4:00 am
Location: Oviedo FL, home of the Oviedo Chickens!
Top

Re: First Teardrop build for a lifelong DIY Madman

Postby MitchReef » Sat Aug 23, 2014 10:09 am

I have a lot of work stuff I have to tend to today, and thus I will likely just have a shopping trip for a router bit late in the day. Tomorrow is a day reserved for just doing fun and good stuff so I plan to finish cutting and pre-assembling the framing woodwork and the deck top and get it flush routed to the full profile. Again, this may not be exciting to anybody else, but it's great for me. I will snap some pictures with the framing done and then the trimmed deck.

Hope everybody is having a great Saturday, as usual it's headed to 95 but with very low chance of rain. Maybe I will complete my goals for the decking completion.
First time Teardrop build, hoping for acceptable end quality!
Here's my Build Thread:
viewtopic.php?f=50&t=60812
User avatar
MitchReef
Teardrop Builder
 
Posts: 30
Images: 1
Joined: Mon Aug 18, 2014 4:00 am
Location: Oviedo FL, home of the Oviedo Chickens!
Top

Re: First Teardrop build for a lifelong DIY Madman

Postby MitchReef » Mon Sep 01, 2014 10:24 am

Okay, enough time has been dedicated to my finger stab, despite the two scars having really cool Phillips Head crosses!!!!

LET THERE BE SAWDUST!!!

Anyway, I got out yesterday and had a productive day. I was able to finish gluing the criminal timber together and clamp it up, so it could dry as a tighter less "gappy" member. It didn't dry enough to work yet, but it is dry today, so it will be my next effort. Anyway, I got all the other pieces cut to size and placed around the frame with clamps, even if not permanently. I attached the floor panel to the existing timbers and then got out the new Router Bit and cut the flooring flush to the timbers. It was a little progress, but as always, I came up with little things I got done as I worked on the floor panel.....

Anyway, here are the pictures:
Lots of SAWDUST, even more in the side yard!!!!
Image

I didn't trim off the front or back yet, as I will be placing 1 X 4 across the back and front members of the trailer, to give the "finished" look
Image

Image

There is an inset from 4 X 4 to 2 X 4 at the wheels, for a bit of extra clearance. and the 2 X 4 is then relieved for axle swing:
Image

And no new blood!!!! except for a little cut on the palm of my right hand and some sort of scrape on the bottom of my foot. I really must start wearing shoes and a shirt when working....

Anyway, next I will cut the criminal element (the remaining timber) to the correct dimensions and get the floor panel finalized. The floor will largely attach by bolting the wooden timbers to the frame with bolts and washers, then a few wood screws through the frame into the cross pieces and I should be road worthy! When I finish the floor panel construction I will start on running trailer wiring and reinstall the basic propane piping. I am planning on just running most chassis wiring through the frame rails and don't feel the need for conduit. What is the opinion on that idea? I would properly clip and secure the wires.

My plan is also to paint the entire bottom with the Rhinocoat type stuff for durable weatherproofing. Before that I need to plan and place the insulation foam board. I found a local Wholesale Lumber Yard (plywood specialty) who carries 5 X 10 sheet goods so I am looking into the idea, at least for the 3/4" inner wall support sheets. But I will spend some more time in SketchUp. It's a shame my job takes soooo many hours a week, as I have much more motivation than time!
First time Teardrop build, hoping for acceptable end quality!
Here's my Build Thread:
viewtopic.php?f=50&t=60812
User avatar
MitchReef
Teardrop Builder
 
Posts: 30
Images: 1
Joined: Mon Aug 18, 2014 4:00 am
Location: Oviedo FL, home of the Oviedo Chickens!
Top

Re: First Teardrop build for a lifelong DIY Madman

Postby kd8cgo » Wed Sep 03, 2014 2:43 pm

Cool, my brother was a nuke, EM and worked on the reactor controls, motors, batteries and even the archaic washing machines on those things.

What kind of tow vehicle will you be using? This looks/sounds like it will be heavy! Are you shooting for any particular weight, or just going for "sturdy"? Am I reading right that you are going to use 3/4" ply for the inside of the walls, plus something else on the outside, like a sandwich type of wall? Curious about your profile too, so many different options to go with. You can post up SketchUp screenshots too, if you want to reveal some of the design - some people seem to like to surprise us with design elements as the build takes shape, which is cool as well!
kd8cgo
Teardrop Advisor
 
Posts: 61
Images: 21
Joined: Sat Aug 04, 2007 12:13 am
Location: MI, USA
Top

Re: First Teardrop build for a lifelong DIY Madman

Postby MitchReef » Wed Sep 03, 2014 3:58 pm

I was going with the 3/4 inch structural and load bearing member for the rooftop air conditioner. It says the roof has to be rated for 100#. I was going with 3/4 for that purpose and was thinking either 1/4 or 1/2 for the outer skin and another 1/4 inside wall. The main reason for the effective 4 X 4 sections was for spacing. I really have no idea what the thing will weigh but I am pulling it with a Hyundai Elantra.

If my design is excessive I wish somebody would chime in because I would like it to stay as light as possible and I don't want to throw a lot of extra money at it.
First time Teardrop build, hoping for acceptable end quality!
Here's my Build Thread:
viewtopic.php?f=50&t=60812
User avatar
MitchReef
Teardrop Builder
 
Posts: 30
Images: 1
Joined: Mon Aug 18, 2014 4:00 am
Location: Oviedo FL, home of the Oviedo Chickens!
Top

Re: First Teardrop build for a lifelong DIY Madman

Postby MitchReef » Wed Sep 03, 2014 4:40 pm

The design is going to basically be a Benroy type but with the front wall raked out 8 inches at the top, then curved back from there. I am considering a "shark fin" looking homemade shroud for the AC. I wanted 5' width inside but the donor trailer axle was a bit narrow for safety at that width, hence the 2" inset at the wheels. I have a lot of goodies from the donor trailer and they will have some effect on the design.

I'm wondering the general consensus on running the wiring through the frame rails and securing along the path versus running conduit. I am thinking conduit will be a real dirty word to pull anything through unless it is pretty sizable tubing.
First time Teardrop build, hoping for acceptable end quality!
Here's my Build Thread:
viewtopic.php?f=50&t=60812
User avatar
MitchReef
Teardrop Builder
 
Posts: 30
Images: 1
Joined: Mon Aug 18, 2014 4:00 am
Location: Oviedo FL, home of the Oviedo Chickens!
Top

Re: First Teardrop build for a lifelong DIY Madman

Postby noseoil » Wed Sep 03, 2014 4:42 pm

Best guess is about 25#-35# per square foot. A lot depends on framing, skins, etc. Take a look at the weight tables in another thread to get an idea of weights. Good start. tim
Build log: viewtopic.php?f=50&t=60248
The time you spend planning is more important than the time you spend building.........

137905
User avatar
noseoil
1000 Club
1000 Club
 
Posts: 1822
Images: 670
Joined: Sun Apr 27, 2014 8:46 am
Location: Raton, New Mexico, living the good life!
Top

Re: First Teardrop build for a lifelong DIY Madman

Postby kayakdlk » Wed Sep 03, 2014 6:46 pm

Depending on what Hyundai Elantra you have you are at 750 to 1500 lbs max towing capacity. Better check the actual requirement. There is a big difference between 750 and 1500 lbs and that needs to include any camping gear, battery if you have one, mattress, coolers etc.

Based on what I see you are going to be heavy!. Think airplane construction not house. All of the parts work together to make one strong structure. Individually they may seem light or flimsy but really they are not.

I built my 5x10 frame and almost a 5x11 body plus large tongue box was built with nothing bigger than 1x2 and 1x3 (maybe a 1x4) and 1/8 baltic Birch plywood. I sandwiched the walls and floor with 3/4 foam in the middle. The counter top was the only 1/2 plywood I used. I used 1/4 plywood for interior shelves. My trailer frame was 2"x2" x.0747 (14 gauge) Square tubing. I used two 1x2 glued together for the roof spares and covered the roof in a single 1/8 sheet Baltic Birch. The entire things is coated with fiberglass cloth and epoxy. I can sit on the roof and stand on the floor without much flex. When all done the total weight is 1480 lbs. More than I planned but not much since it is fairly large and 300 lbs of that weight is the 31" tires/wheels/spacers and axle assembly and the weight includes the mattress and 65+ lb battery

I would at least go thinner on the walls (1/4" or less is plenty and maybe even a single wall thickness of 1/4 plywood framed out for the doors etc. )

I ran my wire through the corrugated plastic conduit used under the hood in most cars. It provides some protection, saves weight and easy access. I figure if it is good enough for a vehicle and what it goes through it ought to be good enough for a trailer.

Good luck with your build

Dan
User avatar
kayakdlk
Platinum Donating Member
 
Posts: 310
Images: 392
Joined: Wed Jun 27, 2012 9:02 pm
Location: Foothills of Colorado
Top

Next

Return to Build Journals

Who is online

Users browsing this forum: No registered users and 12 guests