5x10 renovation and build

...ask your questions in the appropriate forums BUT document your build here...preferably in a single thread...dates for updates, are appreciated....

Re: 5x10 renovation and build

Postby inthewoods » Tue Aug 26, 2014 10:38 pm

Second job I've been putting off was to get the cabin door sealed so no water or insects could attack the unsuspecting camper inside. Not having any easy (read cheap) access to aluminum T trim or other beautiful and typical TD parts and seals I decided to make trim ring for the door opening on the inside for the cabin and seal it from the inside rather than the out. It seemed like the most reasonable and easiest to do. I think for the most part I used the Steve Fredericks method? I might have that wrong - sorry If I do. i read a lot of threads trying to get a plan in my head. Here's what I ended up doing:

1. Took some 1/2" birch ply and cut out a 28"x 42" rectangle. That sheet was about 4" wider than the door opening and 6" taller than the opening.

2. I put that sheet on the inside of the cabin against the door opening and traced a pencil line around the door opening and onto the plywood. Then with the sheet outside again I penciled in a line 5/8" smaller than the line I just traced of the door opening.

3. Jigsaw out the centre using the line just drawn.

4. Then I used a router to cut a 3/8" wide by 1/4 deep rabbet along the inner edge of the hole in the sheet of ply. After that some sanding, 1/8" round over routing on all edges and a few other little cuts to notch out some spots for the door latch.

5. From the inside of the cabin I screwed this trim ring to the cabin wall with the rabbetted edge toward the outside of the trailer. To complete the rabbet I used a 1/2" flush trim bit in my router and carefully by hand guided it around the door opening so the bearing ran along the existing door opening edge. A bit more sanding and some trimming with a chisel and I had an inch of wall material the same shape as the door opening and then a 5/8" ring that 1/4" thick and was smaller than the door opening.

6. Lots of coats of poly to seal it all up.

7. Reinstall the aluminum trim peice.

8. Install a 3/8"x3/8" epdm rubber door and window seal (wave profile according to package) from local hardware store. I have a gap between closed door and inner trim of 1/4" so the 3/8" seal adequately squeezes but doesn't completely crush when closing door.

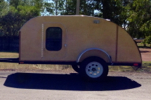
... That's it. I haven't water tested yet but it looks like it will work. Here's some photos to help make sense of all this...


ImageUploadedByTapatalk1409110695.307345.jpg
ImageUploadedByTapatalk1409110695.307345.jpg (228.52 KiB) Viewed 1755 times


ImageUploadedByTapatalk1409110682.124983.jpg
ImageUploadedByTapatalk1409110682.124983.jpg (224.4 KiB) Viewed 1755 times
User avatar
inthewoods
Teardrop Master
 
Posts: 112
Images: 25
Joined: Mon Aug 26, 2013 3:19 pm
Location: Saskatchewan, Canada

Re: 5x10 renovation and build

Postby inthewoods » Tue Aug 26, 2014 10:40 pm

Here's a couple detail photos of the trim and seal setup from outside...

ImageUploadedByTapatalk1409110818.057254.jpg
ImageUploadedByTapatalk1409110818.057254.jpg (191.45 KiB) Viewed 1754 times


ImageUploadedByTapatalk1409110805.073726.jpg
ImageUploadedByTapatalk1409110805.073726.jpg (226.14 KiB) Viewed 1754 times


ImageUploadedByTapatalk1409110792.357706.jpg
ImageUploadedByTapatalk1409110792.357706.jpg (218.24 KiB) Viewed 1754 times
User avatar
inthewoods
Teardrop Master
 
Posts: 112
Images: 25
Joined: Mon Aug 26, 2013 3:19 pm
Location: Saskatchewan, Canada

Re: 5x10 renovation and build

Postby inthewoods » Tue Aug 26, 2014 10:48 pm

Last small job for today was to refit the bunk bed and couch. Now that the door had an extra 1/2 of thickness I had to cut some notches out of the bunk bed base so it would fit back into the correct position in the trailer. Also I had decided earlier that I was also going to take a little off the length of the bed base so it wouldn't be such a perfect fit. I cut a 5/8" notch in the front left side of the bed base and then took only an 1/8" off for the remainder of the left side. I'm happy to report the notch and 1/8" extra off the end worked great and now the bed base is actually very easy to move from bunk position into couch position. Sweet... Now time to sit on the couch in the trailer and close my eyes... No wait I might fall asleep.

Here's a couple photos of the bunk and couch positions showing the notch I cut to fit this around the door trim.

ImageUploadedByTapatalk1409111313.157111.jpg
ImageUploadedByTapatalk1409111313.157111.jpg (241.14 KiB) Viewed 1751 times


ImageUploadedByTapatalk1409111300.140567.jpg
ImageUploadedByTapatalk1409111300.140567.jpg (172.54 KiB) Viewed 1751 times
User avatar
inthewoods
Teardrop Master
 
Posts: 112
Images: 25
Joined: Mon Aug 26, 2013 3:19 pm
Location: Saskatchewan, Canada
Top

Re: 5x10 renovation and build

Postby inthewoods » Tue Aug 26, 2014 10:52 pm

One more photo of the couch setup and door trim... Really thinking I might grab the iPad and read some build threads on this couch...

ImageUploadedByTapatalk1409111519.523988.jpg
ImageUploadedByTapatalk1409111519.523988.jpg (198.83 KiB) Viewed 1749 times
User avatar
inthewoods
Teardrop Master
 
Posts: 112
Images: 25
Joined: Mon Aug 26, 2013 3:19 pm
Location: Saskatchewan, Canada
Top

Re: 5x10 renovation and build

Postby KCStudly » Wed Aug 27, 2014 7:54 am

Nice work! I am having second thoughts about not having incorporated some sort of back rest into my build. :thinking:
KC
My Build: The Poet Creek Express Hybrid Foamie

Poet Creek Or Bust
Engineering the TLAR way - "That Looks About Right"
TnTTT ORIGINAL 200A LANTERN CLUB = "The 200A Gang"
Green Lantern Corpsmen
User avatar
KCStudly
Donating Member
 
Posts: 9640
Images: 8169
Joined: Mon Feb 06, 2012 10:18 pm
Location: Southeastern CT, USA
Top

Re: 5x10 renovation and build

Postby inthewoods » Sat Aug 30, 2014 8:18 pm

Today I got around to building the assembly that will hold the galley lighting in place on the underside of the hatch. I was all excited to get it mounted and then realized I didn't buy the hinges and hardware I needed to finish the job. Oh well... I will put it aside so I can put the clear coat on later this week then get it mounted next weekend.

ImageUploadedByTapatalk1409447838.066544.jpg
ImageUploadedByTapatalk1409447838.066544.jpg (229.04 KiB) Viewed 1674 times


ImageUploadedByTapatalk1409447826.516883.jpg
ImageUploadedByTapatalk1409447826.516883.jpg (235.38 KiB) Viewed 1674 times


ImageUploadedByTapatalk1409447807.617585.jpg
ImageUploadedByTapatalk1409447807.617585.jpg (227.83 KiB) Viewed 1674 times
User avatar
inthewoods
Teardrop Master
 
Posts: 112
Images: 25
Joined: Mon Aug 26, 2013 3:19 pm
Location: Saskatchewan, Canada
Top

Re: 5x10 renovation and build

Postby KCStudly » Sat Aug 30, 2014 9:43 pm

That has a nice modern look to it. :thumbsup:

Might be cool to back light the mounting base with another small LED or few. :thinking:
KC
My Build: The Poet Creek Express Hybrid Foamie

Poet Creek Or Bust
Engineering the TLAR way - "That Looks About Right"
TnTTT ORIGINAL 200A LANTERN CLUB = "The 200A Gang"
Green Lantern Corpsmen
User avatar
KCStudly
Donating Member
 
Posts: 9640
Images: 8169
Joined: Mon Feb 06, 2012 10:18 pm
Location: Southeastern CT, USA
Top

Re: 5x10 renovation and build

Postby inthewoods » Sat Aug 30, 2014 11:11 pm

Ok... Now you got me thinking. The LED fixtures are dual white / Red type... I'm thinking a little bit of RED LED behind would look nice at night... :)
User avatar
inthewoods
Teardrop Master
 
Posts: 112
Images: 25
Joined: Mon Aug 26, 2013 3:19 pm
Location: Saskatchewan, Canada
Top

Re: 5x10 renovation and build

Postby Metalhead » Fri Sep 12, 2014 10:30 am

Your build looks great!!

Like your couch to bed idea and may "steal" it for my design :D .

I will definitely follow along. Good luck!
User avatar
Metalhead
Teardrop Builder
 
Posts: 39
Images: 7
Joined: Thu Sep 11, 2014 5:01 pm
Top

Re: 5x10 renovation and build

Postby inthewoods » Sun Sep 14, 2014 10:57 am

Thanks for the compliments. I'm enjoying the building process.
User avatar
inthewoods
Teardrop Master
 
Posts: 112
Images: 25
Joined: Mon Aug 26, 2013 3:19 pm
Location: Saskatchewan, Canada
Top

Re: 5x10 renovation and build

Postby inthewoods » Sun Sep 14, 2014 11:00 am

This weekend I found down time to complete the galley lights wiring and I mounted the assembly that holds the lights to the underside of the hatch.

ImageUploadedByTapatalk1410710415.472972.jpg
ImageUploadedByTapatalk1410710415.472972.jpg (250.06 KiB) Viewed 1531 times


ImageUploadedByTapatalk1410710400.155844.jpg
ImageUploadedByTapatalk1410710400.155844.jpg (243.14 KiB) Viewed 1531 times


ImageUploadedByTapatalk1410710381.923600.jpg
ImageUploadedByTapatalk1410710381.923600.jpg (239.04 KiB) Viewed 1531 times
User avatar
inthewoods
Teardrop Master
 
Posts: 112
Images: 25
Joined: Mon Aug 26, 2013 3:19 pm
Location: Saskatchewan, Canada
Top

Re: 5x10 renovation and build

Postby inthewoods » Sun Sep 14, 2014 11:02 am

And a few more photos...
ImageUploadedByTapatalk1410710521.589757.jpg
ImageUploadedByTapatalk1410710521.589757.jpg (218.31 KiB) Viewed 1528 times


ImageUploadedByTapatalk1410710504.822862.jpg
ImageUploadedByTapatalk1410710504.822862.jpg (237.57 KiB) Viewed 1528 times


ImageUploadedByTapatalk1410710483.723196.jpg
ImageUploadedByTapatalk1410710483.723196.jpg (240.81 KiB) Viewed 1528 times
User avatar
inthewoods
Teardrop Master
 
Posts: 112
Images: 25
Joined: Mon Aug 26, 2013 3:19 pm
Location: Saskatchewan, Canada
Top

Re: 5x10 renovation and build

Postby inthewoods » Thu Jun 04, 2015 6:40 am

I've been deep into the process of finishing all the little details for the past month since the warm weather came back to the prairies and haven't taken the time I should have to update the build log here. I will be playing catch up for a bit as I update the posts and photos. At the end of June the whole family is taking our van and teardrop for a 6000-7000 km trip out east to visit family in Ontario. We will probably trek through the northern US states and cross back over into canada in Michigan. On the return leg we will drive through the Canadian provinces and around the Great Lakes. Time is really ticking by so I'm really trying to make quick work of getting the trailer ready for the trip.
User avatar
inthewoods
Teardrop Master
 
Posts: 112
Images: 25
Joined: Mon Aug 26, 2013 3:19 pm
Location: Saskatchewan, Canada
Top

5x10 renovation and build

Postby inthewoods » Thu Jun 04, 2015 7:10 am

At the beginning of May I bet the bullet and ordered some much needed parts from Vintage Technologies. Model 7350 Fantastic Fan, a set of LED marker lights, and an aluminum table mount rail. I also ordered my new camping stove... A cook partner 22" from Partner Steel. Between the exchange rate and driving to Montana to pick it all up I still came out a little ahead of buying it in Canada but truth be told I couldn't find compatible items easily locally so it was just easier to order from the U.S. The parts all arrived in Montana and I picked them up on may long weekend. 5 hour round trip from my house but it's an easy drive.
User avatar
inthewoods
Teardrop Master
 
Posts: 112
Images: 25
Joined: Mon Aug 26, 2013 3:19 pm
Location: Saskatchewan, Canada
Top

Re: 5x10 renovation and build

Postby inthewoods » Thu Jun 04, 2015 7:16 am

With parts in hand I first attacked the roof of the teardrop and installed the fantastic fan. The original owner of the teardrop had roughed in the framing of the roof to accept a roof vent so it was an easy installation. I didn't take any photos of the install because it was very straight forward according to the many post on this forum.. Here are photos post install....
ImageUploadedByTapatalk1433420068.105691.jpg
ImageUploadedByTapatalk1433420068.105691.jpg (236.02 KiB) Viewed 1243 times


ImageUploadedByTapatalk1433420050.005901.jpg
ImageUploadedByTapatalk1433420050.005901.jpg (170.37 KiB) Viewed 1243 times


The photo of the interior shows how I've hidden the DC power lines to the fan. I bought a piece of flexible copper plumbing pipe and carefully drilled out holes in the roof rafters. I slid the pipe through the rafters and then put the wiring through the pipe.

I'm happy with the results and the way the fan trimmed out nice on the inside.
User avatar
inthewoods
Teardrop Master
 
Posts: 112
Images: 25
Joined: Mon Aug 26, 2013 3:19 pm
Location: Saskatchewan, Canada
Top

PreviousNext

Return to Build Journals

Who is online

Users browsing this forum: No registered users and 4 guests