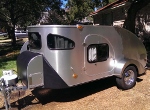
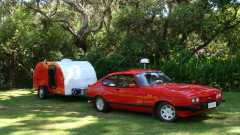
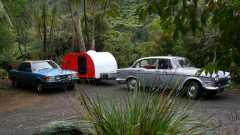
Regal Eagle Done! Video Tour 6/29/15

...ask your questions in the appropriate forums BUT document your build here...preferably in a single thread...dates for updates, are appreciated....

Re: Regal Eagle - UPDATE 10/13/14 new pics

Postby Java Jack » Thu Oct 16, 2014 1:00 am

I don't think there is anything to feel bad about...it is a really great design and very functional.

We have a grand baby on the way so we opted for the 560 so we would 1) have room in case we were stuck inside due to rain and 2) so the grand baby would be able to sleep with us if we went camping as a family.

I remember when my kids were young, my in-laws had a nice 5th wheel so my daughter slept in their tub when we went camping as a family. While I don't have a tub for the baby to sleep in, I do now have bunk beds!

Seems like your larger version will work perfect for kids of all ages. I think the drawback to ours is that it's only good for kids less than 5 feet or about 8 or 9 years old. So, young families really can't look at this as a long term solution but with a design like yours, it will work well into their teens by which point, parents are ready to kick them out into their own tent. LOL.
There are 10 types of people in this world, those that understand binary and those that don't.
Regards,
Java
Proud Owner of a CampInn 560 Ultra
Blog: http://cre8tiveapps.blogspot.com/
Video: https://youtu.be/TLLFt3vzFoA
Sill Images: http://imgur.com/a/EE0zC#0
User avatar
Java Jack
Teardrop Master
 
Posts: 186
Joined: Wed Aug 06, 2014 3:39 pm

Re: Regal Eagle - UPDATE 10/13/14 new pics

Postby Sheddie » Thu Oct 16, 2014 4:17 am

Gunguy05 wrote:
As far as why we make it larger.
I sometime feel bad that our design is so much like a CI, but I just REALLY like the design. I kept looking at other ways to build the same structure, but their design seems ingenious to me. I guess that is the great thing about TD's (or TTT's), build what you like, the way you like it.


I guess that is the great thing about TD's (or TTT's), build what you like, the way you like it.
Exactly. :thumbsup:
User avatar
Sheddie
1000 Club
1000 Club
 
Posts: 1499
Images: 1129
Joined: Mon Jul 01, 2013 3:26 pm
Location: Whangarei, New Zealand

Re: Regal Eagle - UPDATE 10/13/14 new pics

Postby Gunguy05 » Thu Oct 16, 2014 7:24 am

Java Jack wrote:I don't think there is anything to feel bad about...it is a really great design and very functional.

We have a grand baby on the way so we opted for the 560 so we would 1) have room in case we were stuck inside due to rain and 2) so the grand baby would be able to sleep with us if we went camping as a family.

I remember when my kids were young, my in-laws had a nice 5th wheel so my daughter slept in their tub when we went camping as a family. While I don't have a tub for the baby to sleep in, I do now have bunk beds!

Seems like your larger version will work perfect for kids of all ages. I think the drawback to ours is that it's only good for kids less than 5 feet or about 8 or 9 years old. So, young families really can't look at this as a long term solution but with a design like yours, it will work well into their teens by which point, parents are ready to kick them out into their own tent. LOL.


I liked what you said in the video about why you bought a TD. Very little setup, being able to drive and pull over an camp. We had all the same ideas when I started looking at our build. It fit our camping style perfectly.
Brian


Checkout my buildThe Regal Eagle Bow front for 4
Image
Also my teardrop updates from blog on Dad Rambles
User avatar
Gunguy05
The 300 Club
 
Posts: 385
Images: 6
Joined: Mon Dec 02, 2013 4:45 pm
Location: South GA
Top

Re: Regal Eagle - UPDATE 10/13/14 new pics

Postby Gunguy05 » Sat Oct 18, 2014 10:31 pm

Friday afternoon after work I was able to glue the two ceiling panels together. That didn't take long, but I let them dry overnight and now they are ready to go. I got the little guy to help me push the two pieces into place then I put some weight on top until they dried.

Image

Also, I cut the spar pieces (if you want to call them that) for the front. I say that becuase they are a combination of 2x6 wood that is cut to fit the front curve, and will tie into the last forward spare of the flat part of the trailer.

I used the template that I made when we started way back when. It has come in hand for a number of different fitting procedures, and I plan on using it for a few more.

Image

Tonight we were able to get all of the spars glued onto the top. Including the boxed areas for the fan and the top moonlight window. (I prebuilt these on the bench and laid them into place). A great idea looking back on it. :thumbsup:

No pics of tonights progress, but I hope to trim the front ceiling off with the router tomorrow, and glue the curved spar pieces in.
Brian


Checkout my buildThe Regal Eagle Bow front for 4
Image
Also my teardrop updates from blog on Dad Rambles
User avatar
Gunguy05
The 300 Club
 
Posts: 385
Images: 6
Joined: Mon Dec 02, 2013 4:45 pm
Location: South GA
Top

Re: Regal Eagle - UPDATE 10/13/14 new pics

Postby Gunguy05 » Sun Oct 19, 2014 4:35 pm

Ok...

We got the front roof spar pieces glued in this afternoon. Not too bad. Also we were able to start running the wires for the 12V stuff to the back.

Image

All the 12Vstuff is going to run down the left side of the trailer. Wires will run in the back of the inside cabin cabinets, snake underneath the counter and the PD 4045 will be in the cabinets on the left.

Image

110 is underneath, and on the right. And will converge into the PD4045.

Image

Running wires is a piece of cake. I used to work in telecommunications, and my dad has been with AT&T for 40 yrs...Gonna finish the wiring and start the foam in the roof this week,then most likely start on the hatch..

Things are looking good! Ordering doors and Aluminum soon :applause: :thumbsup: :FNP 8)
Brian


Checkout my buildThe Regal Eagle Bow front for 4
Image
Also my teardrop updates from blog on Dad Rambles
User avatar
Gunguy05
The 300 Club
 
Posts: 385
Images: 6
Joined: Mon Dec 02, 2013 4:45 pm
Location: South GA
Top

Re: Regal Eagle - UPDATE 10/13/14 new pics

Postby Gunguy05 » Sun Oct 26, 2014 8:09 pm

Made a fair amount of progress this weekend. Worked mainly on the roof, but did piddle a little on the hatch.

I bounced around quite a bit on the roof, but am almost done with it. We got all of the 12V (including nav lights) done. Snapped a few pics along the way to document where the wires are located.

Image


I glued in most, but not all of the foam for the roof. Still have a few pieces to cut.

Image

Also, cut in the holes for the moon roof, and the fantastic vent.

Image

Drilled a small how in the front quarter panel. Ran a wire to the top and bottom bunk. The plan is to have an LED strip above each of them.

Image

Dad is planning on going to get the tires put on the wheel tomorrow. We have had those since we bought the trailer, just collecting dust. Now it's time for a little bling,bling. 8)

Hopefully we will be closing up the roof this week, and then it's on to the front windows, or the hatch.. or ... we will see what's next. :NC :NC
Brian


Checkout my buildThe Regal Eagle Bow front for 4
Image
Also my teardrop updates from blog on Dad Rambles
User avatar
Gunguy05
The 300 Club
 
Posts: 385
Images: 6
Joined: Mon Dec 02, 2013 4:45 pm
Location: South GA
Top

Re: Regal Eagle - UPDATE 10/13/14 new pics

Postby Java Jack » Fri Oct 31, 2014 10:46 am

It's really coming together nicely.

Are you going to seal the box where the AC sits? Also, have you routed plumbing to drain off the condensation build up for the AC?
There are 10 types of people in this world, those that understand binary and those that don't.
Regards,
Java
Proud Owner of a CampInn 560 Ultra
Blog: http://cre8tiveapps.blogspot.com/
Video: https://youtu.be/TLLFt3vzFoA
Sill Images: http://imgur.com/a/EE0zC#0
User avatar
Java Jack
Teardrop Master
 
Posts: 186
Joined: Wed Aug 06, 2014 3:39 pm
Top

Re: Regal Eagle - UPDATE 10/13/14 new pics

Postby Gunguy05 » Fri Oct 31, 2014 10:54 am

Java Jack wrote:It's really coming together nicely.

Are you going to seal the box where the AC sits? Also, have you routed plumbing to drain off the condensation build up for the AC?


Yes. 1 of 2 plans on that.

Original plan was to completely CPES and paint (to protect the CPES) the inside of the box. Then, put a drain in the bottom of the AC cabinet and route a 1/2" tube, through the cabinets, down to the ground.

However,

I neighbor (who does ac work), who was over checking out the camper a couple weeks ago, said that he could build me a pan for it, with a fitting soldered in for the drain line. My only concern here is that it needs to fit well, so that no rain water gets in and around it (underneath it) and gets stuck between the pan and the box.

Will probably go the CPES route, since we already have that, and it seems much simpler. But I might be swayed another route if I find a better way. :D

Do you know if the campinn has a pan under it?
Brian


Checkout my buildThe Regal Eagle Bow front for 4
Image
Also my teardrop updates from blog on Dad Rambles
User avatar
Gunguy05
The 300 Club
 
Posts: 385
Images: 6
Joined: Mon Dec 02, 2013 4:45 pm
Location: South GA
Top

Re: Regal Eagle - UPDATE 10/13/14 new pics

Postby Java Jack » Fri Oct 31, 2014 1:55 pm

I am pretty sure it drains to the ground. When I was running it last weekend I saw it dripping on the ground all weekend. I can't really see the box but I think it is black inside so I am thinking it is a painted on vapor barrier or something with a drain line to the outside. I can see some of the plumbing in the cabinet and follow it down the wall towards the ground.
There are 10 types of people in this world, those that understand binary and those that don't.
Regards,
Java
Proud Owner of a CampInn 560 Ultra
Blog: http://cre8tiveapps.blogspot.com/
Video: https://youtu.be/TLLFt3vzFoA
Sill Images: http://imgur.com/a/EE0zC#0
User avatar
Java Jack
Teardrop Master
 
Posts: 186
Joined: Wed Aug 06, 2014 3:39 pm
Top

Re: Regal Eagle - UPDATE 10/13/14 new pics

Postby Gunguy05 » Sun Nov 09, 2014 8:12 am

Gotten a little work done on the hatch the last few days. I was originally going to use double 1x2 pine, but at the recommendation of tony.latham I decided to use 1x3. Great choice!


Image


Yesterday we were able to get the hatch framing complete, and the skin put on it. Also, the hatch hinge trimmed to fit around things (no photos yet), and it attached to the trailer side. Still have to attach it to the hatch yet for a test fit. :D

Image

Image

Next is to run the wiring for the hatch (tail lights, license plate light, hatch light, and maybe 2 speakers), and then to close the roof up. Then on to the front... I think.. :roll:

Also, we got the doors in this week. Still don't need them until we put the Aluminum on, but I wanted to make sure they fit in case I had to do any fitting in that area I could do it without the aluminum on yet. These are the 26x36 from Frank Bear. Great guy to work with, and where I have bought all of my TD specific parts, hatch hinge, top window, doors, will buy trim also.

Image

Image

Took out the front cabinet panel and began to layout the doors on it. Will try and cut those out today. Going to go with push inside catches on them so that they don't catch on the person sleeping up there.

Image
Brian


Checkout my buildThe Regal Eagle Bow front for 4
Image
Also my teardrop updates from blog on Dad Rambles
User avatar
Gunguy05
The 300 Club
 
Posts: 385
Images: 6
Joined: Mon Dec 02, 2013 4:45 pm
Location: South GA
Top

Re: Regal Eagle - UPDATE 10/13/14 new pics

Postby KCStudly » Sun Nov 09, 2014 9:27 am

Looking awesome!!! :thumbsup: :thumbsup: :thumbsup:
KC
My Build: The Poet Creek Express Hybrid Foamie

Poet Creek Or Bust
Engineering the TLAR way - "That Looks About Right"
TnTTT ORIGINAL 200A LANTERN CLUB = "The 200A Gang"
Green Lantern Corpsmen
User avatar
KCStudly
Donating Member
 
Posts: 9640
Images: 8169
Joined: Mon Feb 06, 2012 10:18 pm
Location: Southeastern CT, USA
Top

Re: Regal Eagle - UPDATE 10/13/14 new pics

Postby S. Heisley » Sun Nov 09, 2014 9:21 pm

I sometime feel bad that our design is so much like a CI, but I just REALLY like the design. I kept looking at other ways to build the same structure, but their design seems ingenious to me. I guess that is the great thing about TD's (or TTT's), build what you like, the way you like it.


Don't feel bad. Imitation is one of the best forms of flattery. I doubt that Camp Inn is concerned. You are sort of giving their design free advertisement.
Not everybody can do what you are doing. The ones who can't or don't want to will buy. :thumbsup:
User avatar
S. Heisley
Super Lifetime Member
 
Posts: 8866
Images: 495
Joined: Mon Sep 17, 2007 10:02 am
Location: No. California
Top

Re: Regal Eagle - UPDATE 10/13/14 new pics

Postby aggie79 » Sun Nov 09, 2014 9:23 pm

KCStudly wrote:Looking awesome!!! :thumbsup: :thumbsup: :thumbsup:


+1 As KC said, "awesome."
Tom (& Linda)
For build info on our former Silver Beatle teardrop:
Build Thread

93503
User avatar
aggie79
Super Duper Lifetime Member
 
Posts: 5405
Images: 686
Joined: Tue Aug 07, 2007 5:42 pm
Location: Watauga, Texas
Top

Re: Regal Eagle - UPDATE 10/13/14 new pics

Postby Gunguy05 » Sun Nov 09, 2014 10:26 pm

S. Heisley wrote:
I sometime feel bad that our design is so much like a CI, but I just REALLY like the design. I kept looking at other ways to build the same structure, but their design seems ingenious to me. I guess that is the great thing about TD's (or TTT's), build what you like, the way you like it.


Don't feel bad. Imitation is one of the best forms of flattery. I doubt that Camp Inn is concerned. You are sort of giving their design free advertisement.
Not everybody can do what you are doing. The ones who can't or don't want to will buy. :thumbsup:
:pictures:
aggie79 wrote:
KCStudly wrote:Looking awesome!!! :thumbsup: :thumbsup: :thumbsup:


+1 As KC said, "awesome."
KCStudly wrote:Looking awesome!!! :thumbsup: :thumbsup: :thumbsup:


Thanks to you all for the kind words! The windows got the best of me a while ago.. I had to see more.

Serendipitously when we were cleaning up tonight my son had left a sheet of the underlayment material that we had used for the templates lying out in the grass where it had collected dew and was quite bendy. SO...I tried to see how well it would bend to the front curve and ... bingo!

We were going to use an extra layer of the oak ($$ and not too bendy) for the outside sub layer under the skin. This is where the window hole will be cut, and the trimlok gasket will sit. I had been concerned about the stability of this given the thin top later of oak and it's proneness to splinter (thus not giving a good sealing surface for the gasket).. BUT this stuff works great and takes a clean cut on the edge.

Anyways, I gave in and went back outside a few minutes ago and cut a piece to fit and bent it into place. Works like a charm. The outline is where the side window will be, but with radius corners.

Image
Brian


Checkout my buildThe Regal Eagle Bow front for 4
Image
Also my teardrop updates from blog on Dad Rambles
User avatar
Gunguy05
The 300 Club
 
Posts: 385
Images: 6
Joined: Mon Dec 02, 2013 4:45 pm
Location: South GA
Top

Re: Regal Eagle - UPDATE 11/9/14 Hatch skinned

Postby Sheddie » Mon Nov 10, 2014 3:31 am

Hi Brian,
:thumbsup:
And those wheels look good too.
:beer: Frank
User avatar
Sheddie
1000 Club
1000 Club
 
Posts: 1499
Images: 1129
Joined: Mon Jul 01, 2013 3:26 pm
Location: Whangarei, New Zealand
Top

PreviousNext

Return to Build Journals

Who is online

Users browsing this forum: No registered users and 7 guests