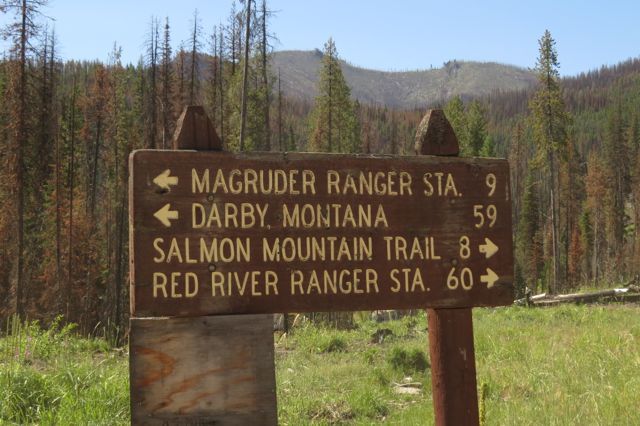
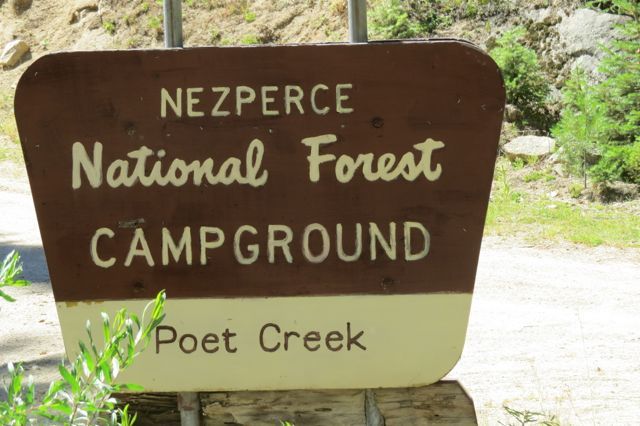
The Poet Creek Express - Foamie Hybrid

Canvas covered foamies (Thrifty Alternatives...)

Moderator: eaglesdare

Re: The Poet Creek Express - Foamie Hybrid

Postby KCStudly » Thu Nov 13, 2014 12:10 am

On Monday I PL’d the cabin side hinge spar into place. After masking the top rear edge of the bulkhead, I put a 1/8 inch bead of PL on the rear edge of the ceiling skin and another in the corner between the rear edge of the ceiling skin and the top edge of the bulkhead. A dozen or so 2-1/2 inch long coated deck screws go down thru the spar into the cedar frame of the bulkhead. These screws are well counter sunk into the spar so that I can fill the heads prior to covering. The dark swath in front is where I wiped the excess squeeze out up with a spirit damped rag, after scooping up the bulk with a stick.
Image
Image

There was a lot less squeeze out on the galley side, which I was grateful for. All it needed was a little cleanup with the stick and a quick wipe before removing the tape.
Image
Image

Because the screws go down thru the spar on the leading edge (with the rear edge hanging off the bulkhead a little), and the profile is curved here, the spar rocked forward a little; no big deal. Where the seal will wrap up around the hatch side spar (where I did the round over), I need to fit a little inside radius block on each side to fill in what would otherwise be a gap in the corner between the top of the walls and the spar. I started fitting this little piece of maple by matching the angle of the spar. It’s shown behind the little shim here, but will sit out flush to the outside of the wall once it is cut down and the inside radius is cut.
Image

Tonight I had a late start. When I got to the loft my little shop radio wasn’t working. Karl had been having electrical issues on a grand scale. The electrical service entrance is actually on a pole in his front yard where the meter and disconnect are located. From there the wires were directly buried up to the house, under the old slate and concrete walkway. They had that all dug up and have been installing a new patio off the kitchen door. Apparently when they lifted the leads to pull them thru the new conduit, the neutral lead didn’t get socked down well at the disconnect. Somehow this caused high voltage throughout the house (Karl measured surges up to 170v on a 110 outlet), blowing several dimmer switches, the transformer for the igniter on their gas stove, two expensive transformers on their furnace, a ballast in a fluorescent light fixture, my little radio, and one of Karl’s cordless Makita battery chargers.

Anyway, the rest of the evening was spent contemplating blocking options and details for the possibility of aluminum rock guarding of the front wall. I had not planned this out in advance. Ideally the guard would extend up just below the front radius, would cover the locker bump out, and would wrap around the wall corner radii at least a few inches, if not tapering down the side walls toward the door jambs.

The more I looked at it, the more work and materials seemed to be involved. In the interest of simplifying, I am also considering options, such as: applying bed liner material over the canvas; applying epoxy over the canvas then bed liner; and applying the canvas with epoxy, epoxy over canvas, then bed liner. Need to test.

I posted an inquiry about bed liner as stone protection for foam here.

If I can make one of these options work, I think it would be a better solution, would appear more like what I had in mind visually, and would maintain water tightness much better.

Also, Karl and I rationalized that installing a galley hatch handle could prompt people to try and open or close the hatch indifference to the actuators, which will not yield. In the off chance that I need to lift the hatch manually, after disconnecting the lower actuator brackets I can just grab the bumper and lift the hatch. So no blocking needed for that.

I gave a little more thought to mounting and wiring the tail lights, license plate and marker light, and have almost completely forgotten to add blocking for the galley light. I might need to fit little pads for the fixture “feet” to sit flat against the inside curve of the hatch, so I guess I have gone too far too fast already.

So the bottom line is that no actual work got done, besides making some decisions on how and where to proceed.
KC
My Build: The Poet Creek Express Hybrid Foamie

Poet Creek Or Bust
Engineering the TLAR way - "That Looks About Right"
TnTTT ORIGINAL 200A LANTERN CLUB = "The 200A Gang"
Green Lantern Corpsmen
User avatar
KCStudly
Donating Member
 
Posts: 9640
Images: 8169
Joined: Mon Feb 06, 2012 10:18 pm
Location: Southeastern CT, USA

Re: The Poet Creek Express - Foamie Hybrid

Postby Wolffarmer » Thu Nov 13, 2014 12:34 am

Karl got off cheap. Years ago when I was a TV management student at the university I was producing/directing/writing/grip a TV show. We was using slide projectors projecting slides ( of course ) on screens and shooting them with the studio cameras (still B&W). But could do pans, tilts and zooms on them. The slide chain had color but static display. Well, back to the slide projectors. Had 2 of them in the studio this night and BOOM, lens blows out. Grab another and BOOM more lens blows. little pieces of glass. Did this to 5-7 projectors. Used up all the university could spare. Had a nice pile of them in the studio. Finally got the show filmed. Next day talked to the station engineers and put a V/ohm meter on the 110 and found it was 150-170. Did more looking around and voltages was high all over that TV station. Engineers said. "Well, that explains why the equipment seemed to be failing quickly. While I blew up a mess of cheap slide projectors. Ended up saving the University a bunch of money.


Oh, Nice work. as usual. You getting any of this cold nasty weather?

Randy
"these guys must be afraid of the dark"
User avatar
Wolffarmer
Donating Member
 
Posts: 4612
Images: 309
Joined: Wed May 02, 2007 1:32 pm
Location: Idaho Rupert

Re: The Poet Creek Express - Foamie Hybrid

Postby KCStudly » Thu Nov 13, 2014 12:56 am

Wolffarmer wrote:Nice work. as usual. You getting any of this cold nasty weather?


Thanks, Randy. Yup, the weather is headed our way. It was 61 deg F when I left work today, but the forecast for the next few days is chilly with "wintery mix".

Did they figure out what was causing the electrical problems?
KC
My Build: The Poet Creek Express Hybrid Foamie

Poet Creek Or Bust
Engineering the TLAR way - "That Looks About Right"
TnTTT ORIGINAL 200A LANTERN CLUB = "The 200A Gang"
Green Lantern Corpsmen
User avatar
KCStudly
Donating Member
 
Posts: 9640
Images: 8169
Joined: Mon Feb 06, 2012 10:18 pm
Location: Southeastern CT, USA
Top

Re: The Poet Creek Express - Foamie Hybrid

Postby Wolffarmer » Thu Nov 13, 2014 1:08 am

KCStudly wrote:Did they figure out what was causing the electrical problems?


Yes, but slips my mind what it was. I do know there was all kinds of people from the power company and university swarming around for a few days. This was back when the VCR machines was taller than the tallest person at the station. ( and he was tall ) and the tape was 2 inch wide and on huge reels. Use to slam those things around. Specially when I was working the station and during station breaks. Have to que up tapes and run them while grabbing another reel off the rack and slam it on a VCR and thread it and que it up and run it. Once I ran over the University President who stopped by to watch "Oops, sorry " Ernest Hartung. He was a good guy.

Randy
"these guys must be afraid of the dark"
User avatar
Wolffarmer
Donating Member
 
Posts: 4612
Images: 309
Joined: Wed May 02, 2007 1:32 pm
Location: Idaho Rupert
Top

Re: The Poet Creek Express - Foamie Hybrid

Postby KCStudly » Sat Nov 15, 2014 7:10 am

Progress has stopped for a few days while I attend to an issue at the day job; putting in some overtime. :NC
KC
My Build: The Poet Creek Express Hybrid Foamie

Poet Creek Or Bust
Engineering the TLAR way - "That Looks About Right"
TnTTT ORIGINAL 200A LANTERN CLUB = "The 200A Gang"
Green Lantern Corpsmen
User avatar
KCStudly
Donating Member
 
Posts: 9640
Images: 8169
Joined: Mon Feb 06, 2012 10:18 pm
Location: Southeastern CT, USA
Top

Re: The Poet Creek Express - Foamie Hybrid

Postby Wolffarmer » Sat Nov 15, 2014 10:20 am

Evil day jobs. waiting for your return to real work.

;) Randy
"these guys must be afraid of the dark"
User avatar
Wolffarmer
Donating Member
 
Posts: 4612
Images: 309
Joined: Wed May 02, 2007 1:32 pm
Location: Idaho Rupert
Top

Re: The Poet Creek Express - Foamie Hybrid

Postby KCStudly » Sat Nov 15, 2014 10:47 pm

I managed to get to a comfortable place on that project at work, so was able to get out of there at about 3pm today. Thursday was a 12 hr. day, and Friday was 10 hrs. Fortunately, I got some time on the build tonight and will not have to go in tomorrow!

It was a little late to start sanding for another coat of poly on the hatch (translation – I wasn’t that ambitious), so I revisited the rock guard situation. I decided that if I lower the top of the guard to be just below the top of the locker bump out, that would solve a bunch of headaches. Jumping ahead a bit to show the big picture, I have marked up this pic to show the concept. The front rock guard will actually consist of two pieces, one on either side of the locker. Each will be formed with two bends in a Z-shape. The side-to-front bend will be formed in the break press using a round nosed die to match the 3/4 inch radius at the wall edge, while the inside corner at the locker will be a crisp bend, either on the pan break or using a sharp nosed die set on the press.
Image

This will allow the forward leading edges to be screwed to the side of the locker, and will eliminate the extra blocking crossing over above the locker.

Side note: Karl is making good progress installing a 45kw generator shed behind the barn to provide adequate 3 phase power to operate the 100 ton press and 1/4 x 10 ft shear that has been purchased at a recent auction. These should be available to use by the time I am ready to make the rock guards and Karl is eager to try out his new “toys”, um, tools, so he is looking forward to helping here.

Anyway, I had to back up a little on the first layer of foam that I had already glued to the front. I wanted to leave the guard just down enough from the top of the locker so that there is a little space for caulk between the vertical surfaces (below the slight radius edge of the locker) and the tops of the guards. I just need enough blocking for a row of screws along the top edge of the guard, so 1x2 on edge will do, matching the 1-1/2 inch thickness of the foam. Here I have used a blank piece of 1x as a gauge and straight edge to draw a line where the foam needed to be trimmed back.
Image

Next I used the same piece of wood below the line as a cutting guide for the extended razor knife, making a few passes to make a clean square horizontal cut. Then a couple of passes slipping the blade down vertically between the plywood and foam to get this.
Image

Dry fitting the blank. Still need to do some more scraping and sanding to remove the foam remnants and glue residue.
Image
(The front foam runs wild here and has not been faired back to the wall yet.)

Again, rather than using the router with the big 3/4 inch round over, I laid out the corner radii, rough cut on the band saw and sanded to the line with the small block. For these one-z two-z operations it just seems quicker than doing a set up. On the curb side I remembered Karl’s little jig saw, and gave that a try.
Image

It was slower due to the finer blade (which probably needs to be replaced) and I didn’t realize until after that the table was tilted a couple of degrees, but it got the job done well enough.

With no easy way to clamp the blocking into place for glue up, I played around with the Kregg making sure that the inboard screw would not go thru the locker. Here I am holding the curb side blocking over the locker to show how the screw will go thru the edge.
Image

On the outside I used a trim screw to find the blocking, shown here lying on top over the pilot hole. Also note the rounded front corner of the block, matching the wall to roof round over.
Image

Glued and screwed.
Image
Image
Image

I’ll have to make a slight adjustment to the foam pieces that have already been dry fit above these locations, but that is no big deal.

Tomorrow I will look closer at letting in some diagonal blocking strips on the side walls, for the tops of the guards there.

Last little thing for today was to pull the lower hatch actuator brackets back off so that I can get them and the upper brackets powder coated to match the rear wear strip along the back edge of the floor. When they go back in it will be with the permanent washer plates.
KC
My Build: The Poet Creek Express Hybrid Foamie

Poet Creek Or Bust
Engineering the TLAR way - "That Looks About Right"
TnTTT ORIGINAL 200A LANTERN CLUB = "The 200A Gang"
Green Lantern Corpsmen
User avatar
KCStudly
Donating Member
 
Posts: 9640
Images: 8169
Joined: Mon Feb 06, 2012 10:18 pm
Location: Southeastern CT, USA
Top

Re: The Poet Creek Express - Foamie Hybrid

Postby GPW » Sun Nov 16, 2014 6:40 am

Cool Rock/corner guard ... :thumbsup: 8) :applause:
There’s no place like Foam !
User avatar
GPW
Gold Donating Member
 
Posts: 14920
Images: 546
Joined: Thu Feb 09, 2006 7:58 pm
Location: New Orleans
Top

Re: The Poet Creek Express - Foamie Hybrid

Postby KCStudly » Sun Nov 16, 2014 10:08 am

Thanks GPdub. The new plan will require a lot less work and will cost less, too, because I can get it all out of one sheet.

As much as I would like to use diamond tread aluminum, because of the hassles it presents running it in the break press (forming around a radius corner; stretching, marring, etc.) and the fact that I won't be able to wrap any kind of edge trim around the corner with it, I will most likely be going with flat sheets. Probably 0.060 thk.

Maybe I can get something with a large engine turned pattern like RandyG used for his cabinet door panels. :thinking: Maybe too much "unsubtle".
KC
My Build: The Poet Creek Express Hybrid Foamie

Poet Creek Or Bust
Engineering the TLAR way - "That Looks About Right"
TnTTT ORIGINAL 200A LANTERN CLUB = "The 200A Gang"
Green Lantern Corpsmen
User avatar
KCStudly
Donating Member
 
Posts: 9640
Images: 8169
Joined: Mon Feb 06, 2012 10:18 pm
Location: Southeastern CT, USA
Top

Re: The Poet Creek Express - Foamie Hybrid

Postby GPW » Sun Nov 16, 2014 1:08 pm

JMHO, I always thought engine turned looked really Great on Antique Aircraft ... :thumbsup: 8) ;)
We’ve never tried to “work” Diamond plate , didn’t know it was such a PIA.. :o
There’s no place like Foam !
User avatar
GPW
Gold Donating Member
 
Posts: 14920
Images: 546
Joined: Thu Feb 09, 2006 7:58 pm
Location: New Orleans
Top

Re: The Poet Creek Express - Foamie Hybrid

Postby tony.latham » Sun Nov 16, 2014 3:31 pm

KC:

Keep your eye on the prize:

Image
Image
Image

Tony 8)
User avatar
tony.latham
Gold Donating Member
 
Posts: 7073
Images: 17
Joined: Mon Jul 08, 2013 4:03 pm
Location: Middle of Idaho on the edge of nowhere
Top

Re: The Poet Creek Express - Foamie Hybrid

Postby KCStudly » Sun Nov 16, 2014 6:10 pm

I hear ya' Tony. Thing is, if I don't add the blocking now, it would be a lot harder to add the rock guards later. (Just between you and me, if I really wanted to go to Poet Creek this instant... well, there is snow there now, but if I wanted to go sooner rather than later, I would just pack a tent and sleeping bag, and go. No. I am on a quest to fulfill a vision.

Looking back at my very first concept sketch.
Image
Note the rock guard outline.

:)

Geep, the problems with diamond plate aren't such a big deal, but I can be a bit "picky" on details. I'm leaning toward the engine turning, especially if I can find it as a factory finish with protective film applied. That would help keeping things from getting scuffed or scratch during fab.

Small update to follow.
KC
My Build: The Poet Creek Express Hybrid Foamie

Poet Creek Or Bust
Engineering the TLAR way - "That Looks About Right"
TnTTT ORIGINAL 200A LANTERN CLUB = "The 200A Gang"
Green Lantern Corpsmen
User avatar
KCStudly
Donating Member
 
Posts: 9640
Images: 8169
Joined: Mon Feb 06, 2012 10:18 pm
Location: Southeastern CT, USA
Top

Re: The Poet Creek Express - Foamie Hybrid

Postby KCStudly » Sun Nov 16, 2014 7:55 pm

Ever notice how I say I’m going to work on a thing and then end up working on something else instead? I think it is a byproduct of designing as I build. It only seems like it is faster. With a computer model I can design as I build, undo things, and change things as I design in a fraction of the time; without having to worry about committing to anything.

So while I said I was going to look at the blocking for the rock guards on the side walls, I subconsciously avoided that today and worked on other things.

A small detail that I have been meaning to get to; felt dots for the inside of the locker door to keep it from rattling and chafing.
Image
Image

Next up, extending the first layer of foam that I had previously fit over the roof panel splice backer and kerfed for the front radius. When I got there today the loft was only at 36 deg F (brrr). My little recording thermometer indicated an overnight low of 30 deg F, so I was a little late taking my glues and paints home with me (that hot box idea is sounding better and better). I went to use GS but it wouldn’t come out of the can. Tried GG, but it was like molasses. So, even though the heaters had only gotten it up to 45 when this pic was taken, I went ahead and used TB2. After all, it is just to hold the piece on long enough to get it fit and glued onto the front wall.
Image
The little scrap of wood is just a backer to spread the clamping force of the tape out. Did this two times, one for each piece on either side of the locker.

Next up I did a little tune-up on Karl’s little detail bandsaw. Cleaned out the mouse turds (it had been stored in his enclosed CT), cleaned the wheels so the blade would track well, adjusted the table square, and cleaned it up a bit. The little blade was better suited to cut the inside radii for the hatch seal corner blocks.
Image
Image

Here is the curb side block sitting in approximate location on top of the wall behind the cabin side hinge spar.
Image

After stepping back the thickness of the tangents and marking out the rabbets, I hand chiseled them out.
Image

In this pic of the street side recess you can see that I had a little splintering of the grain on the spar; had to glue that back into place.
Image

All in all I was happy with the result. Here they are after gluing and a little hand sanding to fine tune fair.
Image
Image
KC
My Build: The Poet Creek Express Hybrid Foamie

Poet Creek Or Bust
Engineering the TLAR way - "That Looks About Right"
TnTTT ORIGINAL 200A LANTERN CLUB = "The 200A Gang"
Green Lantern Corpsmen
User avatar
KCStudly
Donating Member
 
Posts: 9640
Images: 8169
Joined: Mon Feb 06, 2012 10:18 pm
Location: Southeastern CT, USA
Top

Re: The Poet Creek Express - Foamie Hybrid

Postby working on it » Sun Nov 16, 2014 8:46 pm

KCStudly wrote:...Looking back at my very first concept sketch.
Image....:)
Looks like you have the determination, and skills, to pursue your plan from A to Z.... I lacked both, starting with my first concept
tigerII teardrop.jpg
tigerII teardrop.jpg (71.51 KiB) Viewed 896 times
but as Dirty Harry stated, "a man's got to know his limitations...." http://www.youtube.com/watch?v=_VrFV5r8cs0
2013 HHRv "squareback/squaredrop", rugged, 4x8 TTT, 2225 lbs
  • *3500 lb Dexter EZ-Lube braked axle, 3000 lb.springs, active-progressive bumpstop suspension
  • *27 x 8.5-14LT AT tires (x 3) *Weight Distribution system for single-beam tongue
  • *100% LED's & GFCI outlets, 3x fans, AM/FM/CD/Aux. *A/C & heat, Optima AGM, inverter & charger(s)
  • *extended-run, on-board, 2500w generator *Coleman dual-fuel stove & lantern, Ikea grill, vintage skillet
  • *zinc/stainless front & side racks *98"L x 6" diameter rod & reel carrier tube on roof
173193172890148599
User avatar
working on it
2000 Club
2000 Club
 
Posts: 2189
Images: 457
Joined: Tue Oct 04, 2011 9:05 pm
Location: DFW Texas
Top

Re: The Poet Creek Express - Foamie Hybrid

Postby tony.latham » Sun Nov 16, 2014 9:02 pm

Just between you and me, if I really wanted to go to Poet Creek this instant... well, there is snow there now, but if I wanted to go sooner rather than later, I would just pack a tent and sleeping bag, and go.


This afternoon the sky was a crystal blue. Not a cloud. Four inches of snow covers the ground. The slush ice is making a hissing noise as it grinds along the edges of the frozen shelf of the Salmon River. It'll dip below zero tonight. Camping season? Well... it's closed. Poet Creek and the Magruder Corridor will soon be as devoid of human life as the moon.

Time to light a fire in the shop and make stuff. :thumbsup:

T
User avatar
tony.latham
Gold Donating Member
 
Posts: 7073
Images: 17
Joined: Mon Jul 08, 2013 4:03 pm
Location: Middle of Idaho on the edge of nowhere
Top

PreviousNext

Return to Foamies

Who is online

Users browsing this forum: No registered users and 0 guests