We got both sides skinned with ply and are starting on the hatch. For the hatch we are using still focusing on very light weight. That poses a couple of problems because the curves in the hatch tend to allow a lot of bending moments to distort the structure. To address this we are using beam construction with torque tubes. Once I got a master hatch profile, we routed these out of 1/2" spars of HW ply. Then we screwed all 6 together, and planned/sanded them to match. Then match drilled holes that would accept 1" EMT conduit. You can see them lined up below.
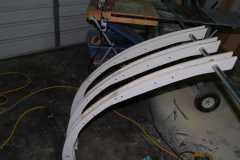
There will be two EMT cross pieces. These will span at the top and bottom. The EMT will be cut to size and at the two ends and the middle, it will be cross drilled to accept a 5/16" X 8" long bolt. The bolt will sit in a cavity between one of the spars and another layer of ply. The cavity will have a clear hole drilled. Once I get the framing in place with the cross bracing it will be clammed into place on the back of the galley and the cavities will be filled with epoxy. This will lock the structure into place to match the form of the galley. You can see one side of the cavity in this photo.
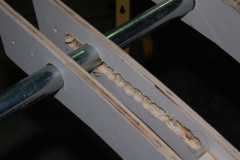
The will be another piece of play, with a similar opening that will be screwed on to complete the cavity.
You might notice that the cavity for the cross bolt looks rough, it is. I want there to be plenty surface for the epoxy to bite into, for a good strong joint.
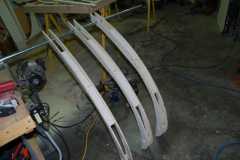
This is very much like the construction of an aircraft wing to resit twisting moments.
The perimeter and the spans between the spars will be be boxed in normally.
Should lead to a nice stiff, light hatch that will be very resistant to twisting.