Finally a little progress. Sometimes it seems as if I have a total lack of focus. First I’m working on putting foam on the cabin. Then I detour onto the tongue box. Then, while the TB spackle is drying I switch to the shovel mount (which is a prerequisite to finishing the front foam). Now I'm stuck into that task. Like a ping pong ball it seems.
Anyway, to decide on the blocking to mount the brackets for the shovel and axe, I figured I needed to settle the design for those items. Yesterday I finalized the shovel handle bracket idea and today, instead of sanding on the TB, I decided to run with the idea.
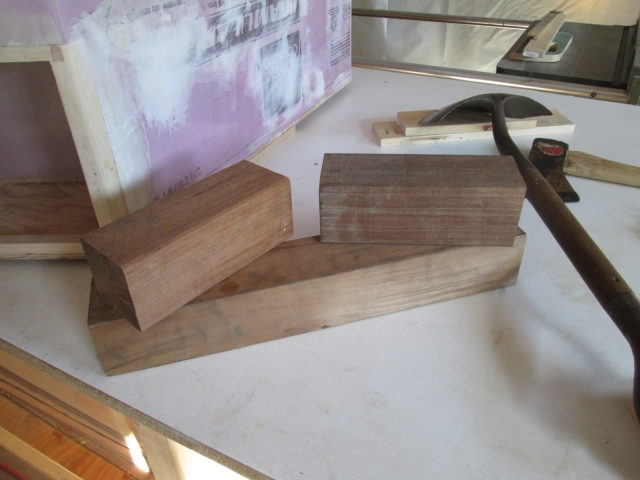
The two Ipe chunks (sitting on top) were each less than half the length of the cedar (underneath, all 4x4 nominal or 3-1/2x3-1/2 actual). However, the Ipe each weighed more than the entire length of cedar by itself. Suffice to say that the Ipe is like rock or steel. Karl says you can tap it like steel and it will hold the threads! I decided to keep that for something decorative and use the lighter weight cedar for the shovel mounts.
Here I have used the bandsaw to cut a semicircular trough thru the bottom of the blank. This will receive the stirrup handle of the shovel. The cut out plug was smoothed off a bit, wrapped in sandpaper, and used as a block to sand out the saw lines inside of the trough (in progress at the time of the pic).
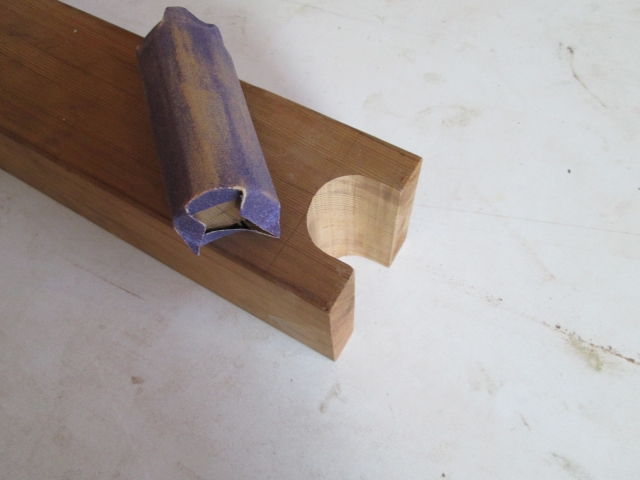
Three more cuts on the bandsaw to give the piece some contour and allow it to register into the stirrup of the shovel.

After some additional trimming, some planing, lots of hand sanding and rounding over the outside edges with the router, you can see in this sequence how the shovel handle will be captured and kept from sliding down when tilted into position (imagine that the table top is the front wall of the cabin).
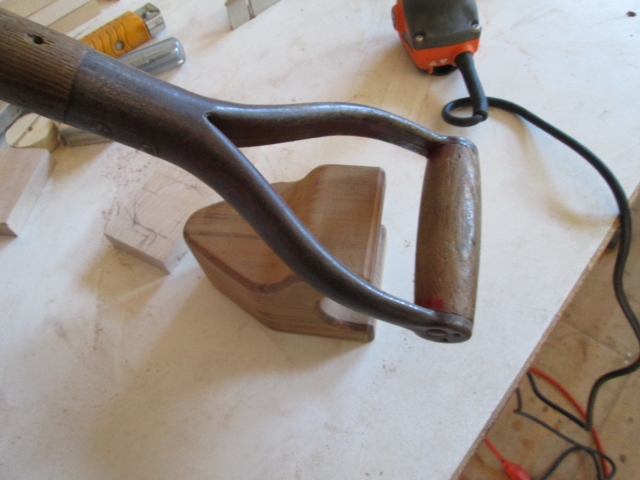
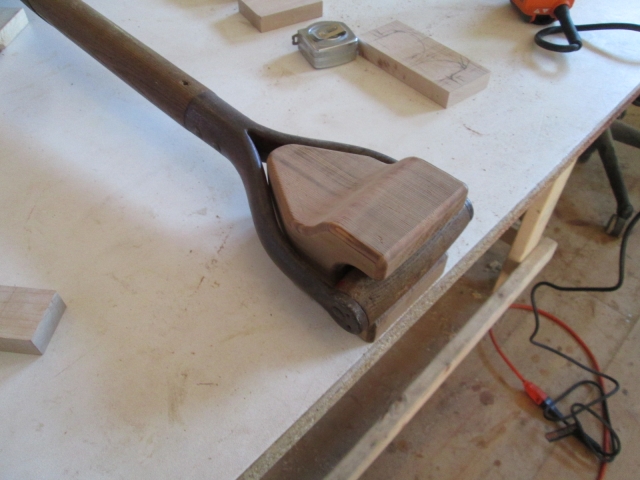
This is the lower bracket. It will keep the shovel from twisting and prevent the spade from hitting the painted canvas. It will also hold the weight of the shovel and make it easier to fasten the latch on the upper bracket. I’ll drill for a couple of fasteners that will go thru the flat of the triangular area and into thread inserts in the blocking that will be glued into the front wall. I'll be able to remove the brackets for trips where these tools won't be needed.
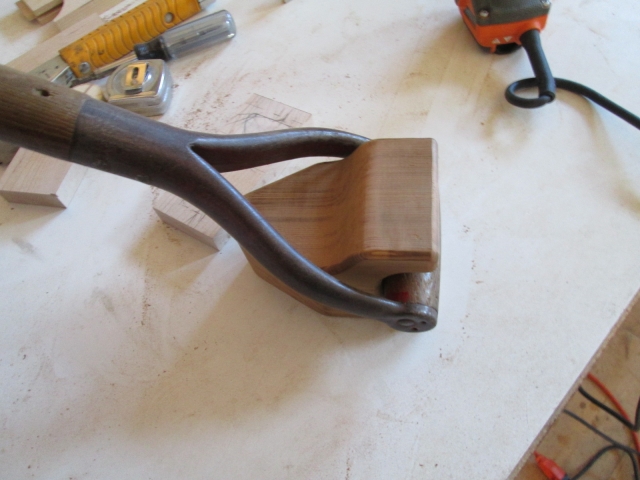
I also worked on the upper bracket that is very similar to the 2nd pic above. It will cradle the shaft of the shovel handle, holding the spade away from the wall and will get a hinged or pivoting bar that will latch the shaft into place. I must have forgotten to take a picture of that. The mounting bolts for that will be countersunk down in the trough, so they will be inaccessible when the latch is made.
I also brought my axe with me (since I had to go out to the shed to get the snow shovels out for the season anyway and thought I might get to those brackets, too), but before starting on the mounts I got distracted sharpening it. Axes don’t really need to be that sharp to function, but putting a keen edge on a useful tool is something I enjoy doing. Unfortunately, this time I carelessly bumped a fingertip on the cutting edge and got a pretty good flap… springing a bit of a leak. All in all a minor injury, but the card I had in my wallet said it had been about 9-1/2 yrs since my last tetanus shot (I think I may have had one since, but not according to my wallet), and having been stored in the shed there was some trace rust on the edge of the blade before I had started sharpening, so better safe than sorry, I took a trip to the walk-in center. A little cleanser, some glue, a shot in the arm (feels like a slug) and 5 days of antibiotics, and I am good to go.


 ) more time I can zero in on the functionality and ergonomics, hopefully making the item that much more useful/successful. If I spend a little effort (time) on the finishing touches, it just might look good, too. So as you can see, it really just boils down to time.


 Shudder at the thought.


 Oh well, just a nice box for your new BBQ trailer ... which is obviously turning into a “salvage” project ...


