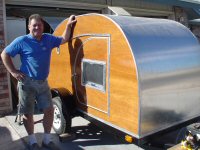
Starting my build

Converting Cargo Trailers into TTTs

Re: Starting my build

Postby CGRotorhead » Sat Jan 10, 2015 12:15 pm

You could always get an adjustable height tow hitch and be able to level out the trailer pretty easily
   HE WHO LIVES WITHOUT DISCIPLINE, DIES WITHOUT HONOR.
                                  
User avatar
CGRotorhead
Teardrop Master
 
Posts: 105
Images: 0
Joined: Sun Jul 27, 2014 4:18 pm
Location: San Diego, CA

Re: Starting my build

Postby CGRotorhead » Sat Jan 10, 2015 12:16 pm

aztrooper wrote:CGROTORHEAD, thanks for the link. Beats the $220 I was quoted by the RV suspension center I was going to take it to. They would have welded the pads on but I think this will work and my brother-in-law has a Mig welder I could spot it on with after it's all in place. :thumbsup:

:beer: ya a couple tack welds wouldnt hurt
   HE WHO LIVES WITHOUT DISCIPLINE, DIES WITHOUT HONOR.
                                  
User avatar
CGRotorhead
Teardrop Master
 
Posts: 105
Images: 0
Joined: Sun Jul 27, 2014 4:18 pm
Location: San Diego, CA

Re: Starting my build

Postby aztrooper » Sat Jan 10, 2015 10:38 pm

Rainier 70, as far as hitch height, I have a fixed position hitch and a weight distribution hitch so it will all be good. As far as the flooring expanding, we are going to have area rugs in it with a rubber backed rug to step in onto.
aztrooper
Teardrop Builder
 
Posts: 46
Joined: Mon Jun 15, 2009 8:18 am
Location: Arizona
Top

Re: Starting my build

Postby aztrooper » Thu Jan 29, 2015 9:15 pm

It's been a little slow the last couple of weeks. We went up to the White Mountains and made an offer on some property and the sale on our house back in Missouri closes tomorrow. I did get some work done. I unscrewed all the 3/4" plywood flooring in the trailer in preparation for putting in the 3/8" bottom plywood, 6" fiberglass floor insulation and then laying and screwing the floor back down. While I have the floor off, I'm going to put the over/under kit on as it will be much easier now. Thanks to a post on the list, I bought two over/under kits from Trailer Parts Supply Store. http://www.easternmarine.com/dexter-2-3 ... k71-384-00. UPS brought it today. After I got the floor out, I jacked the trailer up and put two concrete 8x8x16" blocks stacked on top of each other, under the front and rear frame rails in front and in back of the two axles. Now I can take the bolts out of the leaf spring hangers and current axle brackets with ease. Don't know yet if I will have to disconnect the brake wires yet or not.

Image
Image

After I get the axles under the leaf springs, I'll get the 3/8" plywood painted with Herculiner HCL1B8 Brush-on Bed Liner to seal it up. I'm going to screw it in place then calk the inside edges before putting in the fiberglass insulation batting. Hopefully by then, I will have decided on whether I am going to use a gray/black water tank or not. I would like to have a real potty in the trailer but haven't been able to figure out in my mind how I would connect the shower/gray water line to the tank as I would have one combined gray/black tank. I am assuming that the toilet would flush right into the top of the tank but don't know how I would run the gray water to it. Any thoughts would be appreciated.
aztrooper
Teardrop Builder
 
Posts: 46
Joined: Mon Jun 15, 2009 8:18 am
Location: Arizona
Top

Re: Starting my build

Postby aztrooper » Tue Feb 03, 2015 9:59 pm

First nice day following about a week of rain so I went out to the trailer and installed the axle under kit. I have a dual axle trailer so there were some little things to watch for that wasn't mentioned in the instructions. The front axle spring is attached on the front side to the welded on bracket to the frame. The rear of the spring has two spring shackles that attach to a floating piece along with the front of the rear spring. The rear of the rear spring attaches to the fixed welded on bracket to the frame. I started with the rear axle. Removed the bottom spring plate after putting my jack under the axle. I raised up the axle to take weight off of the leaf spring then removed the rear spring bolt and then the top shackle bolt. I removed the leaf spring and then lowered the axle and installed the under kit, put the axle on top and reinstalled the rear spring bolt then the front making sure the leaf springs and shackles were ABOVE the floating piece. I then did the front axle on the same side using the same procedure making sure the rear of the leaf spring was ABOVE the floating piece. Didn't have to cut the brake wires. I then did the other side the same way.
Here are the after pictures.
Image
Image
Plenty of clearance now. It is 16" from the ground to the bottom of the frame.
aztrooper
Teardrop Builder
 
Posts: 46
Joined: Mon Jun 15, 2009 8:18 am
Location: Arizona
Top

Re: Starting my build

Postby hankaye » Tue Feb 03, 2015 10:48 pm

aztrooper, Howdy;

Looks like a fine job ... what's it look like underneath ???

hank
Striving for a less complicated life since 1949 ...
Every day I beat my own previous record for number of consecutive days I've stayed alive.
hankaye
2000 Club
2000 Club
 
Posts: 2567
Images: 1
Joined: Thu Dec 06, 2012 5:35 pm
Location: S.W. New Mexico
Top

Re: Starting my build

Postby aztrooper » Tue Feb 03, 2015 11:00 pm

Hank, do you mean the underneath of the trailer of the under kit I just installed? There are pics of the underneath of the trailer on page 1. I didn't (should have) take any before/after pics. I'll get some of the after pics and put them up.
aztrooper
Teardrop Builder
 
Posts: 46
Joined: Mon Jun 15, 2009 8:18 am
Location: Arizona
Top

Re: Starting my build

Postby aztrooper » Tue Feb 03, 2015 11:46 pm

Just had a breakthrough. We really want a flushable toilet, not a portable one in the trailer. I've been looking at RV type tanks but couldn't figure out how to plumb it so I could have the gray and black water go into the same tank. I was resigned to going with a portable toilet and started looking on Ebay for a portable tank to be able to empty the toilet into when I came across this picture.
Image

I got so excited, I called my wife over to look at it. Now all I will have to do is bring the drain for the shower down with a P trap, connect the kitchen sink drain above that, bring it out to the edge of the trailer with a Y where the toilet will connect to it and the valve and then hook it up to the portable tank. COOL!!! My water tank is 33 gallons and this tank is 35 gallons so all will be good. Another problem solved.
aztrooper
Teardrop Builder
 
Posts: 46
Joined: Mon Jun 15, 2009 8:18 am
Location: Arizona
Top

Re: Starting my build

Postby Padilen » Wed Feb 04, 2015 12:24 am

My plan as well.
Padilen
Donating Member
 
Posts: 1536
Joined: Fri Jan 30, 2015 4:20 pm
Top

Re: Starting my build

Postby hankaye » Wed Feb 04, 2015 11:26 am

aztrooper, Howdy;

These folks have just about everything you need for a septic system. You just need to
supply the 3" straight pipe.
http://www.valterra.com/product-categor ... -products/
also remember that when you 'add' solids and single ply to the tank you diminish the liquid
volume ... best to empty the porti-tank when it is 3/4 full ...
You won't need a P trap if you use a RV type commode, but is worth it's weight in Gold for
the sink.


hank
Striving for a less complicated life since 1949 ...
Every day I beat my own previous record for number of consecutive days I've stayed alive.
hankaye
2000 Club
2000 Club
 
Posts: 2567
Images: 1
Joined: Thu Dec 06, 2012 5:35 pm
Location: S.W. New Mexico
Top

Re: Starting my build

Postby aztrooper » Wed Feb 04, 2015 9:32 pm

Scored today. A girl we know is moving after a bad divorce and was giving away alot of the ex's stuff that he left. We got a NEW Whirlpool 10.6 Cu. Ft. refrigerator for FREE!! It is bigger than we were looking at but will work out well, especially for free. Matches the outside color of the trailer too. It's 60.5" tall, 24.25" wide and 21.5" deep. About the same W and D as the smaller one but a little taller which is no problem.
Image
aztrooper
Teardrop Builder
 
Posts: 46
Joined: Mon Jun 15, 2009 8:18 am
Location: Arizona
Top

Re: Starting my build

Postby aztrooper » Sun Feb 08, 2015 5:08 pm

Well, after measuring the new refrigerator and plotting and looking at it on my scale drawing, I am not going to use it. It's too big, so we are going to sell it and go with the original idea of the 4.3 Cu Ft. refrigerator at Home Depot. Any money we get by selling the refrigerator will offset the smaller one.
aztrooper
Teardrop Builder
 
Posts: 46
Joined: Mon Jun 15, 2009 8:18 am
Location: Arizona
Top

Re: Starting my build

Postby hankaye » Sun Feb 08, 2015 8:17 pm

aztrooper, Howdy;

I'd like to ask what the taller 'fridge' weighed and what the what a "dorm" size weighs.

hank
Striving for a less complicated life since 1949 ...
Every day I beat my own previous record for number of consecutive days I've stayed alive.
hankaye
2000 Club
2000 Club
 
Posts: 2567
Images: 1
Joined: Thu Dec 06, 2012 5:35 pm
Location: S.W. New Mexico
Top

Re: Starting my build

Postby lrrowe » Sun Feb 08, 2015 8:49 pm

Hank, 4.3 to 4.6 CF ones weight about 67 lbs. from my recent searches.
Bob

First Post on Purchase of Trailer: http://www.tnttt.com/viewtopic.php?f=42&t=60722
Hot water infloor and radiator heating project:[url]http://www.tnttt.com/posting.php?mode=reply&f=54&t=62327[/

Image Image
User avatar
lrrowe
Donating Member
 
Posts: 3285
Images: 439
Joined: Sun Feb 10, 2013 5:54 am
Location: SW Virigina
Top

Re: Starting my build

Postby aztrooper » Sun Feb 08, 2015 9:16 pm

hankaye wrote:aztrooper, Howdy;

I'd like to ask what the taller 'fridge' weighed and what the what a "dorm" size weighs.

hank

According to the book, it weighs 134 pounds.
aztrooper
Teardrop Builder
 
Posts: 46
Joined: Mon Jun 15, 2009 8:18 am
Location: Arizona
Top

PreviousNext

Return to Cargo Trailer Conversions

Who is online

Users browsing this forum: No registered users and 1 guest