Thank you to everyone for the encouragement. Lots of snow, a ski trip, a tweak to my back after skiing too hard have all delayed my progress but I'm finally back to building. My hope is that I can get the walls and roof up and then get it canvased before the spring winds pick up. Here is what I have accomplished since my last post.
Notches and cross beams:
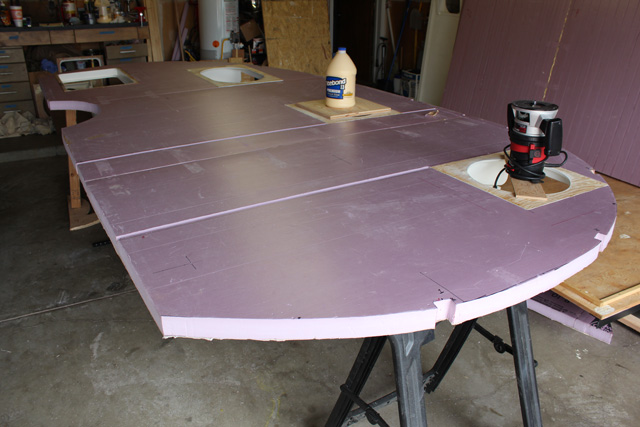
I got this idea from the post on the Big Pink being built and decided it was a great idea. I cut notches in the top of the walls and then cut some cross beams to go in them. This should help greatly when it comes time to glue the walls to the floor. Not only will it help to keep the walls parallel but it should provide a bit of support to the roof. You can see the notch in the edge as I am gluing the windows in the wall.
Installed a door handle in the door:
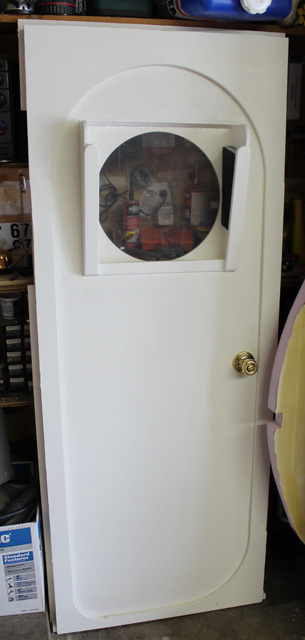
This turned out to be more of an issue than I expected. Had I researched more thoroughly, I would have discovered that 1.75 inches is the normal maximum thickness of a household entry door. In my initial search I was led to believe that extension kits for thick doors are more common than they actually are. All the hole jigs that exist to help you are built for 1.75" or thinner door too. I finally found what I was looking for at a locksmith's shop. If I build another door, I'll make sure it is 1.75" or thinner and not the 2" that I built this door. Really I just picked 2" because it matched the wall thickness and I thought the extension kit was more common.
Cut and installed guide boards for the walls:
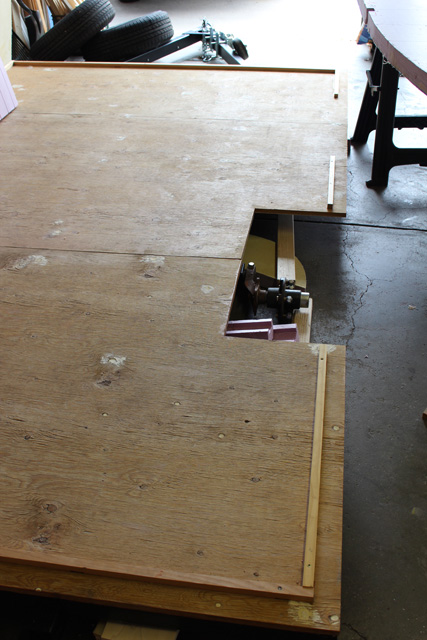
I saw this in someone else's build. They glued guide boards to the floor to press the walls against. It gives a bit more glue surface, and since the inside of my walls are already canvased, it should help to hold the wall to the floor even better. As you can see I have taken the wheels off the trailer and it is sitting on rolling casters. I've measured at least 5 times to make sure I can get it back out the garage. Let's hope I didn't make a mistake

Kerfed roof pieces until I had foam dust in places the sun doesn't shine:
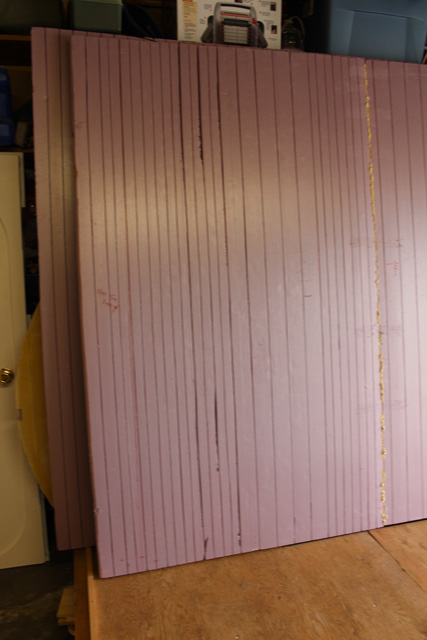
I used a circular saw set to about 70% depth of the foam and I used math to estimate the number and spacing of the kerfs. There is a great post of how to do this on the board but basically you figure out the difference in circumference between the inside and outside of the piece you want to bend and then you cut enough kerfs to shorten the inside of the piece to match the outside. I let Sketch-up figure out this difference for me. Then assuming my saw blade took out 1/8" with each cut I could figure out how many cuts to make and how far apart to space them. I over estimated a bit. If the calculations said I needed 8 kerfs I would cut 10 just to be safe. Then I actually test fit the piece and had to adjust by cutting a few additional kerfs in areas where it felt like there was too much stress.
I did learn an important tip when kerfing with a circular saw. Pulsing the saw (pulling the trigger and then let the blade coast) it gives a cleaner cut. If you look closely at the kerfs you can see a few where the saw blade got hot enough that it melted the kerf and made it wider. That was before I figured out that pulsing the saw avoids that.
I'm gluing the windows in the walls now and the next step is to put up the walls.


 “in real time” ... Nice your floor is so low as to lower the entire height of the trailer, making entry and exit much easier ... How high is the floor off the ground ? Just curious ?


 . just remember we are family, and like family we sometimes joke around and pick on each other. you are doing a great job so far!