I know what you're saying OP, and I'm sure a kitten is in our near future, but there is always a transitional period; and those little critters have so much energy and fearlessness that you have to be ready for them!

Got about 3 hrs of real work in today and another 1/2 hr staring and contemplating; considering things like side clearance light wire routing and whether to add a bit higher curbing for the roof vent, like Wobbly Wheels has done on his build. Also, I’m thinking I will probably have to drop the build cradle down off of the horses and tilt the cabin over onto each floor edge in order to have easier access to fair the final roof foam when the time comes.
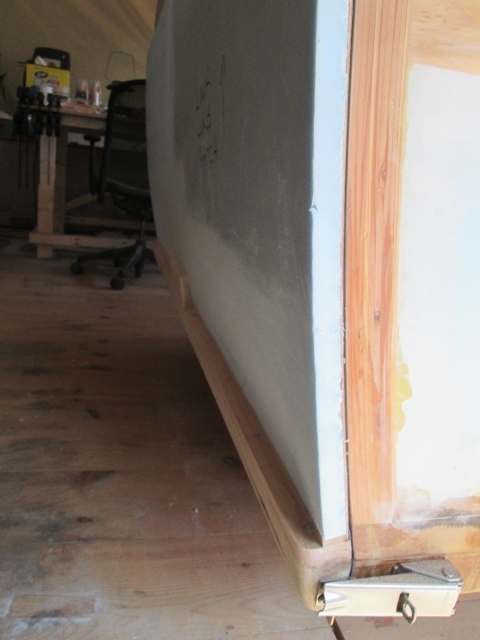
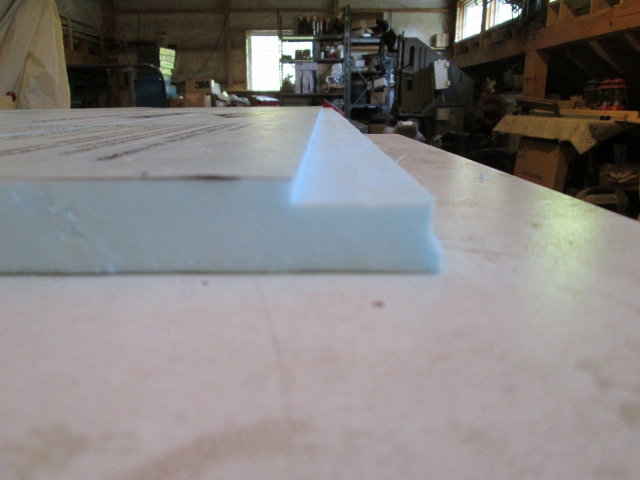
Anyway, I pulled the stretcher off the hatch, did a little bit of scraping to remove some excess PL300 from the wooden areas, and sanded the lower edge of the curb side lower foam fair to the cleat at the bottom.
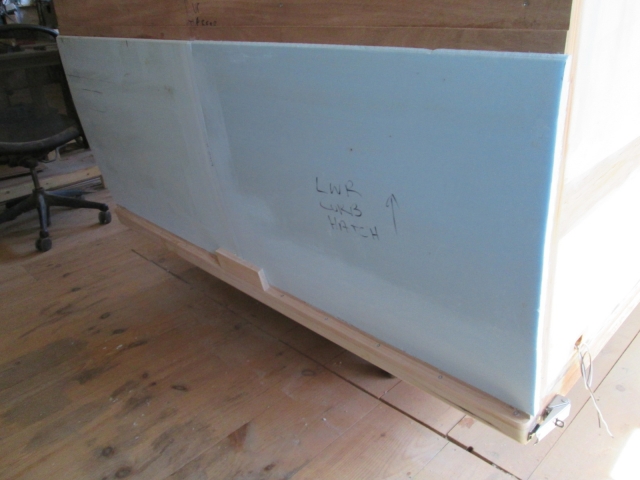
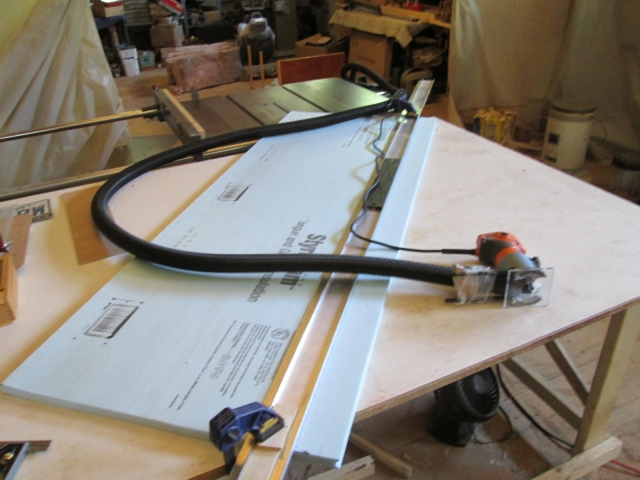
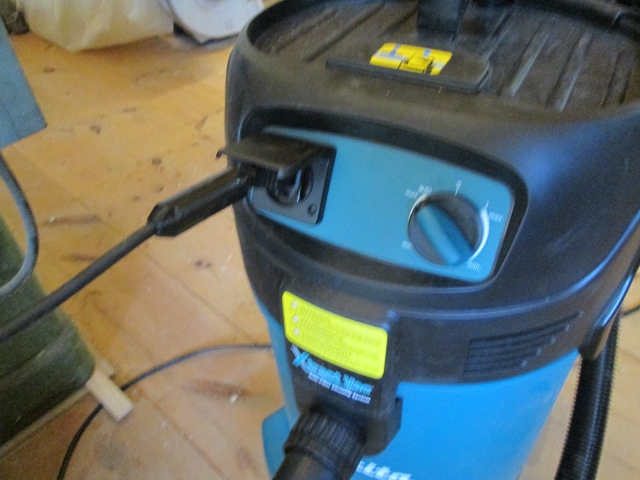
That was the last of the partial sheets. Time to start fitting the next full cabin width sheet on the hatch. With Karl’s encouragement, I decided to try out his new ‘super throw down’ shop vac. The small 1-1/2 inch hose was easy to adapt, albeit crudely, to the small trim router. Took the rear shield off, screwed the guide fence rods into the base, wedged a piece of wood in there to keep the hose from dragging on my rip fence, and wrapped it with some packing tape.
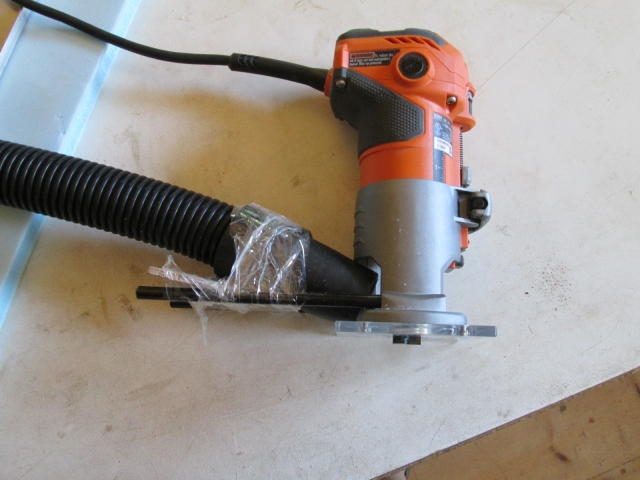
The hose is long and slinky, and very easy to manage compared to the typical larger hose from the old 16 gal vac.
The coolest feature, other than the ultra-quiet operation, is the remote auto start feature. Just plug the tool into the face of the vac and when you turn it on the vacuum comes on automatically. Stays on a few seconds after you shut the tool off to make sure that the hose gets clear. Very nice. I actually had to shut the router off to make sure that the vac was running, it was so quiet.
That took care of the rabbet in the lower edge of the foam to clear the splice backer in the hatch skin.
You may recall when we went thru the table saw we were never able to get the locking feature for the blade depth to free up, so while I have obviously been able to change the depth of cut, I have been unable to lock the adjustment into place. For most cuts this isn’t an issue because the blade usually protrudes thru the cut and if it drifts slightly it doesn’t affect anything. On a few occasions where I was cutting dadoes or rabbets I have seen a little drift with the blade rising out of the table as the cabinet vibrates a little. When running the saw for extended periods, such as when making a bunch of kerf cuts, I have stopped in the middle and verified the blade depth, rather than risk inconsistent cuts. To avoid this I found a very simple solution; clamp a stop to the hand wheel. (The knob in the middle of the hand wheel is supposed to turn in order to lock the position, but it is frozen.)
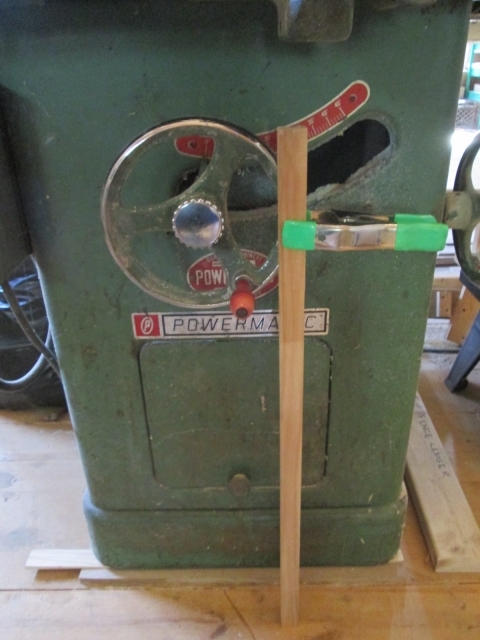
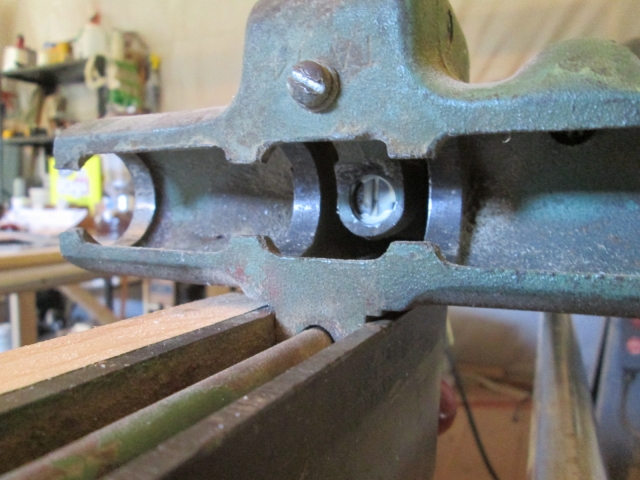
Another thing that I have had to adjust every so often is the cam on the near side rip fence clamp. With each application and release of the clamp this recessed screw would back off about 1/4 turn. So I adjusted it tight again and put a dab of PL2 on it, that will hopefully lock it enough to prevent it from backing off (the closest thing I had to Loctite with in arms reach).
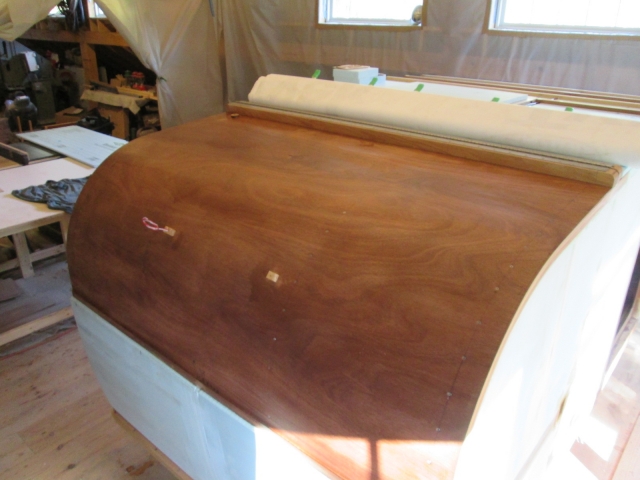
The upper radius on the hatch is not as severe as the front radius so I went with a larger 2 inch spacing on the kerfs. Seemed to be enough on dry fit.
By just dry fitting the panel and pressing it against the blocking for the galley light screws, I could transfer their location and make the cutouts. The larger one with the wires I cut clean thru, while the smaller one I just chipped out with the razor knife.

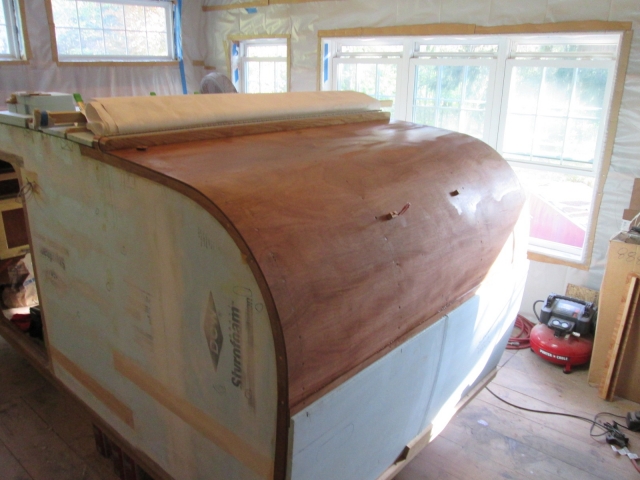
Before I was working with smaller pieces and could spread the PL300 evenly to effect a seal to the wood, but with these larger panels that isn’t going to be an option. My test with the PL300 over hard TB2 was good and I thought I might roll that on as a sealer coat, but I haven’t moved my big gallon jugs back into the loft yet, so just had a small bottle with me. Decided to proceed with “the mix” instead. Mixed 8 oz regular polyurethane (not the high build) with 4 oz of spirits and that was just the right amount to slobber over the remaining hatch skin, along the edges, covering the wall edgings and along the top and rear of the bumper. (Sorry for the sunlight glare in the pics.)
And that's where I left off.
I'd like to wish a happy mother’s day to my mom, again, and to all of the other mothers out there in TD land.